
Kali Linux is mainly used for advanced penetration testing and security auditing. It is a Debian-based rolling release Linux distribution that specifically caters to the likes of network analysts and penetration testers.
The central aspect of Kali Linux is its pre-installed security tool suite that can be used for various cyber-security purposes.
This guide is about installing Kali Linux on VirtualBox, allowing you to have a Kali VM. VirtualBox is free, open-source, and cross-platform virtualization software that creates virtual machines on top of your OS.
Download Kali Linux ISO Image
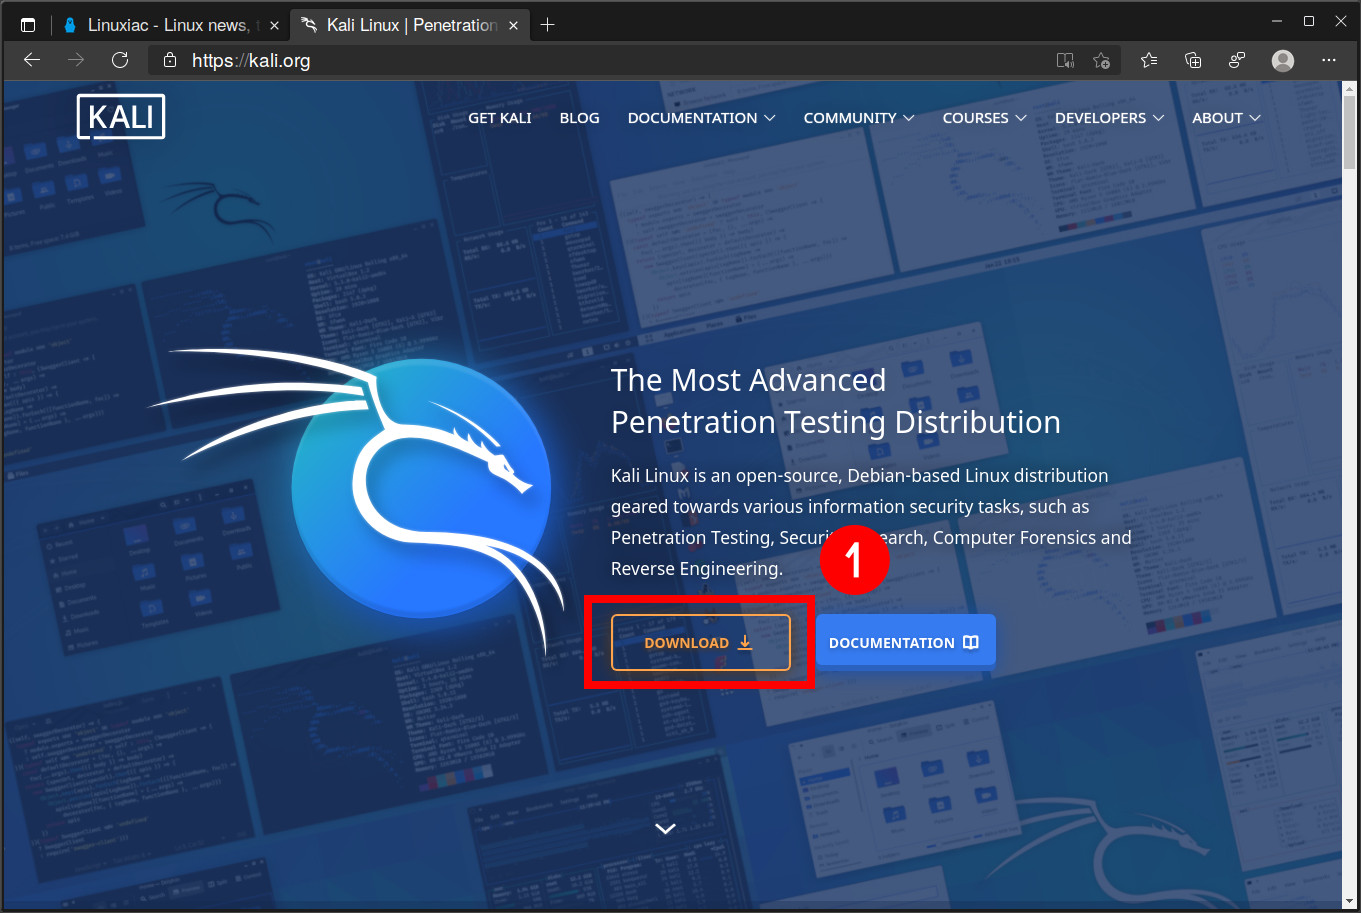
First, we need to download the installation ISO image. So point your browser to the Kali Linux website and click on the “Download” button.
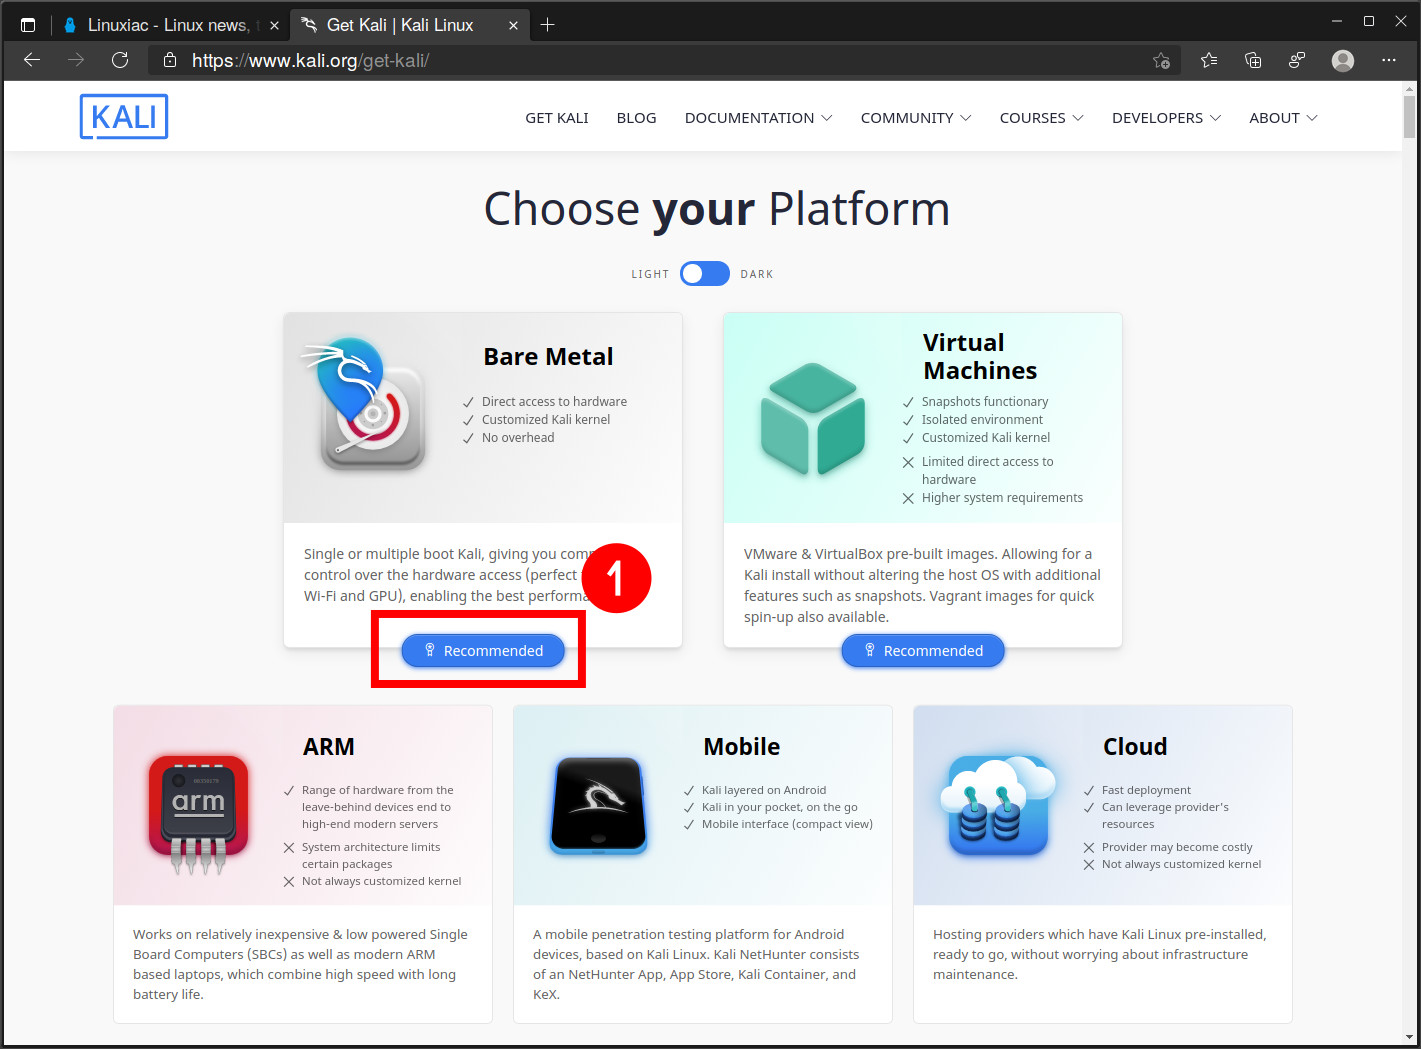
Choose the “Bare Metal” platform.
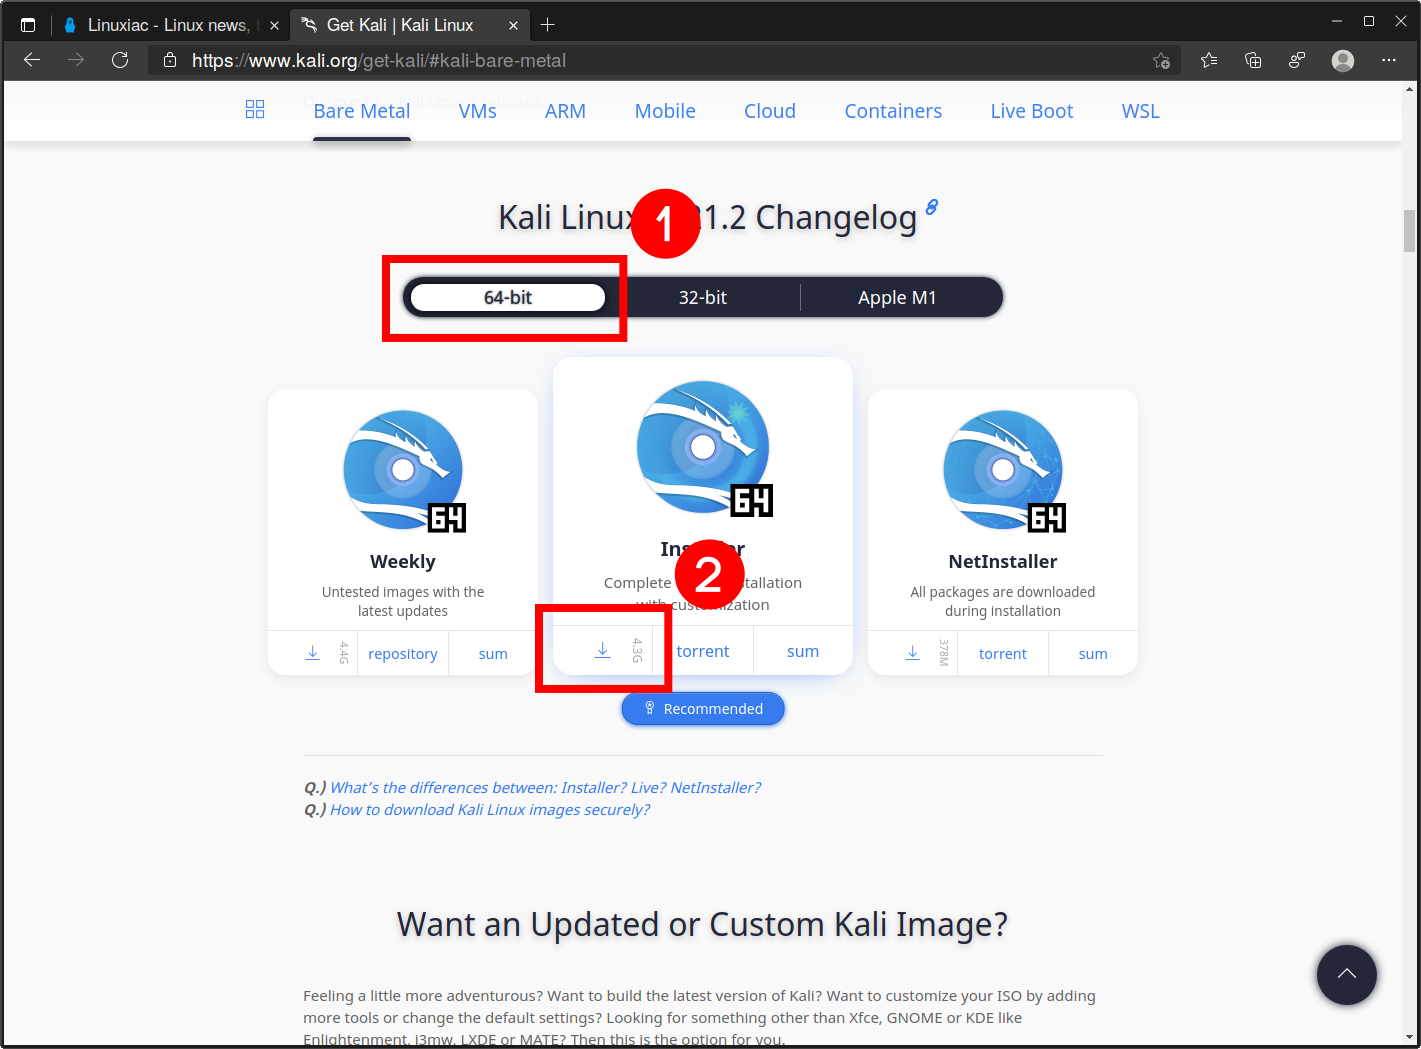
Select “Installer” from the available options, choose “64-bit“, and click on the download button to start downloading the ISO installation image.
Setting up a Virtual Machine in VirtualBox
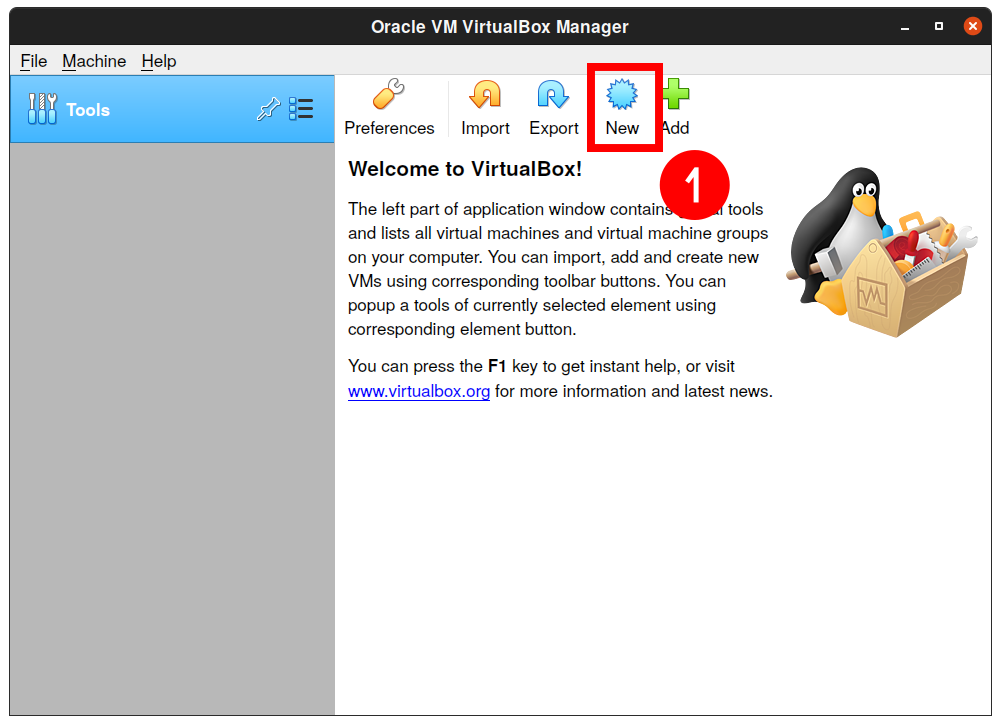
1. To create a new virtual machine for installing Kali Linux on VirtualBox, open VirtualBox and click “New.”
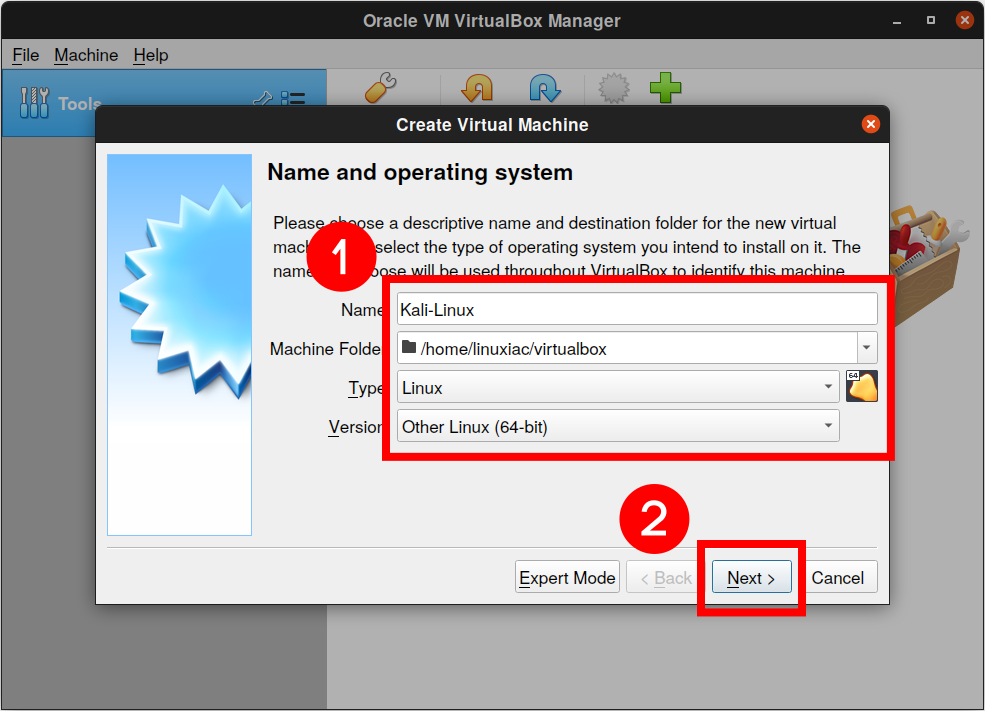
2. Enter a name for your virtual machine (e.g., Kali-Linux), select “Linux” as the type, select “Other Linux (64-bit)” as the version, and click “Next.”
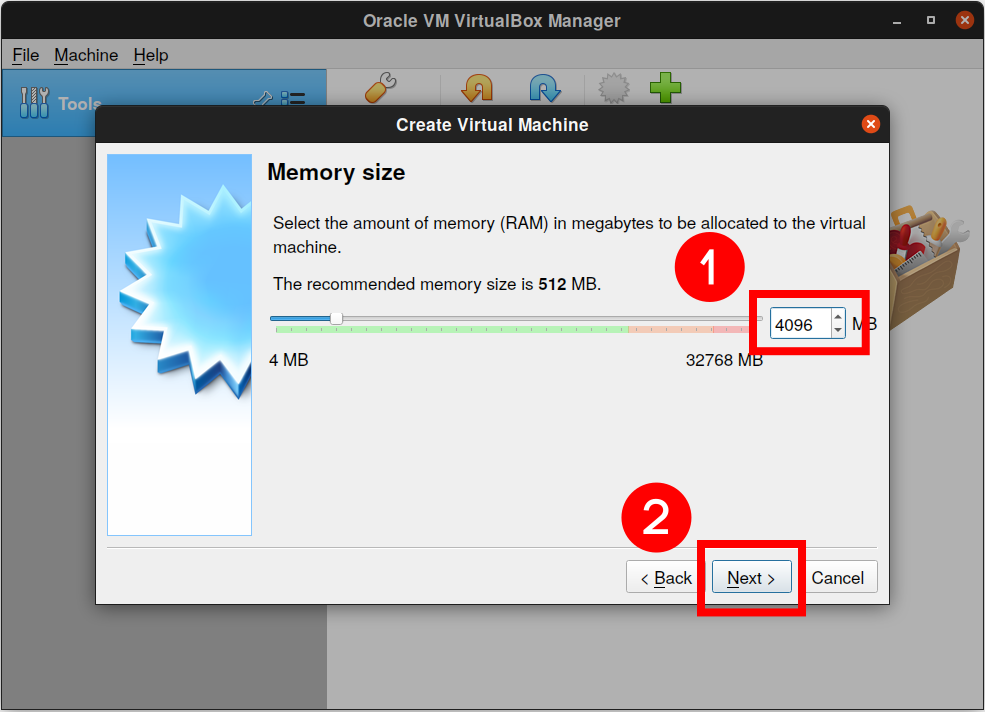
3. Allocate RAM to the virtual machine. The memory size depends on your host machine’s memory size. As our physical machine used in this example has enough RAM (32 GB), we’ll set 4 GB of RAM for a virtual machine to install Kali Linux on VirtualBox.
You can select any amount of memory you wish, but don’t add more than 50% of your total RAM.
Click on the “Next” button to proceed.
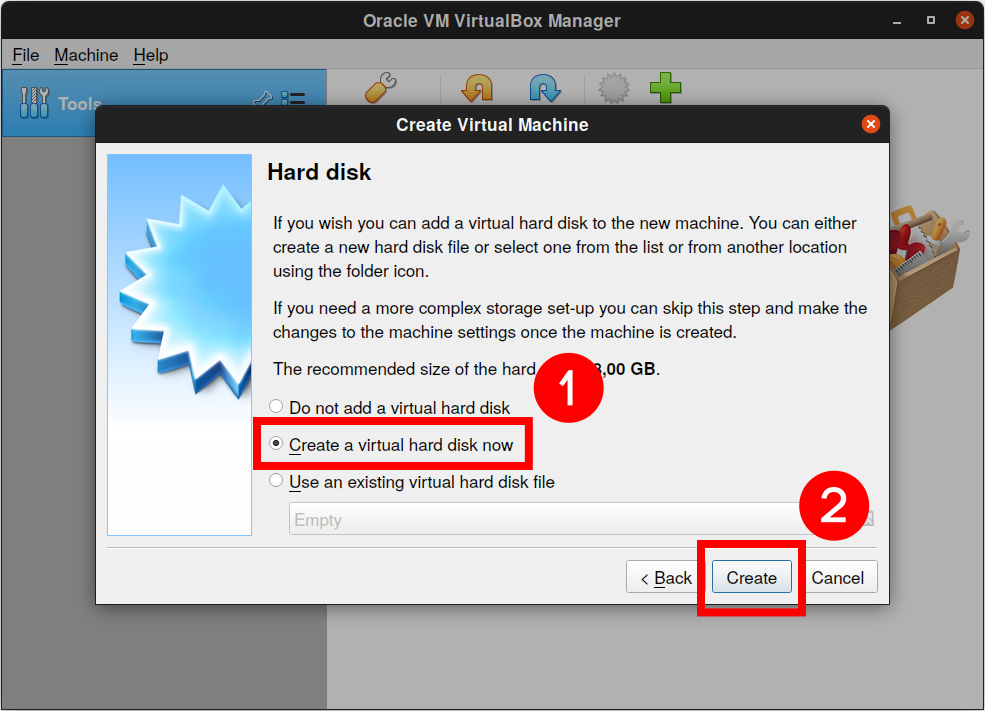
4. Check the “Create a virtual hard disk now” option so we can later define our Kali Linux virtual hard disk size and click the “Create” button.
5. Accept the default “VDI (VirtualBox Disk Image)” drive file type and click the “Next” button.

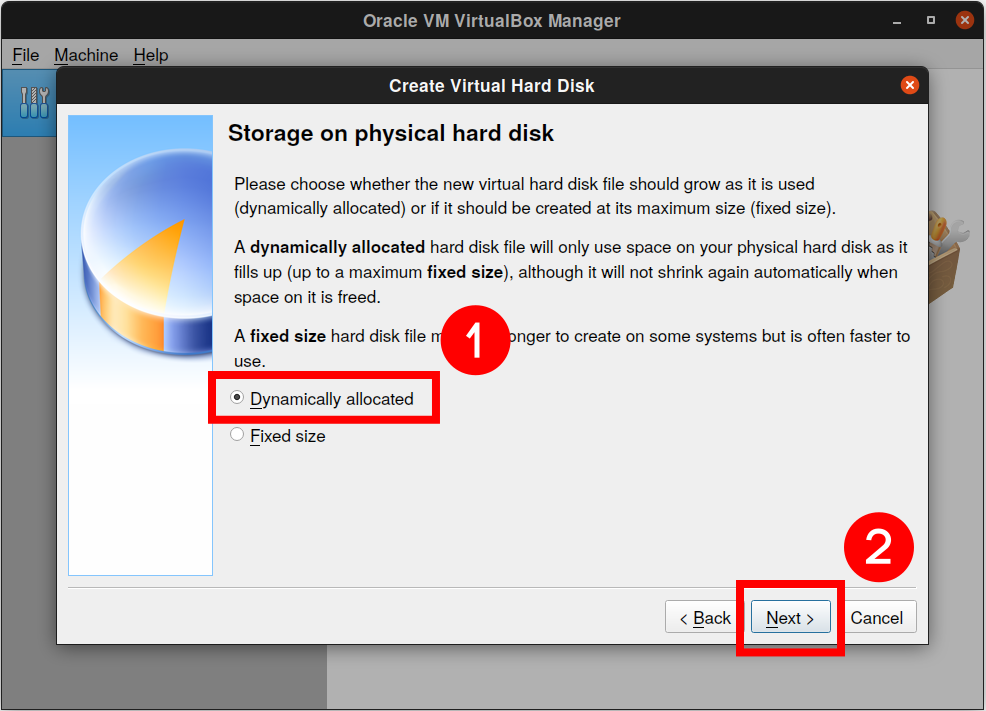
6. Next, we’ll dynamically allocate storage on our physical disk. This option allows you to save space on your physical disk until the virtual disk grows to its maximum given size. Click the “Next” button.
7. The virtual hard drive is a section of your computer’s hard drive space that will be used to store your virtual machine. Set the file size of the virtual disk to 20 GB or more. Click “Create” to finish setting up your Kali Linux virtual machine on VirtualBox.

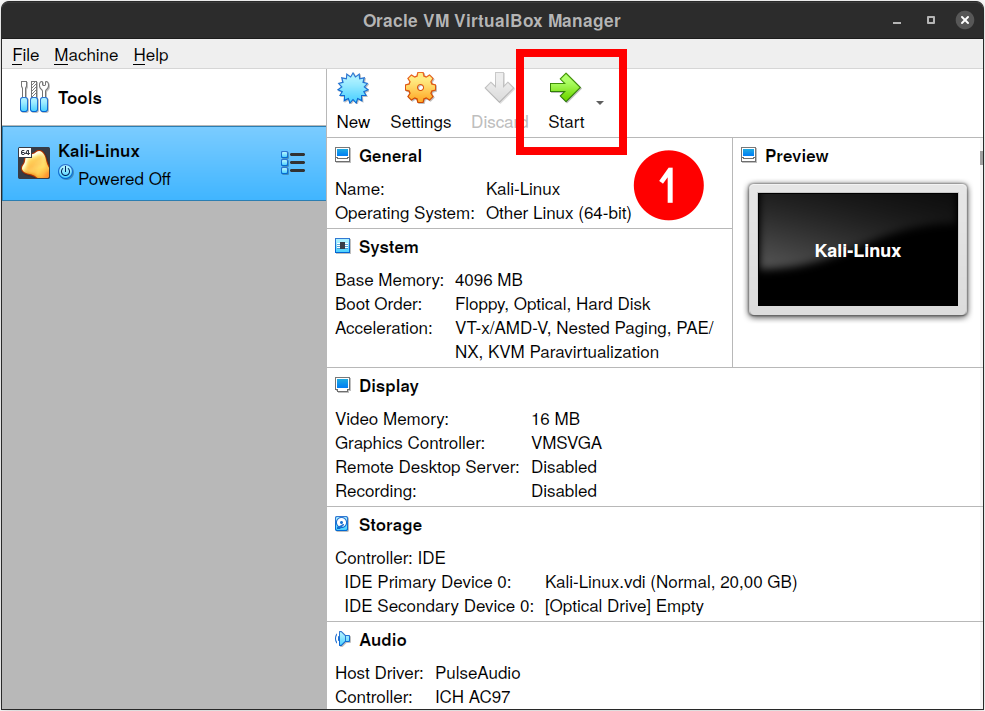
8. The wizard will close and go back to VirtualBox Manager. Select your Virtual Machine and click the “Start” button.
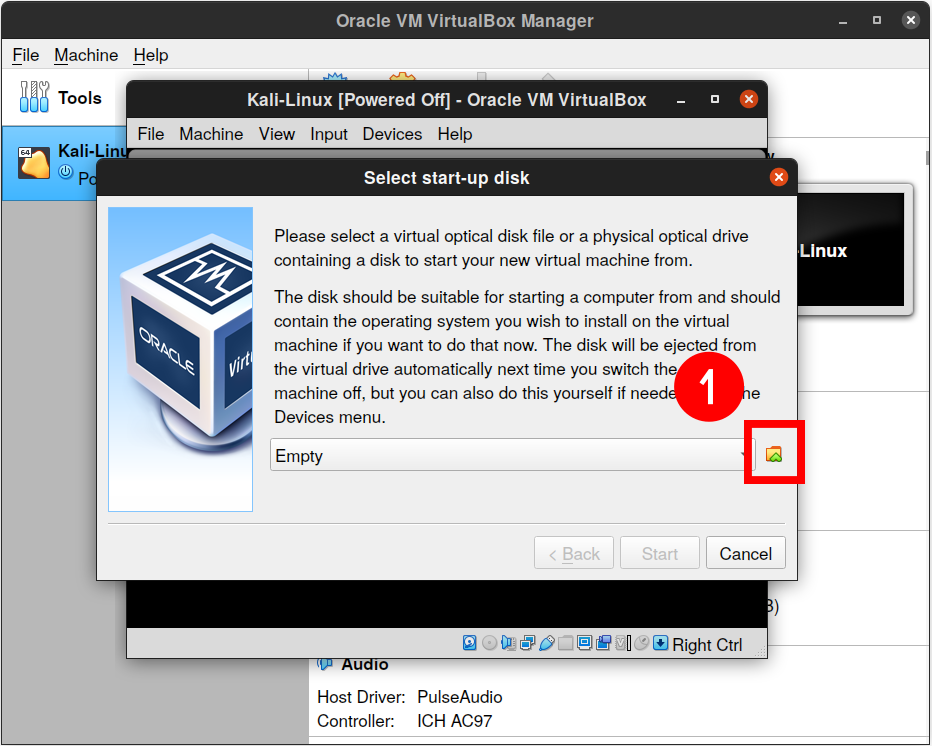
9. When you start Kali Linux virtual machine with VirtualBox, you must select a start-up disk. Start this process by clicking the little folder icon.
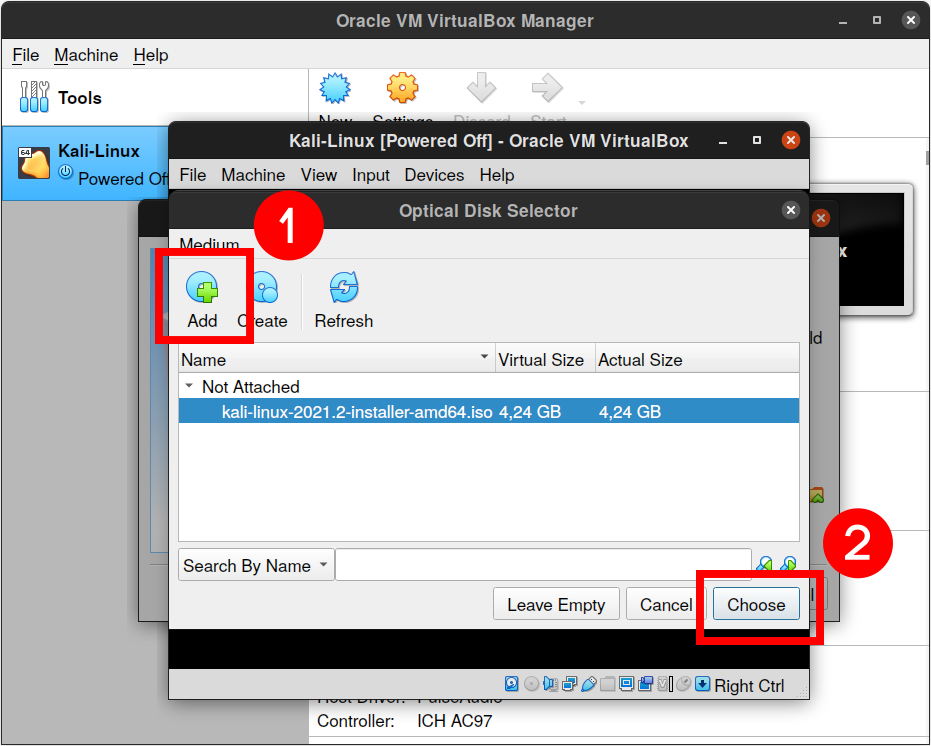
10. You will need to find and select the Kali Linux image (installation ISO file) you want to install. Click the “Add” button to bring up a file dialog box. Use this file dialog box to find and select the Kali Linux image you downloaded earlier.
Confirm your choice by clicking the “Choose” button.
11. With the Kali Linux ISO installation file selected, click the “Start” button.
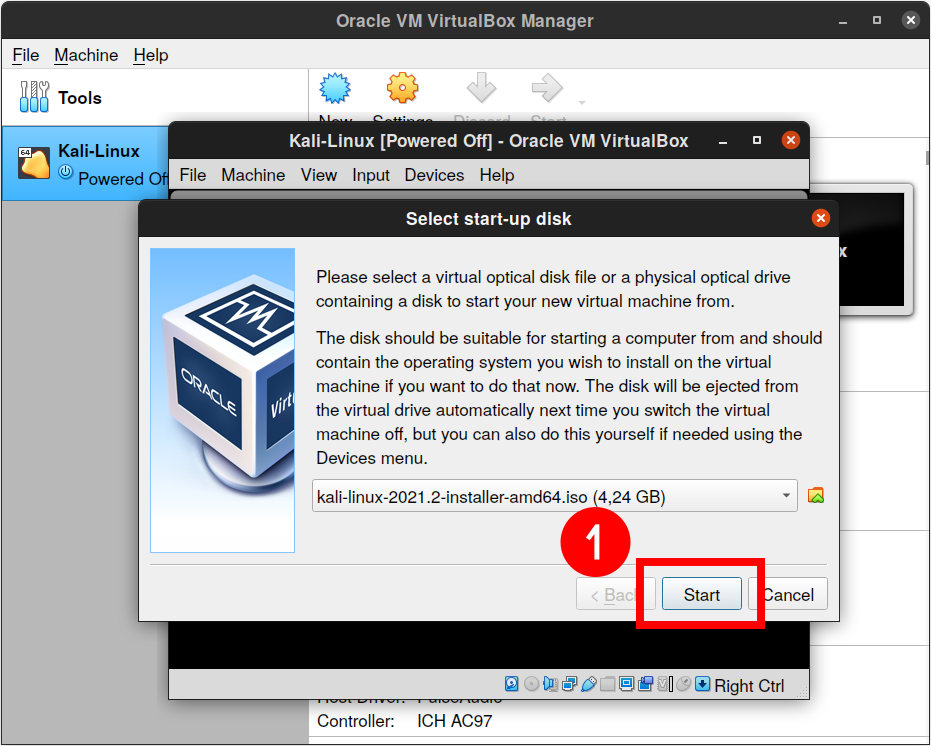
Finally, we can install the Kali Linux operating system to our VirtualBox’s virtual machine. The virtual machine boots from the Kali Linux ISO installation image.
Install Kali Linux on VirtualBox
Things from here are Kali Linux-specific.
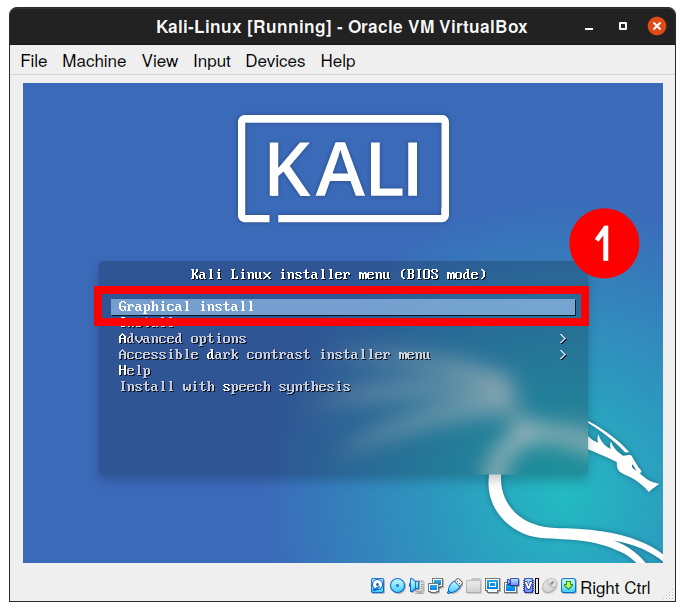
1. To install, choose the “Graphical install” option and press “Enter” to continue.
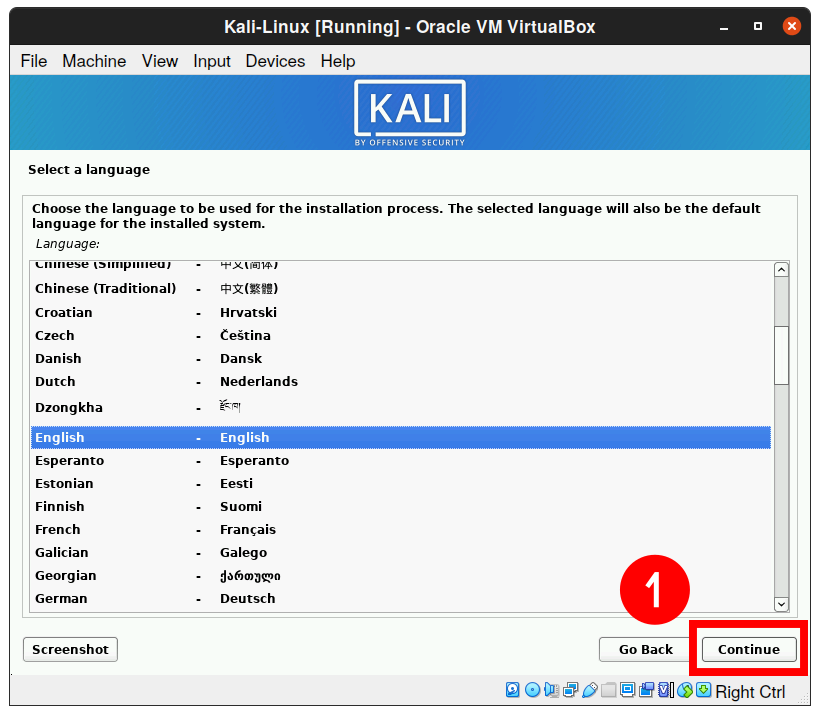
2. Choose the language you wish to use for the installation process and the installed system and click the “Continue” button.
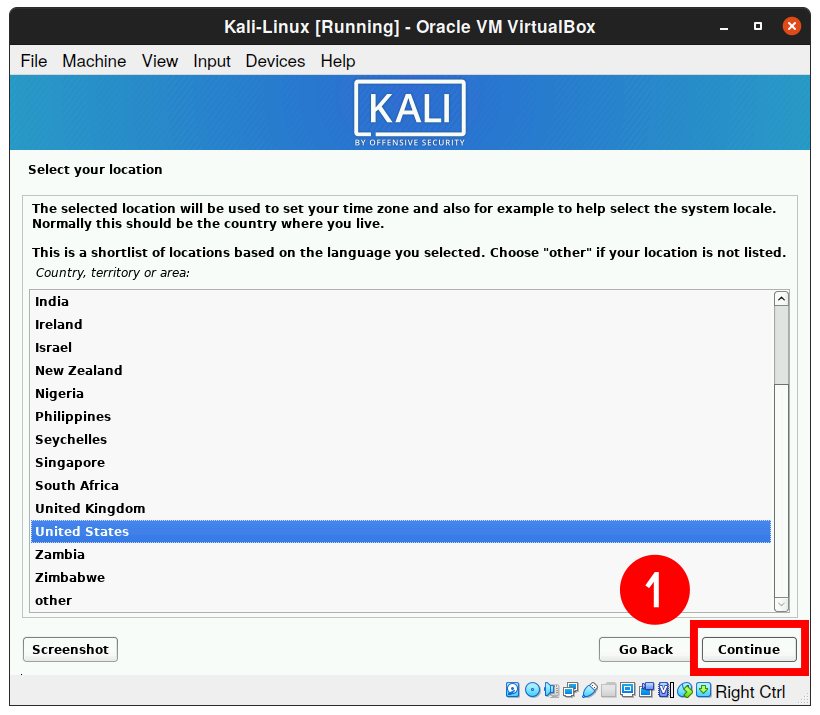
3. Select your location and click the “Continue” button. This option sets your time zone, time format, etc.
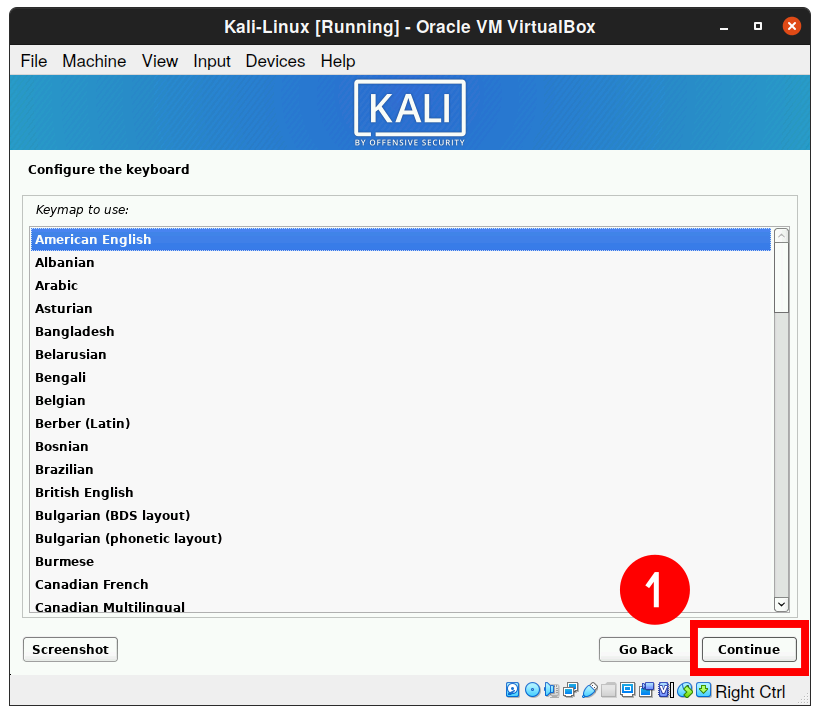
4. Choose your keyboard layout and click the “Continue” button. For the current installation, we will use “American English.”
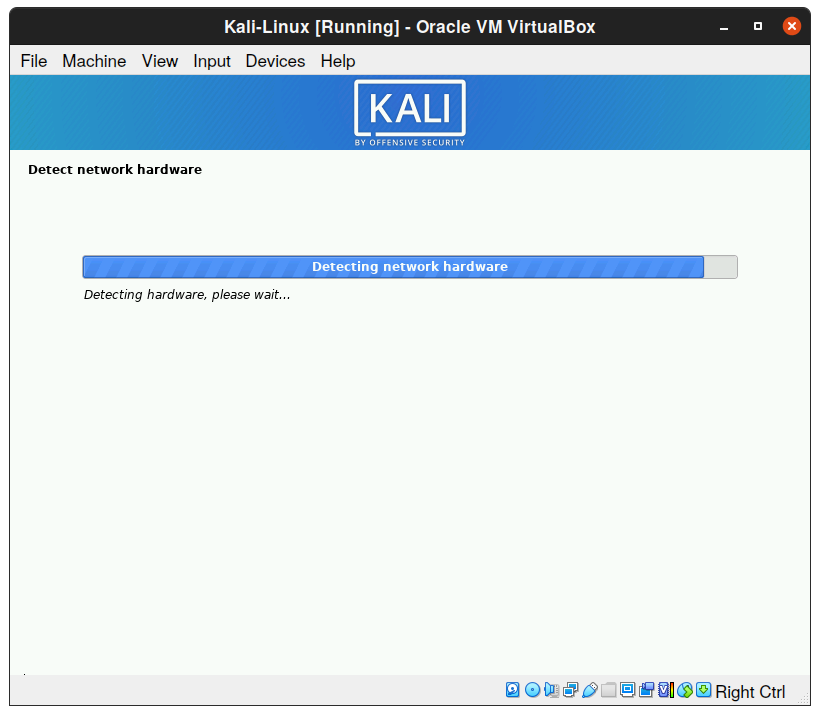
5. Wait for the installer to configure the settings it needs to proceed with the installation.
6. Enter the hostname for your Kali Linux system, for example, “kali-vm.”

7. If you don’t use a domain in your network, you may leave this field empty. Click on the “Continue” button to proceed.

8. Set user account and password. Note that this is a user other than the root user. We will log in with this username once the installation completes.
So type your name and click “Continue” to proceed with installing Kali Linux on VirtualBox.

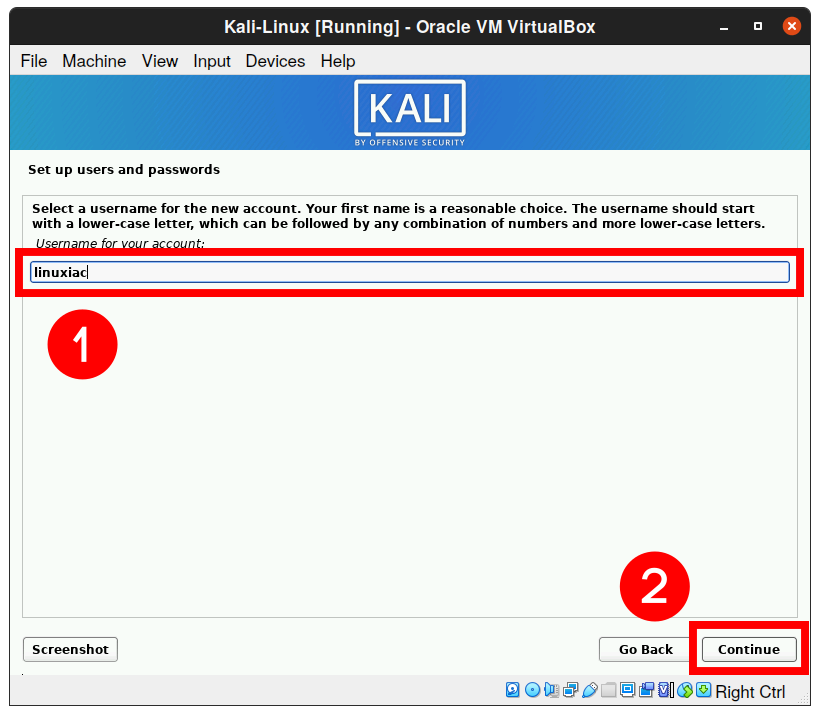
9. Now, you will be asked to provide the username. Type it and click “Continue.”
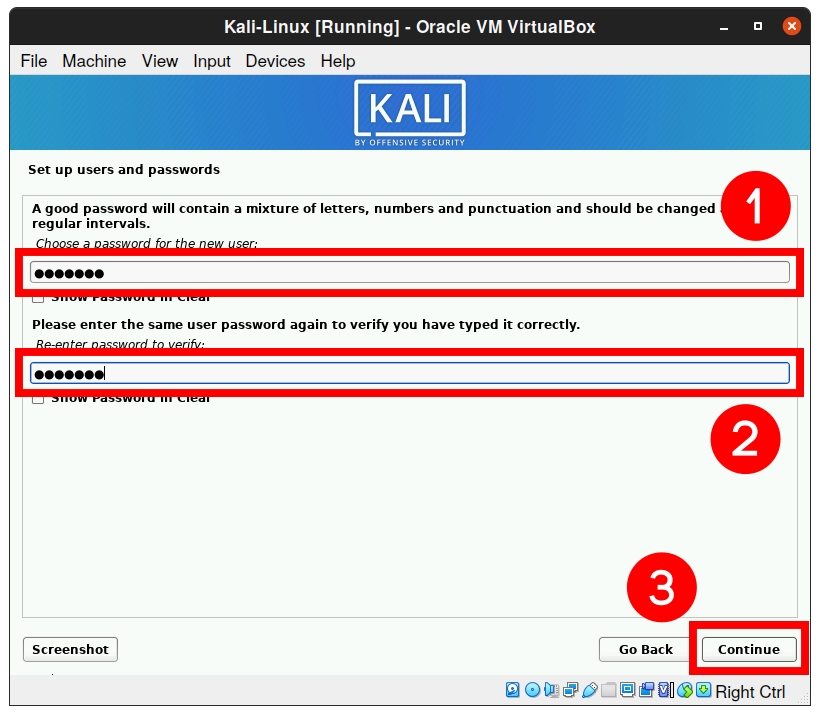
10. Then, set the password.
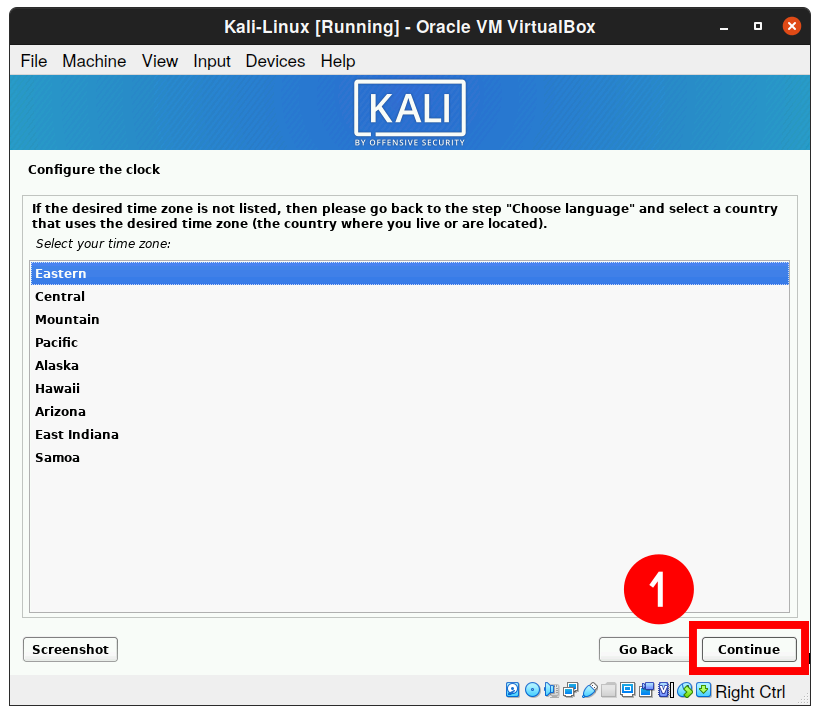
11. Configure the system clock by setting the desired time zone and clicking “Continue.”
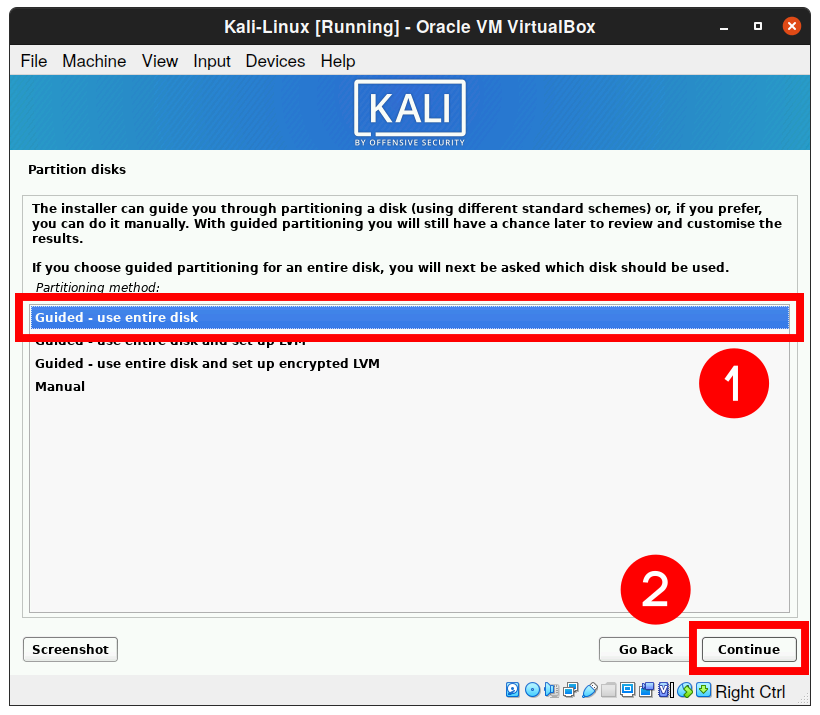
12. Select how you would like to partition the hard disk. Unless you have a good reason to do it manually, go for the “Guided – use entire disk” option and click “Continue.”
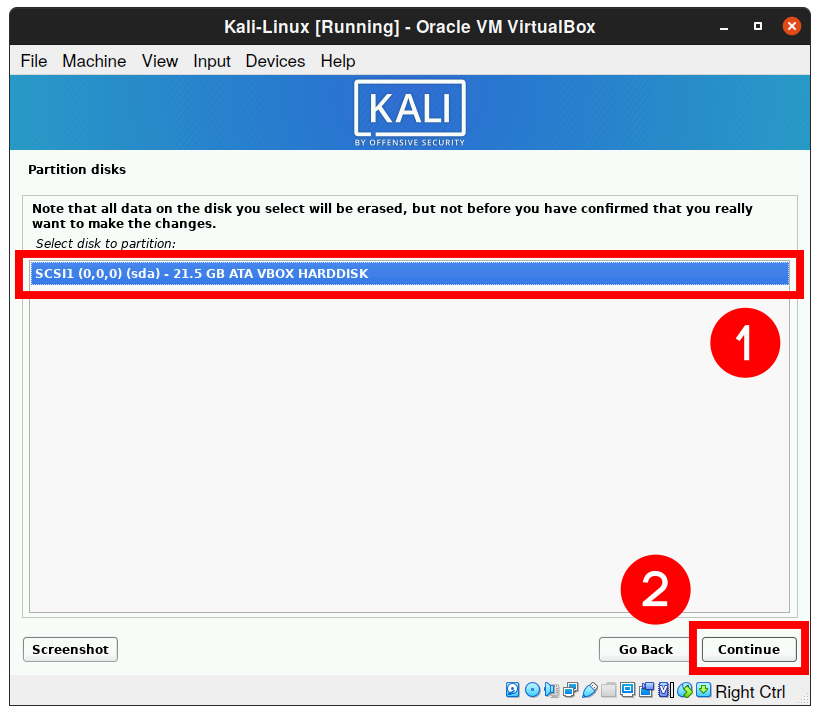
13. Then, select which disk you want to use for partitioning. There should be only one option. Select “ATA VBOX HARDDISK” and click “Continue“.
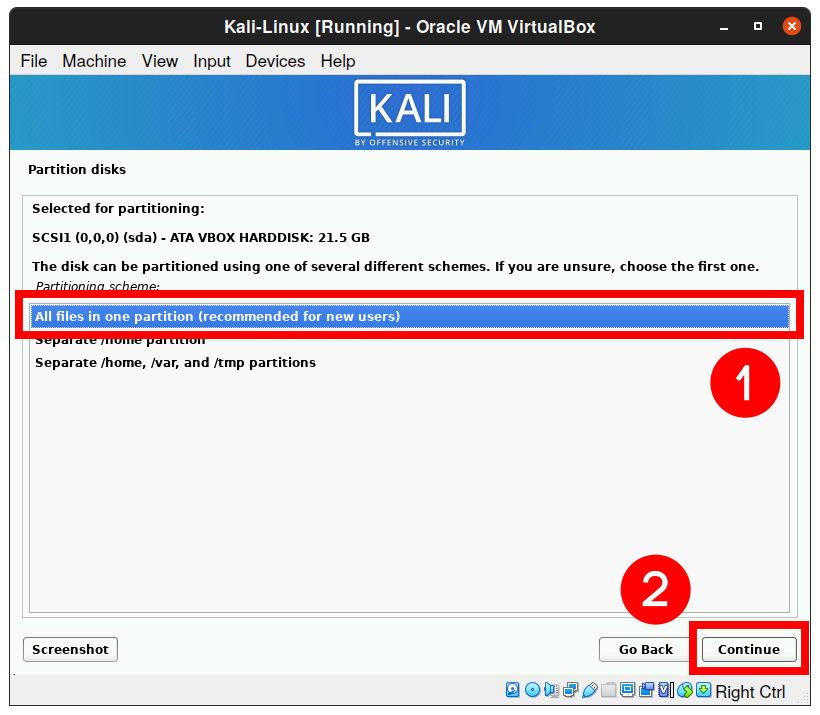
14. Next, select the scheme for partitioning. Choose the default, “All files in one partition,” and click “Continue.”
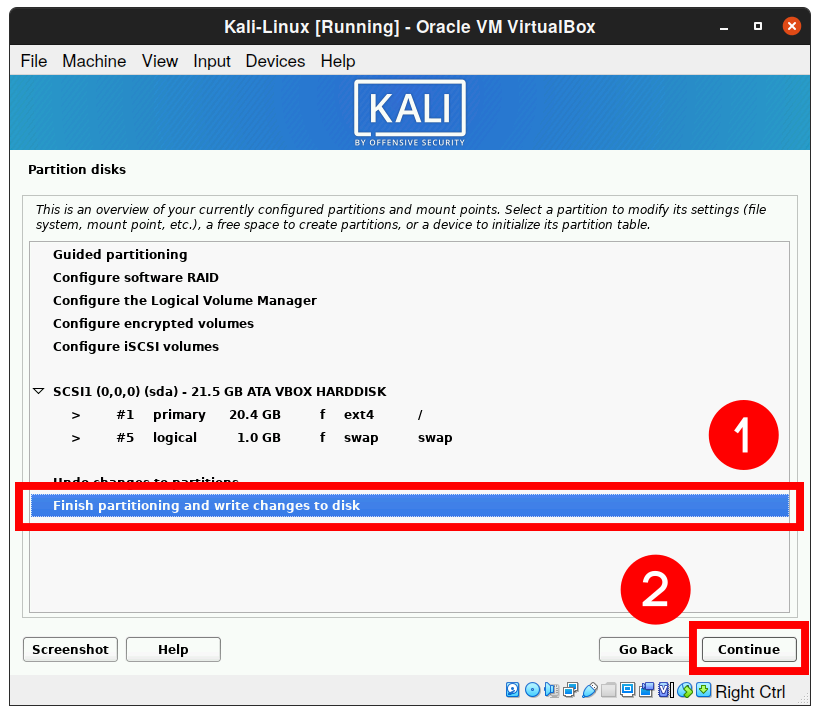
15. The wizard gives you an overview of the configured partitions. Next, select the “Finish Partitioning and Write changes to disk,” which should be selected by default, and click “Continue.”
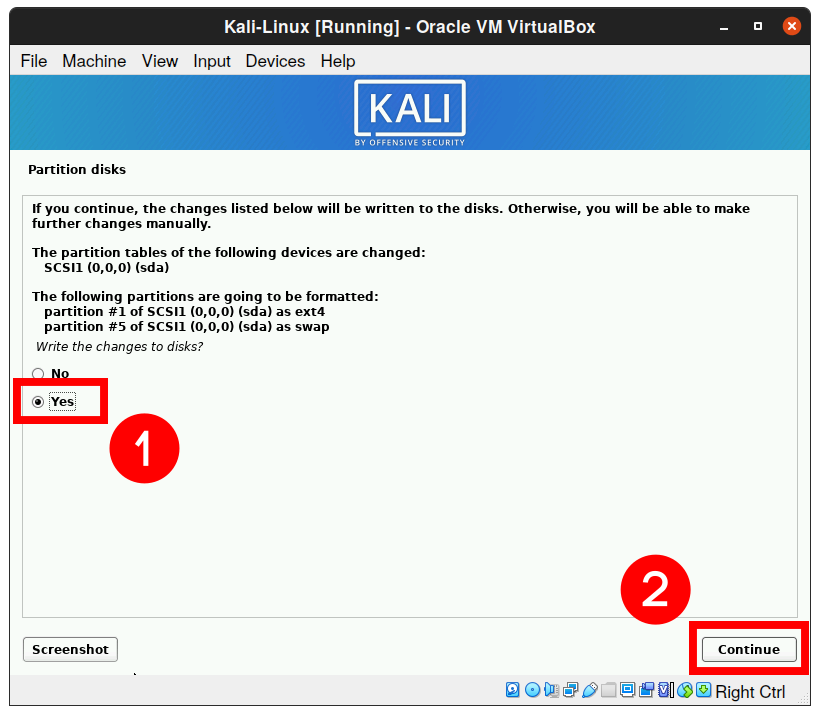
16. Choose “Yes” to confirm changes to the disk and click “Continue.”
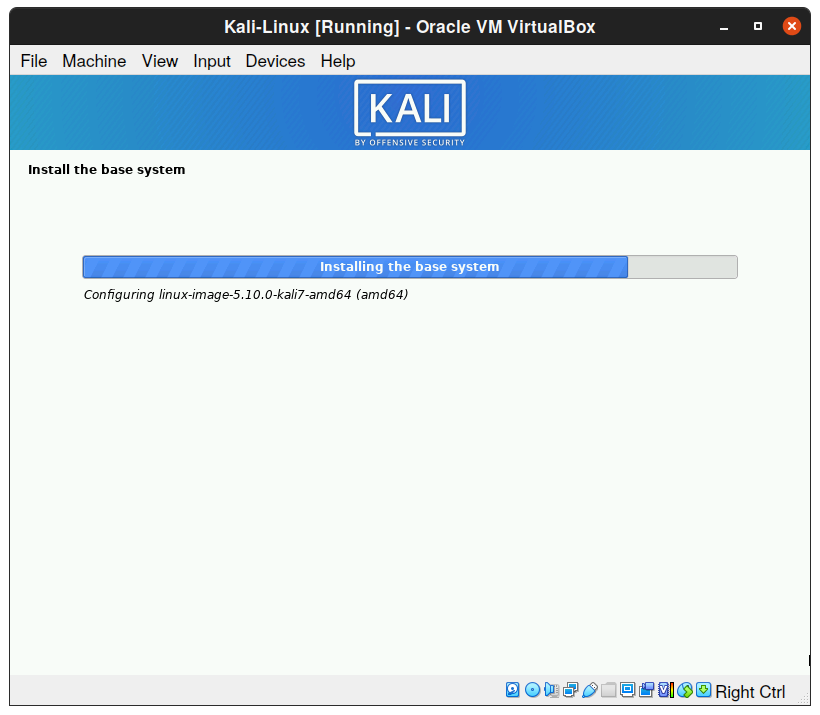
17. Installation of your base system will start. Wait for some time and let the process continue.
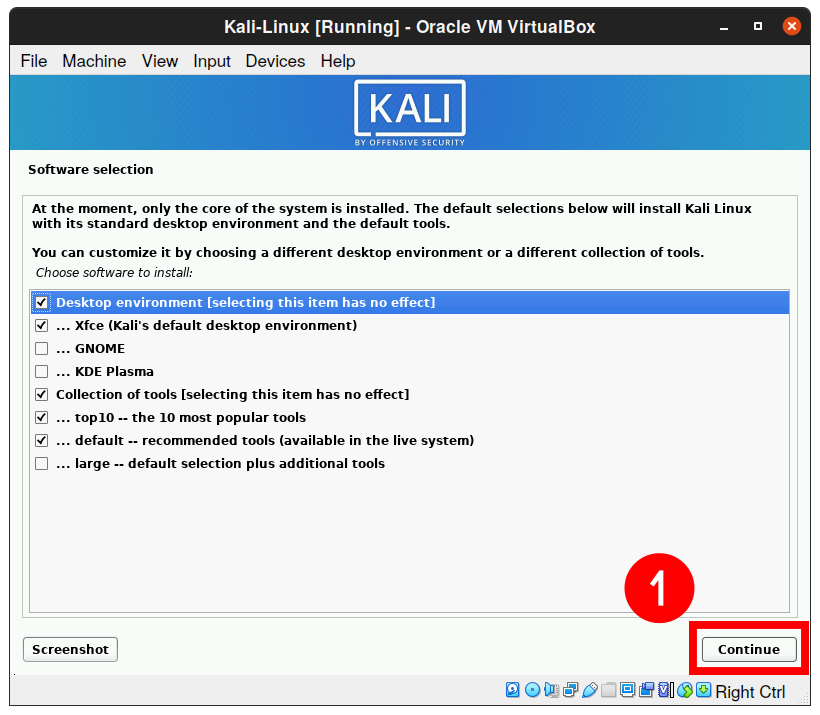
18. From the next screen, you must specify what software you want to install. You can choose a desktop environment from here.
Default is Xfce, which is smooth, faster, and lightweight than others. So leave everything as it is and click on “Continue.”
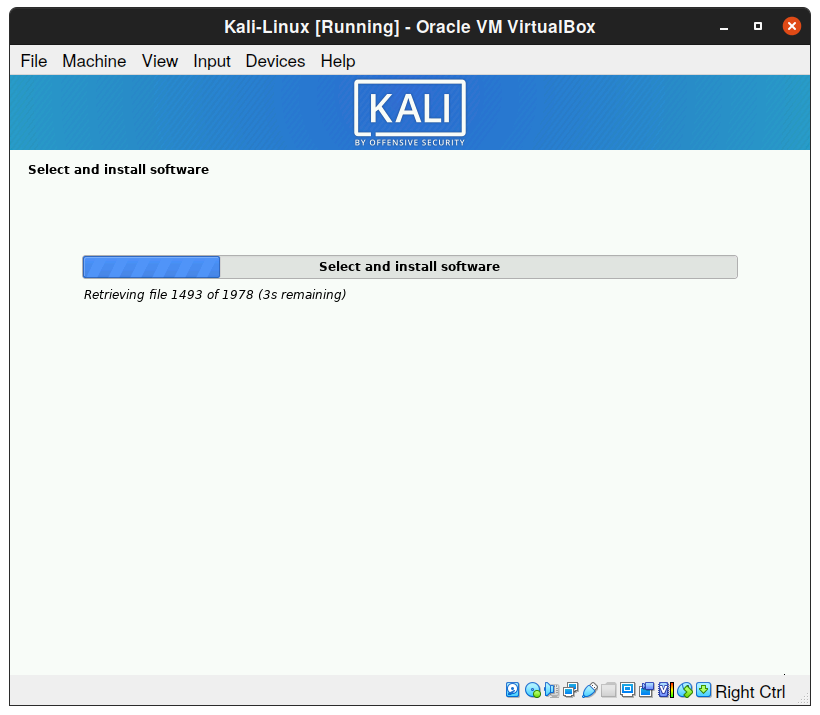
19. The second part of installing Kali Linux on VirtualBox will begin. This step will take some time to complete, so have patience.
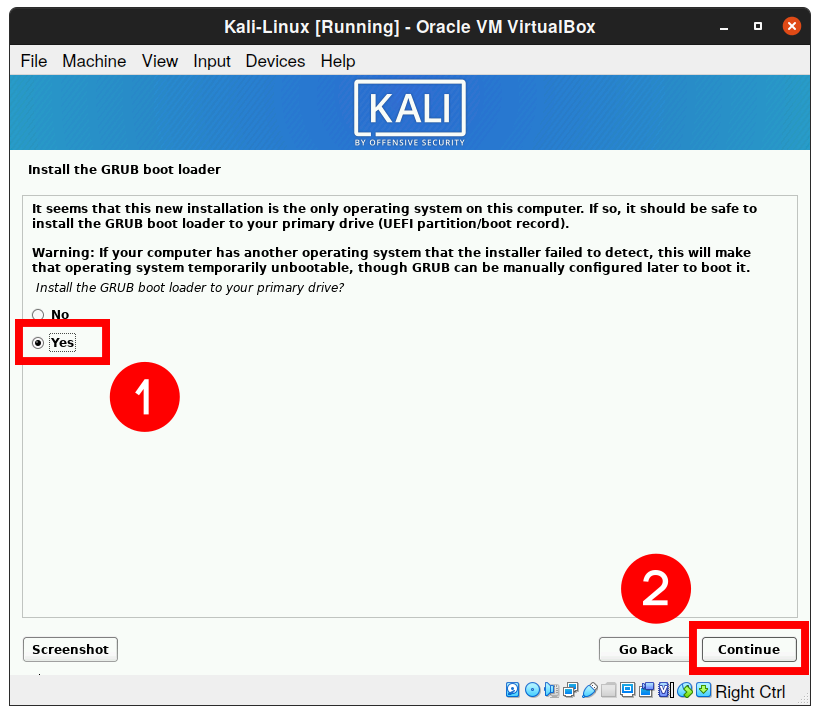
20. Since no other operating systems and boot loaders are on a virtual disk, it is necessary to install GRUB. Select “Yes” and click “Continue.”
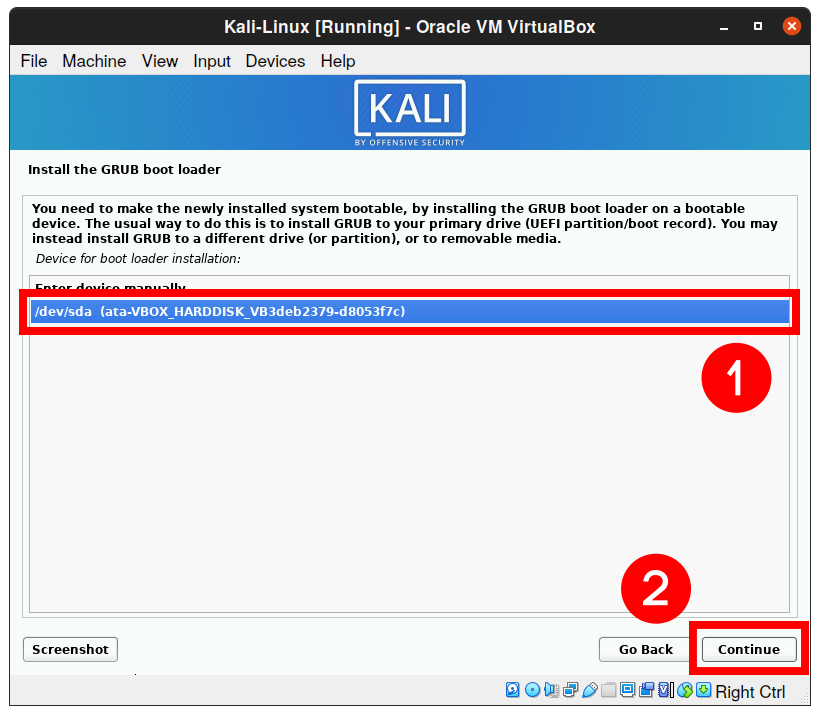
21. You will be asked to select a boot loader device for GRUB installation. Select “/dev/sda” and click “Continue.”
22. The installation will continue. Wait for the process to complete.

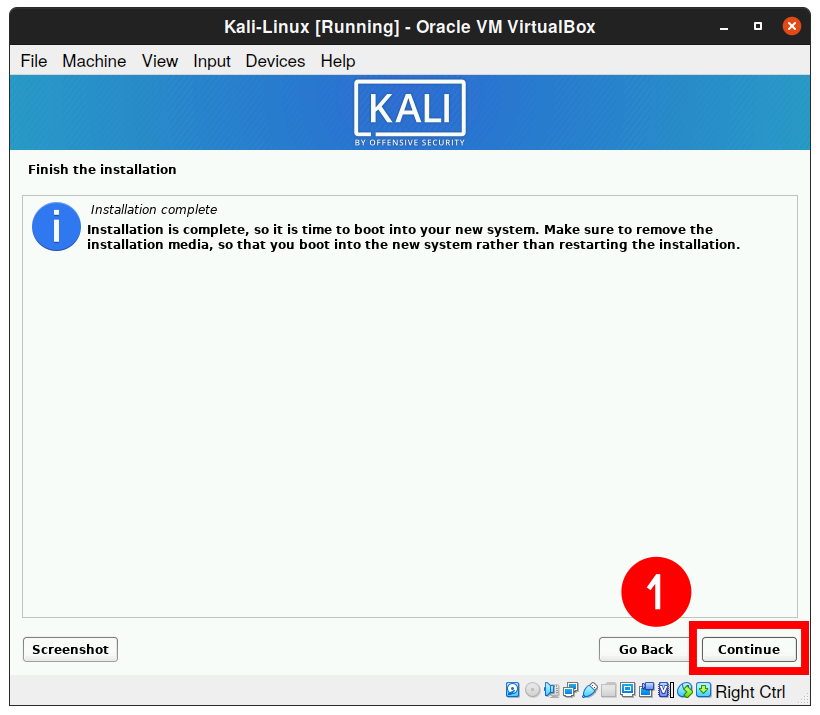
23. Once Kali Linux has finished installing itself, you will see a notification window. Click “Continue” to finalize the installation and wait for your new Kali Linux VM to reboot.
24. By now, you have successfully installed Kali Linux on VirtualBox. Your system will reboot, and you will see the screen.
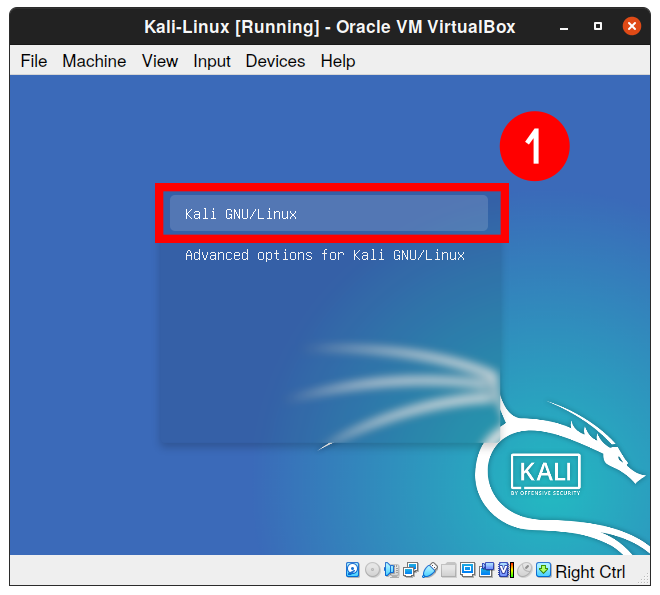
25. From now on, you can log in with the username and password you provided during installation to your newly installed Kali Linux on VirtualBox.
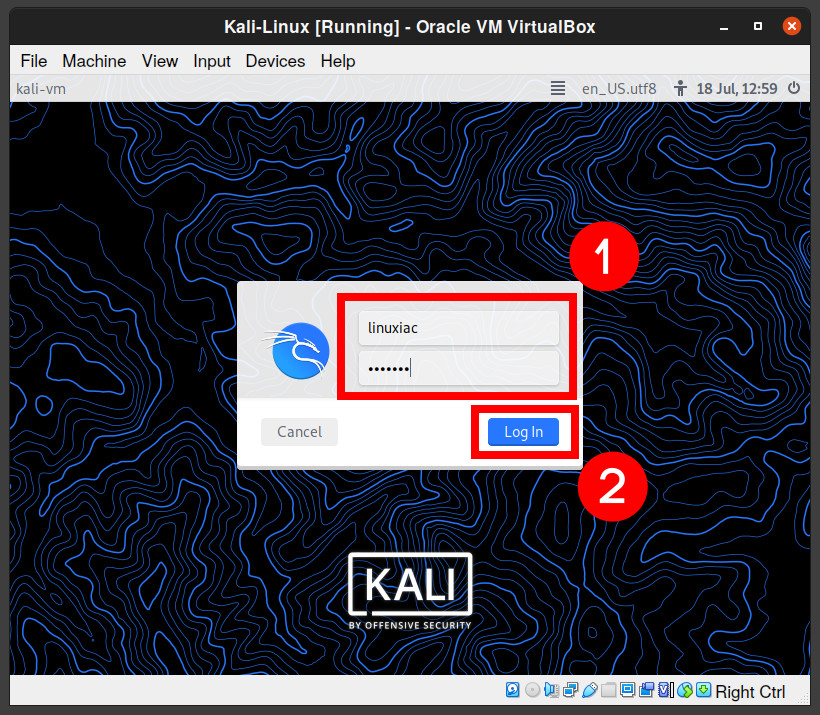
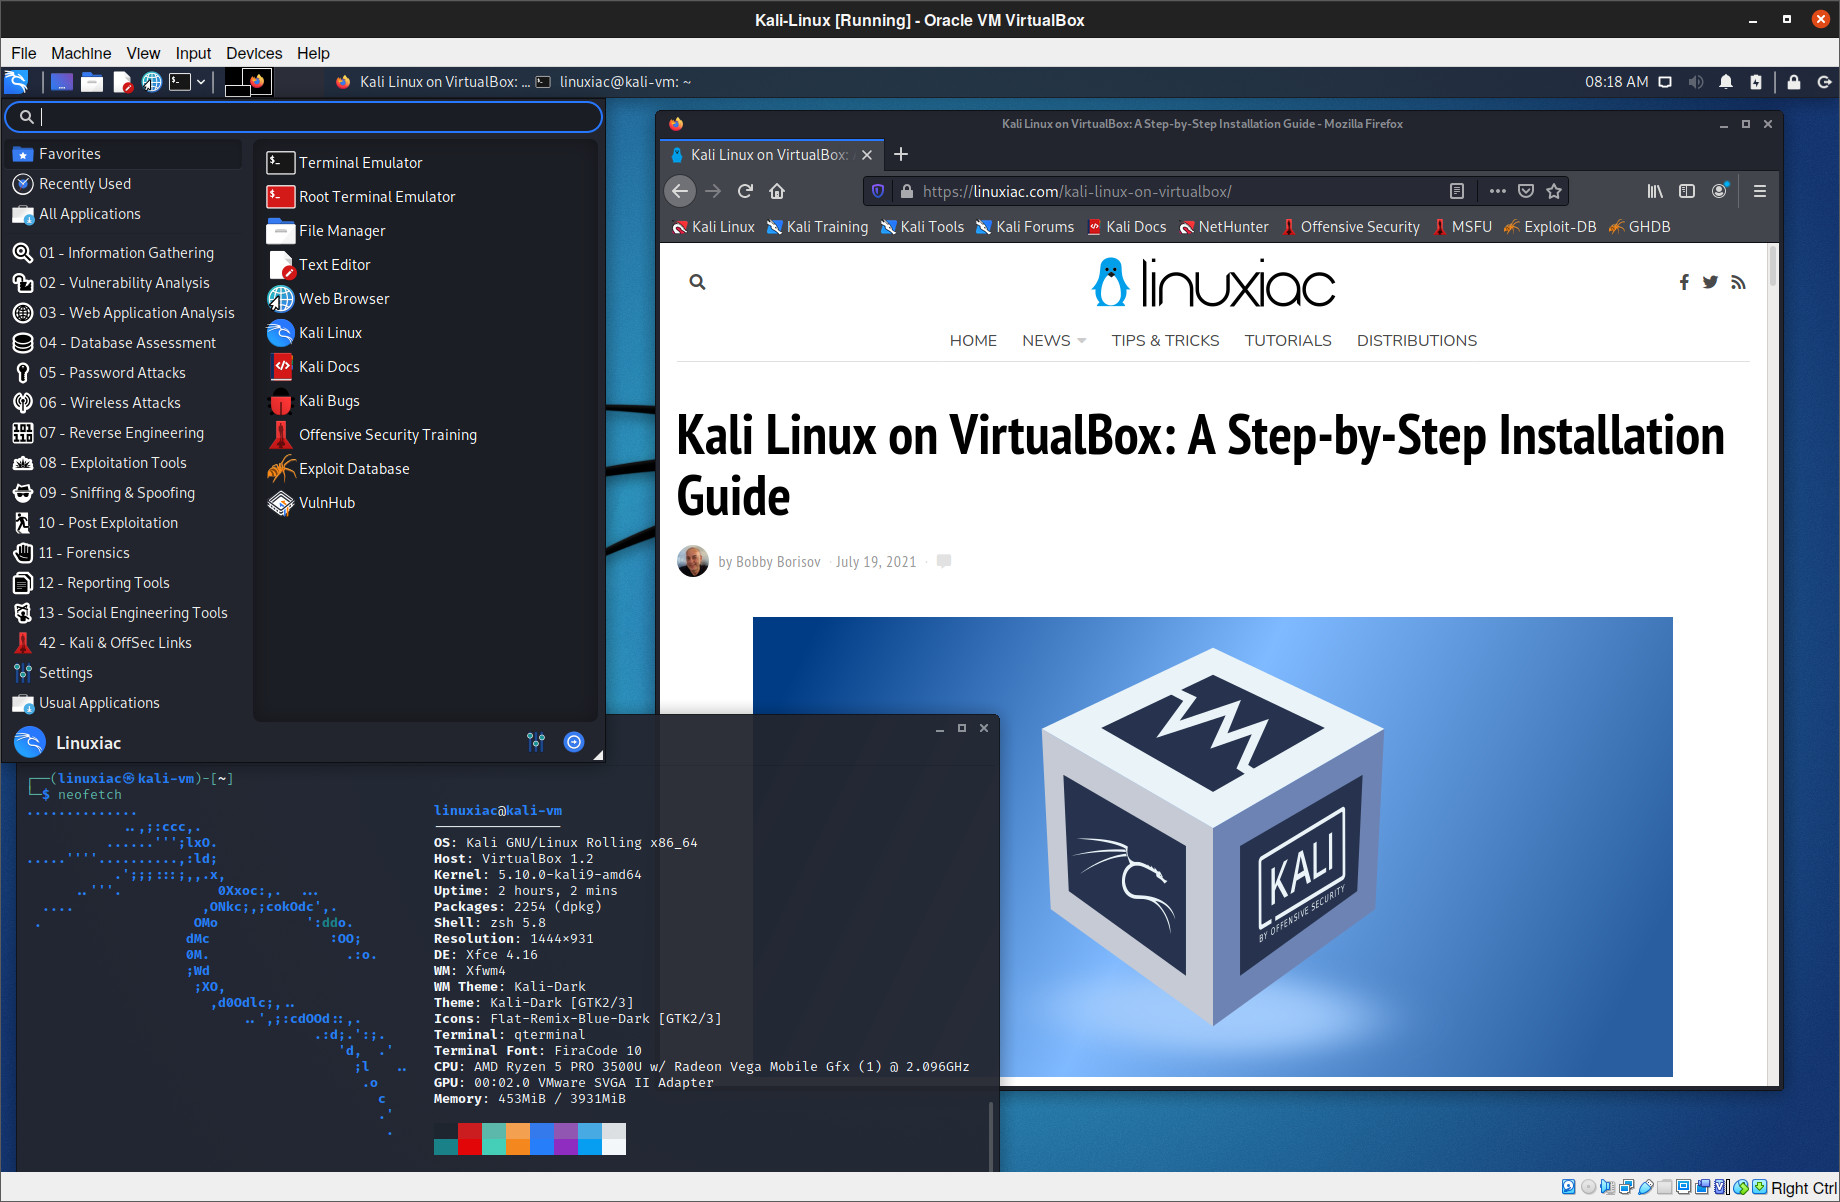
You will be logged into Kali Linux Desktop.
Installing VirtualBox Guest Additions on Kali Linux
VirtualBox Guest Additions is a set of drivers and system utilities intended to improve usability, virtual machine performance, and tight integration with a host OS.
To clarify, you must run these commands in the virtual Kali Linux system.
Update your Kali Linux guest operating system software packages:
sudo apt update
sudo apt upgrade
Once the upgrade completes, reboot your Kali Linux guest operating system and run:
sudo apt install virtualbox-guest-x11Finally, restart your system to reload kernel modules.
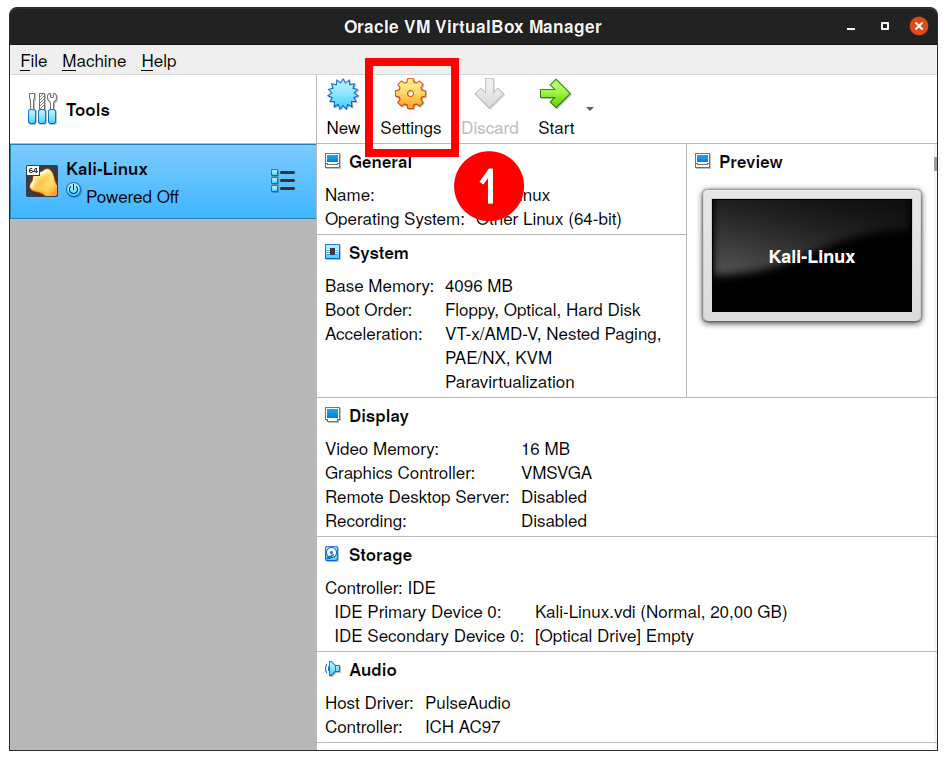
Now with Guest Additions installed, the clipboard of your guest OS can be shared with your host OS. To enable Shared Clipboard and Drag’n’Drop functionality, open VirtualBox Manager and click on “Settings.”
Next, go to the “General” -> “Advanced” tab and enable the two options from the drop-down menu.

Conclusion
This guide taught you how to install Kali Linux on VirtualBox. If you encounter any issues with getting Kali Linux to install as a VirtualBox virtual machine, please feel free to ask your questions in the comment box below.


Why would you pick the bare metal ISO instead of the ISO intended for VirtualBox?
Hi Richard,
Thank you for the good question. I chose this option because it allows the user to go through the entire installation process, thus gaining valuable experience. In addition, installing it in this way allows customization of the OS according to the needs and preferences of the user.
I completely agree that choosing an ISO intended for VirtualBox would be the easier option if the goal is simply to get a working OS with minimal effort.