OpenLiteSpeed (OLS) is a high-performance, lightweight, open-source HTTP server that helps your website to load faster than ever before. It is a powerful, modular HTTP server and can handle hundreds of thousands of simultaneous connections with low resource usage.
With its extensive feature set and easy-to-use web administration console, OpenLiteSpeed will help you have an efficient web hosting infrastructure for your needs.
Its advantages are undeniable. OpenLiteSpeed offers unbeatable performance, security, scalability, simplicity, and optimization bundled in a single package.
Yes, Nginx is undoubtedly the more popular and widely used web server solution, but when it comes to speed, OpenLightSpeed is unrivaled. WPJohnny and WP Speed Matters have written a lot of good material on the subject that is well worth reading.
At the same time, Rocky Linux and AlmaLinux have established themselves in the Linux market as the best RHEL derivatives, offering unmatchable stability and reliability. Combining them with the speed of OpenLightSpeed, you get a free web hosting platform that ranks among the best in the industry.
Unfortunately, at the time of writing this guide, despite the availability of the latest releases of Rocky Linux 9 and AlmaLinux 9, OpenLiteSpeed does not yet support them. Therefore, if you want to take advantage of this web server’s great features, you must install it on a Rocky Linux 8 or AlmaLinux 8 system.
So, without further ado, let’s walk you through the steps of installing the OpenLiteSpeed web server with PHP 8 support on Rocky Linux 8 or AlmaLinux 8.
Step 1: Update System
Before we proceed with OpenLiteSpeed installation on our Rocky or AlmaLinux system, updating the list of available packages is a good idea. So, run the below DNF command to ensure that your current system is up to date.
sudo dnf update -y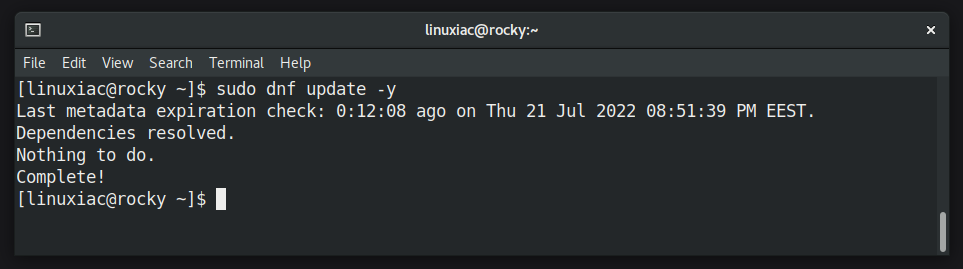
Make sure all available updates are installed.
Step 2: Add EPEL and OpenLiteSpeed Repositories
The Extra Enterprise (EPEL) repository contains a few packages required by OpenLiteSpeed. So, please enable it.
sudo dnf install epel-release -y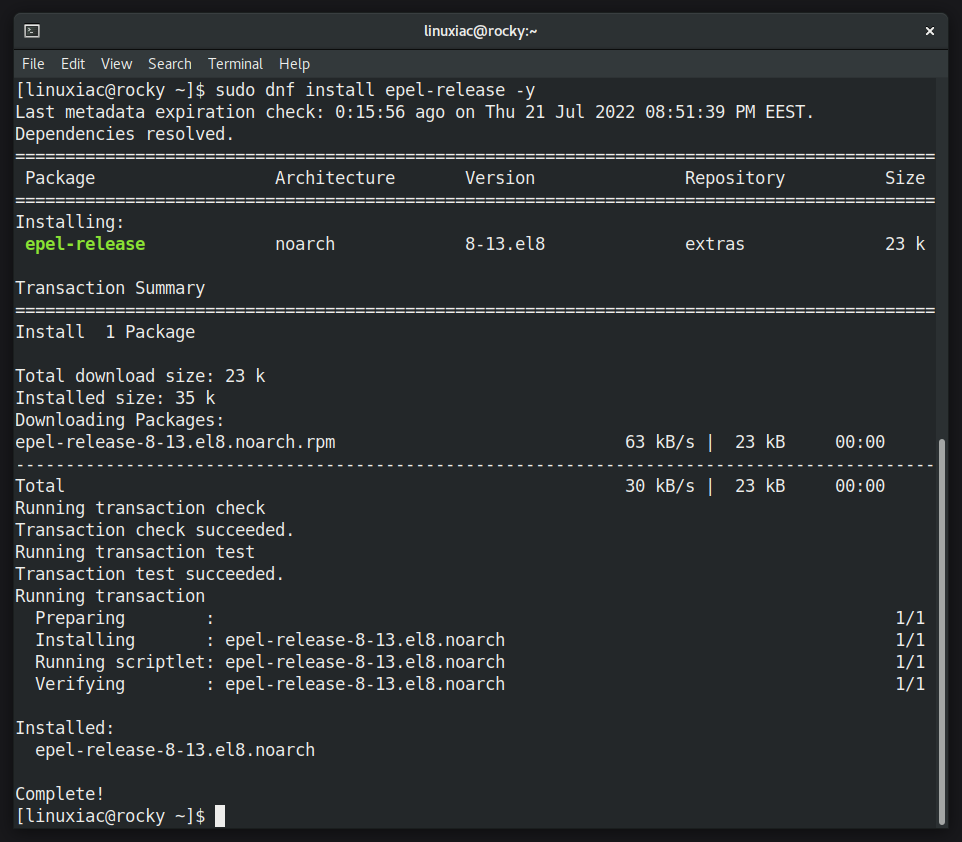
Next, let’s add the OpenLiteSpeed repository to our system. In your terminal app, type:
sudo rpm -Uvh http://rpms.litespeedtech.com/centos/litespeed-repo-1.3-1.el8.noarch.rpmCode language: JavaScript (javascript)
Step 3: Install OpenLiteSpeed on Rocky Linux 8 / AlmaLinux 8
Everything is already set up. Now that we’ve added the EPEL and OpenLiteSpeed repos to our system, we can run the following command to install OpenLiteSpeed:
sudo dnf install openlitespeed -y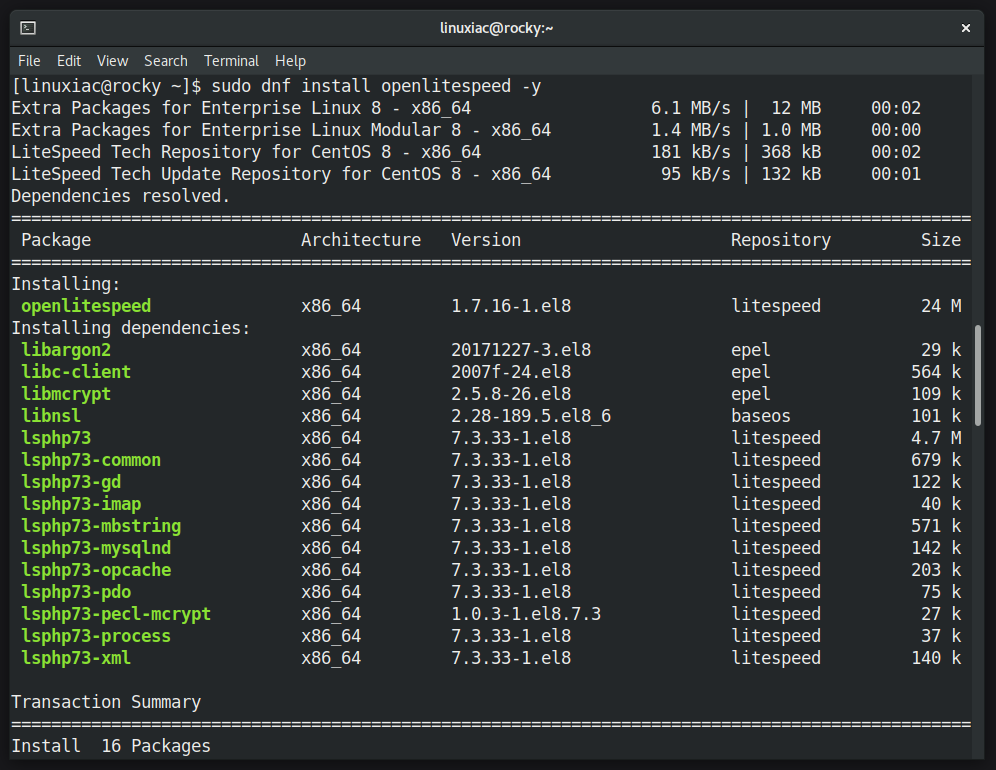
Step 4: Install PHP 8.1
As you can see from the image above, when we install OpenLiteSpeed, it automatically installs PHP 7.3 build made for OpenLiteSpeed. But, of course, we want to have a more up-to-date version so that we can install PHP 8.1 with the following command:
sudo dnf install lsphp81 lsphp81-common lsphp81-mysqlnd lsphp81-gd lsphp81-process lsphp81-mbstring lsphp81-xml lsphp81-pdo lsphp81-imap lsphp81-soap lsphp81-bcmath lsphp81-opcache lsphp81-zip -y
Once all the packages are installed, you can proceed to the next step. In addition, if you want to install a different PHP version, for example, PHP 7.4 or PHP 8.0, replace the lsphp81 portion in the above command with lsphp74 or lsphp80.
Step 5: Setup Admin Password
As previously stated, the OpenLightSpeed web server provides a great web-based admin console. However, you must first create an admin account and password to use it. So, let’s do it.
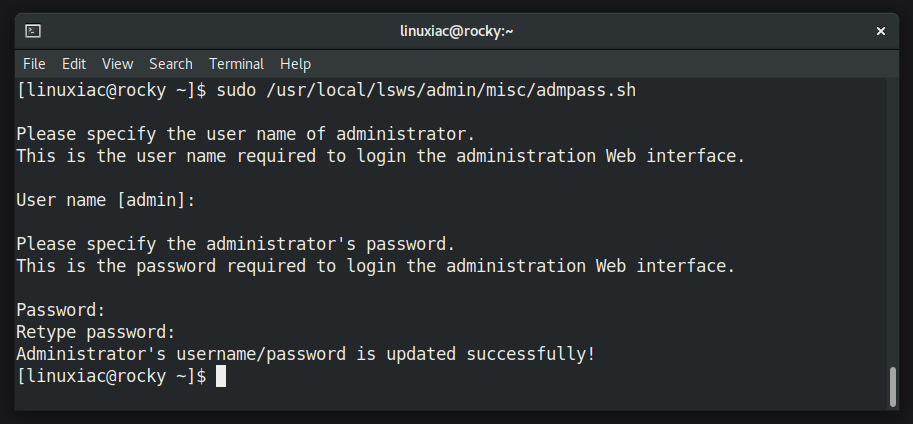
To create an administrative account and password for the OpenLightSpeed web-based console, use the following command:
sudo /usr/local/lsws/admin/misc/admpass.shIt is important to mention that if you press “Enter” without providing a username, “admin” will be set as the default.
Step 6: Configure Firewall
Because OpenLiteSpeed listens on ports 8088 and 7080, we must allow access to these ports for the service to be reachable remotely. Furthermore, we will also allow the standard port 80 for HTTP requests, as we will configure the OLS to use it by default later in the guide.
To do so, execute the following commands:
sudo firewall-cmd --zone=public --permanent --add-port=7080/tcp
sudo firewall-cmd --zone=public --permanent --add-port=8088/tcp
sudo firewall-cmd --zone=public --permanent --add-port=80/tcp
sudo firewall-cmd --reloadCode language: PHP (php)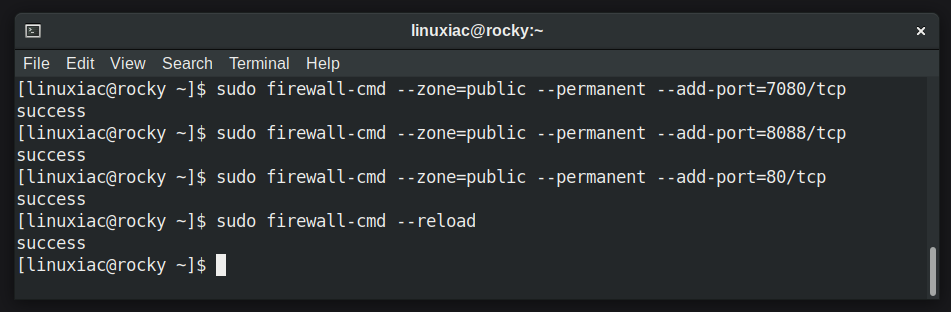
Step 7: Access OpenLiteSpeed Admin Console
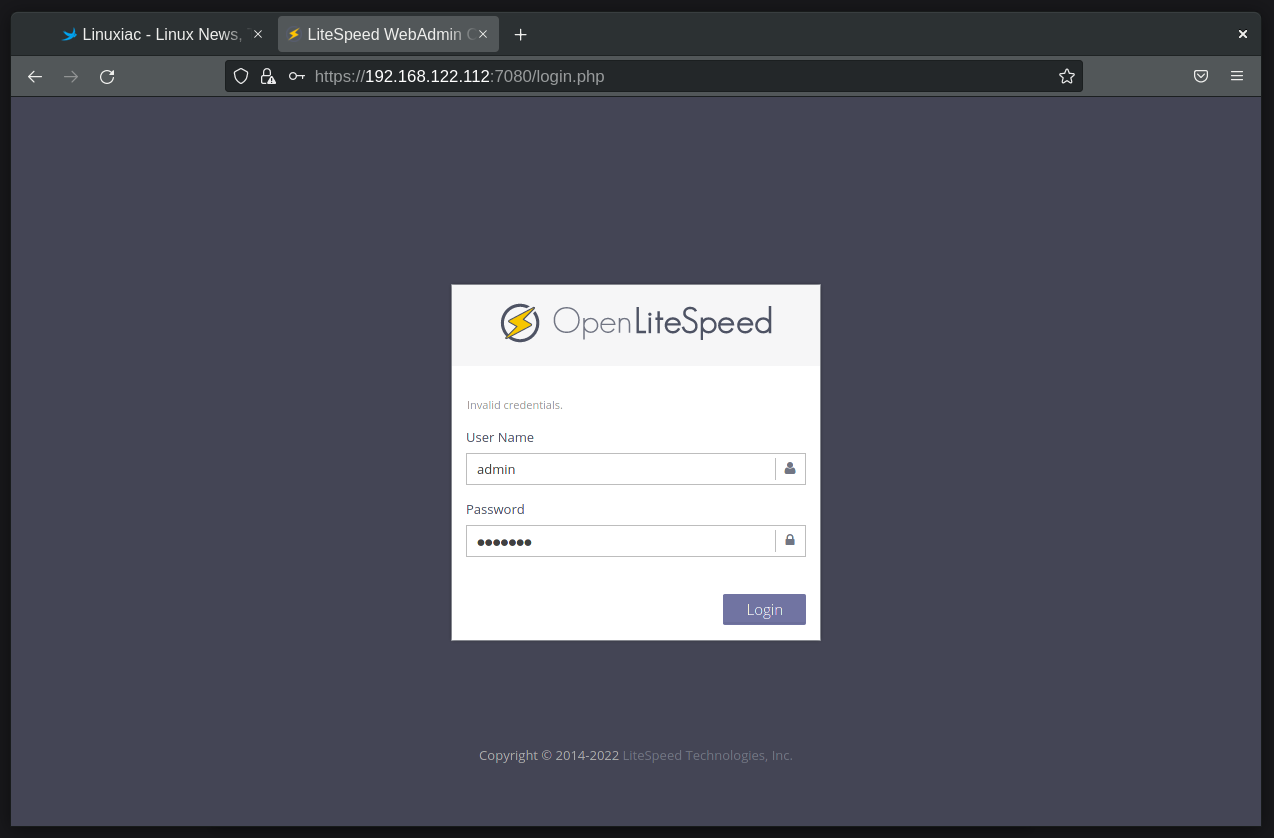
You can now access the OpenLiteSpeed admin interface by navigating to https://your-server-ip-address:7080. The OpenLiteSpeed login screen will greet you. To proceed to the admin dashboard, enter the username and password you created in step 5 and hit the “Login” button.
The OpenLiteSpeed dashboard view then greets you. This is where the majority of your configuration for the web server will take place.

Step 8: Configure OpenLiteSpeed’s PHP 8.1 Support
OpenLightSpeed, as previously stated, uses PHP 7.3 by default. Therefore, we must make some configurations to shift to PHP 8.1. So let’s get started.
First, choose the “External App” tab from the “Server Configuration” menu on the left. Then, on the right, click the “+” button to add the new PHP 8 configuration.

Choose “LiteSpeed SAPI App” from the dropdown menu for the type and press the “Next” button.

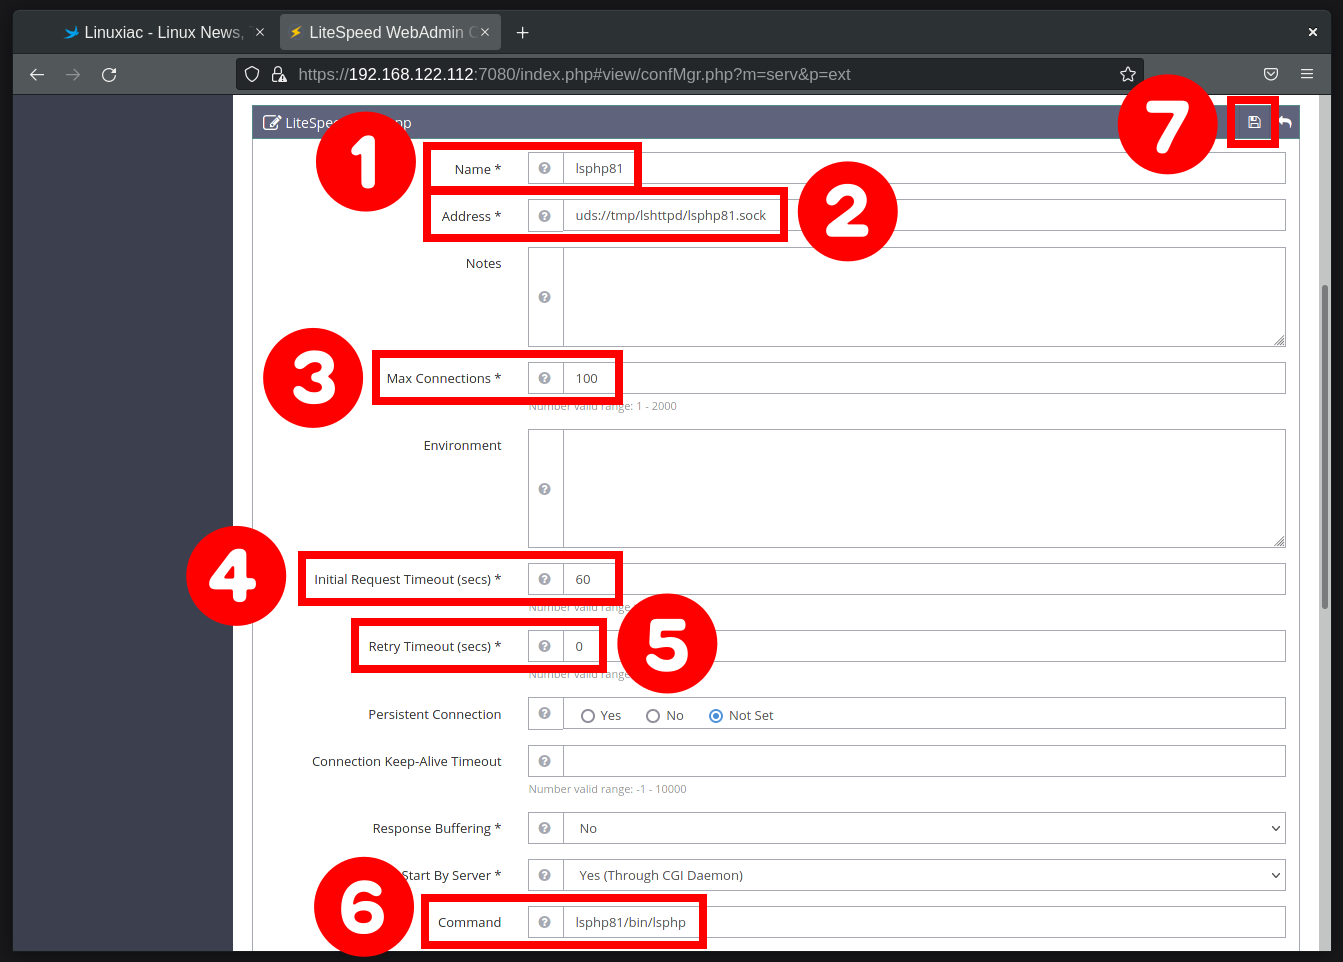
For the next screen, provide the following information:
- Name: lsphp81
- Address: uds://tmp/lshttpd/lsphp81.sock
- Max Connections: 100
- Initial Request Timeout (secs): 60
- Retry Timeout (secs): 0
- Command: lsphp81/bin/lsphp
When you’re done, click the “Save” button to save the configuration.
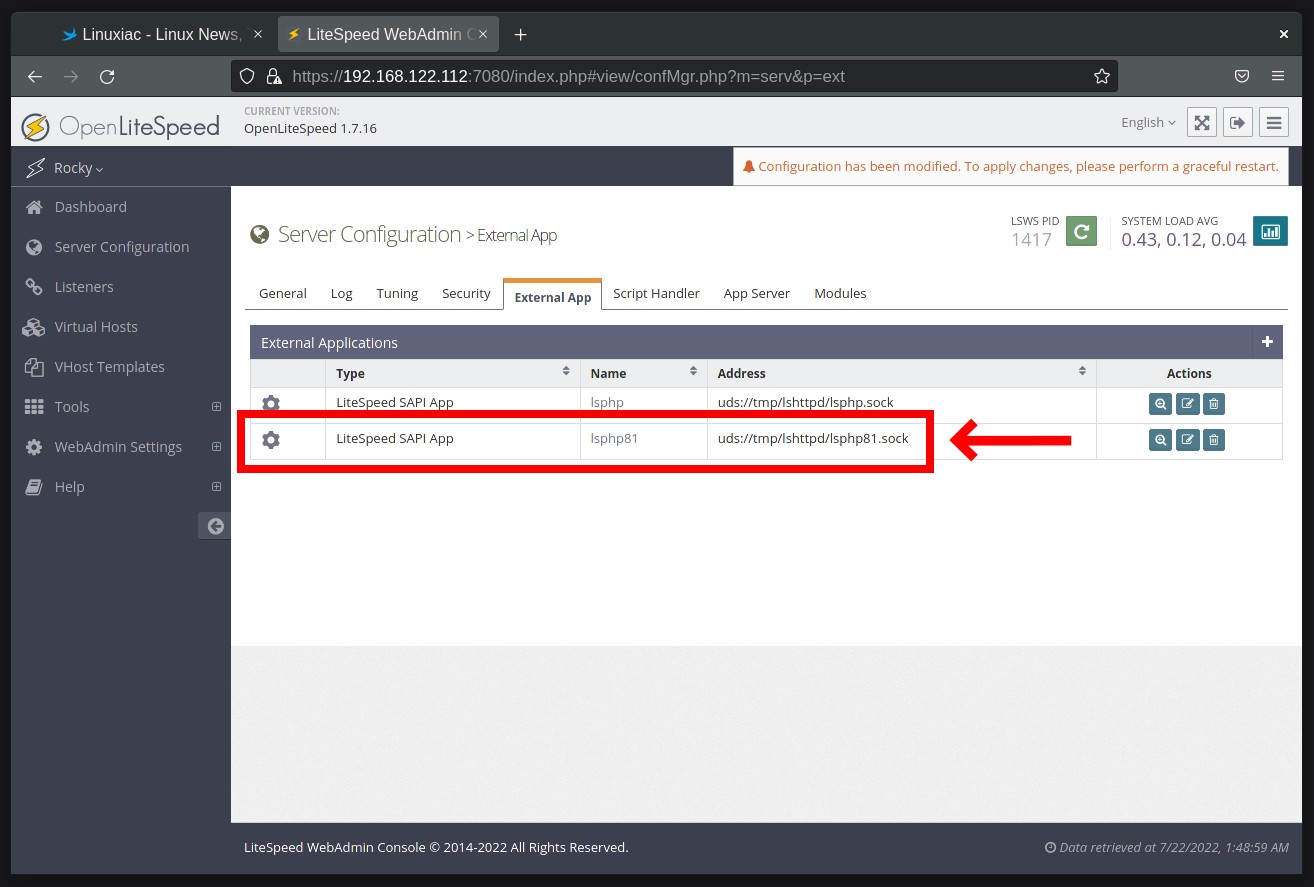
The newly added configuration will appear in the list.
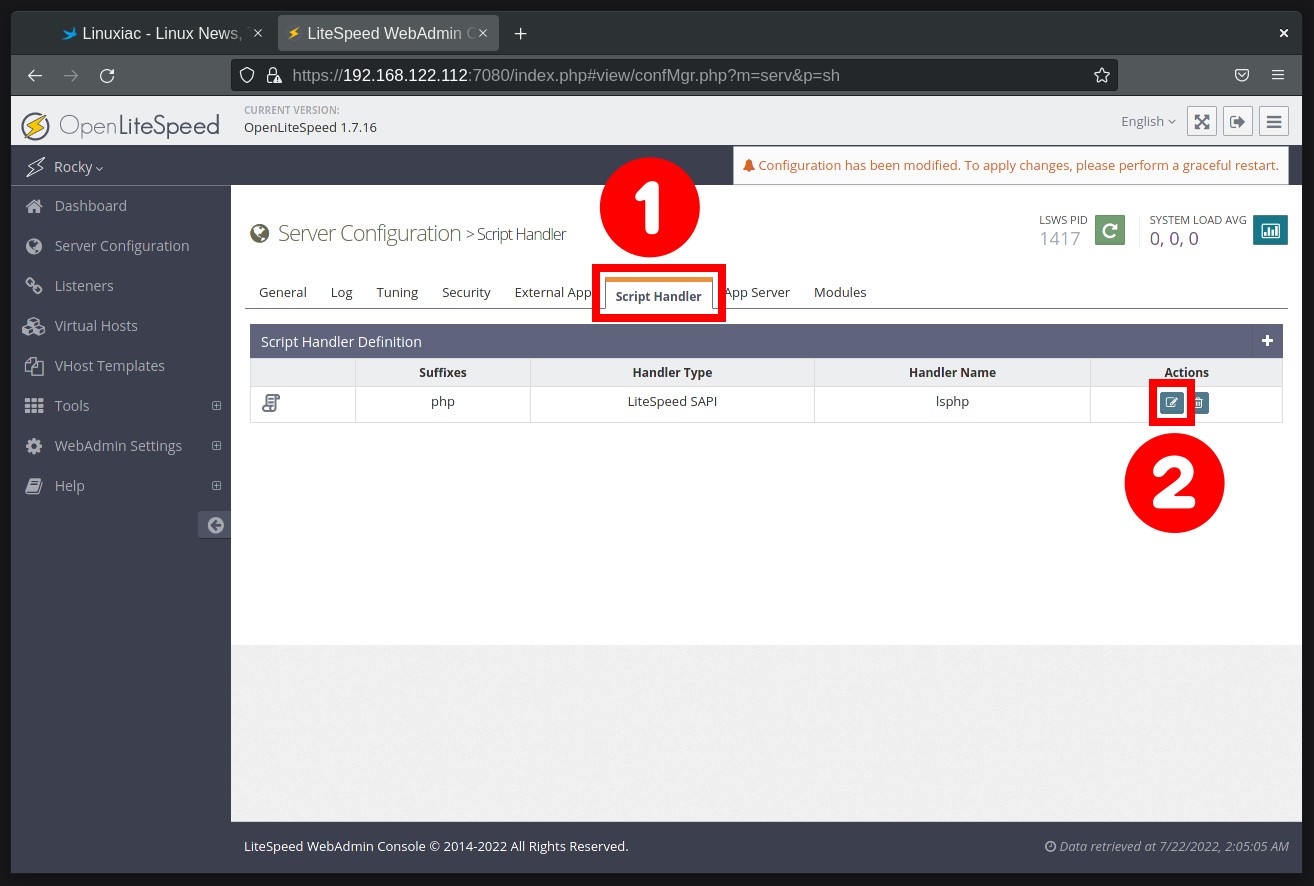
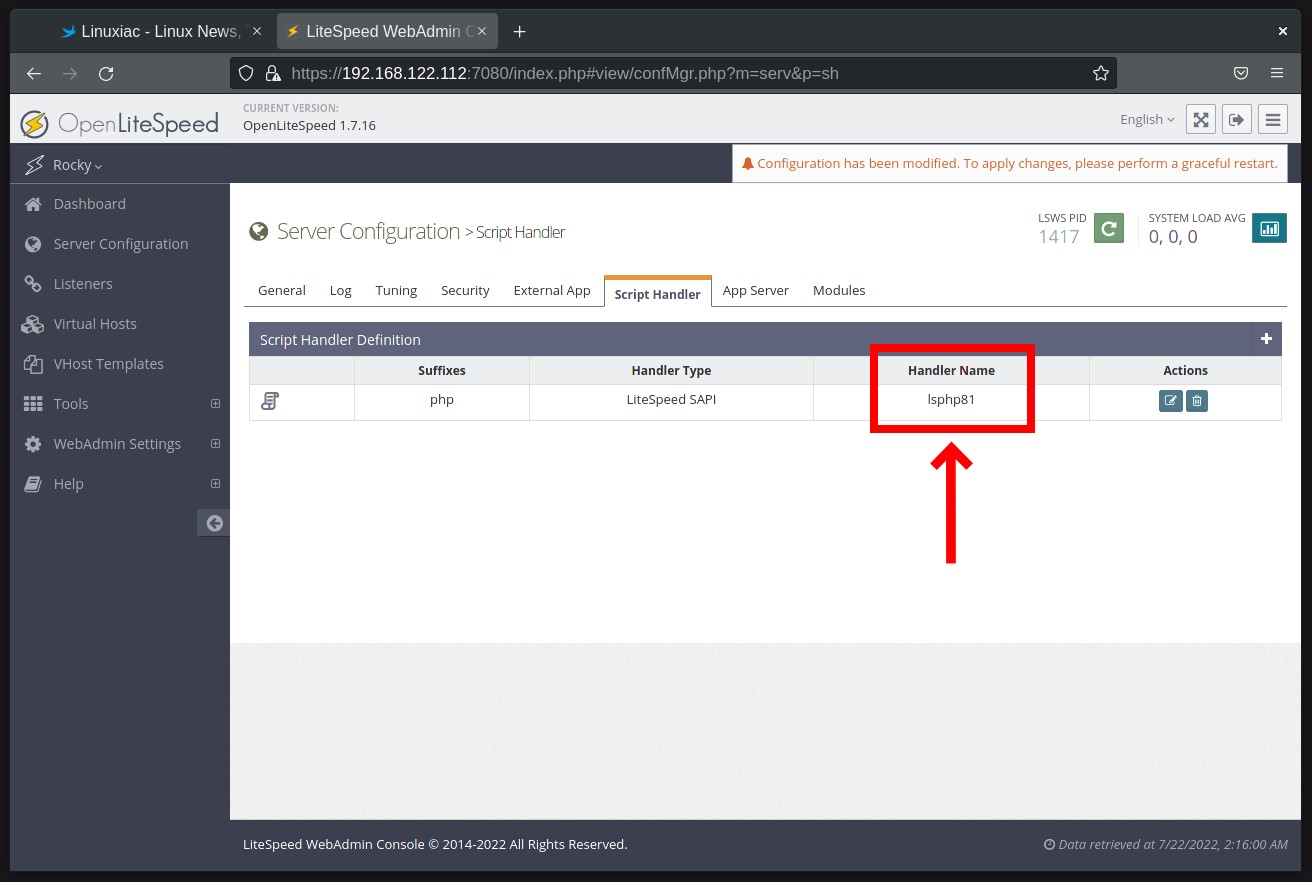
Our configuration was done, but it was only the first part of the process. Now this configuration must be set to OpenLiteSpeed so that the server uses PHP 8.1 by default. To do so, click on the “Script Handler” tab and then hit the “Edit” button.
Select “lsphp81” from the “Handler Name” dropdown menu and click on the “Save” button.
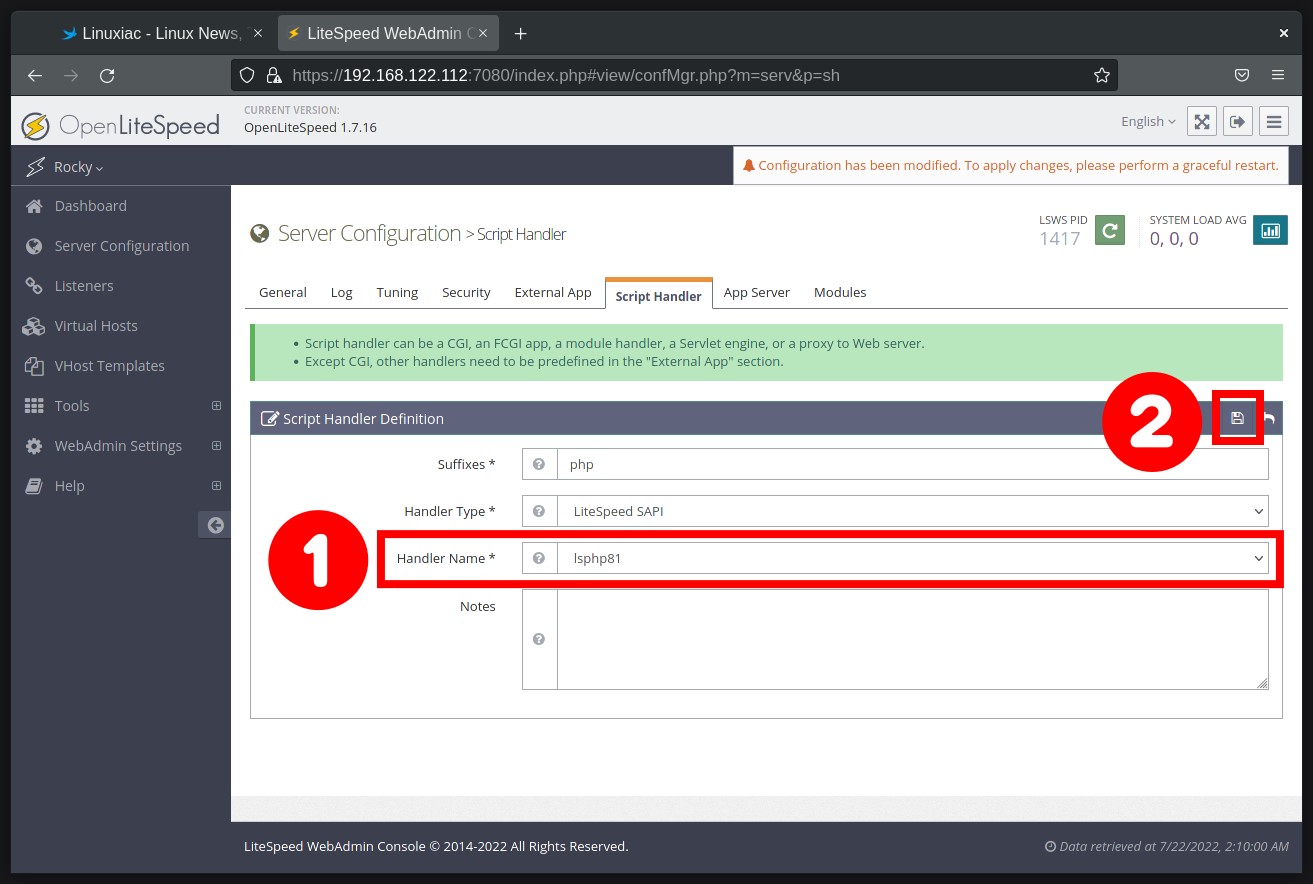
The “Handler Name” column shows that the OpenLightSpeed server uses our new PHP 8.1 (lsphp81) configuration by default.
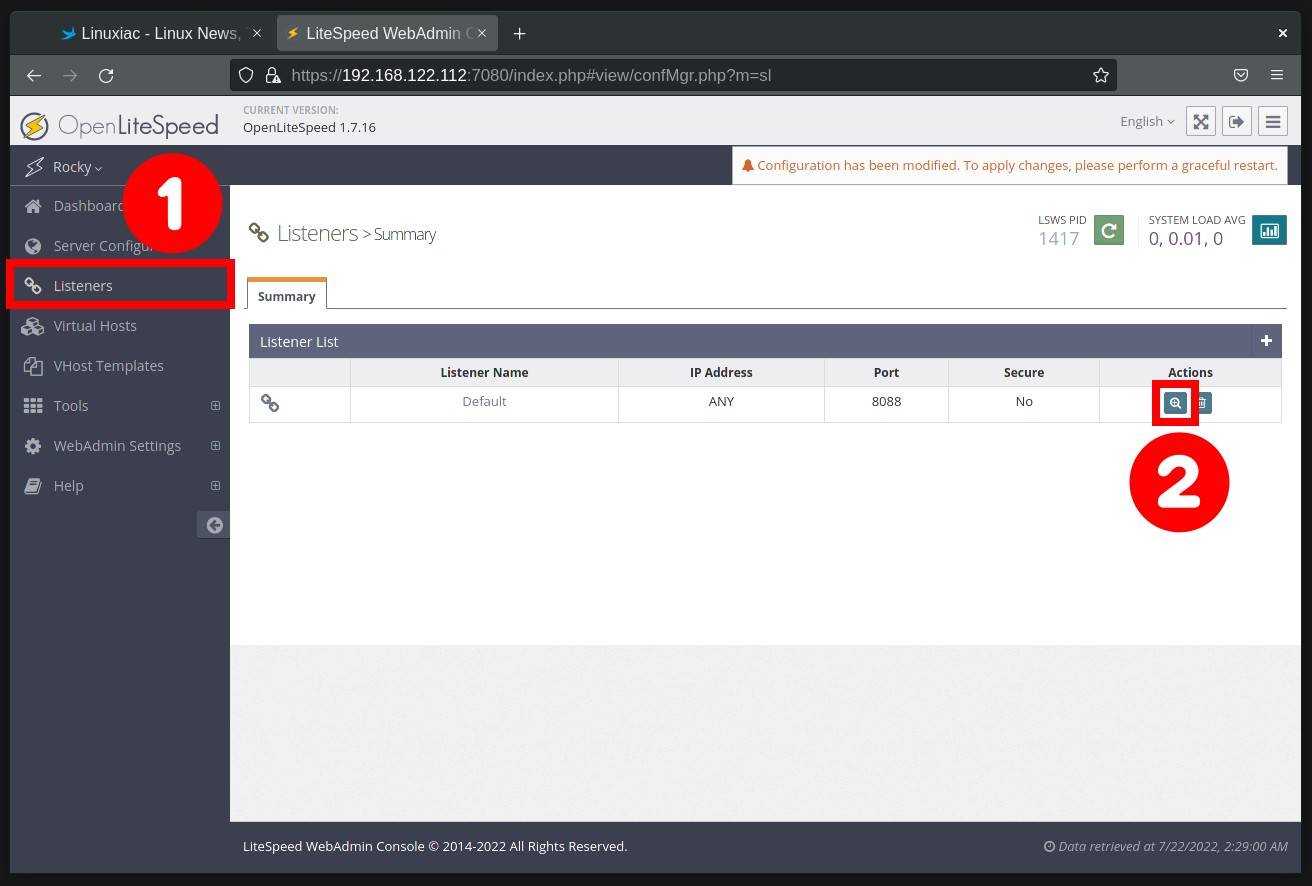
Step 9: Change OpenLiteSpeed Default Port to 80
OpenLiteSpeed listens on port 8088 by default. However, we can change it to port 80, the default port for HTTP requests.
To do so, click on the “Listeners” menu on the left of the WebAdmin console. Then, on the right, pick the “View” icon.
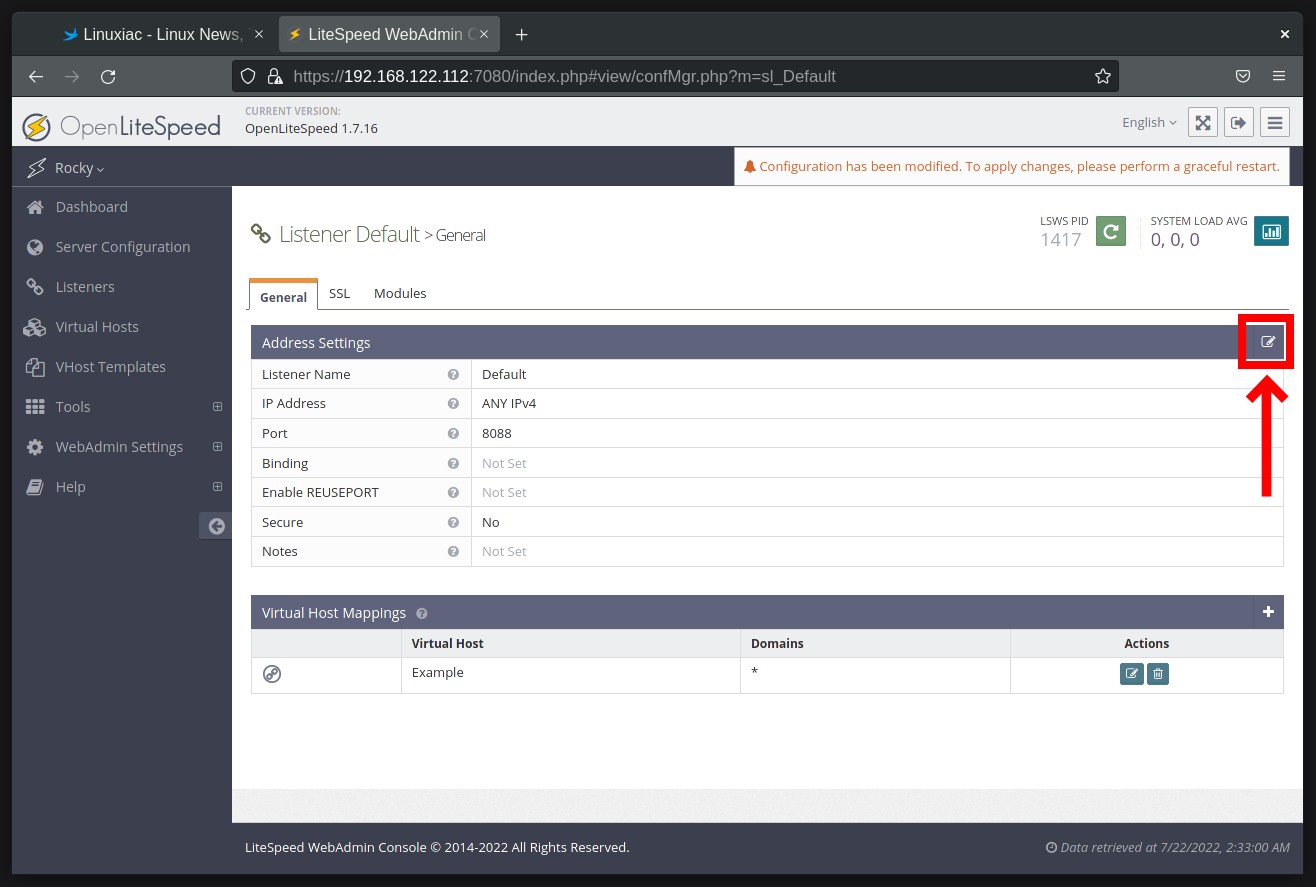
This will open a page with detailed information about the default OLS listener. Then, click the “Edit” icon on the Address Settings line.
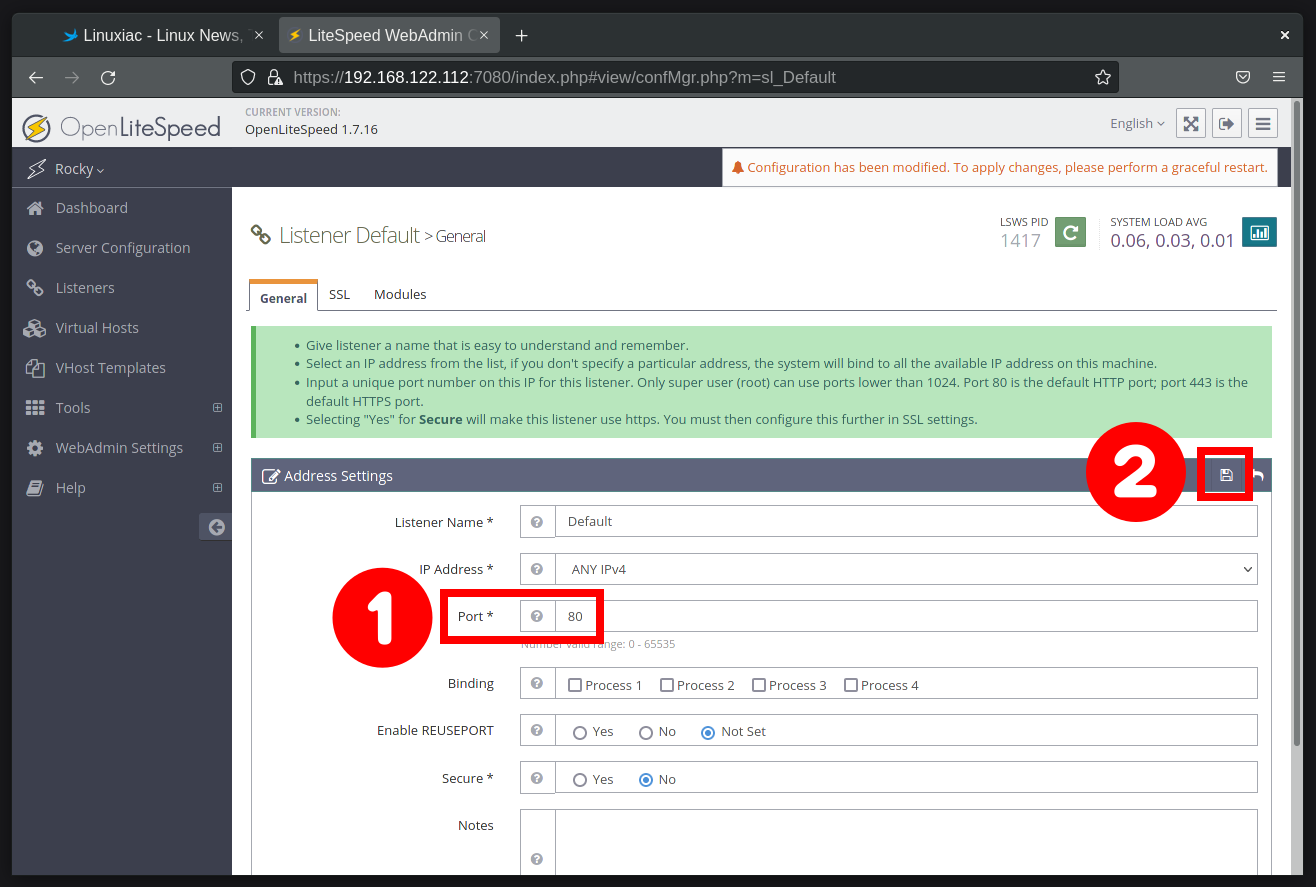
Change the port from 8088 to 80 and save the changes by pressing the “Save” button.
We’re almost there. To let the changes take effect, we need to restart the OpenLightSpeed server. Click on the “Restart” icon.
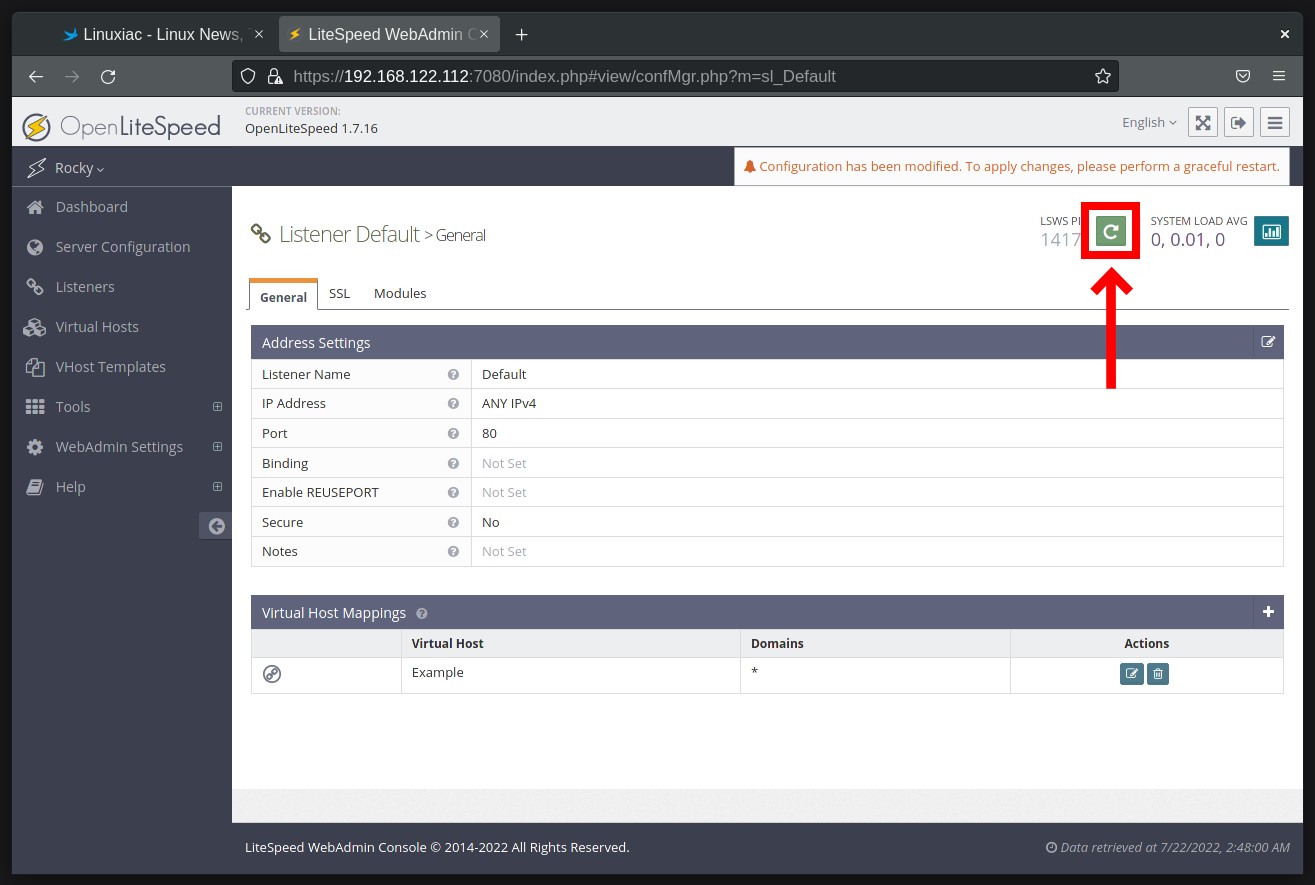
You will be prompted to whether you want the server to be restarted. Press the “Go” button to confirm.

Step 10: Test the Configuration
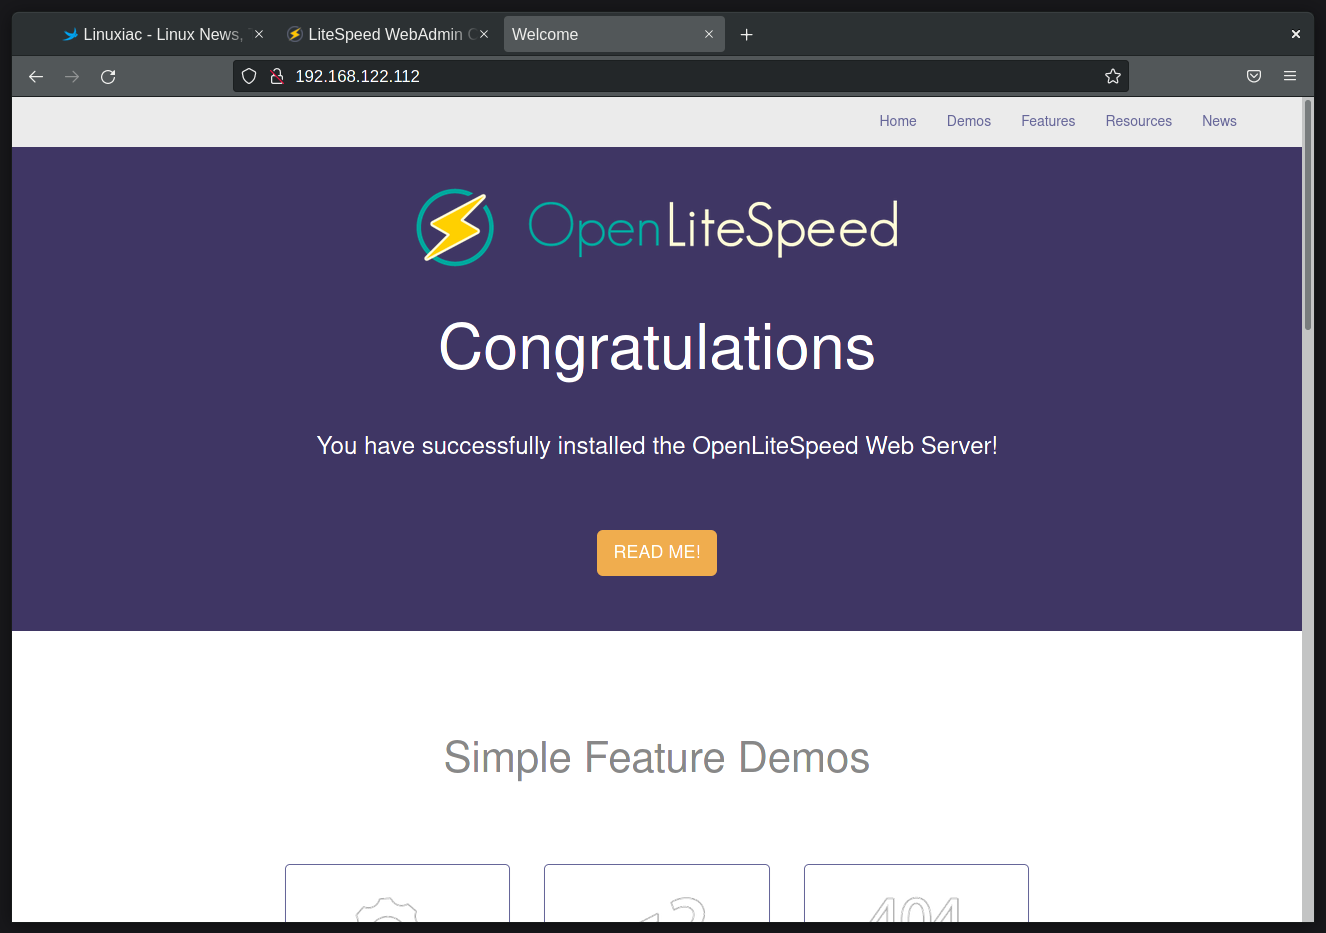
Finally, we can test our OpenLiteSpeed installation. In your web browser, navigate to http://your-server-ip-address. The default OLS web page should greet you.
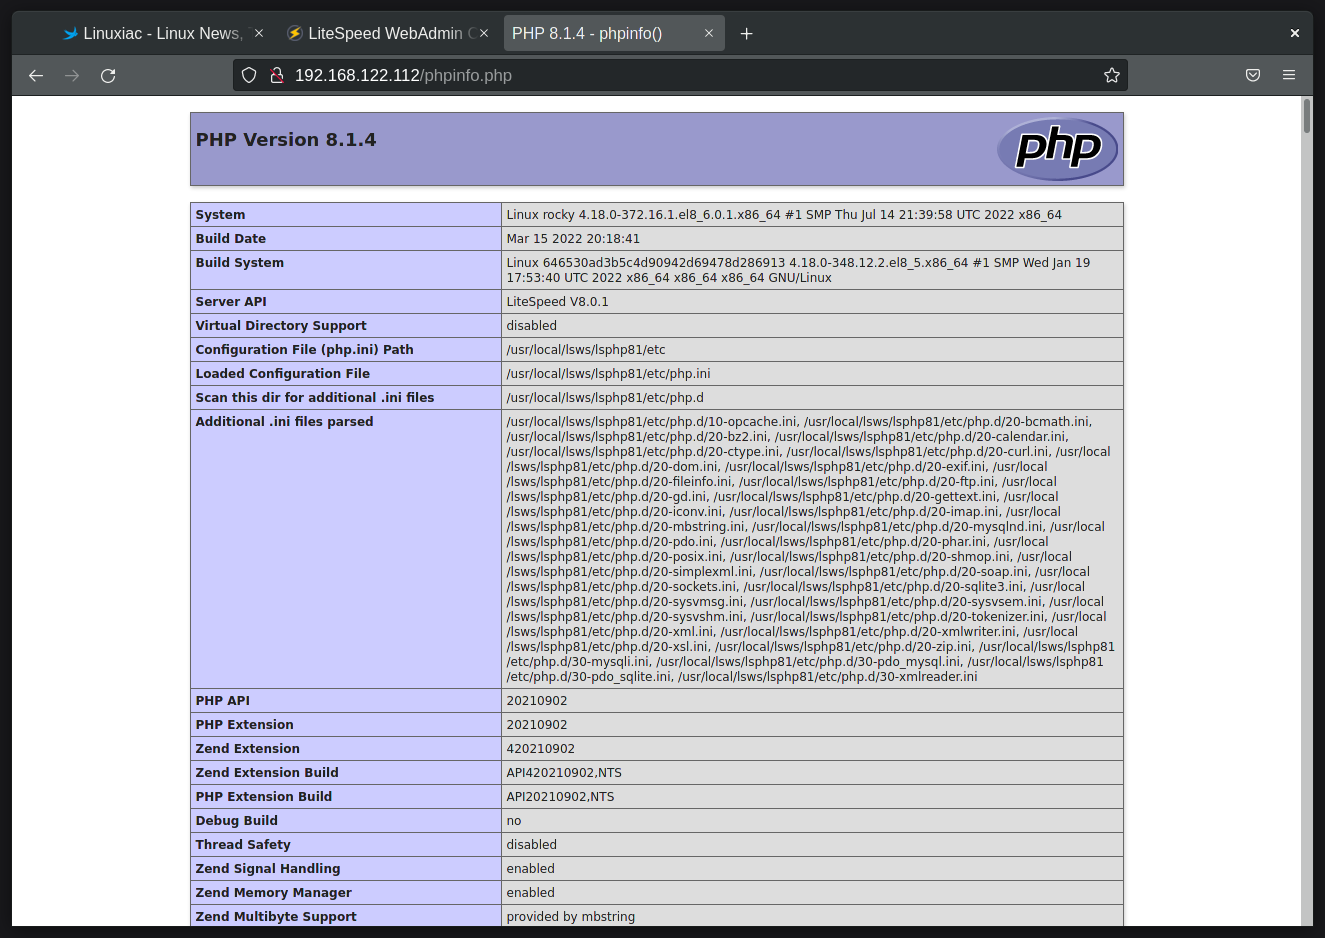
To test whether OpenLiteSpeed runs PHP 8 smoothly, type http://your-server-ip/phpinfo.php into your browser. The page below should greet you, confirming that PHP 8.1 is successfully integrated into the OpenLiteSpeed web server.
OLS Service Management
Of course, the OpenLightSpeed service, like any other Linux service, can be controlled using systemd. The service’s name is lsws. For example, to see its current state, run:
sudo systemctl status lsws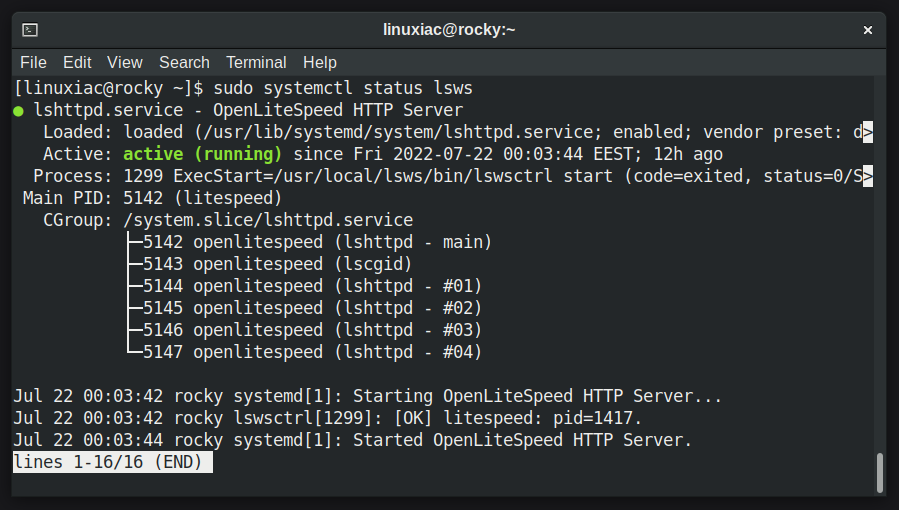
Similarly, use one of the commands below to start, restart, or stop the lsws service.
sudo systemctl start lsws
sudo systemctl restart lsws
sudo systemctl stop lsws
In addition, explicitly enabling the service is not needed because it is enabled by default and starts automatically after installing the OpenLightSpeed web server on your Rocky Linux 8 or AlmaLinux 8 system.
However, if you want to disable its automatic startup on system restart, execute:
sudo systemctl disable lswsAccordingly, to resume the lsws service to start automatically, you need to execute:
sudo systemctl enable lswsConclusion
This guide walked you through installing the OpenLiteSpeed web server on Rocky Linux 8 or AlmaLinux 8. We also showed how to set PHP 8.1 as the default PHP version.
If you’re using Ubuntu, our excellent guide on the subject, “How to Install OpenLiteSpeed Web Server and PHP 8 on Ubuntu 20.04“, will walk you through the installation and configuration steps.
Of course, there is still much to learn about configuring and using OpenLiteSpeed. For additional help or useful information, you can refer to the official documentation.
Thank you for using this guide. Feel free to share your thoughts in the comments box below.