
- What is DNF Package Manager?
- Differences Between DNF and YUM
- Check for Updates
- Update Packages
- Search Packages
- Install Packages
- Reinstall Packages
- Local Install of RPM File
- Download Package RPM File
- Remove Packages
- Remove Unnecessary Packages
- Downgrade Packages
- DNF Software Groups
- List Packages
- View Package Information
- Clear Caches
- Manage Software Repositories
- DNF Transactions History
- Revert and Repeat Transactions
- Conclusion
What is DNF Package Manager?
DNF (Dandified YUM) is a package manager for RPM-based Linux distributions, including RHEL, Fedora, CentOS, AlmaLinux, Rocky Linux, and Oracle Linux. It was initially introduced in Fedora 18 in 2013.
DNF simplifies package maintenance by automatically checking for dependencies and determining the actions needed to install, remove, update, or perform any other operation on your Linux system’s package base.
Furthermore, the DNF package manager allows you to manage and collect information about software repositories on your Linux system.
Many of you are likely familiar with its predecessor, YUM. So, before we go any further, let’s look over the benefits of DNF over YUM.
Differences Between DNF and YUM
Like the DNF, YUM (YellowDog Updater Modified) is a package manager used to manage the software packages’ installation, update, and removal in an RPM-based Linux system.
Unfortunately, YUM has some issues, the most severe of which are poor performance, excessive memory utilization, and dependency resolution delay. All of this led to the development of a superior version of YUM, resulting in DNF’s emergence.
With that said, we can outline the following most essential advantages of DNF over YUM:
- DNF utilizes the libsolv (created and maintained by openSUSE) to resolve dependencies, which is a more efficient dependency resolution library.
- Because DNF was developed in C, C++, and Python, it is fast and light on memory. In contrast, YUM was written entirely in Python.
- DNF’s API is fully documented. In contrast, because the YUM’s API is not properly documented, it is challenging to add new functionality.
- YUM only supports Python extensions, whereas DNF supports many extensions.
Now that you know what DNF is and why it is superior to YUM let’s get into this guide: how to use DNF to manage software packages in RPM-based Linux distributions.
Check for Updates
One of the most commonly used DNF commands is the check for available software package updates.
Using the command below, you can obtain a list of all packages from your enabled software repositories that are available for updating your existing packages on your system.
The command checks for updates but does not download or install the packages.
sudo dnf check-update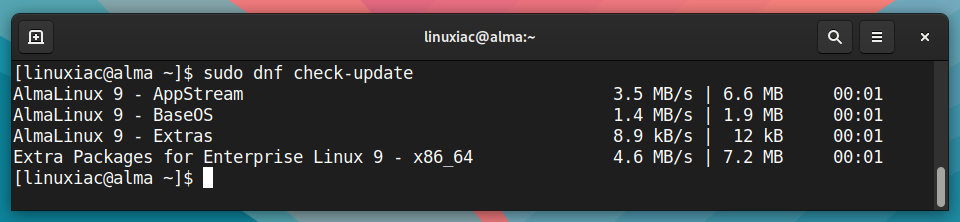
In our case, no packages are available for updating, but if any are, they will be listed.
Update Packages
The most commonly used actions are update operations on currently installed packages. They help to ensure the security and seamless operation of your Linux system. So let’s have a look at them now.
Full System Update
If any updates are available, use the following command to install them all.
sudo dnf updateUpdate Certain Packages Only
Alternatively, use the following command to update only the selected packages, for example, nginx and mariadb.
sudo dnf update nginx mariadbExclude Package from Being Updated
Sometimes, you may decide that specific packages should not be updated. The -x (--exclude) options come in handy in this situation.
The following example shows how to update the entire system while explicitly excluding the nginx and mariadb packages from being updated.
sudo dnf update --exclude nginx mariadbSearch Packages
Another basic DNF functionality that is widely used is packet search. For example, if we want to see whether the nginx package is available in one of the software repositories, type the following command:
sudo dnf search nginx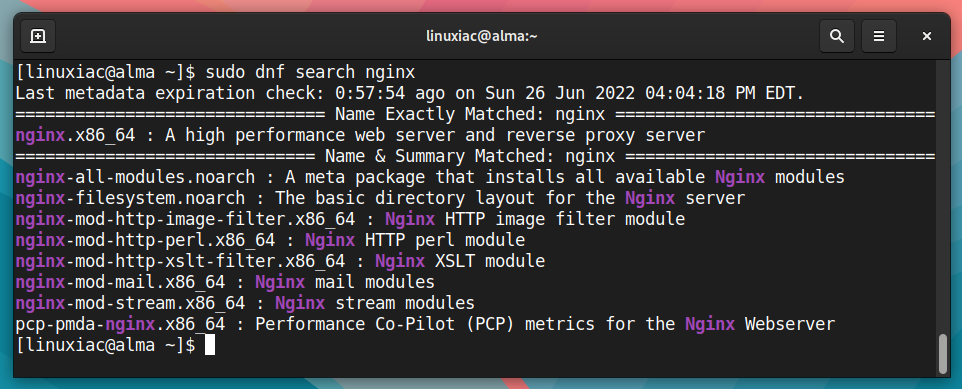
As you can see, the command lists all packages that match the word “nginx.”
Install Packages
To install a new package using the dnf command, for example, nginx, run:
sudo dnf install nginx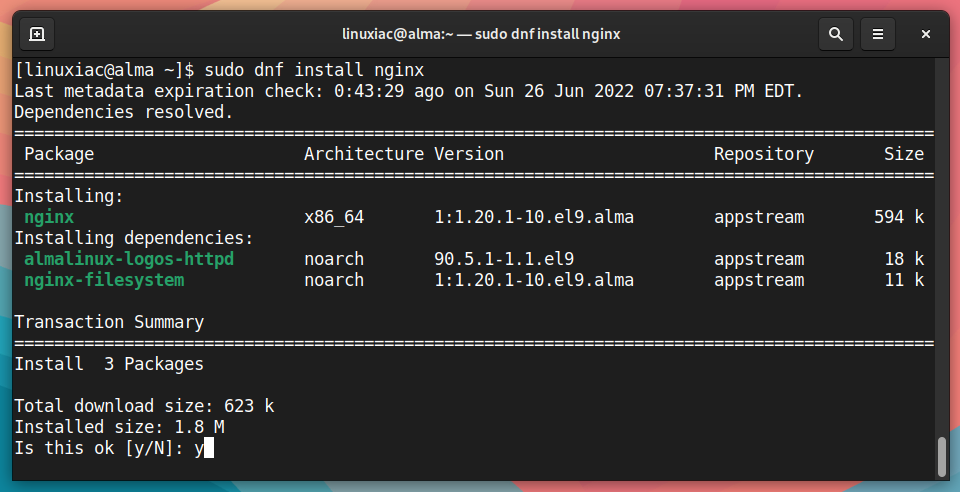
You will be prompted for confirmation during the command execution and need to type y to proceed with the installation. However, you can suppress this confirmation prompt by adding -y to the end of the command.
sudo dnf install nginx -yTo install multiple packages simultaneously, line up the package names one after the other, separated by a space.
sudo dnf install nginx mariadbReinstall Packages
Unfortunately, a package can cause an error during installation and fail installation. In this situation, we can try reinstalling it using the reinstall option.
sudo dnf reinstall nginx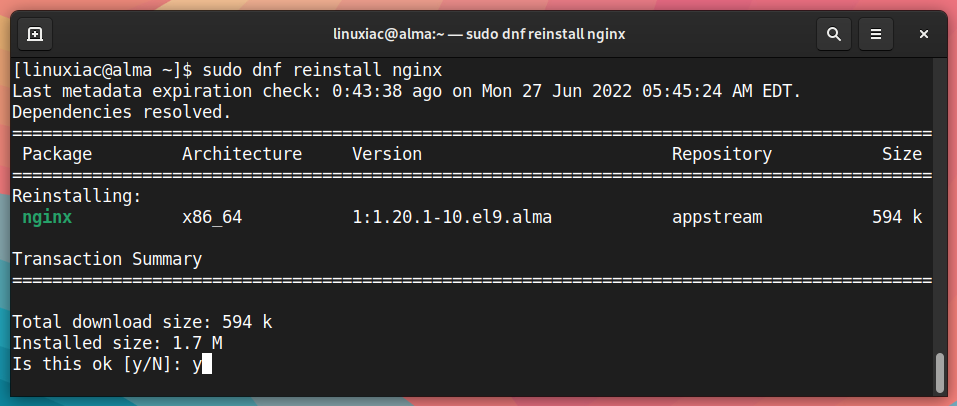
Local Install of RPM File
Sometimes we need to install a previously downloaded RPM installation file locally. To do so, run the dnf command with the install option followed by the complete path to the RPM package.
sudo dnf install /home/linuxiac/nginx-1.20.1-10.el9.alma.x86_64.rpm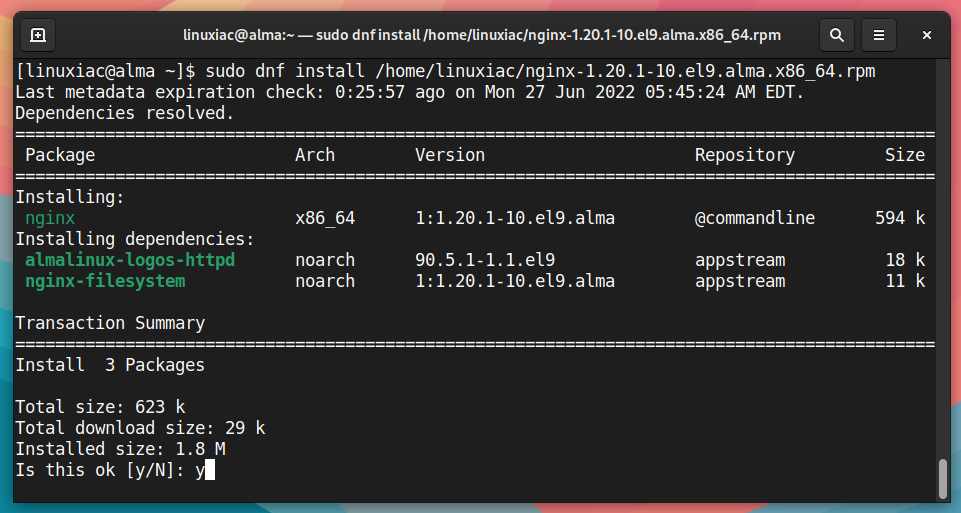
Download Package RPM File
Rather than installing a package, we can optionally only download the .rpm installation file from the repository. By default, the package is downloaded to the current working directory.
sudo dnf download nginx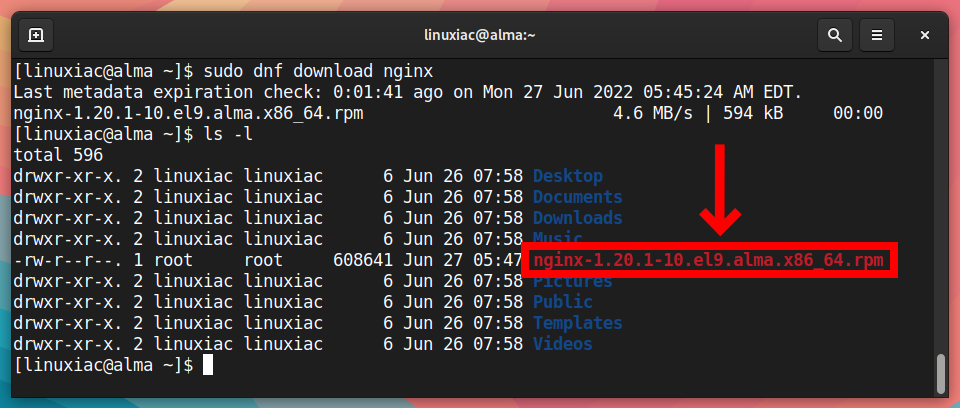
However, if you want to download the installation .rpm file to a directory other than the current one, use the --destdir option followed by the directory path.
sudo dnf download nginx --destdir /tmp/Remove Packages
Another commonly used functionality of the DNF package manager is package removal/uninstallation. The remove parameter can be used to uninstall packages.
For example, to uninstall the nginx package, you should run:
sudo dnf remove nginx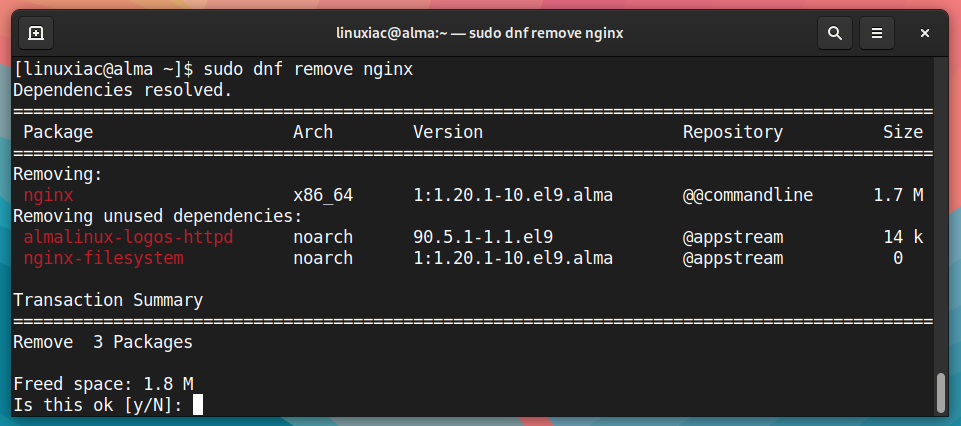
If you want to uninstall multiple packages from your Linux system, type their names one after the other, separated by a space.
sudo dnf remove nginx mysqlRemove Unnecessary Packages
Removing unneeded packages helps to reduce disk usage and potential issues. For example, the autoremove option removes from the system all “leaf” packages installed as dependencies of user-installed packages but no longer required by any such package.
sudo dnf autoremove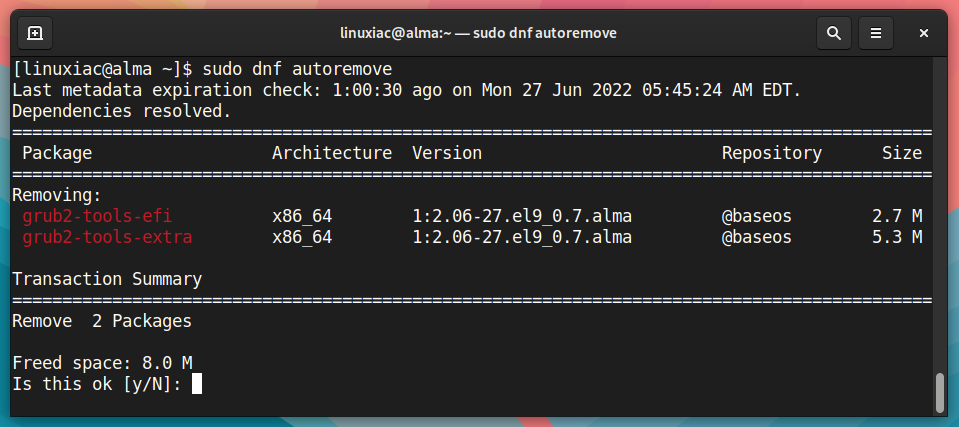
Downgrade Packages
In some cases, you may want to revert to the previously updated version of a package. For example, if an undetected bug in the updated version is causing an error in your system.
So, to downgrade a previously updated package, for example, nginx, use the following command:
sudo dnf downgrade nginxDNF Software Groups
The software groups are a well-known feature of the dnf command that allows you to group many packages under a single name. In other words, they are a collection of packages that all serve the same goal, for example, “Development Tools.”
List Software Groups
Using the software groups dramatically simplifies the software installation process. For example, if you want to install the whole set of development tools, including compilers, libraries, and so on, you’ll have to install dozens, if not hundreds, of packages individually.
Fortunately, this problem is easily solved by using predefined software groups. So, if you want to list all available software groups, you will achieve this task as shown below:
sudo dnf grouplist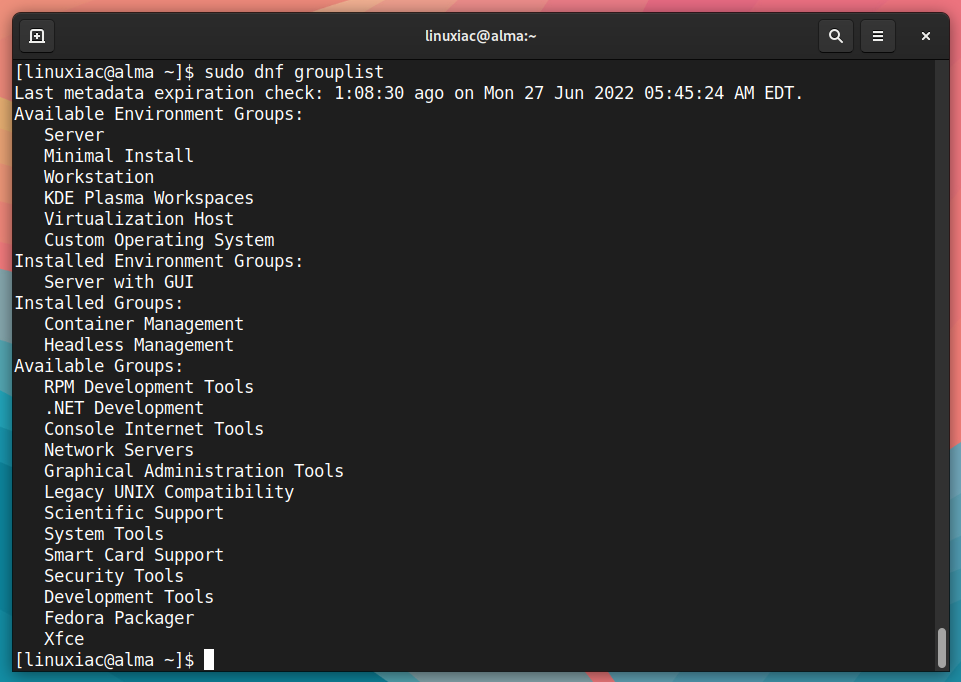
List Software Groups’ Packages
Once we’ve figured out how to view the list of available software groups, we should know what packages they contain. So, to view the available packages in the “Development Tools” group, for example, type:
sudo dnf groupinfo "Development Tools"Code language: JavaScript (javascript)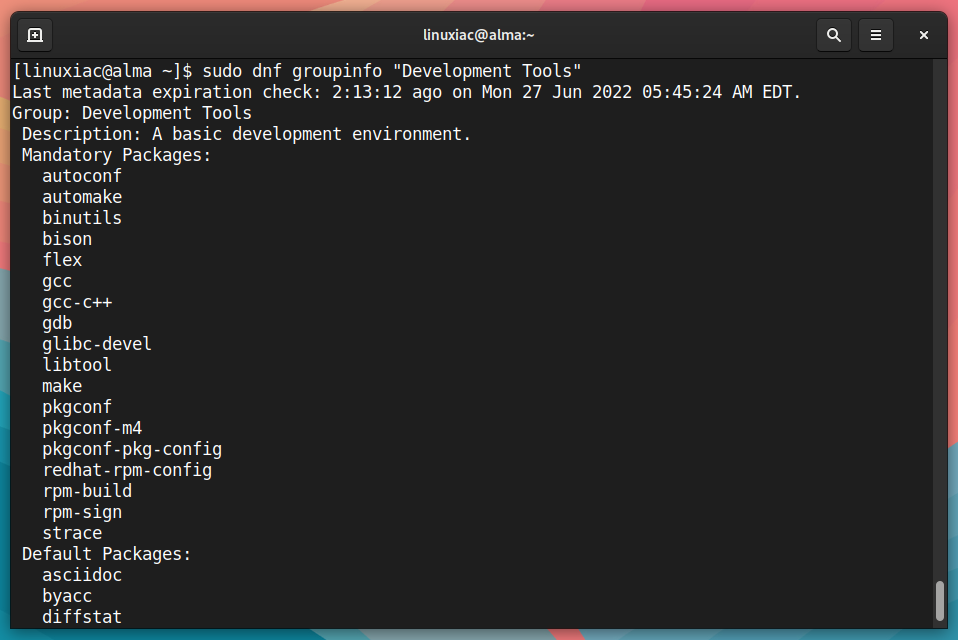
Install Software Groups
Using the groupinstall option makes installing a software group a breeze. For example, if you want to install the “Development Tools” group, you will achieve this task as shown below:
sudo dnf groupinstall "Development Tools"Code language: JavaScript (javascript)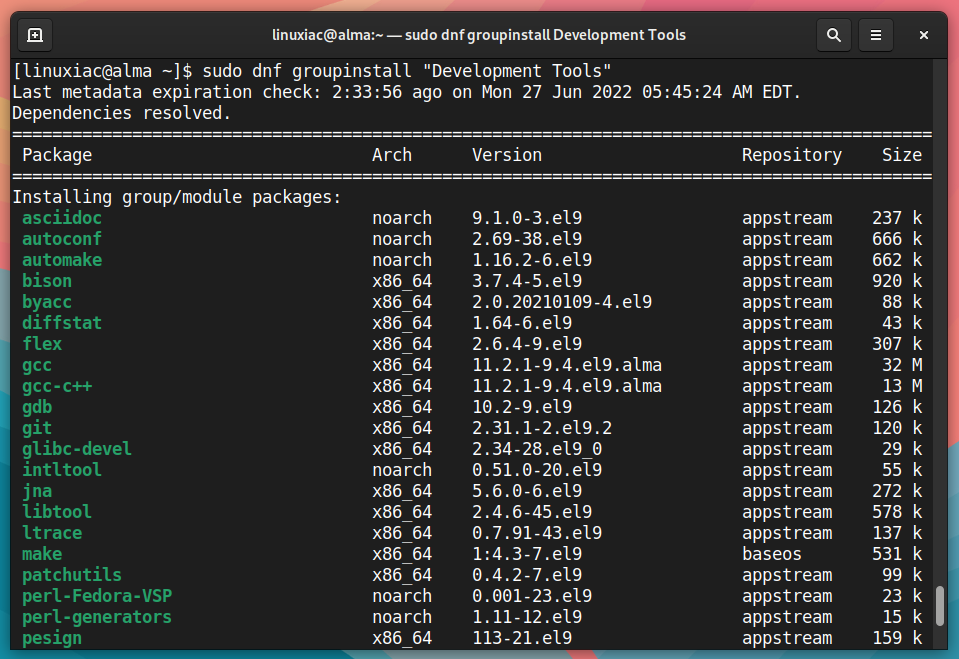
Remove Software Group
Similar to installation, uninstalling an entire software group is simple by using the groupremove option.
sudo dnf groupremove "Development Tools"Code language: JavaScript (javascript)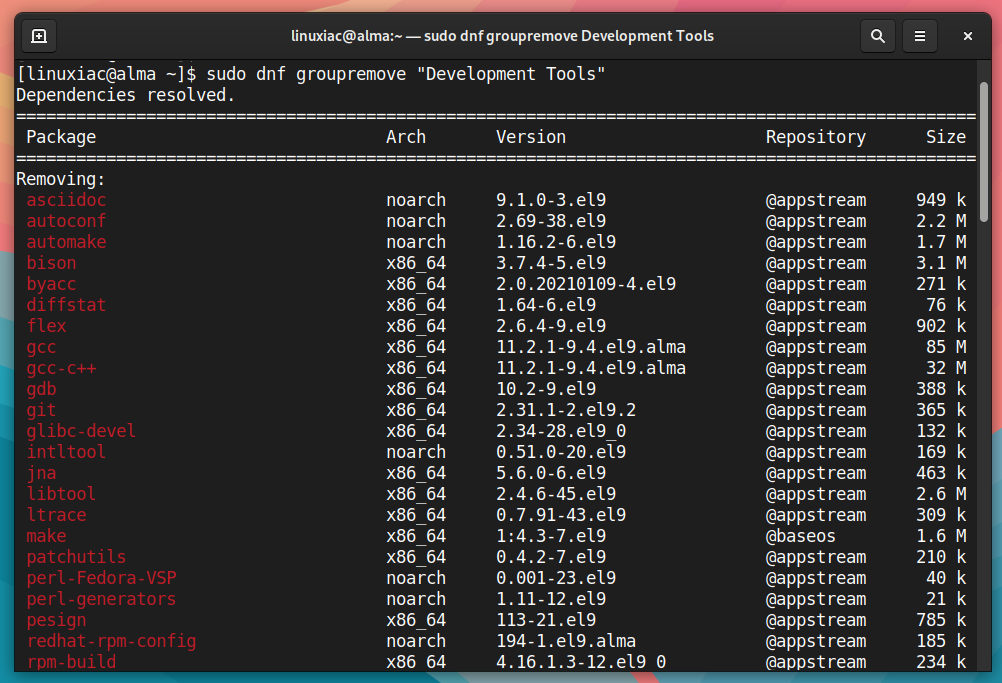
List Packages
When we are looking for a package or want to check if a package is already installed on our system, displaying a list of packages can be pretty helpful. So let’s look at how to get this information using the dnf command.
List All Packages
To see a list of all available packages, run the command below. Again, we clarify that it will output a massive list of packages. These include all packages installed locally on your system and all packages available for installation in your system’s available and allowed repositories.
sudo dnf listCode language: PHP (php)List All Installed Packages
The command below will return a complete list of all RPM packages installed locally on your Linux system.
sudo dnf list installedCode language: PHP (php)List All Installed Packages from the Particular Repo
If you want to see a list of packages installed on your system from a particular repository, for example, those from the EPEL repo, type:
sudo dnf repository-packages epel list installedCode language: PHP (php)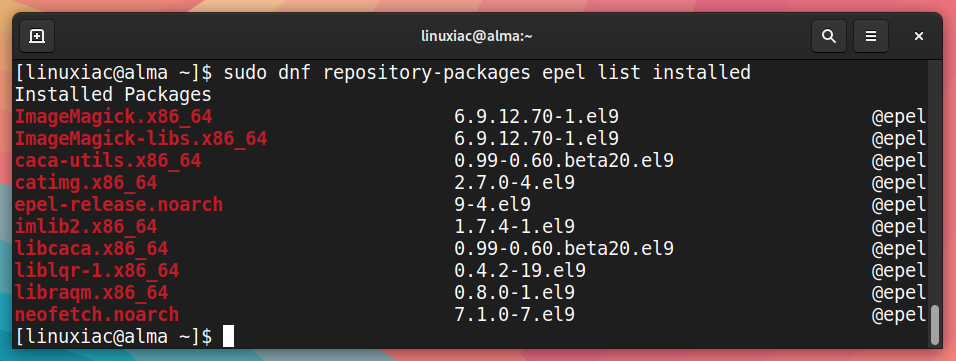
Find Installed Packages
Using the dnf list installed command is one of the most valuable and practical. You can use it to see if a package is installed on your system.
For example, to see if the nginx package is installed, run the dnf list installed command and pipe the result to the grep command, followed by the name of the package you’re looking for.
sudo dnf list installed | grep nginxCode language: PHP (php)
As we can see, the command returns information on the package (if it is locally installed), its version, and the repository to which it belongs.
View Package Information
The info option can be used to view more detailed information about a package. This gives us helpful information such as the architecture, version number, release number, total size, and a description of what the package actually performs.
For example, to see the nginx package info, run the command below:
sudo dnf info nginx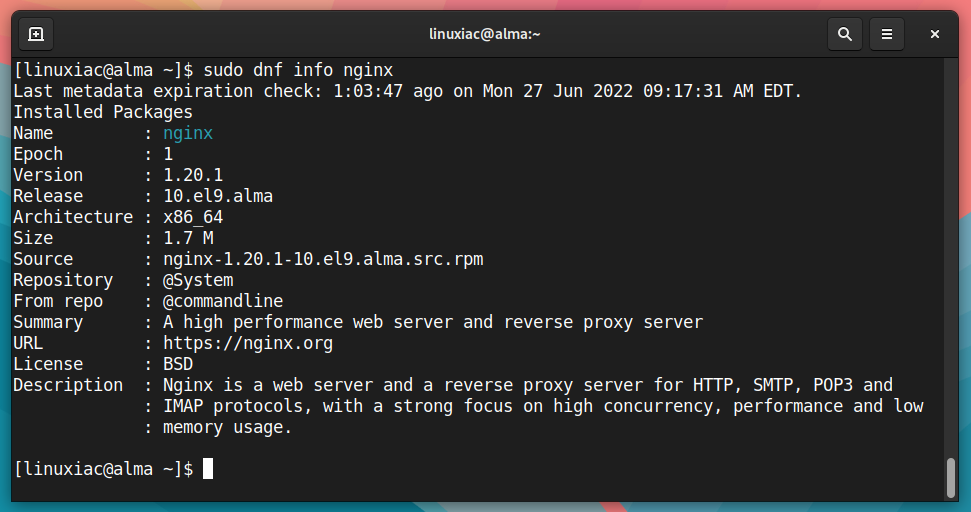
It is important to note that the command will return information about the package, whether or not it is installed locally on your Linux system.
Clear Caches
The DNF package manager caches files in the /var/cache/dnf directory. This includes any such data left over from disabled or removed repositories and for various distribution release versions.
Of course, manually deleting files or directories under /var/cache/dnf is not recommended. So, to remove them use the command shown below.
sudo dnf clean all
Manage Software Repositories
A package repository (in the context of DNF) is a repository for storing and managing RPM software installation packages. It supports clients such as DNF and YUM, which are used to manage binary packages in RHEL-based Linux distributions such as CentOS, AlmaLinux, Rocky Linux, and Oracle Linux.
List Installed Repositories
The following command will display all (enabled and disabled) package repositories available on your Linux system:
sudo dnf repolist --all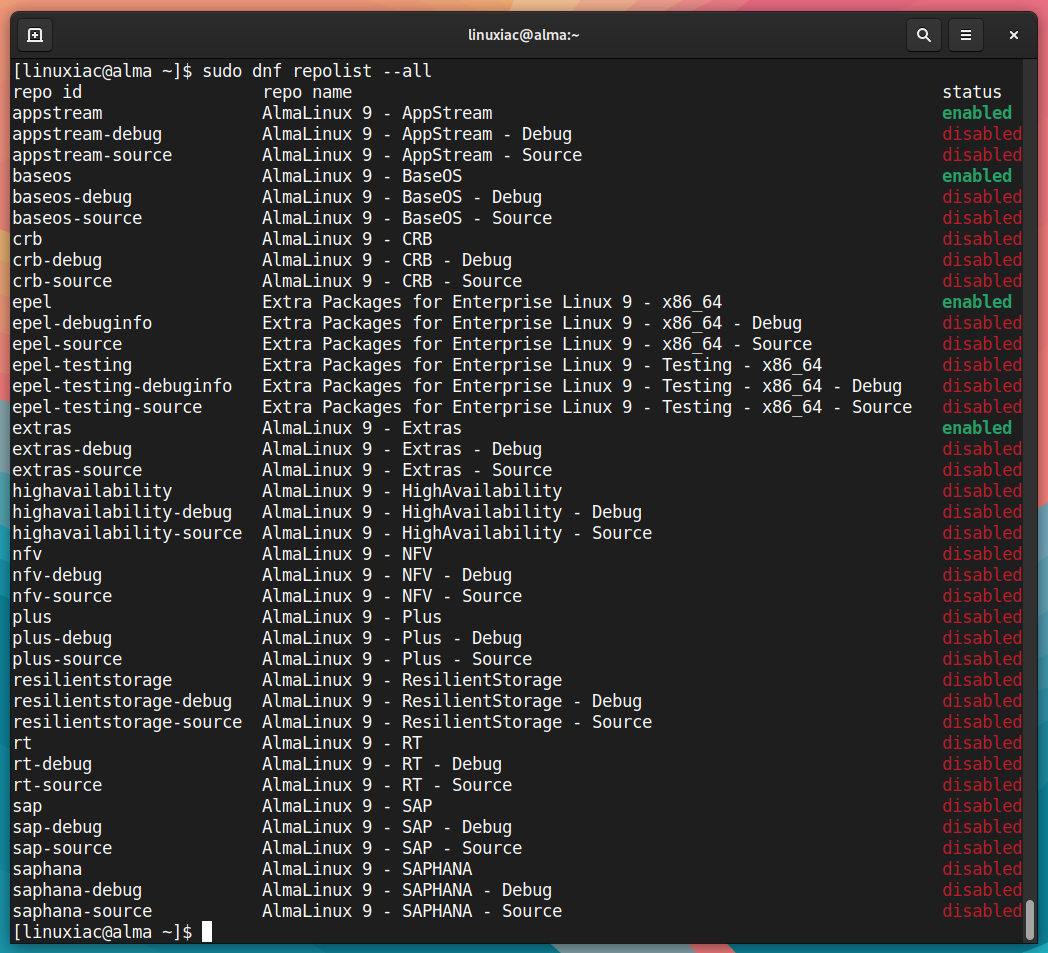
Furthermore, if you just want a list of allowed repositories only, type:
sudo dnf repolist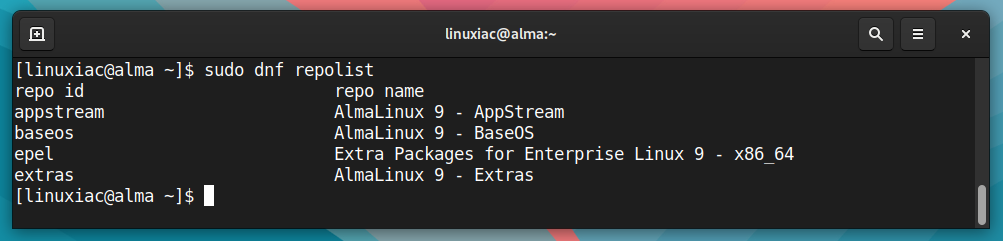
Adding Repositories
A new repository can be added by manually editing or creating a new .repo file in the /etc/yum.repos.d directory. However, the DNF package manager makes it significantly easier to add a software repository so you can install or update packages from it.
The dnf config-manager command can be used to add a persistent repository. Provide a known repository URL after the --add-repo option and a .repo file based on the name of the specified repository URL will be created.
sudo dnf config-manager --add-repo https://rpms.remirepo.net/enterprise/9/remi/x86_64/Code language: JavaScript (javascript)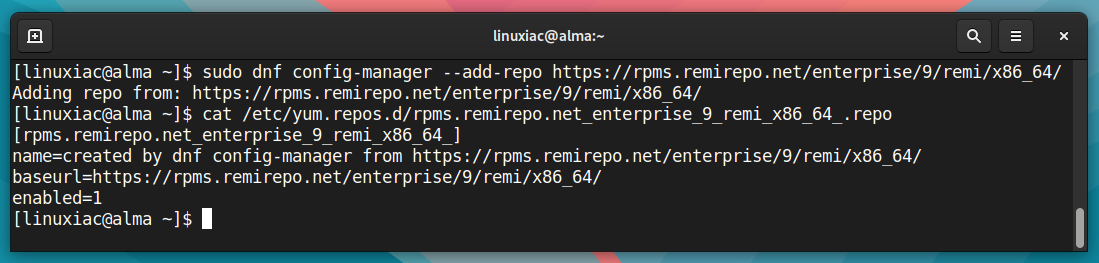
Enable Repository
To enable a particular repository, type the following command, where the last argument is the repository ID. For example, the output of the dnf repolist --all command provides you with the repositories IDs.
sudo dnf config-manager --set-enabled rpms.remirepo.net_enterprise_9_remi_x86_64_Code language: CSS (css)Disable Repository
Alternatively, you can disable a software package repository, such as running:
sudo dnf config-manager --set-disabled rpms.remirepo.net_enterprise_9_remi_x86_64_Code language: CSS (css)DNF Transactions History
The dnf history command lets users view a DNF transactions timeline, including the dates and times they happened.
Additionally, the command provides the number of packages involved, whether transactions succeeded or were canceled, and whether the RPM database was altered between transactions.
sudo dnf history
Furthermore, the dnf history command can also be used to undo or redo certain transactions.
Revert and Repeat Transactions
In addition to reviewing the transaction history, the dnf history command allows you to roll back or repeat a specific transaction.
To revert (undo) a transaction, for example, with ID 6 (install nginx) from the table above, type the following:
sudo dnf history undo 6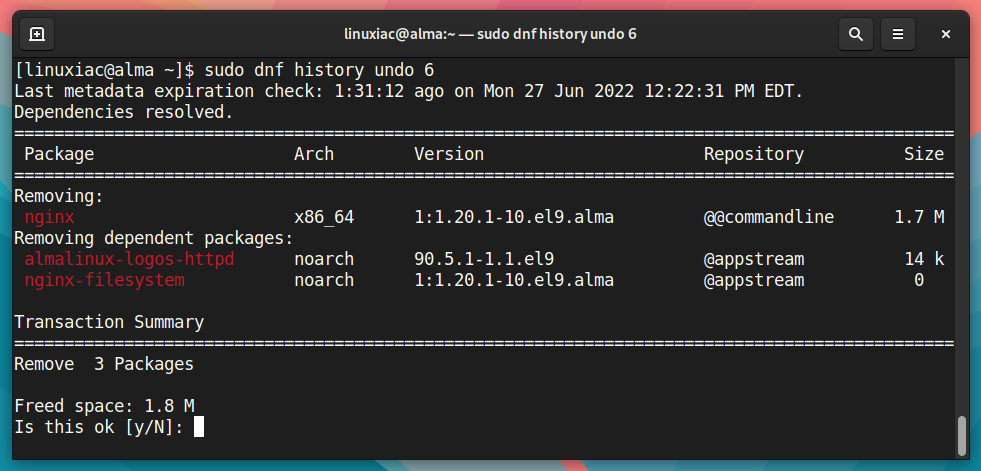
Similarly, to repeat (redo) a particular transaction, type:
sudo dnf history redo 6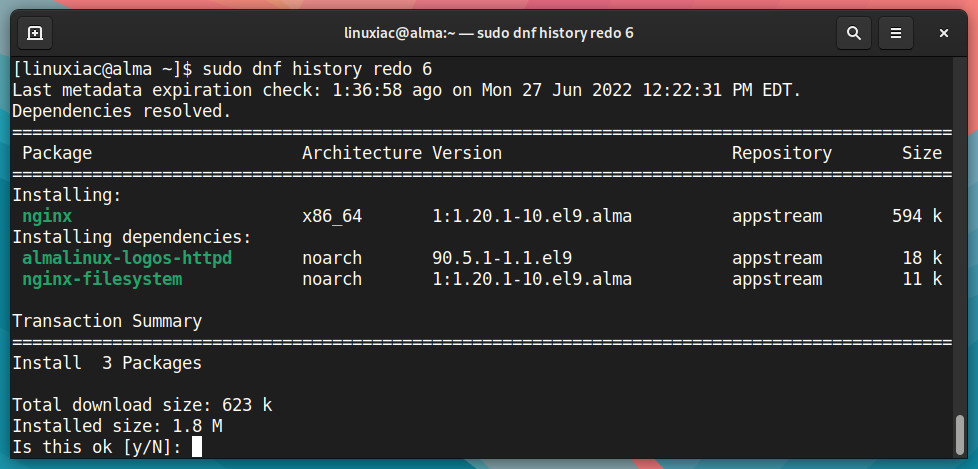
It is important to note that the undo and redo commands revert or repeat the steps taken during a transaction and will fail if the required packages are unavailable.
In other words, if the transaction installs a new package, the undo command will remove it and attempt to downgrade all updated packages to their prior version. Still, the command will fail if the relevant packages are not available.
Conclusion
This was our complete DNF package manager guide with examples. It can also be used as a quick reference for the dnf command. It gives you the information you need to manage the software on your Linux RPM-based system.
Of course, the DNF package manager provides even more options. However, we strongly advise you to familiarize yourself with them from the official DNF documentation.
Hopefully, this guide was helpful in your DNF journey with RPM-based Linux distros. Any suggestions and comments are welcome in the section below.


Nice and cool article!
1 command is outdated, `sudo dnf history`. Add subcommand `list` to see all transactions, or `info` to see more details