OpenLiteSpeed (OLS) is a free and open-source lightweight HTTP server developed by LiteSpeed Technologies. It is a powerful, modular HTTP server and can handle hundreds of thousands of simultaneous connections with low resource usage.
It offers unbeatable performance, security, scalability, simplicity, and optimization bundled in a single package.
In addition, OpenLiteSpeed provides a web-based administration user interface for managing the web server through a web browser.
It is also important to mention that OpenLiteSpeed uses the same configuration as the Apache web server and is compatible with most features offered by Apache.
1. Upgrade the Current Ubuntu System
Before we move on to installing OpenLiteSpeed on Ubuntu, it’s essential to make sure our system is up to date by running the following apt commands in the terminal:
sudo apt update
sudo apt upgrade
2. Add the OpenLiteSpeed Repository
OpenLiteSpeed provides a software repository we can use to download and install the server. But first, we need to add it to our Ubuntu system because it is not included in the Ubuntu default repositories.
So we will use the official script provided by OpenLiteSpeed to add the correct repository automatically to our Ubuntu system.
wget -O - http://rpms.litespeedtech.com/debian/enable_lst_debian_repo.sh | sudo bashCode language: JavaScript (javascript)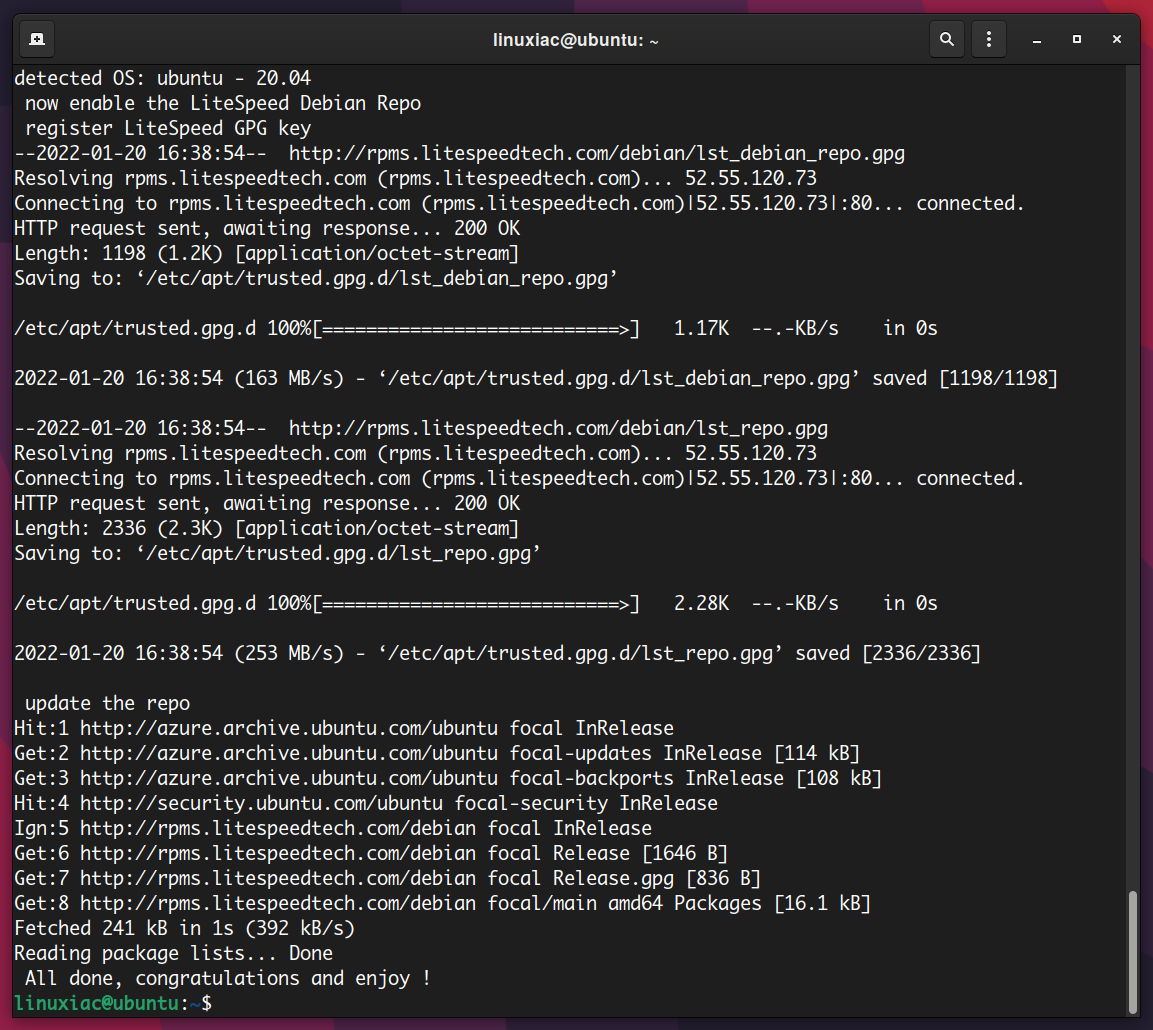
3. Install OpenLiteSpeed Web Server on Ubuntu
Once the repository is added, the OpenLiteSpeed server is available for installation using the command below:
sudo apt install openlitespeedNext, verify the status of the OpenLiteSpeed service with the following command:
sudo systemctl status lshttpd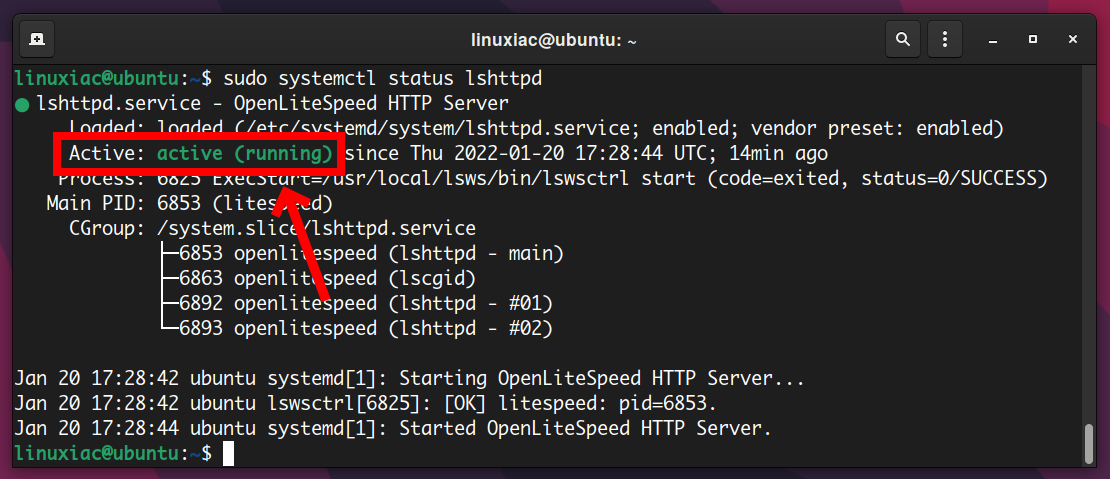
4. Install PHP 8 for OpenLiteSpeed
When we install OpenLiteSpeed, it automatically installs PHP 7.3 build made for OpenLiteSpeed. But, of course, we want to have a more up-to-date version so that we can install PHP 8.0 with the following command:
sudo apt install lsphp80 lsphp80-mysql lsphp80-common lsphp80-opcache lsphp80-curlOnce all the packages are installed, you can proceed to the next step. If you wish to install a different PHP version, replace lsphp80 in the command above with lsphp74, for example.
5. Setup OpenLiteSpeed Admin Password
OpenLiteSpeed provides a web console that listens by default on port 7080. You’ll need to set an admin username and password to access it.
After running the below command, you will be prompted to input the admin username and password.
If you hit “Enter” without choosing a new username defaults to admin as the new administrative username. A password follows the username input. So, retype the password and hit “Enter.”
sudo /usr/local/lsws/admin/misc/admpass.sh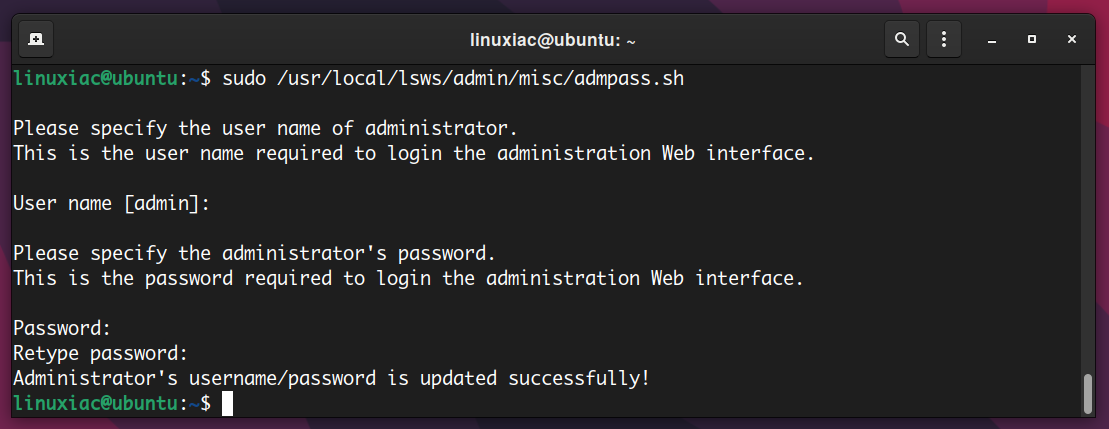
6. Access OpenLiteSpeed Admin Console
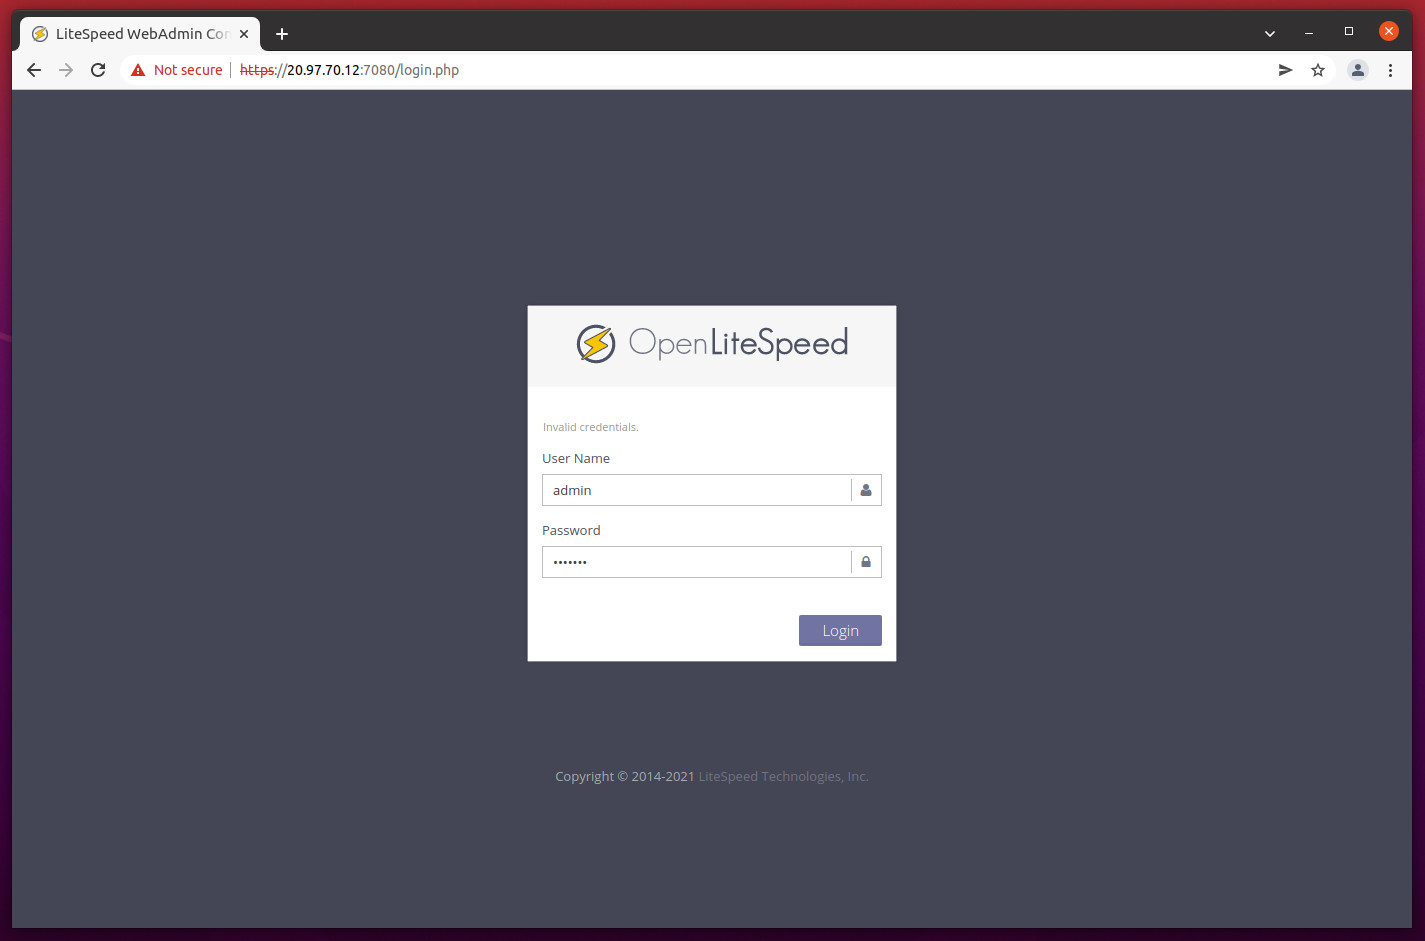
Point your browser to http://your-server-ip:7080, and you should get a login page as shown below. Provide your admin username and password and click the “Login” button.
The OpenLiteSpeed dashboard view then greets you.
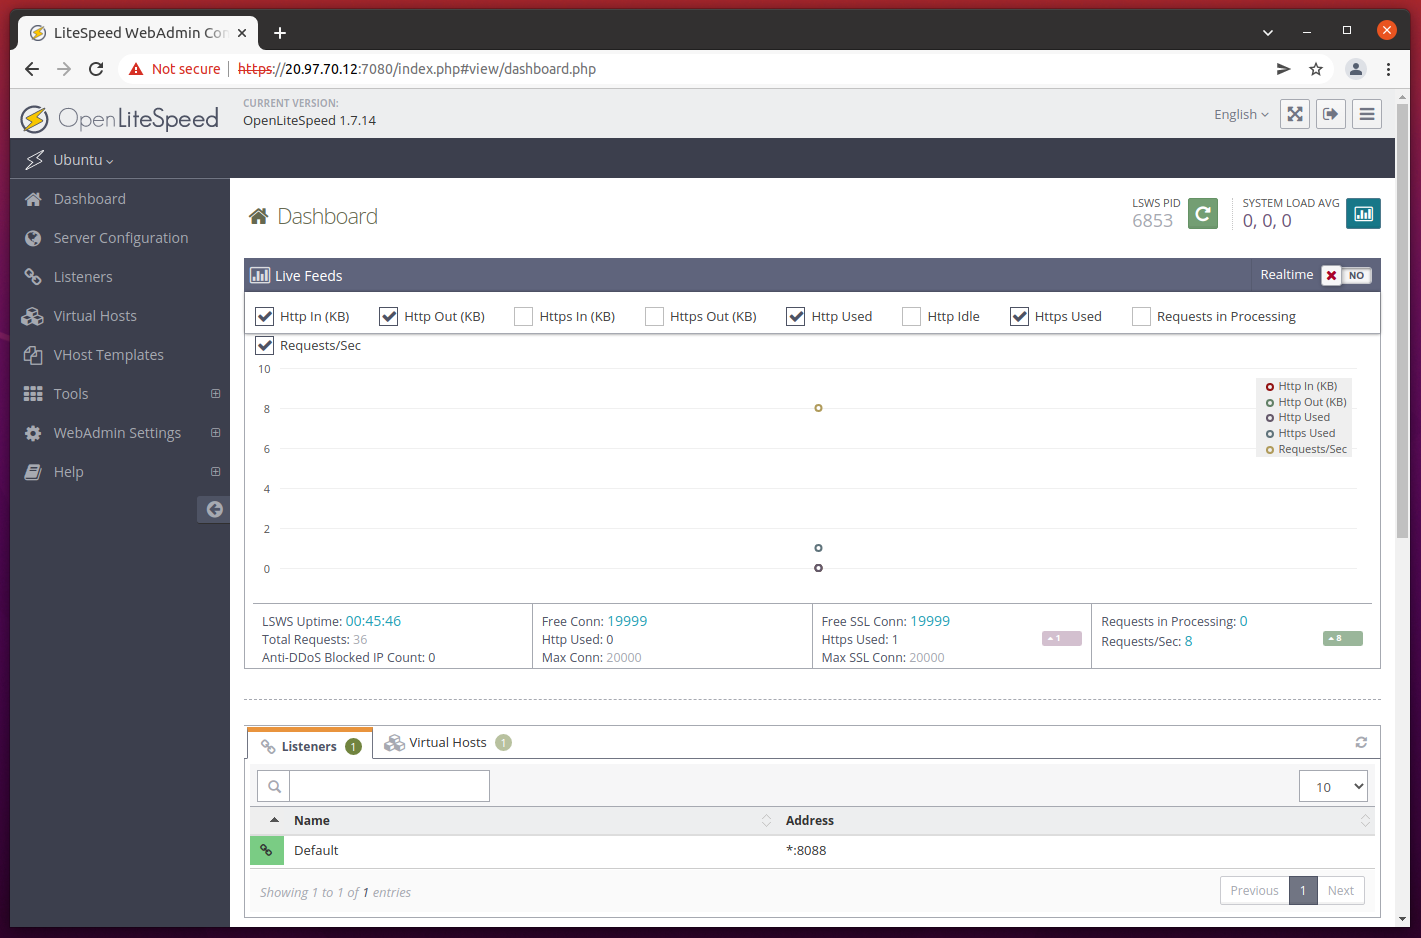
This is where the majority of your configuration for the web server will take place.
7. Configure PHP 8 for OpenLiteSpeed
Next, click the “Server Configuration” menu on the left and choose the “External App” tab. To add the new PHP 8 configuration, click the add “+” button on the right.
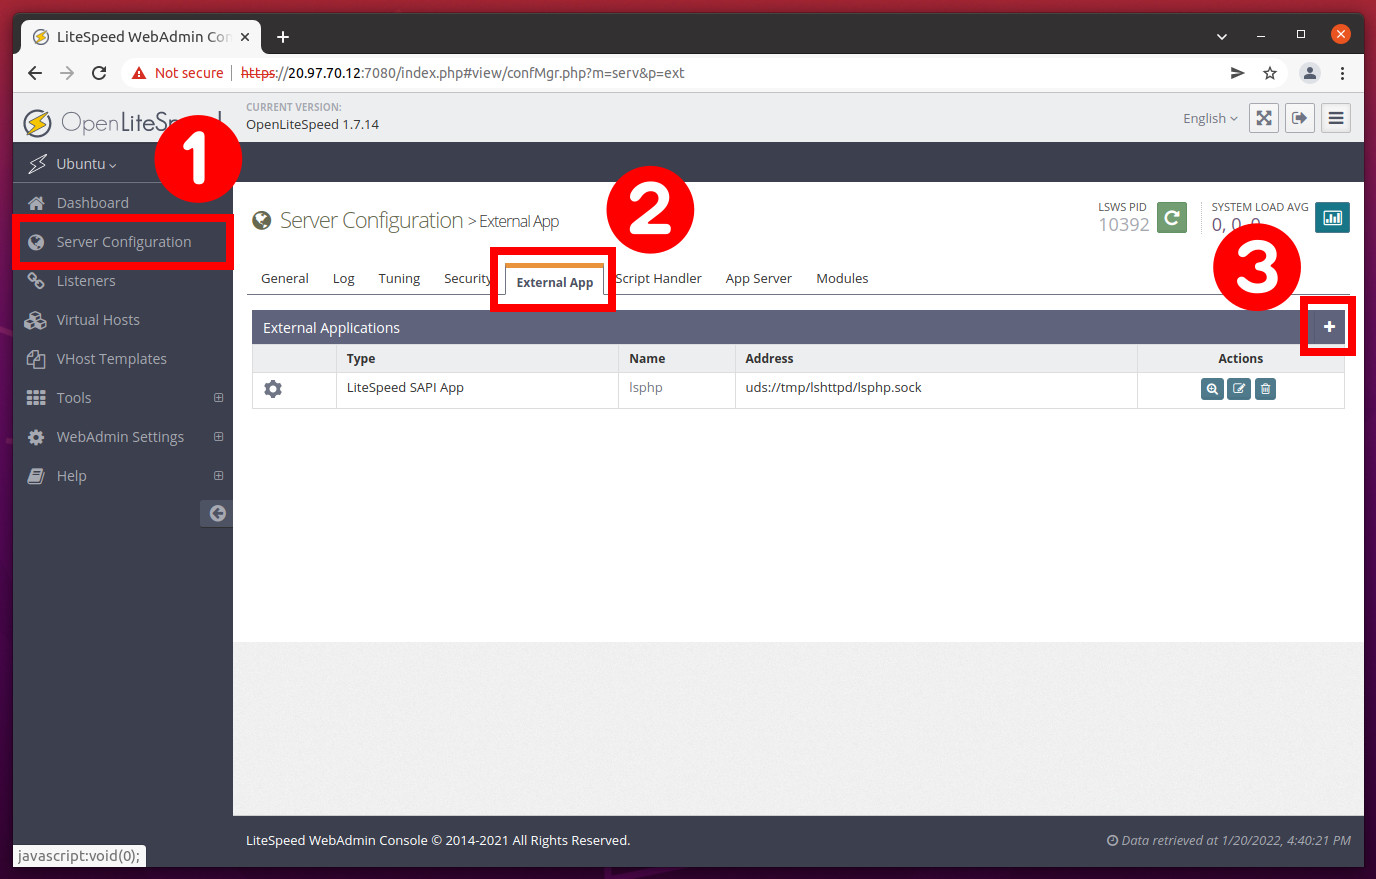
For the type, choose the “LiteSpeed SAPI App” and click the “Next” button.
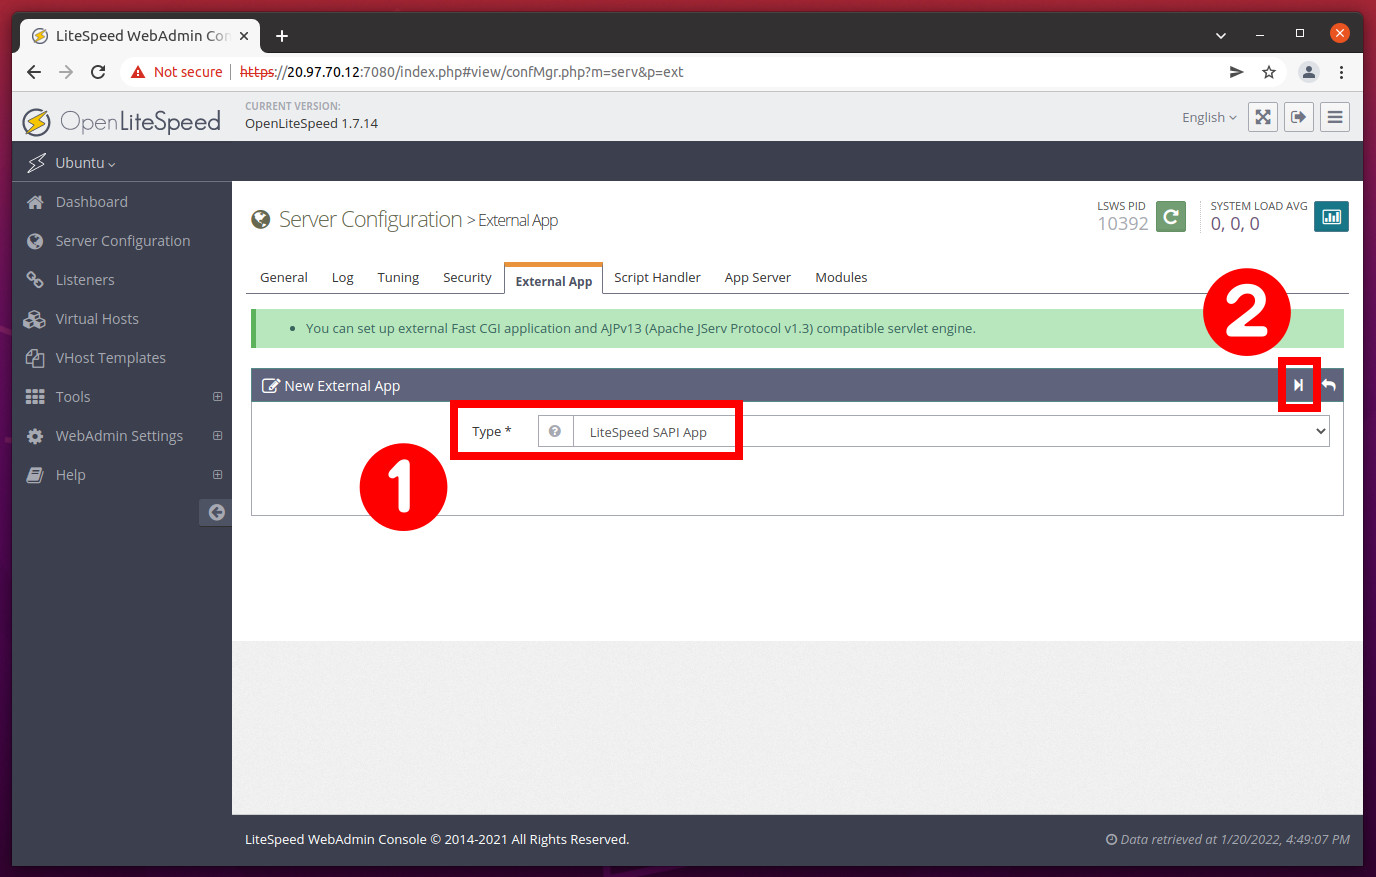
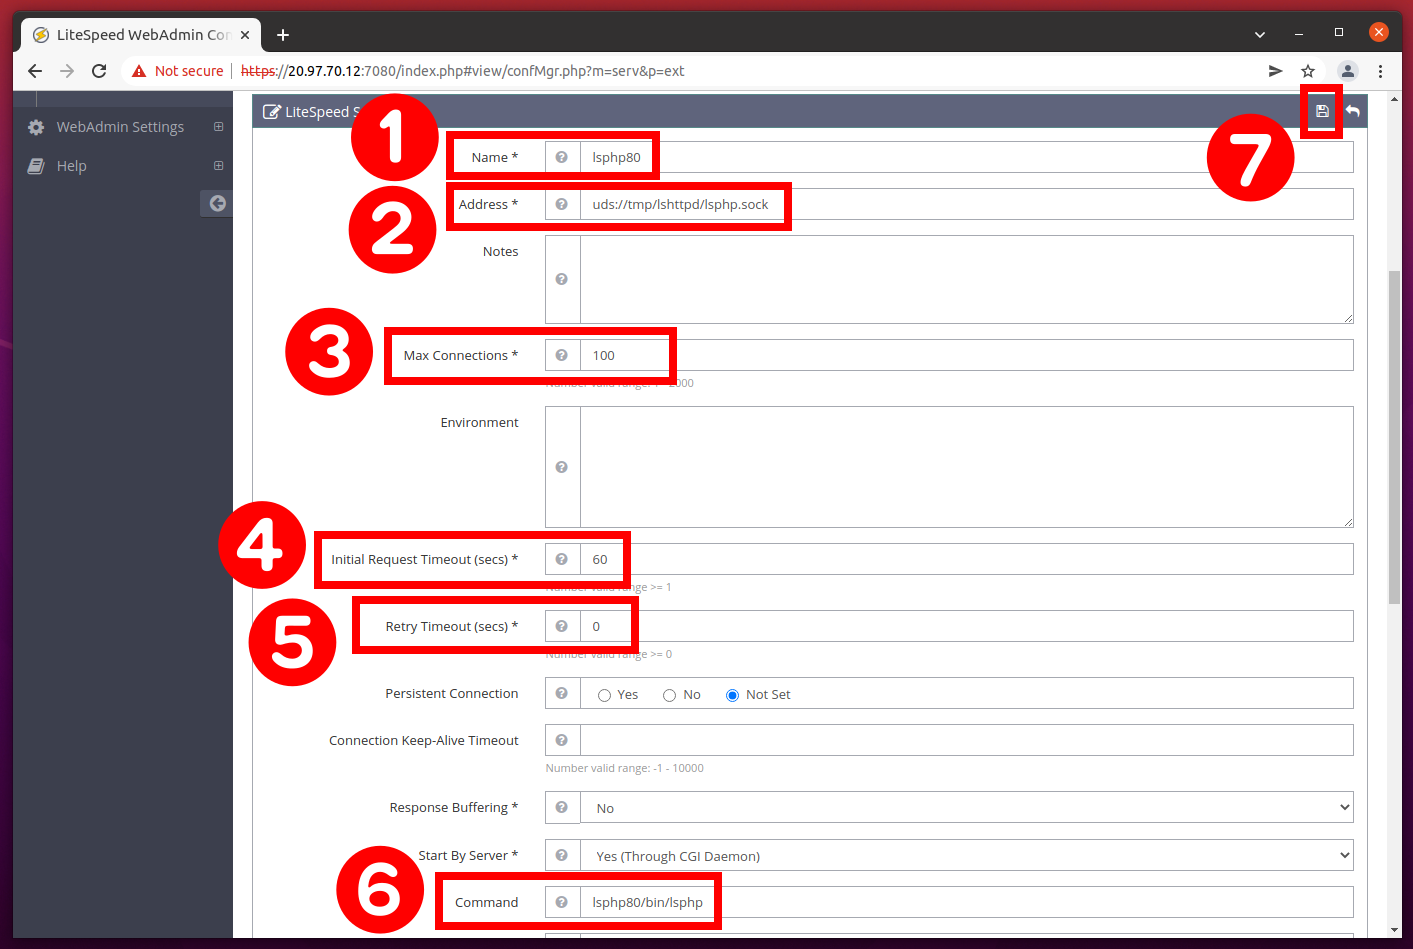
Provide the following information:
- Name: lsphp80
- Address: uds://tmp/lshttpd/lsphp.sock
- Max Connections: 100
- Initial Request Timeout (secs): 60
- Retry Timeout (secs): 0
- Command: lsphp80/bin/lsphp
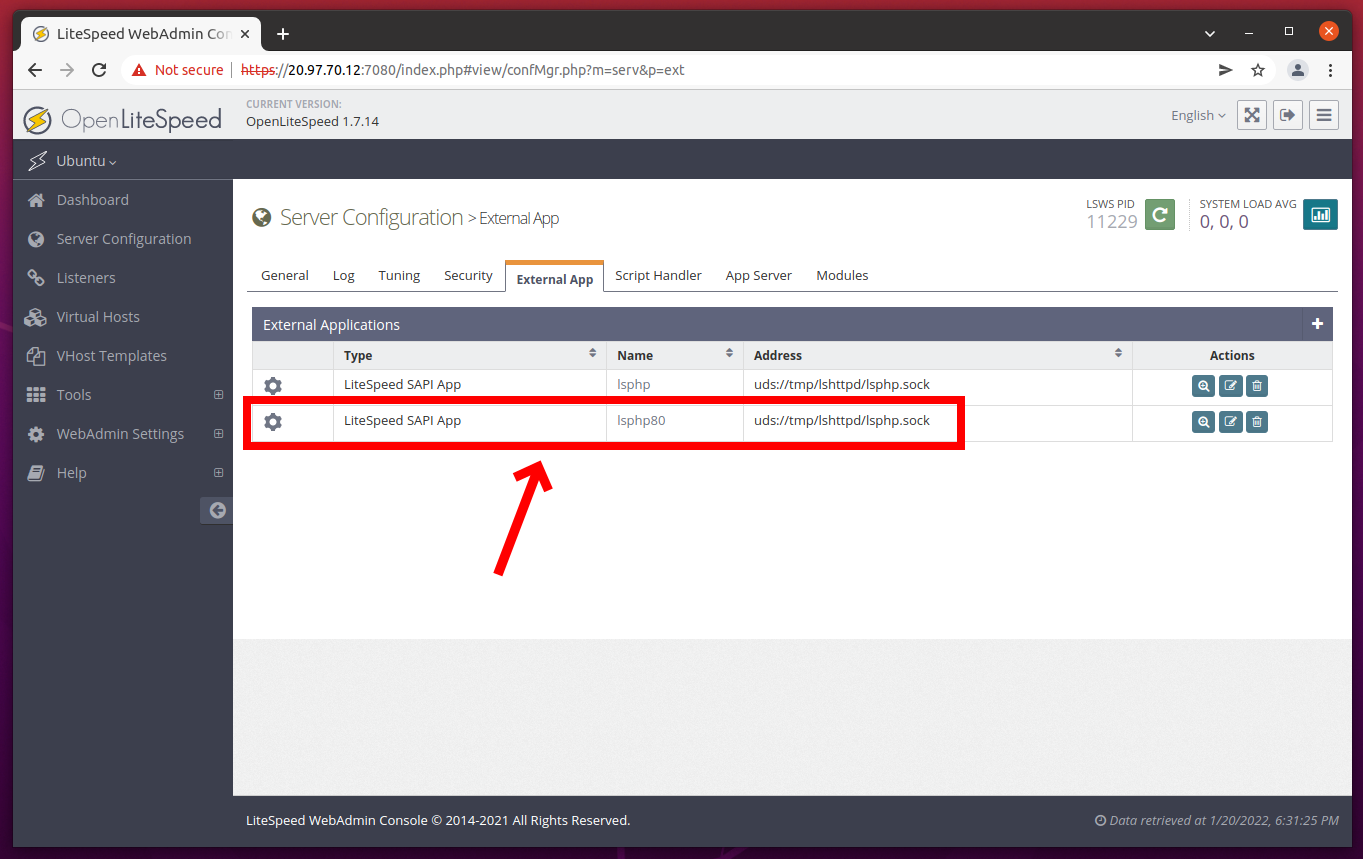
Next, click on the “Save” button to save the configuration.
You should see the following page.
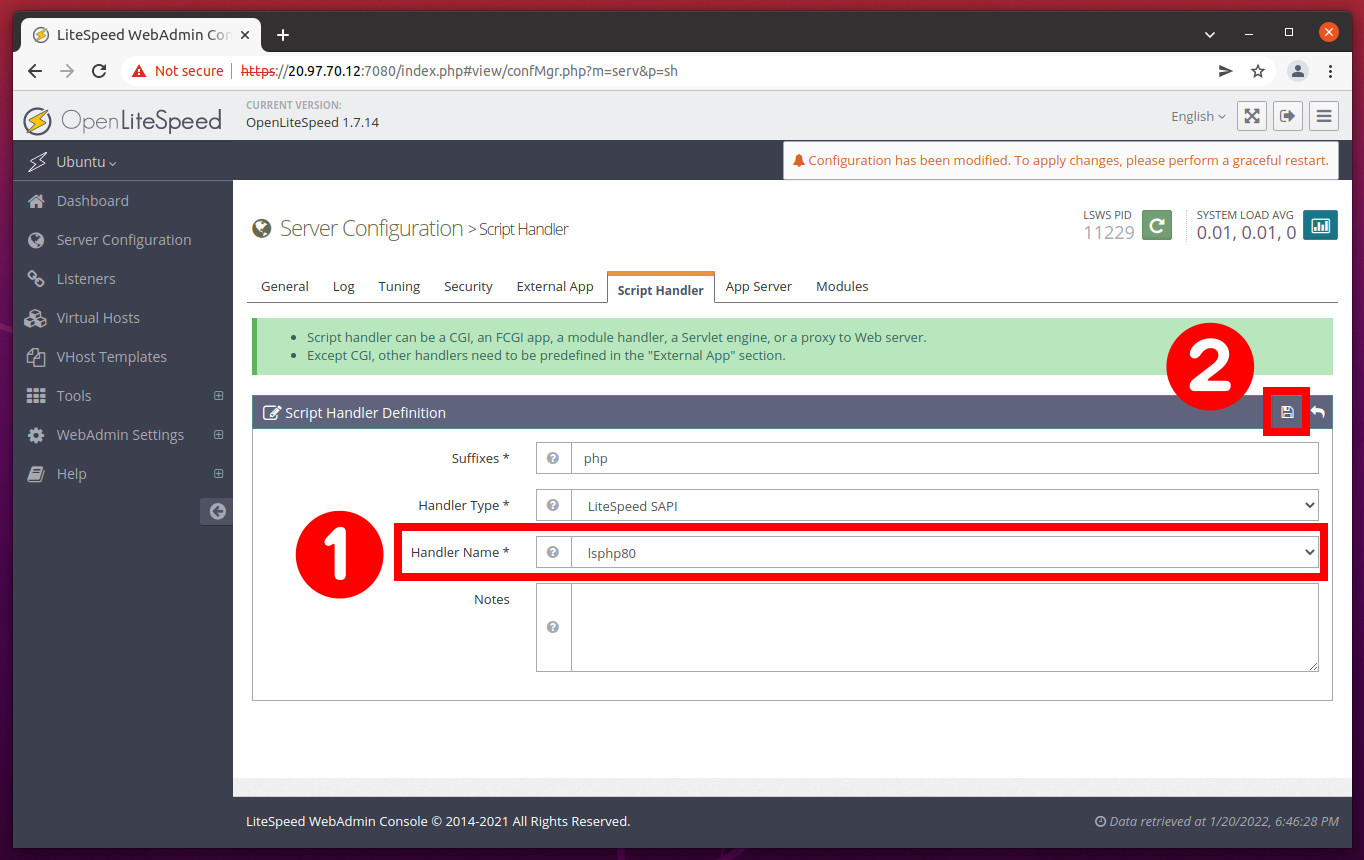
Now you need to change the default PHP for OpenLiteSpeed to the PHP 8.0 version. First, click on the “Script Handler” tab and then hit the “Edit” button.
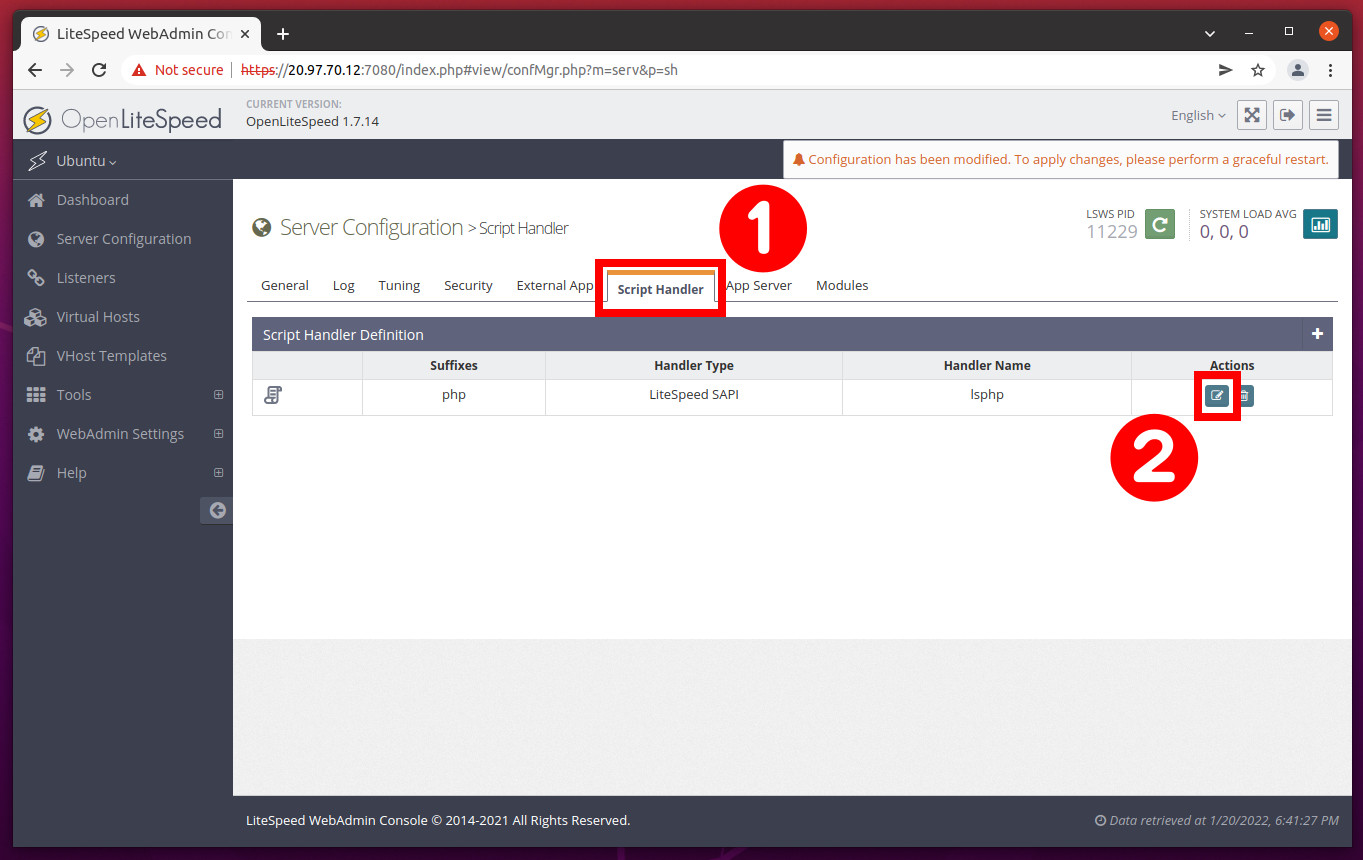
Select lsphp80 from the dropdown menu in the “Handler Name” and click on the “Save” button.
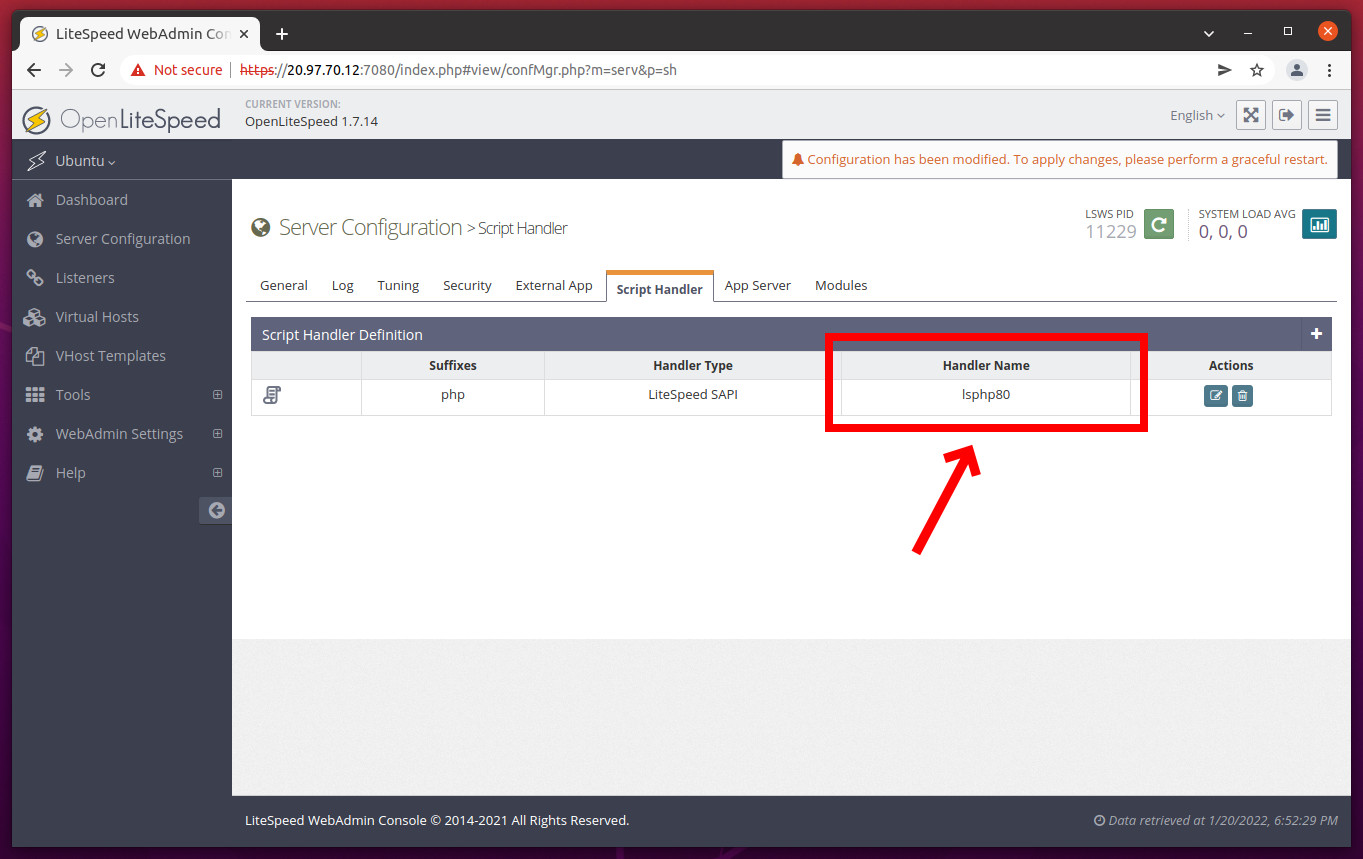
You should see the following page.
8. Change OpenLiteSpeed Default Port
By default, OpenLiteSpeed listens on port 8088. However, we can change it to port 80 instead, the default port for HTTP requests.
To do this, click “Listeners” in the list of options on the left side of the interface. Then on the right, under “Actions,” click on the “View” icon.
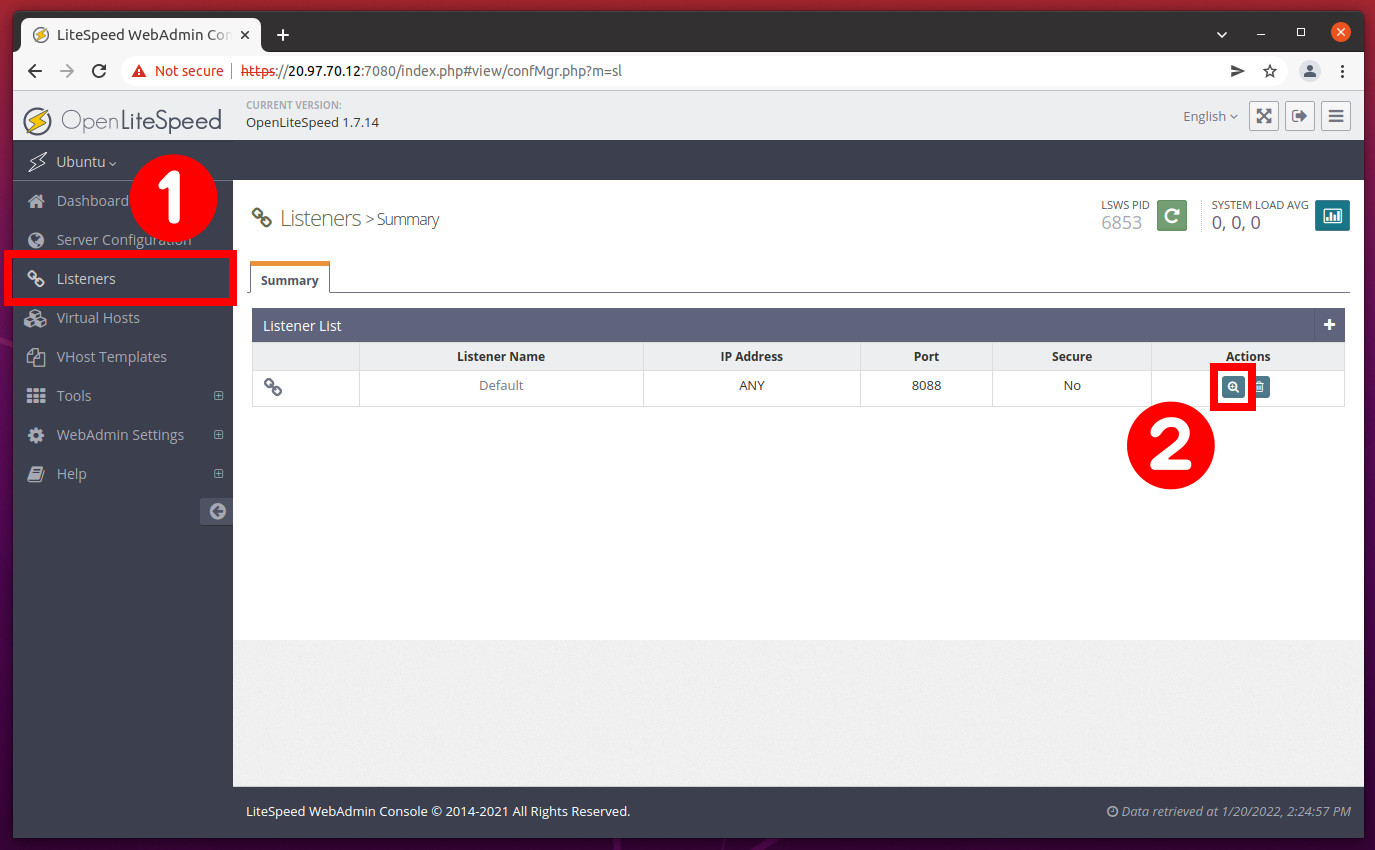
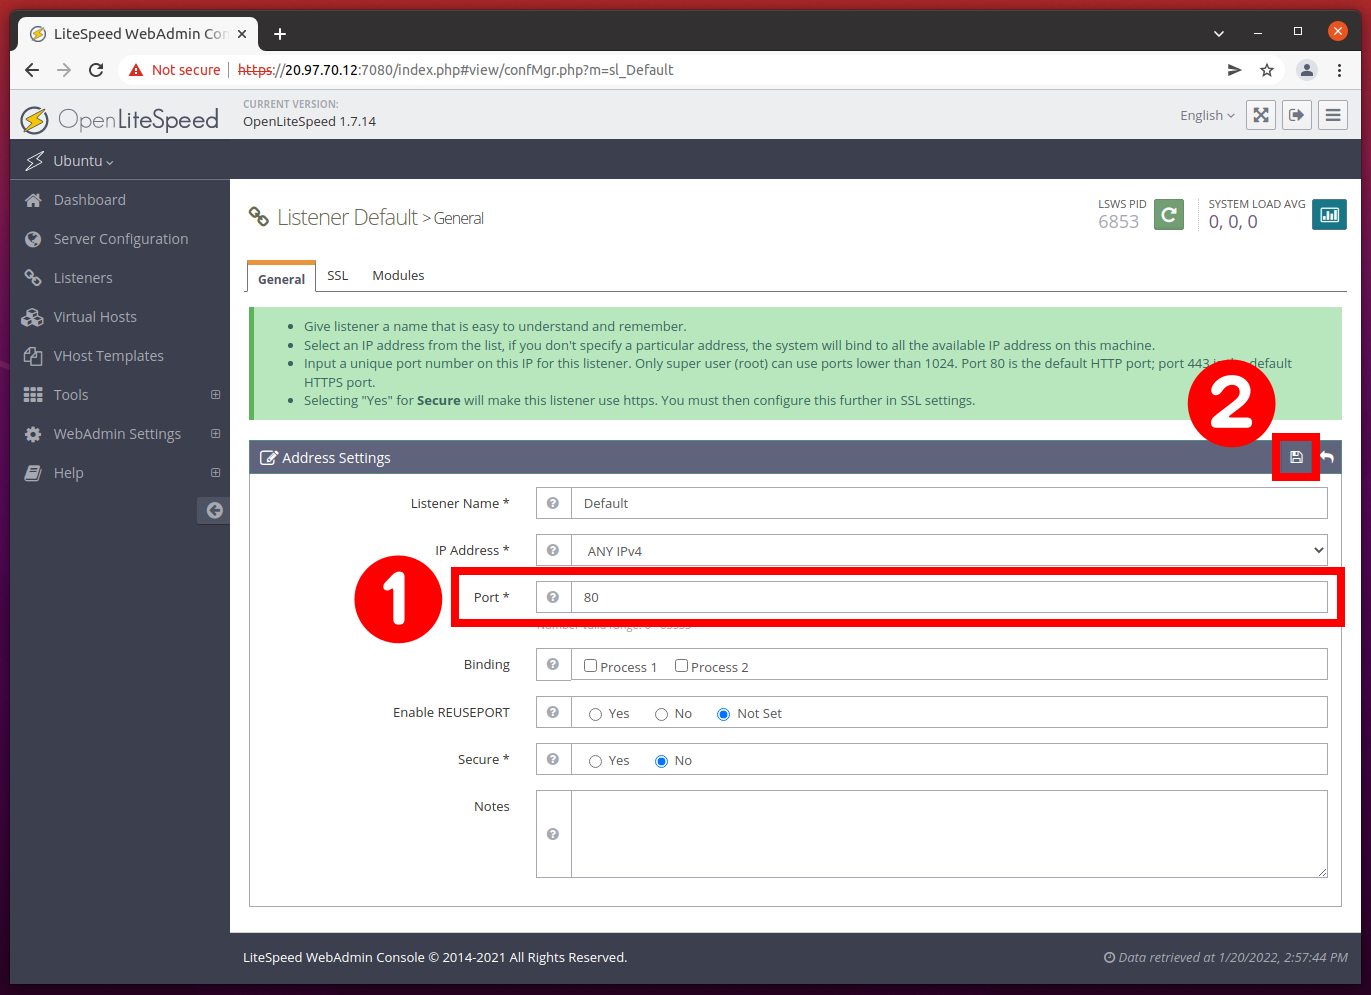
This will load a page with more details about the default listener. Next, click the “Edit” icon on the Address Settings.
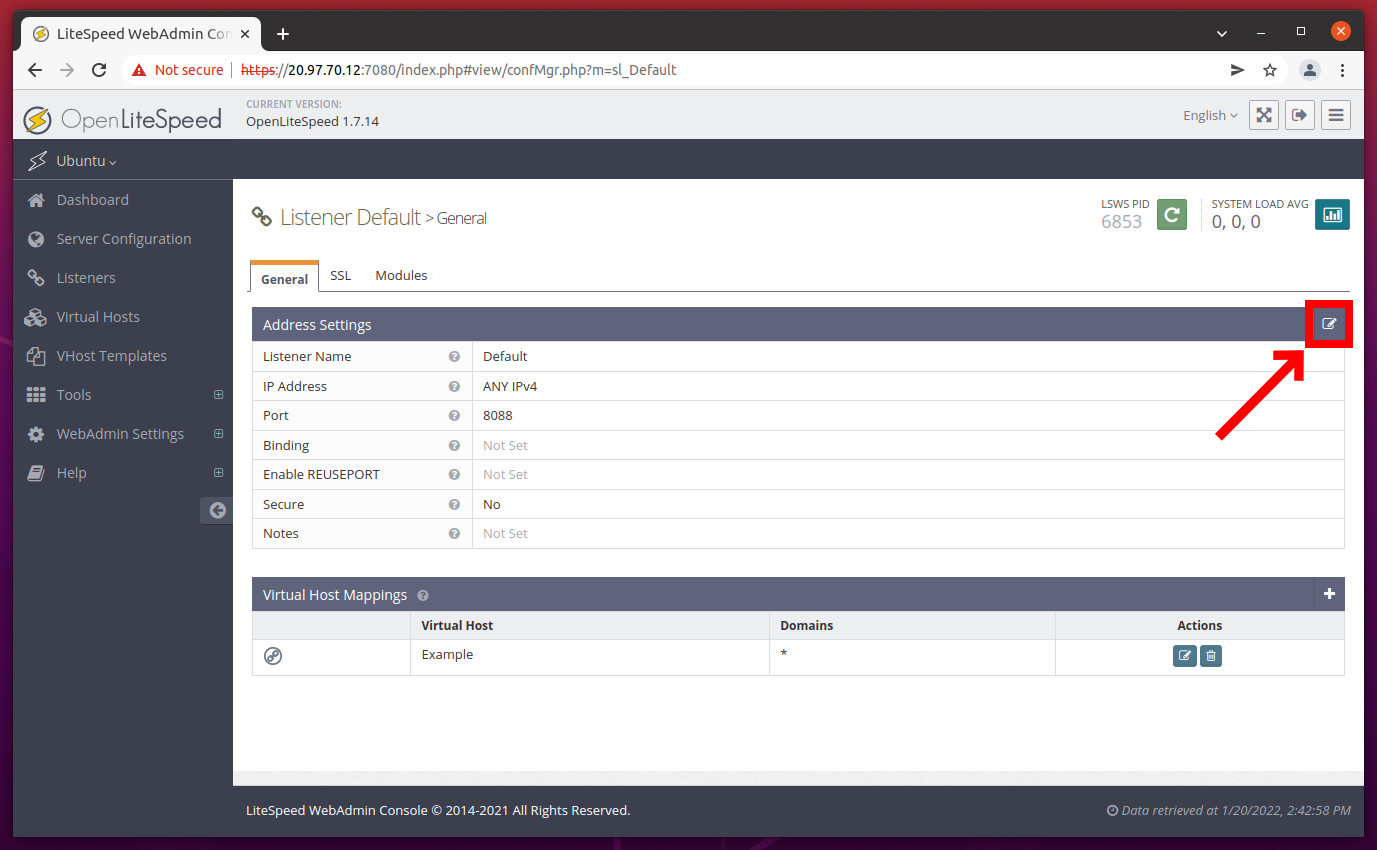
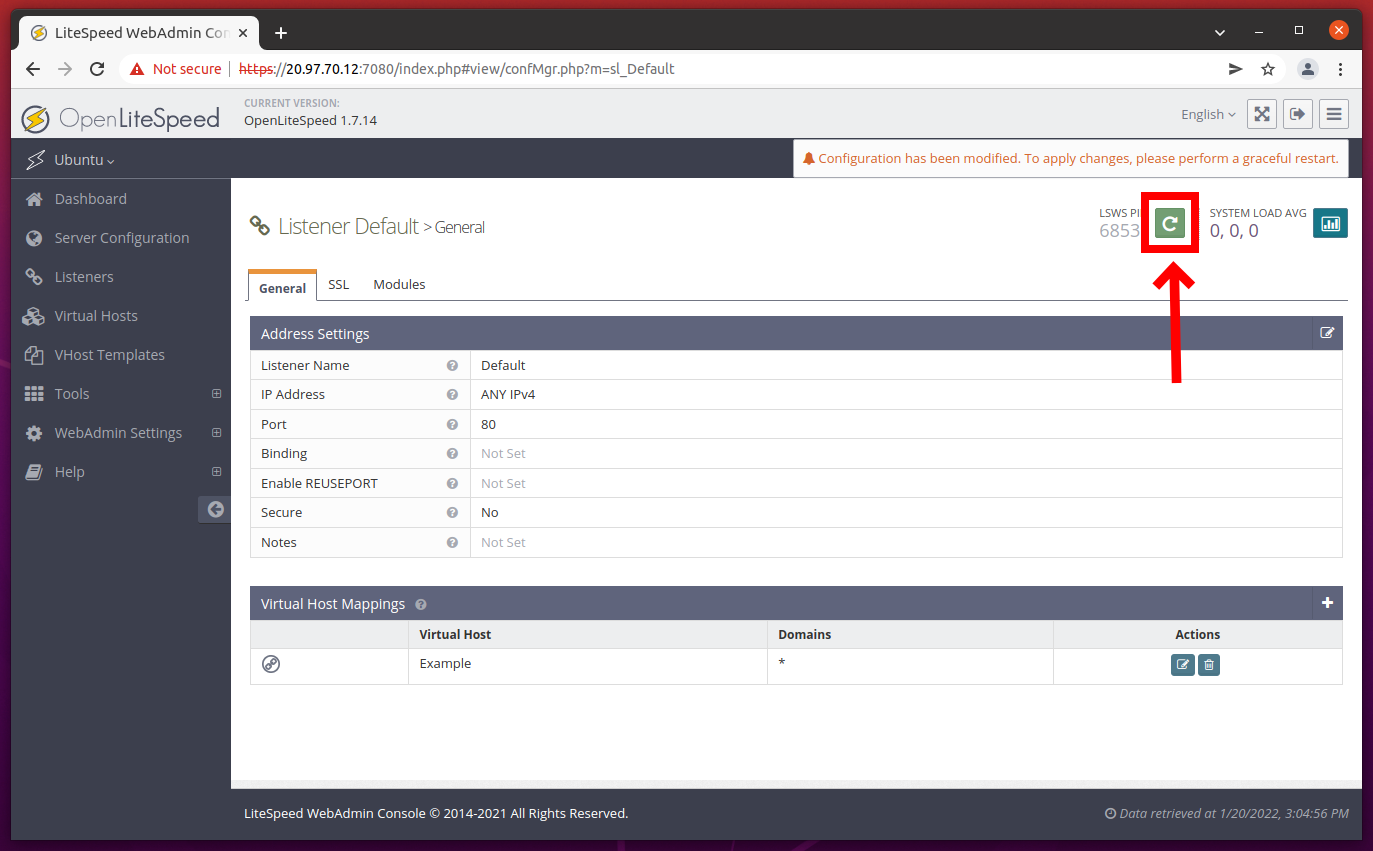
In the default listener address settings, change the port from 8088 to 80 and click on the “Save” (floppy disk) icon to save the settings.
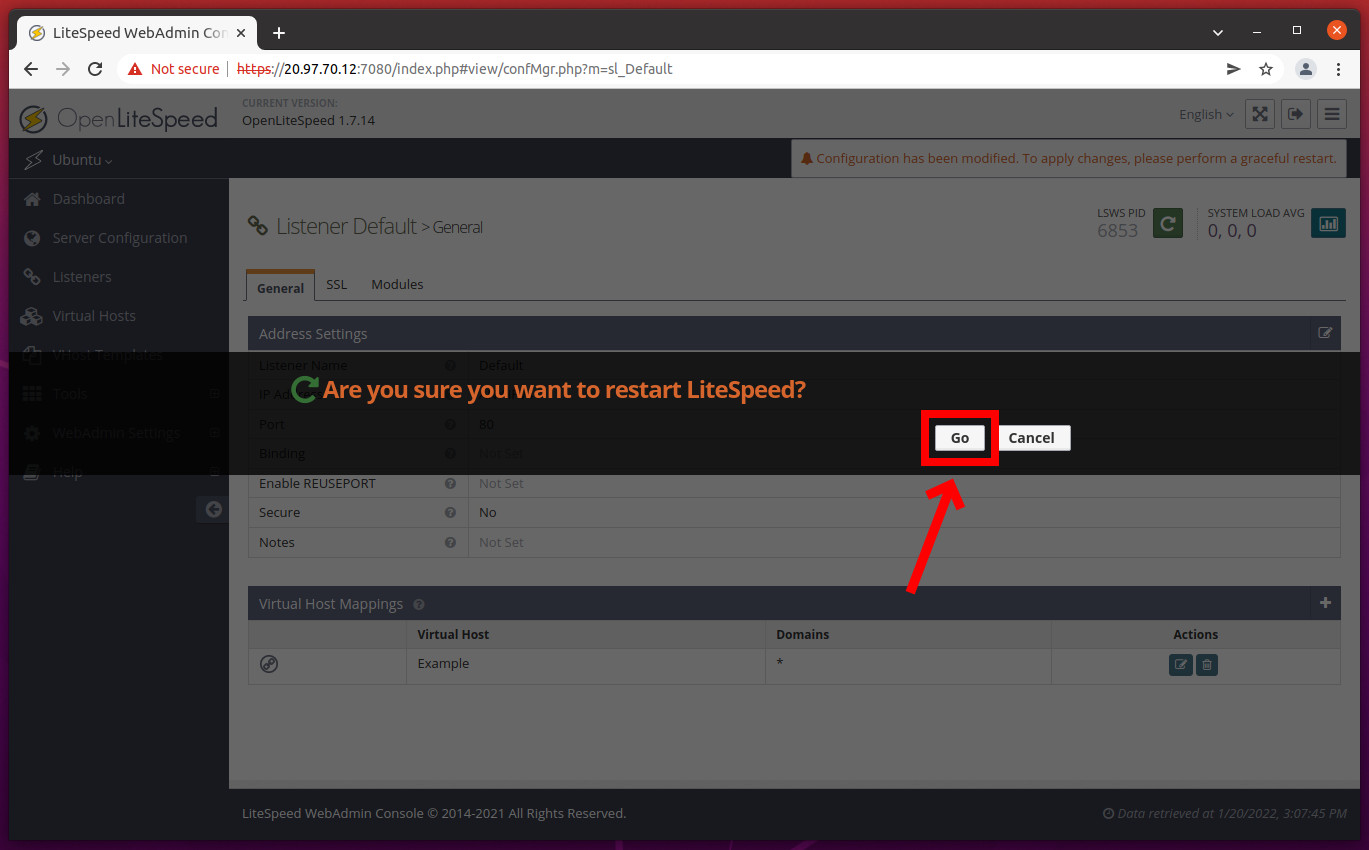
Next, click on the “Restart” icon and perform the graceful restart to apply the changes.
When prompted, hit the “Go” button.
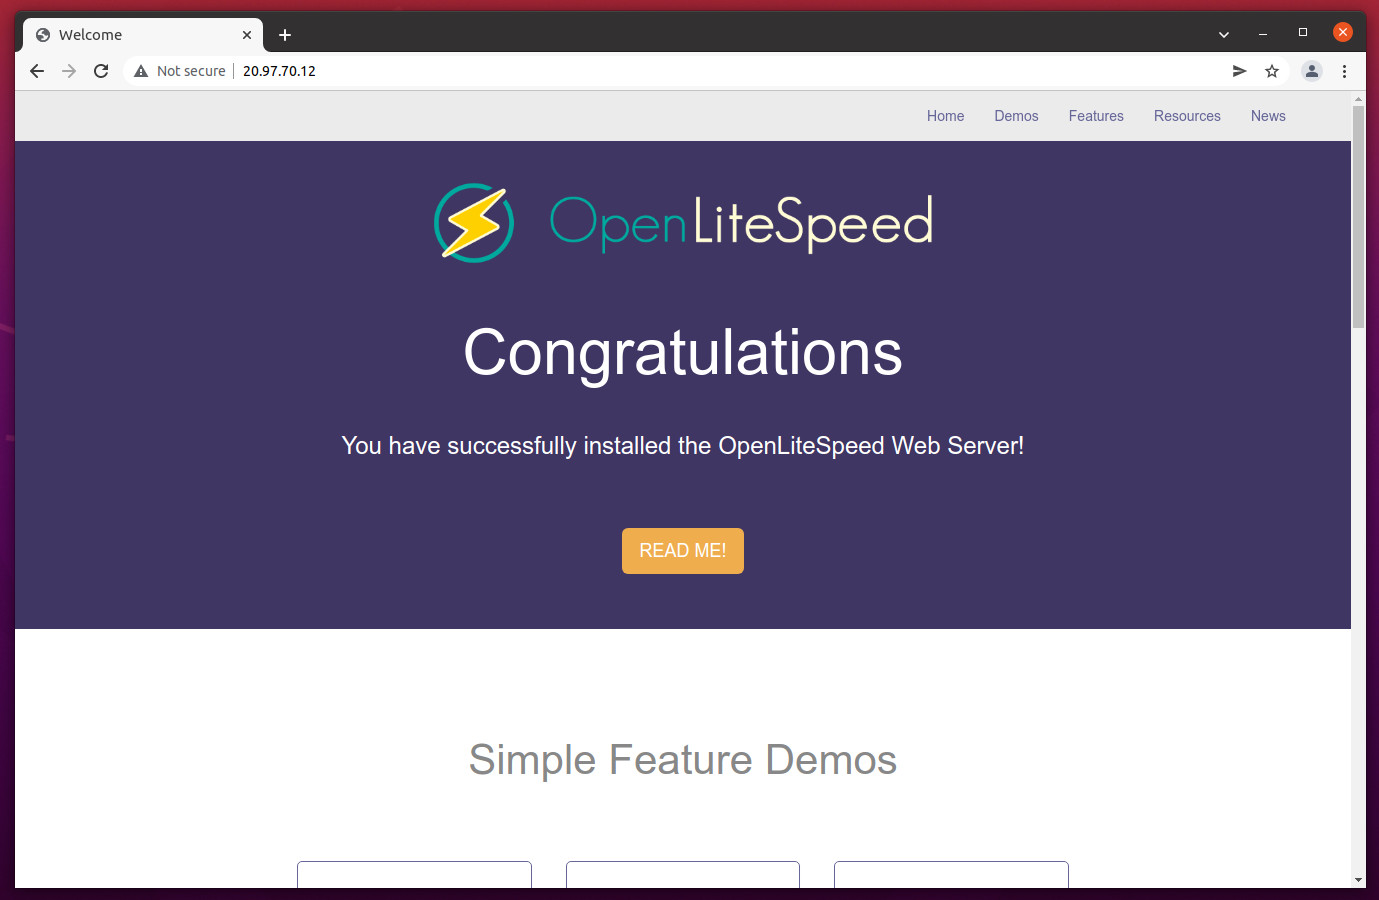
Now, you can access your OpenLiteSpeed web server using the URL http://your-server-ip.
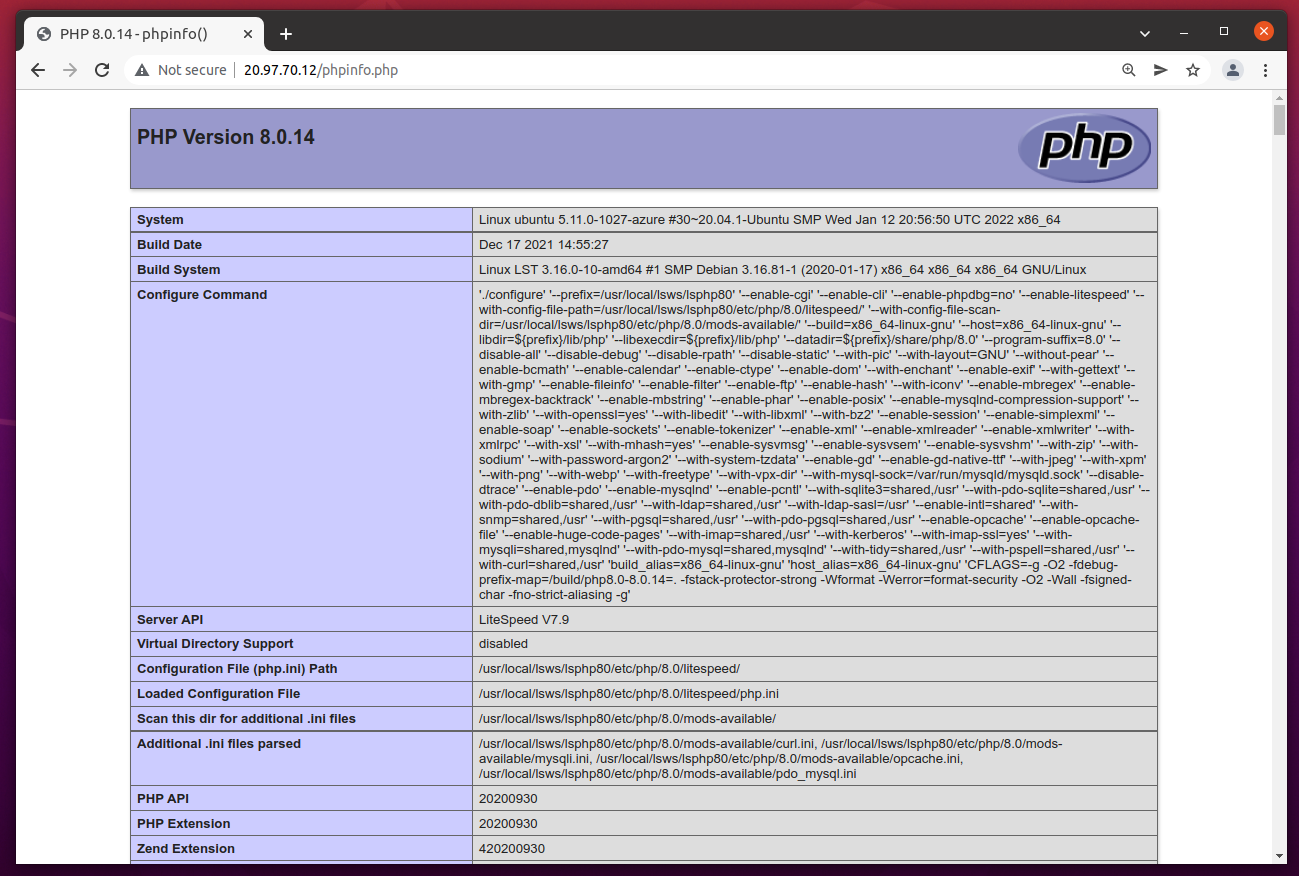
You can also enter http://your-server-ip/phpinfo.php in the browser to test PHP 8 with the OpenLiteSpeed web server. As a result, you should get the phpinfo page as below.
Conclusion
Congratulations! At this point, you should have OpenLiteSpeed and PHP 8 installed and running on an Ubuntu. We hope this tutorial helped you.
There is so much that the OpenLiteSpeed web server can do. For more about OpenLiteSpeed, you can refer to the official documentation.
Feel free to share your thoughts in the comments box below.