
VirtualBox is cross-platform, free, and open-source software that allows you to virtualize the x86 computing architecture. It has allowed open-source enthusiasts and IT professionals to host many operating systems on a single host machine for years.
Although VirtualBox is primarily aimed at home users, it is also commonly utilized in professional environments.
Unfortunately, in Debian’s case, due to a lack of cooperation from upstream on security support for older releases, VirtualBox is unavailable for installation in the official Debian stable repositories.
Fortunately, there is an effortless way to install VirtualBox on Debian 11, which we will show you now.
However, if you’re using Debian 12, check our comprehensive and easy-to-follow “How to Install VirtualBox on Debian 12 (Bookworm)” guide.
Install VirtualBox on Debian 11 (Bullseye)
The tutorial will use the sudo command and assuming you have sudo privileges.
Step 1: Download and Import VirtualBox’s GPG Keys
To ensure that the packages we receive to install the VirtualBox are genuine, first, we should download and import the VirtualBox signed GPG keys on our Debian 11 system.
To do so, type the following commands:
wget -O- -q https://www.virtualbox.org/download/oracle_vbox_2016.asc | sudo gpg --dearmour -o /usr/share/keyrings/oracle_vbox_2016.gpgCode language: JavaScript (javascript)
Notice that the command produces no output.
Step 2: Add VirtualBox Repository for Debian 11
After importing the GPG keys, we’ll add the official VirtualBox repository to our Debian 11 system. This implies that the update package will be made available with the rest of your system’s regular updates if a new version is released.
To accomplish it, type the command shown below.
echo "deb [arch=amd64 signed-by=/usr/share/keyrings/oracle_vbox_2016.gpg] http://download.virtualbox.org/virtualbox/debian bullseye contrib" | sudo tee /etc/apt/sources.list.d/virtualbox.listCode language: PHP (php)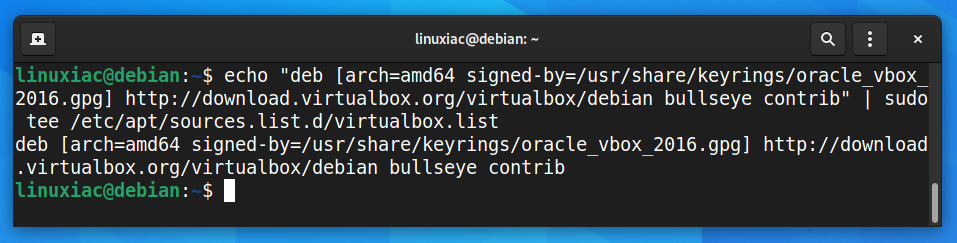
Step 3: Run System Update
Before we proceed with VirtualBox installation on our Debian 11 system, we should update the list of available packages. So, run the below command to update the APT repositories index.
sudo apt update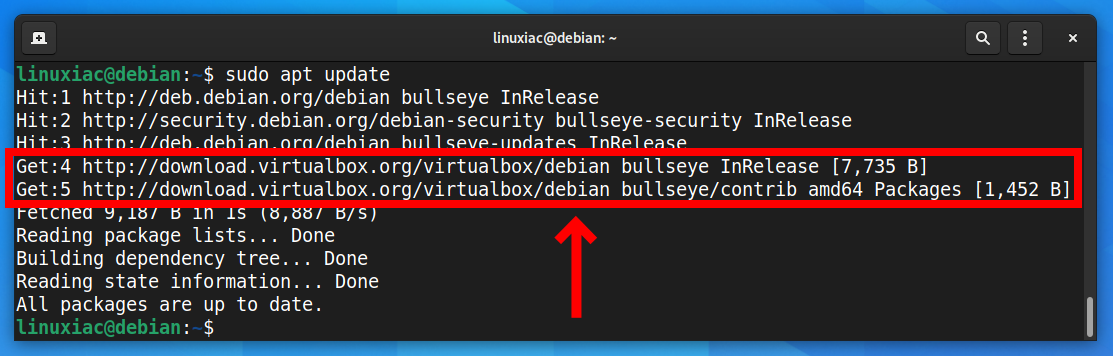
As you can see, our new VirtualBox repository is now available and ready to be used.
Step 4: Install VirtualBox on Debian 11 (Bullseye)
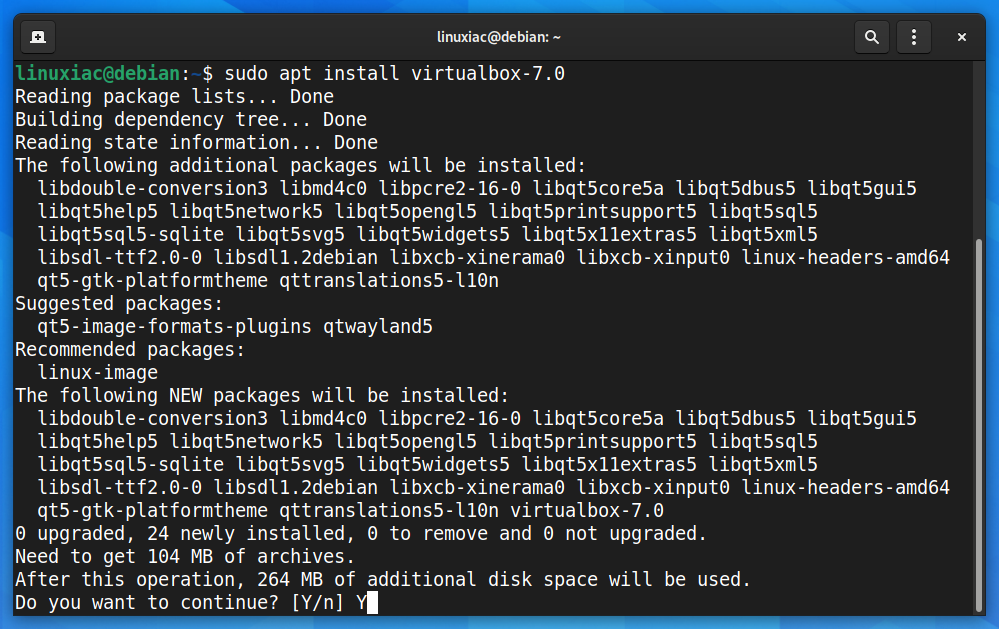
Everything is already prepared for the actual installation. Now, to install VirtualBox on Debian 11, run the following commands:
sudo apt install virtualbox-7.0Code language: CSS (css)When prompted, type Y to confirm that you want to install it and press Enter.
That’s all. The VirtualBox is installed and ready to be used on your Debian 11 Linux system.
Step 5: Install VirtualBox Extension Pack
This is an optional step, but I strongly encourage it because it will make working with VirtualBox on your Debian system easier and more convenient. VirtualBox Extension Pack unlocks many great features, such as:
- USB 2 and USB 3 support
- VirtualBox Remote Desktop Protocol (VRDP)
- Host webcam passthrough
- Disk image encryption with AES algorithm
- Intel PXE boot ROM
One peculiarity should be highlighted here. The VirtualBox Extension Pack’s version must match the version of VirtualBox installed on your Debian 11 system.
So, to verify the exact version of the installed locally VirtualBox, you can use vboxmanage, a build-in VirtualBox’s command:
vboxmanage -v | cut -dr -f1
As you can see, the version of Virtualbox installed is 7.0.6. Therefore, the Extension Pack with the same version must then be downloaded.
So, use the below wget command to download the Extension Pack for VirtualBox.
If your installation is different, replace both places containing 7.0.6 in the command below with the current version. In addition, you can also go straight to the downloads page and look at the available versions.
wget https://download.virtualbox.org/virtualbox/7.0.6/Oracle_VM_VirtualBox_Extension_Pack-7.0.6.vbox-extpackCode language: JavaScript (javascript)Next, to install the VirtualBox Extension pack, run the vboxmanage command as follows:
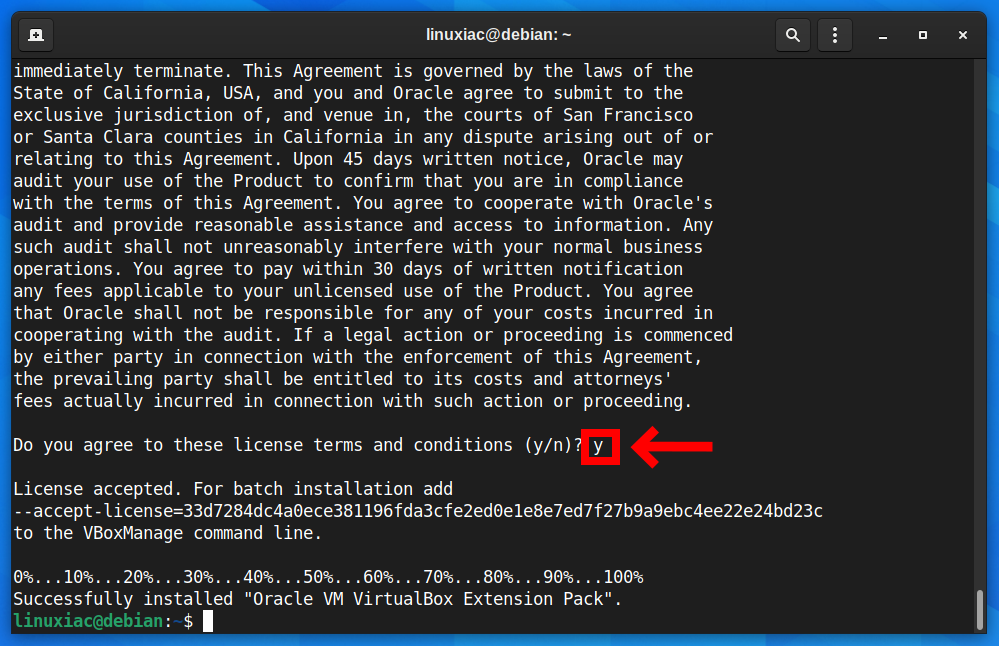
sudo vboxmanage extpack install Oracle_VM_VirtualBox_Extension_Pack-7.0.6.vbox-extpackCode language: CSS (css)When prompted to agree the Oracle’s license terms and conditions, type y to confirm and press Enter.
You can verify that the extension pack was installed correctly by running:
vboxmanage list extpacksCode language: PHP (php)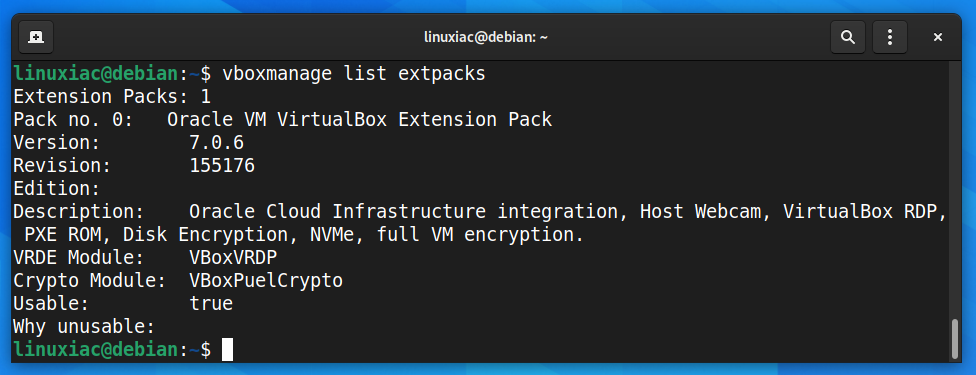
Step 6: Add User to vboxusers Group
Before using VirtualBox, you should add your user account to the vboxusers group. This is quick and simple to accomplish by running:
sudo usermod -a -G vboxusers $USERCode language: PHP (php)Now perform a reboot. After login, check that you are in the vboxusers group with this command:
groups $USERCode language: PHP (php)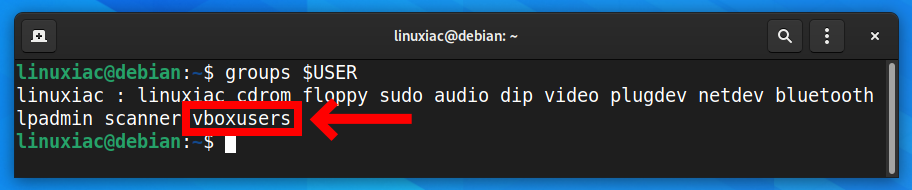
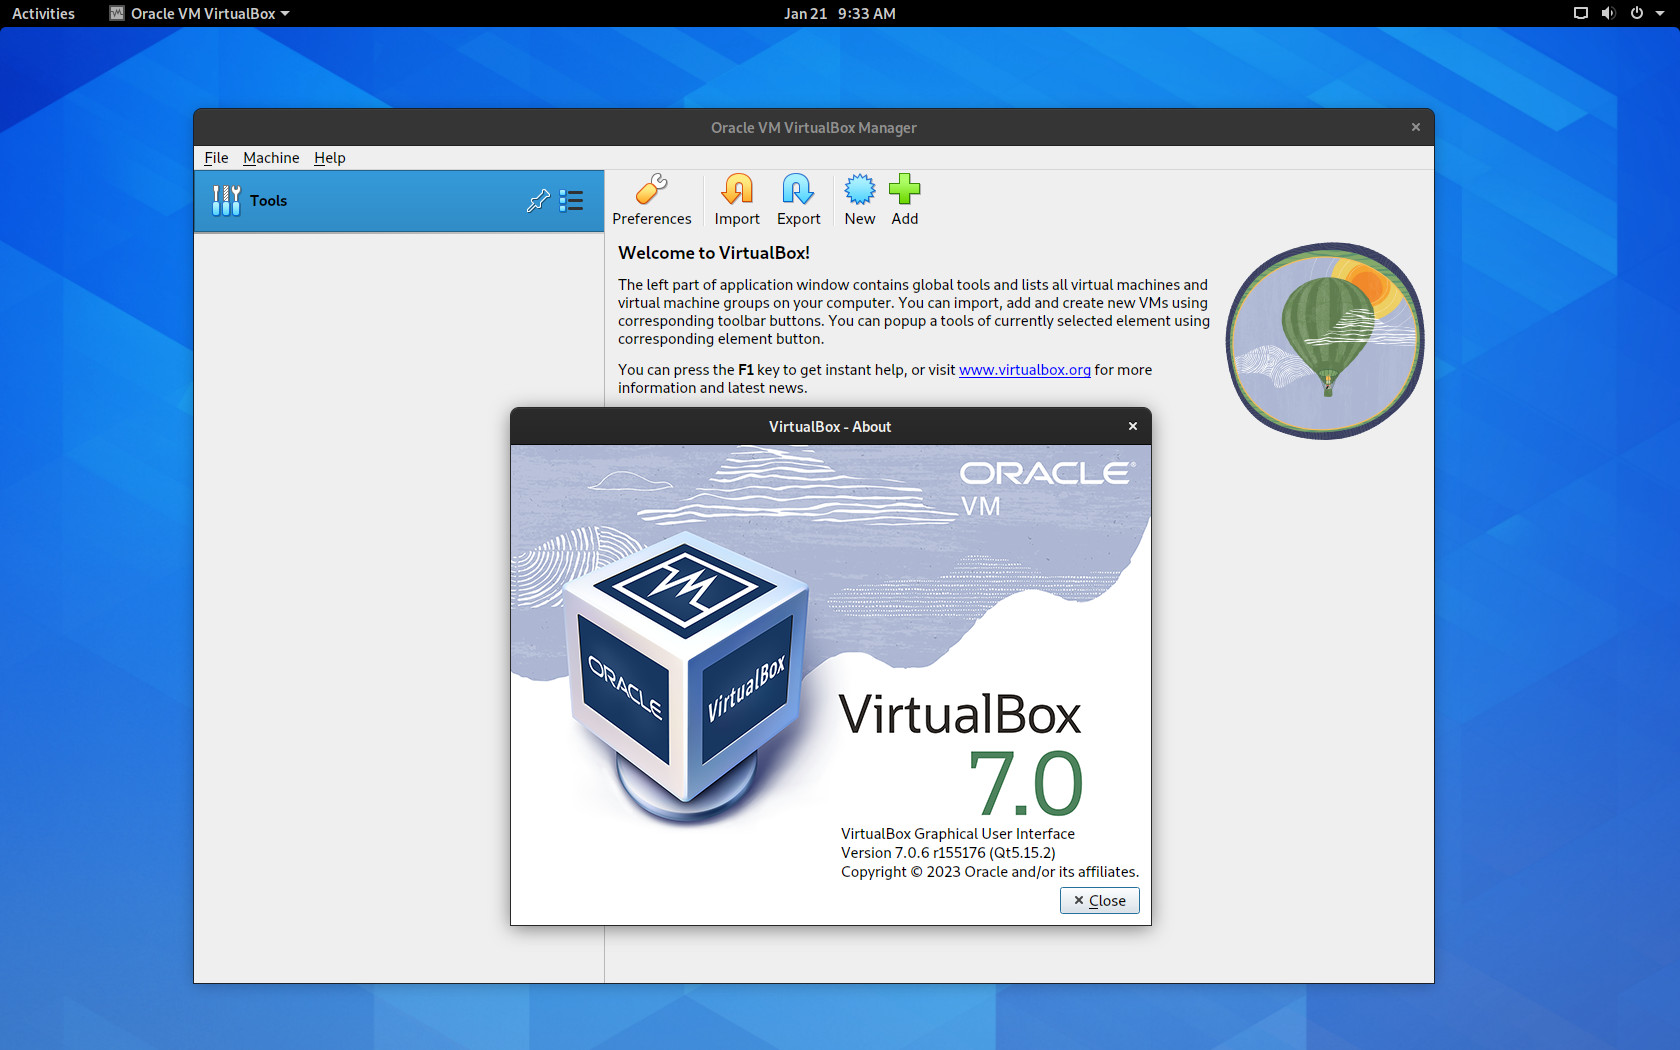
Step 7: Running VirtualBox on Debian 11
You can start using VirtualBox by launching it from the desktop environment’s application menu.

Conclusion
That concludes our guide on installing VirtualBox on Debian 11 (Bullseye). We hope you find this guide helpful. Thanks for your time!
We recommend checking the official documentation for individuals who want to learn more about the features offered by VirtualBox and how to use them effectively.
Your feedback and comments are most welcome.


Hi Bobby.
Thanks so much for a very clear and fully working tutorial article. I followed the steps, even copying & pasting the commands across so I didn’t introduce any typos, and it worked a treat 🙂 I now have VirtualBox installed and running in my Debian 11 Bullseye installation of Pi Desktop (the x86 version of the Raspberry Pi OS) on my Dell Optiplex 7010 USFF machine. I’m experimenting to see if this is a viable alternative to Windows as the hardware won’t run Windows 11 as I do a lot with the Raspberry Pi anyway so this is ideal for me. I may run a virtual Windows machine or 2 inside VirtualBox on this setup!
Thanks again.
Best regards
Steve
Hey Steve,
I’m really glad I could help, and I truly appreciate your kind words. You did an awesome job—congrats!
Your step by step instructions on quickly installing virtualbox on my debian operating system worked flawlessly. Thanks a whole bunch.
Hi Bobby,
Thank you for the excellent tutorial.
I’m trying to setup Virtualbox on Raspberry 4, 4GB with Raspbian OS Bullseye (Debian 11)
All was running fine until Step4:
sudo apt install virtualbox-7.0
E: Unable to locate package virtualbox-7.0
E: Couldn’t find any package by glob ‘virtualbox-7.0’
I tried also other version numbers, but all the same.
Whats wrong?
Hi Walter,
Raspberry Pi (Raspbian) is an entirely different architecture – ARM. So, although it is based on Debian 11, this guide is not applicable there. To install Docker on a Raspberry Pi, follow the steps described here: How to Install Docker on Raspberry Pi: A Step-by-Step Guide
Best,
Bobby
Excellent article and it helped me to successfully install Oracle Virtual Box in no time … Thanks a Million!
Hey Bobby,
many thanks for your article. I think it’s not a good idea to ignore the deprecated message of apt-key. There’s a good reason for it. Ignoring this messages would cause the system to accept signatures from the third-party keyholder on all other repositories configured on the system. This is bad. A better way would be:
1. wget -q https://www.virtualbox.org/download/oracle_vbox_2016.asc -O- | gpg –dearmour -o /usr/share/keyrings/oracle_vbox_2016.gpg
2. echo “deb [signed-by=/usr/share/keyrings/oracle_vbox_2016.gpg] http://download.virtualbox.org/virtualbox/debian bullseye contrib” | sudo tee /etc/apt/sources.list.d/virtualbox.list
BTW: There’s no need to use “oracle_vbox.asc” AFAIK.
Best regards,
Linand
Hi Linand,
I completely agree with the points you made. Thanks for that!
The necessary changes have been made, and the guide has been updated.
Best,
Bobby
Great help, as for the others no problem thanks to your clear and precise help. Thank you very much!
Thanks so much! This worked flawlessly. I was surprised when I couldn’t find it in the usual repositories.
Hello,
I try it several but sitill the same problem in point 4.
root@debian:~# apt install virtualbox-6.1
Reading package lists… Done
Building dependency tree… Done
Reading state information… Done
E: Unable to locate package virtualbox-6.1
E: Couldn’t find any package by glob ‘virtualbox-6.1’
Hi Gustavo,
The tutorial has been updated with the recently released version of VirtualBox 7.
Please, repeat the steps and be sure you don’t miss any.
Best,
Bobby
Best guide, I have found so far.
0 problem during install.
Works flawless.
Thanks 🙂
Hey Chris,
Thank you very much for your kind words! I am happy to have been of help.
Best,
Bobby
awesome step by step guide — it worked 100% as given —thanx -thanx
Hey Jim,
Glad to have been of help! 🙂
Best,
Bobby