
The Raspberry Pi is currently the most widely used single-board computer. Its uses are nearly unlimited; users use it to learn programming skills, build hardware projects, for server needs, do home automatons, or just as a desktop replacement.
However, the Raspberry Pi does not ship with an operating system pre-installed. This means you’ll have to install it yourself. This guide will walk you through all the steps needed to install the official operating system, Raspberry Pi OS, provided by the Raspberry Pi Project, supported and recommended for use by the Pi’s manufacturer.
But before we go any further, let’s explain Raspberry Pi OS.
What Is Raspberry Pi OS?
Raspberry Pi OS (previously called Raspbian) is an officially supported operating system by the Raspberry Pi Foundation. It is a free, open-source, Linux operating system based on Debian engineered for use on Pi boards.
It has been produced as the primary operating system for these boards since 2013, with an initial version in 2012. Furthermore, Raspberry Pi OS is fully optimized for Raspberry Pi devices, allowing you to make the most of the available hardware.
Prerequisites
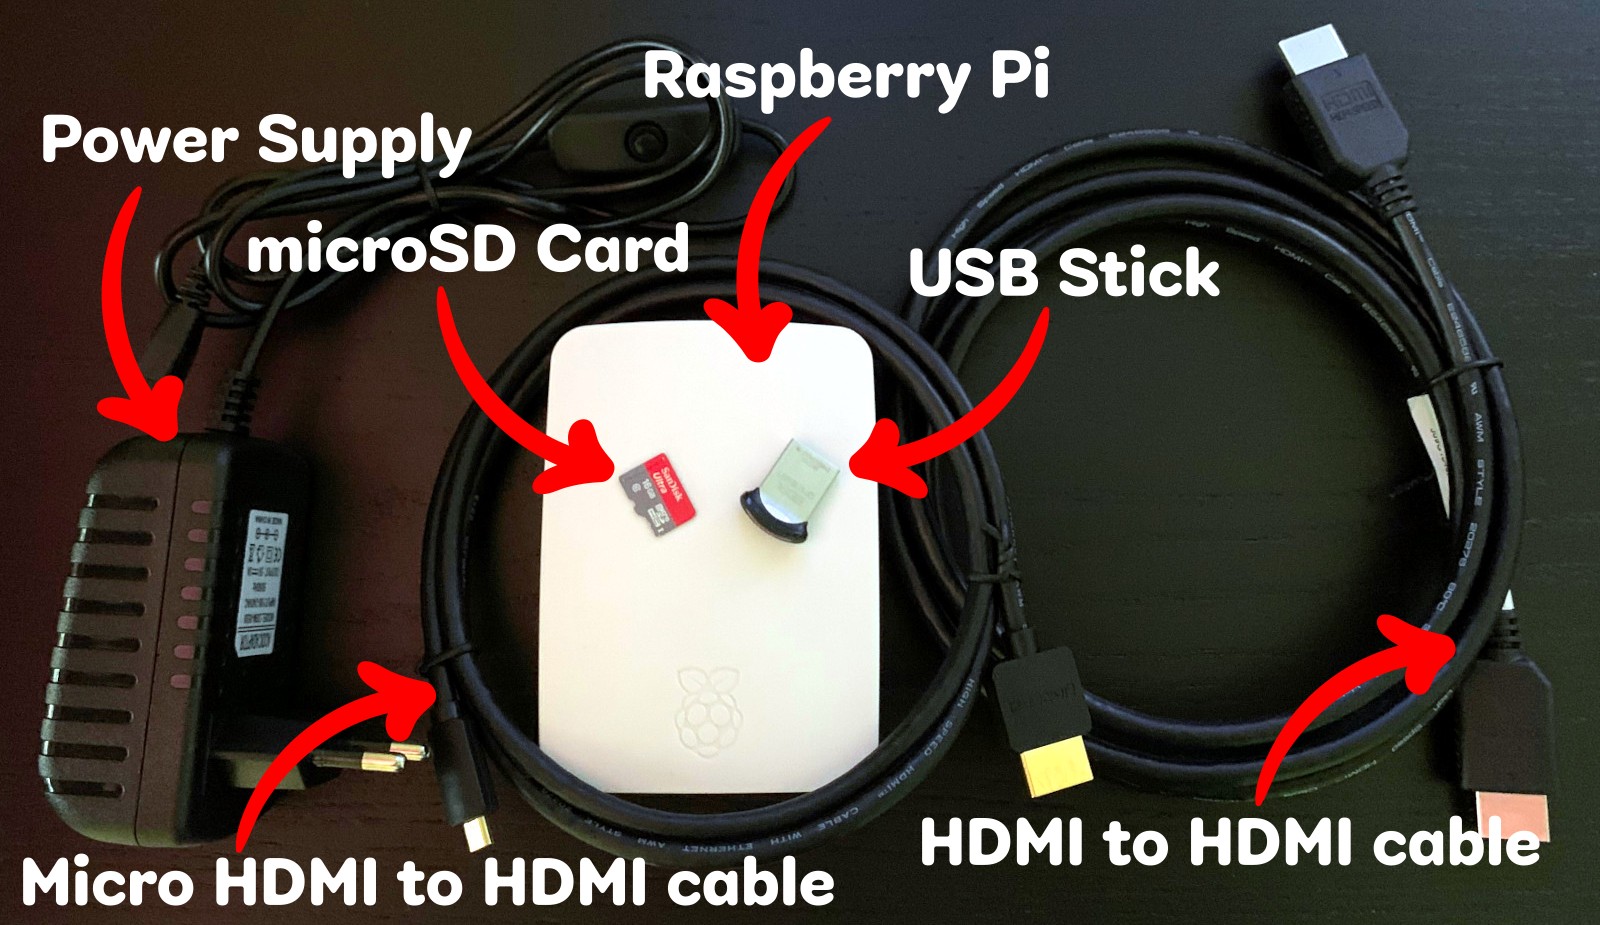
To follow this guide and install Raspberry Pi OS on your Pi device, we’ve explained all the hardware components you’ll need below.
- Raspberry Pi device – any version
- microSD card (all Raspberry Pi versions) or USB stick (Raspberry Pi 3 B+ and Raspberry Pi 4 support installation and booting from a USB) at least 8GB, preferably 16GB or higher
- HDMI to HDMI cable (for Raspberry Pi versions before 4) or Micro HDMI to HDMI cable (Raspberry Pi Zero and Raspberry Pi 4)
- Micro USB Power supply (for Raspberry Pi versions before 4) or USB-C Power supply (for Raspberry Pi 4)
- Keyboard, mouse, monitor
Now that everything is in place, it’s time for installation.
1. Install Raspberry Pi Imager App
The first step is to install the Raspberry Pi Imager. This software simplifies the Raspberry Pi OS installation onto our microSD card or USB stick and makes the entire process easier.
It is specially designed to write a Raspberry Pi operating system to an SD card or USB stick. At the same time, it will format the storage device to the correct filesystem used by the Raspberry Pi OS.
Furthermore, it is supported by the Raspberry Pi Project and is the recommended and official method of installing the Raspberry Pi OS.
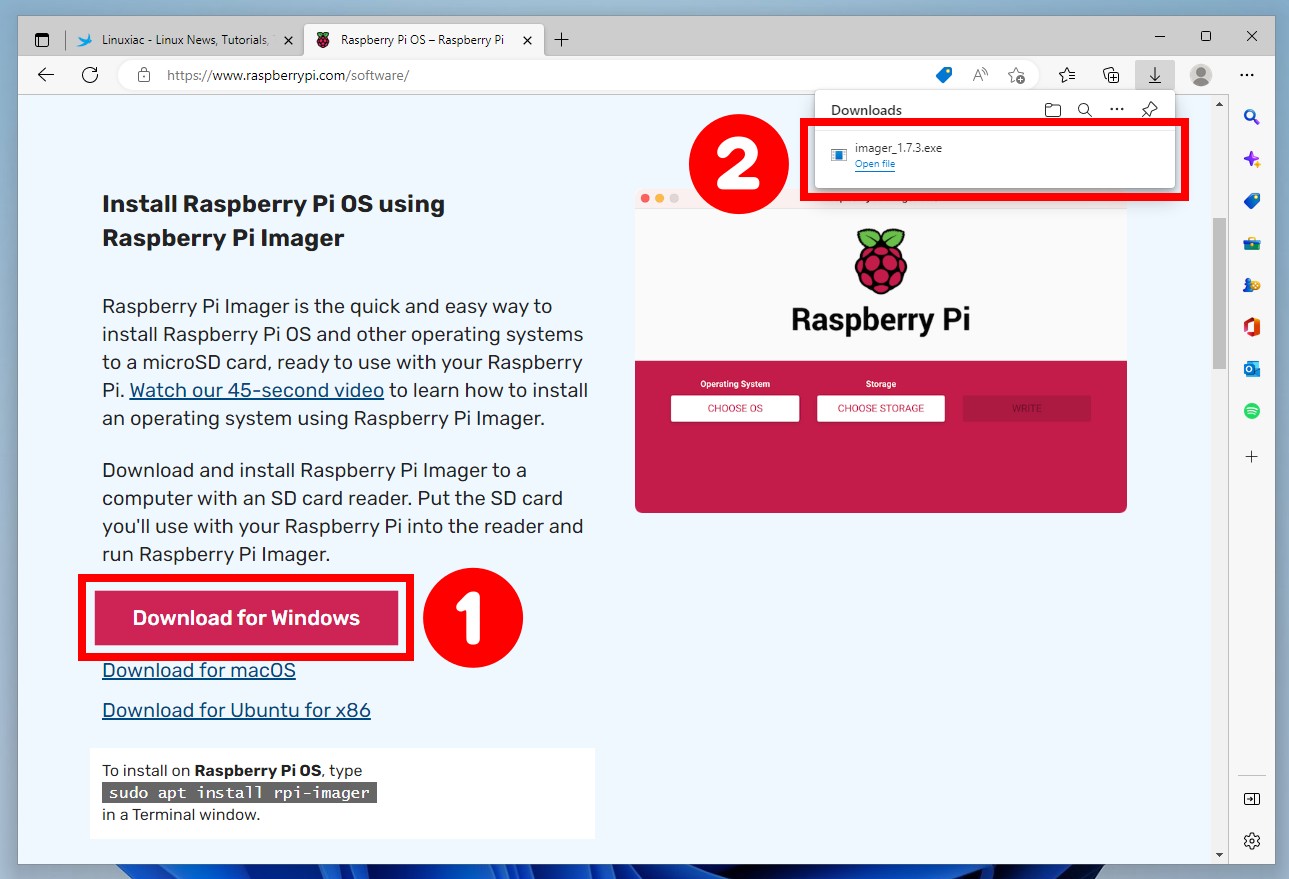
Raspberry Pi Imager is available for Windows, Linux, and macOS. In this guide, we will install it on Windows and use a USB stick instead microSD card to install our Raspberry Pi OS on it.
In your browser, navigate to https://www.raspberrypi.com/software/ and download and install Raspberry Pi Imager.
Next, insert a microSD card/reader or USB stick into your computer and Launch Raspberry Pi Imager.
If you are using Linux, see the instructions for your distribution. In addition, the “Install Raspberry Pi Imager” section of this guide may be helpful to you.
2. Install Raspberry Pi OS
Now everything is ready so that we can begin the installation process. Follow the steps below.
2.1 Choose Raspberry Pi OS Version
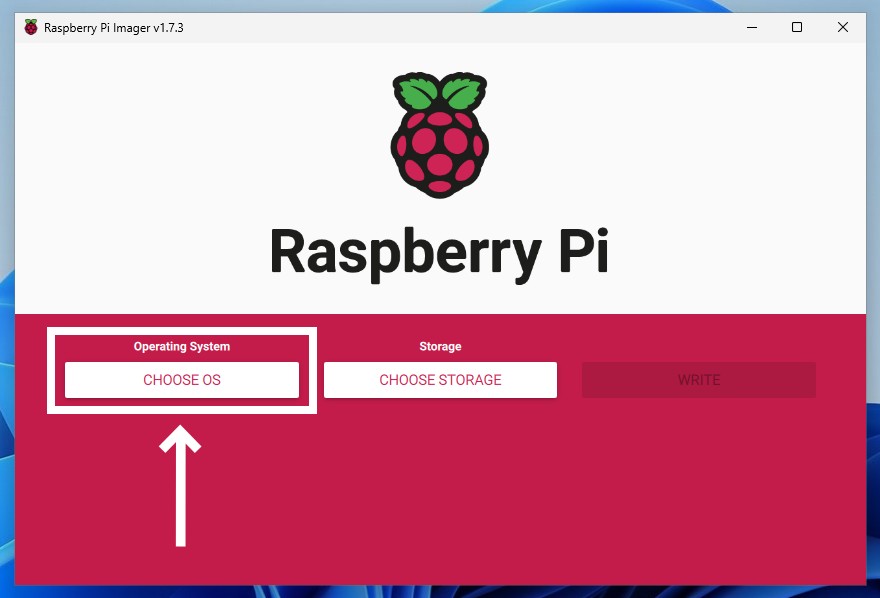
Once the application opens, select “CHOOSE OS.”
Choose “Raspberry Pi OS (32-bit)” from the open window.
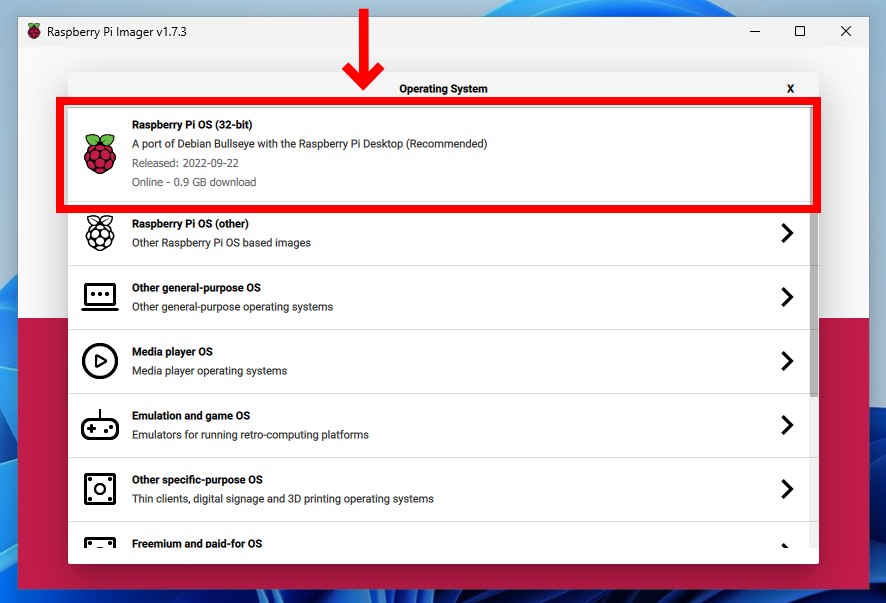
The window will close, and the “Operating System” section will display the Raspberry Pi OS type you selected.
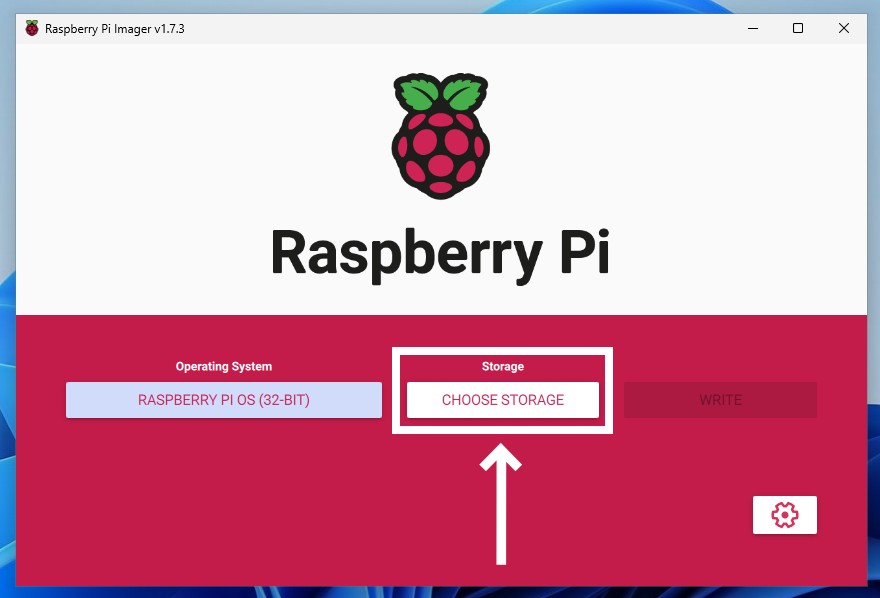
2.2 Choose Storage Device
The next step is to specify the storage device on which we will install Raspberry Pi OS. To choose it, hit the “CHOOSE STORAGE” button.
A sub-window will appear in which your extra storage devices should be listed. If you have more than one, pick the ones from the list on which you will install the Raspberry Pi OS. In our case, it is a 16GB USB stick, so we click on it.
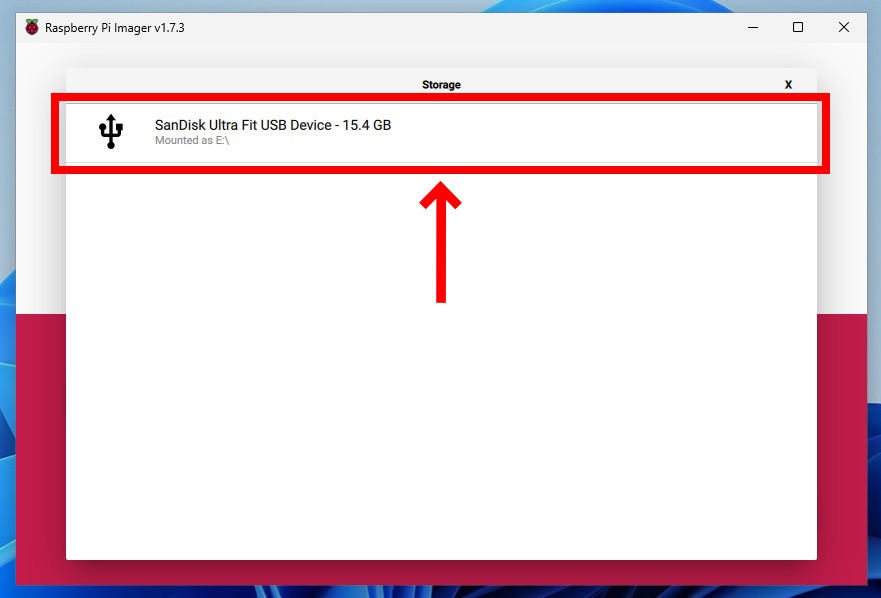
The sub-window will close, and you will be back on the home screen of the Raspberry Pi Imager.
2.3 Configure Additional Settings
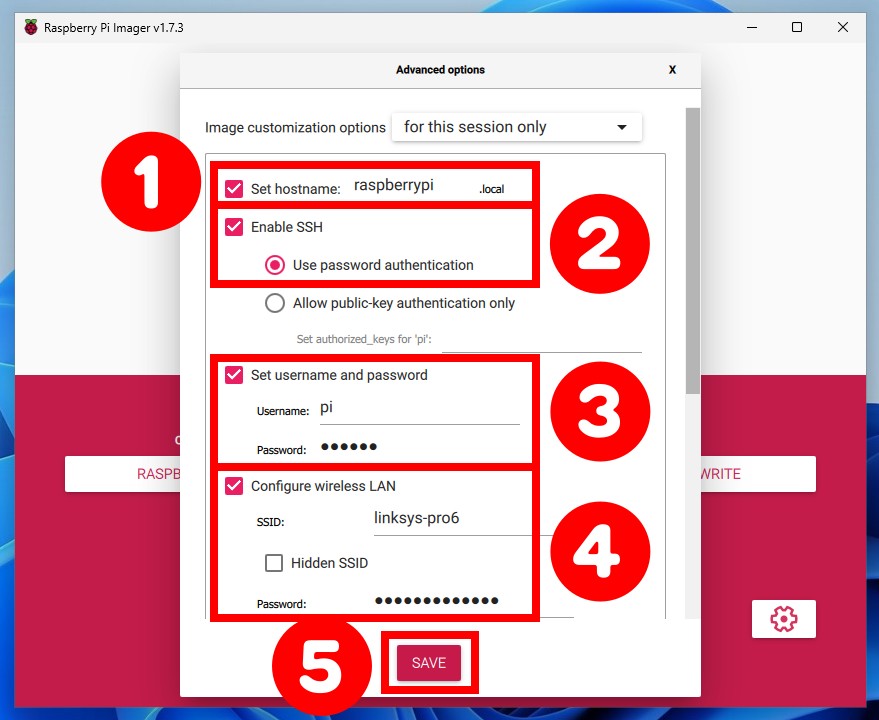
To open and configure additional options, click the gear icon in the bottom right corner of the app.

Give your Raspberry Pi OS installation a name to identify the device on your local network. For our example, we used “raspberrypi,” but you can choose another based on your personal preferences.
Tick the “Enable SSH” checkbox and ensure the “Use password authentication” option is selected.
Tick the “Set username and password” checkbox and enter the username and password you’ll use to access your Raspberry Pi device via SSH remotely.
To allow the Raspberry Pi to connect to your Wi-Fi network, tick the “Configure wireless LAN” checkbox and enter the name of the network and the password to connect to it.
When you’re done, click the “SAVE” button.
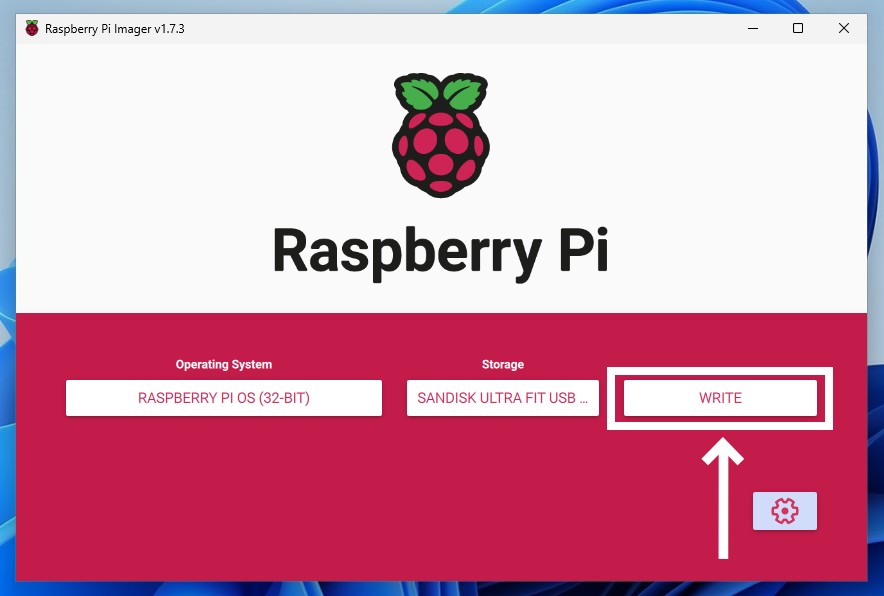
2.4 Write Raspberry Pi OS to microSD Card / USB Stick
Everything is now in place to start installing Raspberry Pi OS on our microSD card or USB stick. To begin the installation process, press the “WRITE” button.
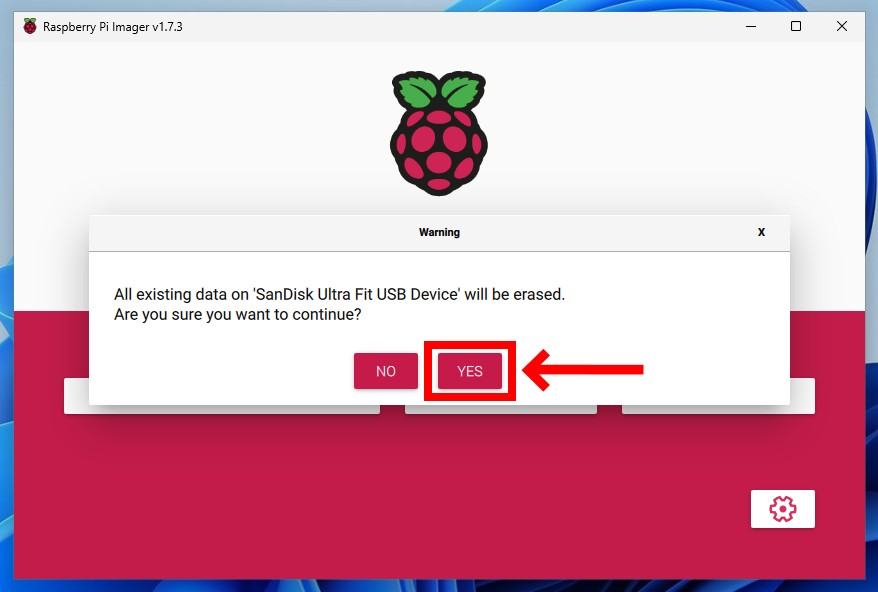
Raspberry Pi Imager will warn you that it will wipe all available data on your microSD card. Confirm your approval to proceed by clicking the “YES” button.
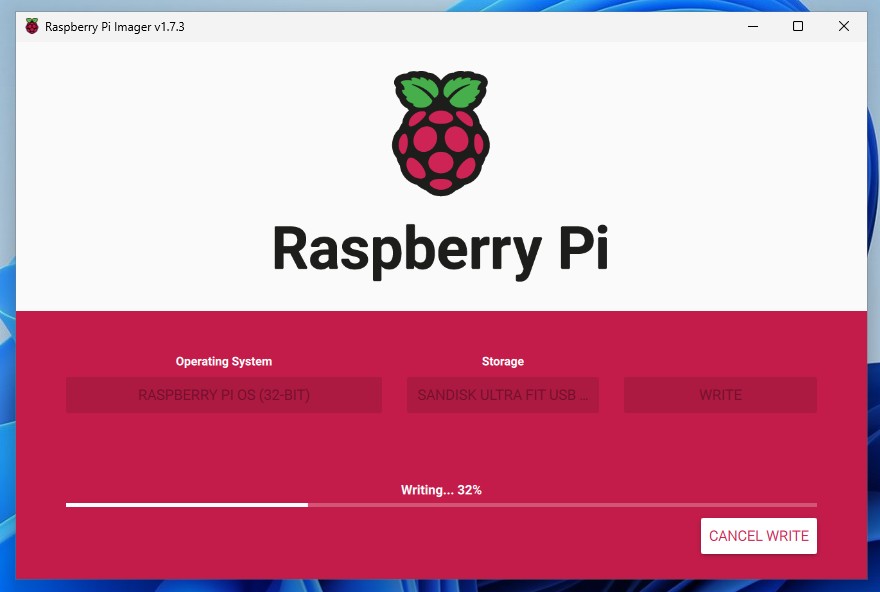
The installation process will start. Depending on your Internet connection’s speed, installing Raspberry Pi OS on your microSD card or USB stick will take between 5 and 15 minutes.
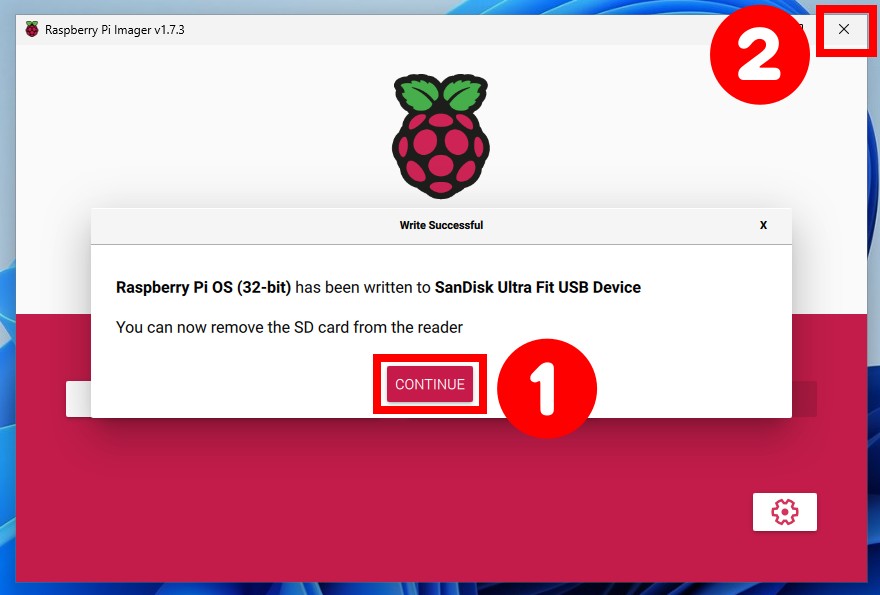
When the installation is complete, the tool will notify you that you can safely remove your microSD card or USB stick. Confirm with the “CONTINUE” button and close the Raspberry Pi Imager app.
3. Booting Your Raspberry Pi
After you’re done writing the Raspberry Pi OS, you’re ready to go. First, insert the microSD card or USB stick into the Raspberry Pi. Then, connect it to a monitor, keyboard, and mouse and plug the Pi into power it on.
Initialization of your new Raspberry Pi OS system will begin as the device reboots itself once or twice to apply its initial settings. The process will take about 1-2 minutes as you will be automatically logged into your brand new Raspberry Pi OS at the end.
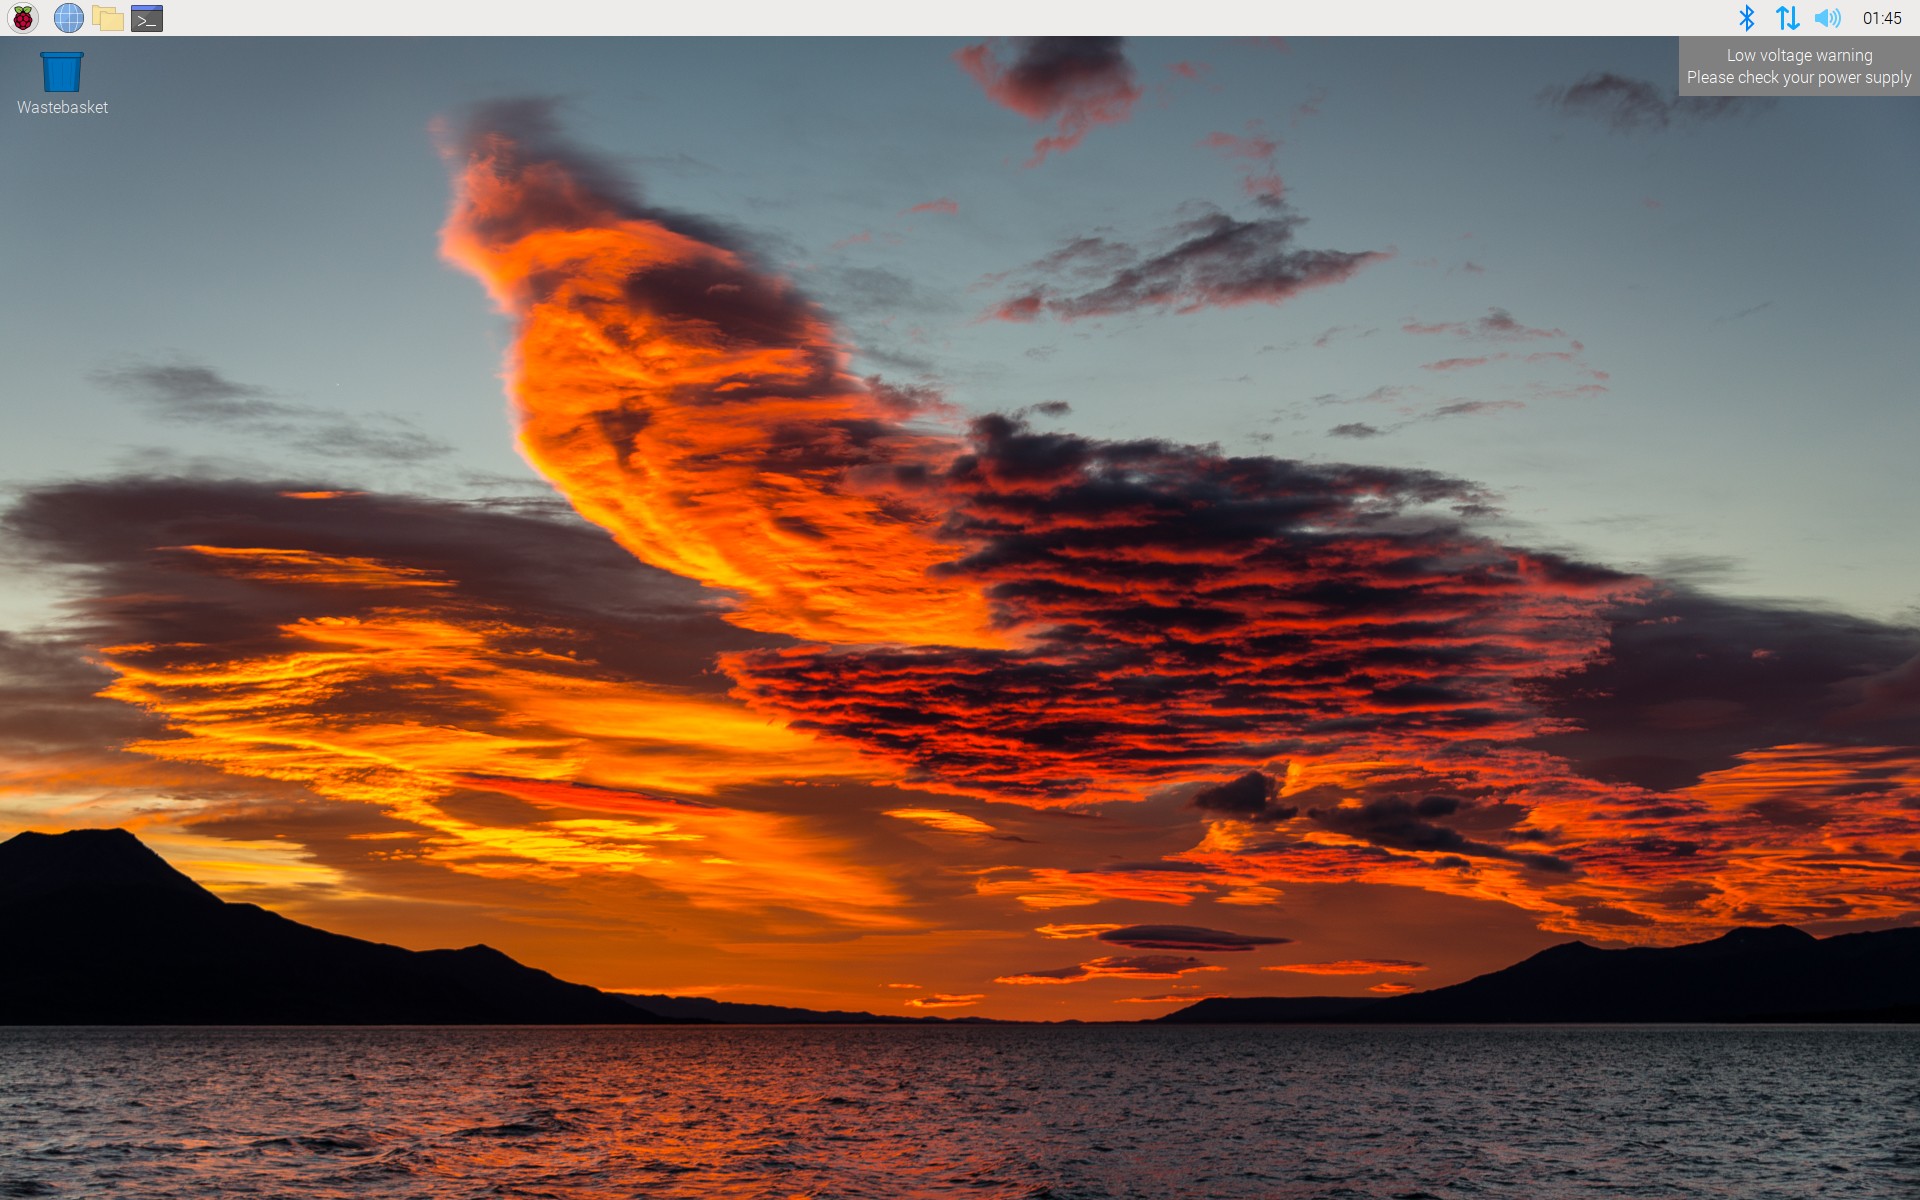
Congratulations! Enjoy your new Raspberry Pi OS. But, before we complete this guide, a few finishing touches are required.
4. Raspberry Pi OS Post-Installation Steps
The first thing to do after installing Raspberry Pi OS is to ensure that your new operating system has the most recent security updates applied.
4.1 Install Security Updates
This task is effortless to complete using the Terminal app. Please open it and run the two commands listed below.
sudo apt update
sudo apt upgrade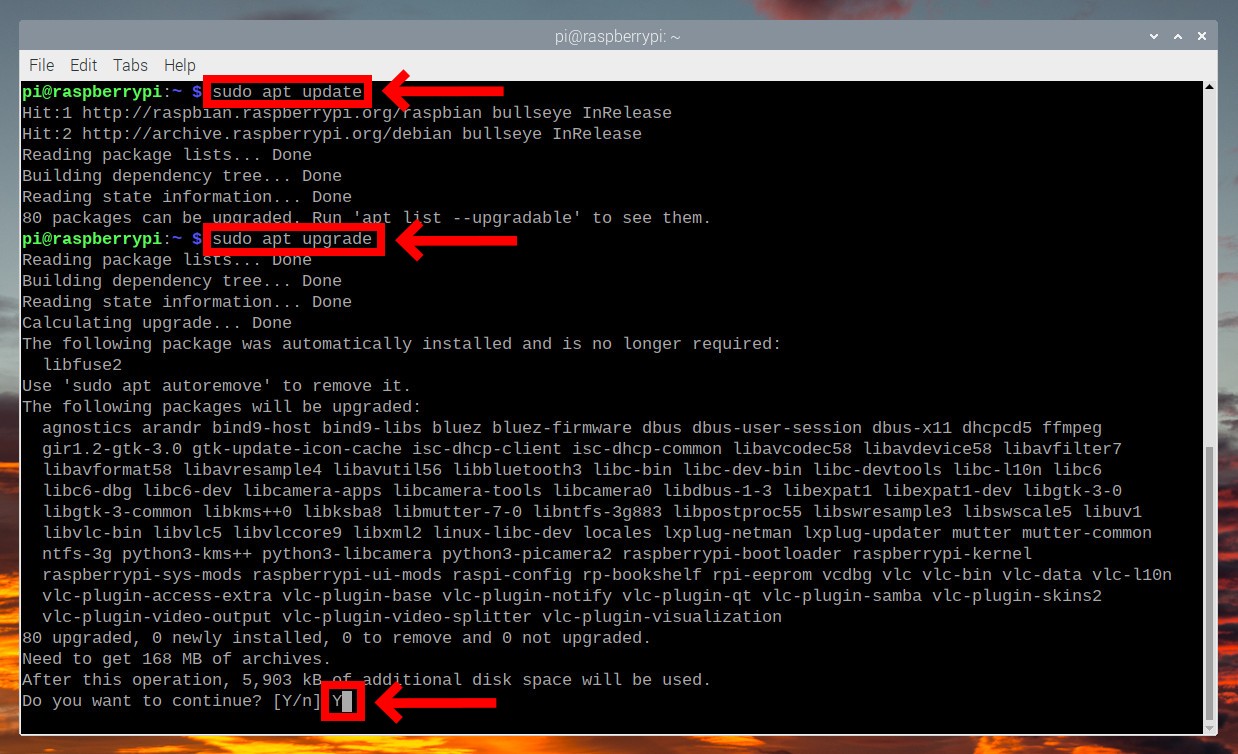
After the process is complete, restart the system. In addition, there is nothing to be concerned about if you face the Linux terminal for the first time. With a bit of practice, you’ll feel right at home.
As we said before, the Raspberry Pi OS is based on Debian Linux; thus, it inherits almost all of its command-line management tools. One of the most important is the APT package manager, which we just used to update the system’s software and install the latest security patches.
Our excellent “How to Use apt Command to Manage Packages in Linux” guide will significantly help if you want to learn more about managing software in Raspberry Pi OS from the command line.
4.2 Install Additional Apps
Finally, we will look at the software available on your new Raspberry Pi OS. Of course, one of the first things you’ll want to do is install additional applications to help you with your daily tasks.
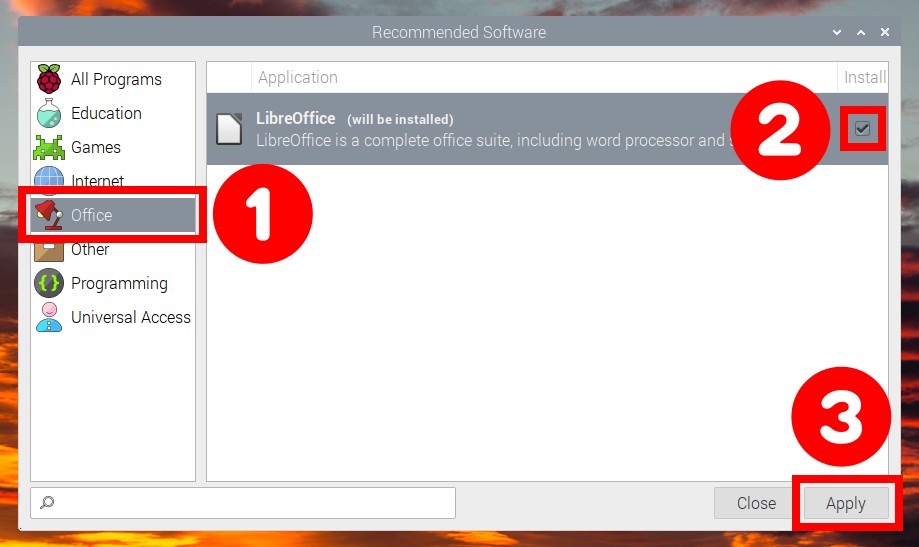
Raspberry Pi OS has an excellent graphical installer that includes recommended apps for installation. For example, the office suite. So let’s install it.
Go to the start menu and click “Preferences” -> “Recommended Software.” Select “Office” on the left, tick the checkbox and confirm with the “Apply” button. Wait for the installation to complete and enjoy your new free office suite.
You can proceed similarly with all other applications available in the “Recommended Software” app. But most importantly, have fun and enjoy your new Raspberry Pi OS.
Conclusion
Congratulation! You successfully installed Raspberry Pi OS with a desktop environment on your Raspberry Pi device. You’ve also installed the most recent security patches and upgraded your software.
Gaining experience with this operating system lays the foundation for even more fascinating projects that Raspberry Pi devices are capable of.
I hope I have helped you. Any comments, opinions, or suggestions are welcomed in the section below.


two minor mistakes in prerequisites:
SD card for Raspberry Pi 1 B
Mini HDMI to HDMI for Raspberry Pi Zero versions