Have you ever dreamed of setting up your personal Netflix minus the monthly subscription fees? Well, you’re in the right place. Enter Jellyfin, a free and open-source media server that puts you in control of your media collection.
To install it, we will use Docker Compose to streamline the installation. If you’re scratching your head thinking, “Docker, what?“ don’t worry! I’ll break everything down into bite-sized, easy-to-follow steps.
By the end of this guide, you’ll have a Jellyfin Media Server humming along, ready to serve your favorite shows and movies. So, let’s dive in.
Prerequisites
Before we start, let’s ensure we have all our digital tools in the box. With that said, installing Docker and Docker Compose is required to deploy a containerized Jellyfin.
So, if you don’t already have Docker installed, any of the following guides will be helpful:
- How to Install Docker on Ubuntu 24.04 LTS
- How to Install Docker on Debian 13 (Trixie)
- How to Install Docker on AlmaLinux 10
- How to Install Docker on Rocky Linux 10
- How to Install Docker on Arch Linux
- How to Install Docker on Fedora
- How to Install Docker on Linux Mint 22
- How to Install Docker on Raspberry Pi
The other essential component is Docker Compose. Remember, it is provided separately from Docker. Therefore, you must install Docker before adding Docker Compose; otherwise, Compose will not function.
Installing it is pretty simple, even if it is not already on your Linux system. To install Docker Compose, type the following two commands:
sudo curl -L "https://github.com/docker/compose/releases/latest/download/docker-compose-linux-$(uname -m)" -o /usr/local/bin/docker-compose
sudo chmod +x /usr/local/bin/docker-composeCode language: Bash (bash)
Install Jellyfin with Docker Compose
It is time to get to the installation, armed with all the necessary tools.
Step 1: Setting up the Working Directory
The first step is to create the project directory in which our Docker Compose deployment file will be placed. Then switch to it; from here on, you need to execute all commands further down in this guide from that location.
mkdir jellyfin
cd jellyfinCode language: Bash (bash)
Step 2: Create a Docker Compose File
Next, we must create a “docker-compose.yaml” file, like a blueprint for our Docker setup. This file will define the services, volumes, ports, etc., telling Docker Compose what to do and how to set up our Jellyfin instance.
So, open your favorite text editor and paste the following content into it:
nano docker-compose.yamlCode language: Bash (bash)services:
jellyfin:
image: jellyfin/jellyfin
container_name: jellyfin
volumes:
- config:/config
- cache:/cache
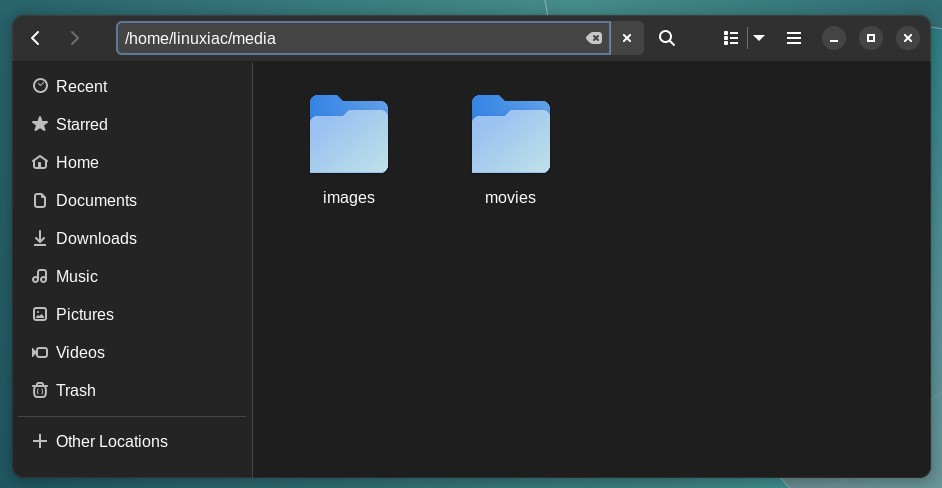
- /home/linuxiac/media:/media
ports:
- 8096:8096/tcp
- 7359:7359/udp
restart: unless-stopped
volumes:
config:
cache:Code language: YAML (yaml)Of course, don’t forget to change the directive “/home/linuxiac/media” in the file above’s “volumes” section with the full path to the directory that contains your media content, which Jellyfin will stream.
The directory will be mounted in the Jellyfin container’s filesystem in “/media.” It is where your movies, photos, music, etc., are expected to reside. For this guide, I have placed two directories inside it containing movies and photos.
Don’t forget to change the time zone (“TZ “) to the correct one for you. A full list of all such can be found here.
Step 3: Deploy Jellyfin with Docker Compose
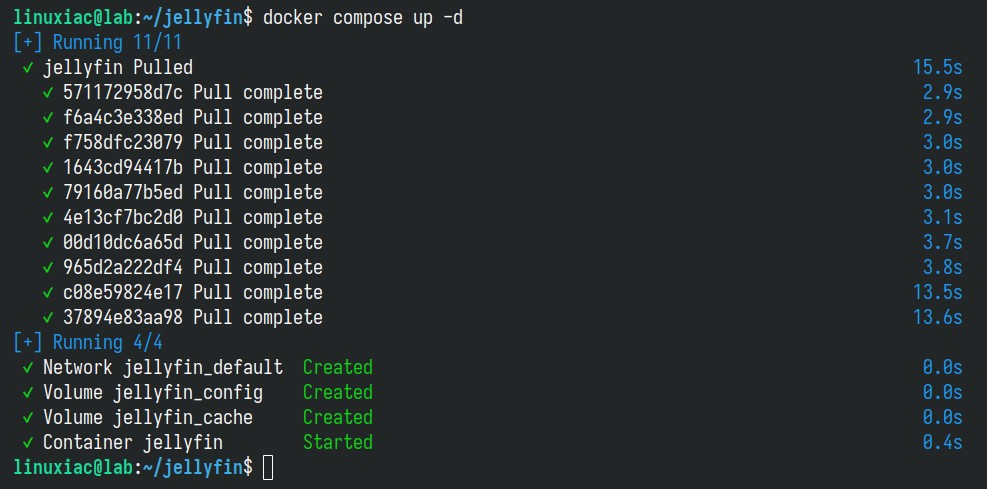
With the “docker-compose.yaml” file defined, we are all set to run our dockerized Jellyfin instance using Docker Compose. So, ensure you are in the directory containing the file, and execute the following command to start and run the container in the background:
docker compose up -dCode language: Bash (bash)The Docker image will start downloading. In the end, you should see a screen similar to the one below, informing you that your Jellyfin server installation has been successfully deployed and is up and running.
Access & Configure Jellyfin
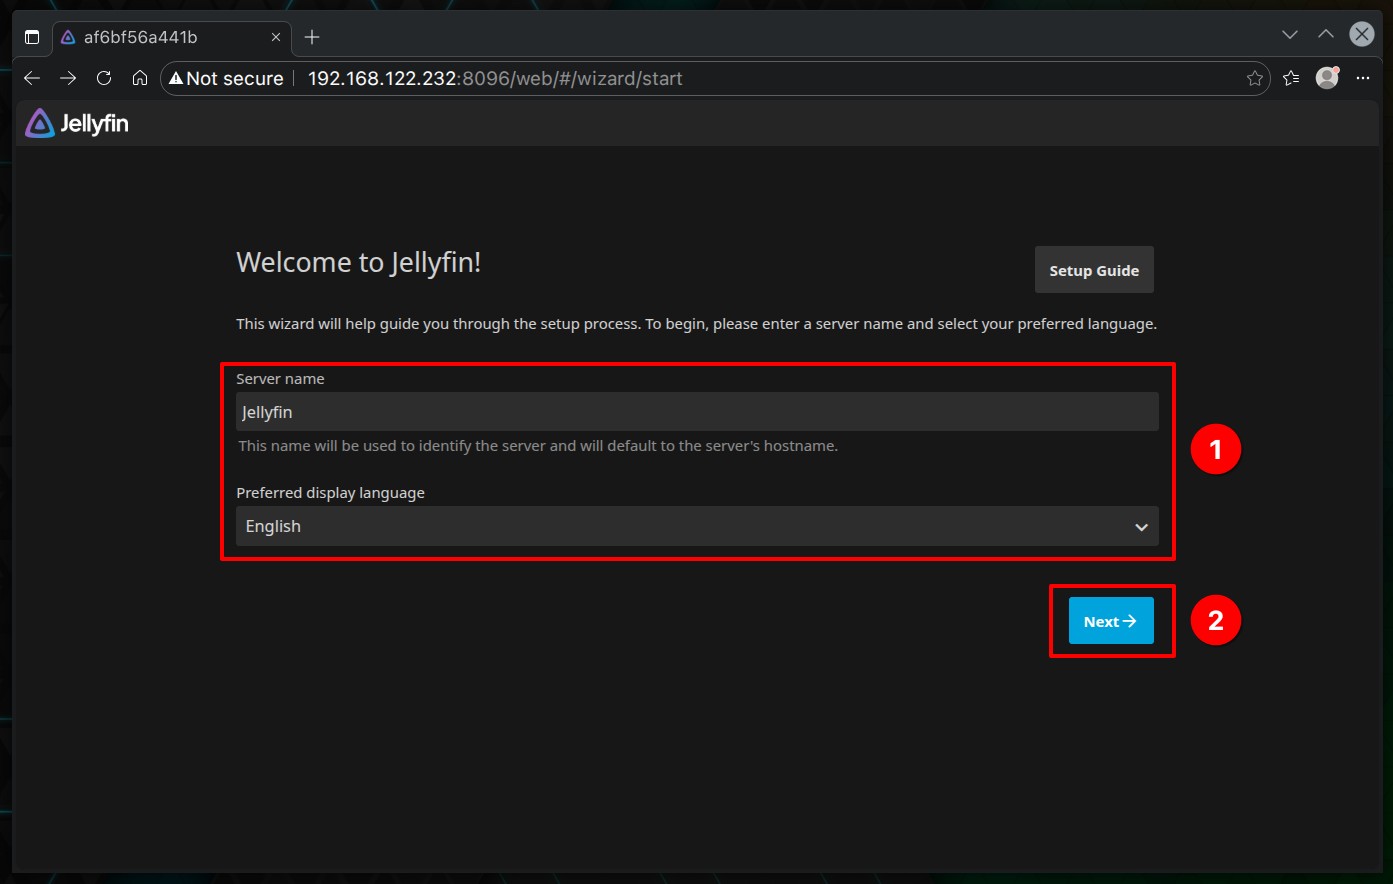
Once the container is up and running, you can access the Jellyfin web interface by navigating to “http://your-server-ip:8096” in your web browser. If you are accessing it from the same machine the container is running on, you can also use “http://localhost:8096.”
The Jellyfin wizard will greet you. Set the name of the server and choose your preferred display language. Then, click “Next.”
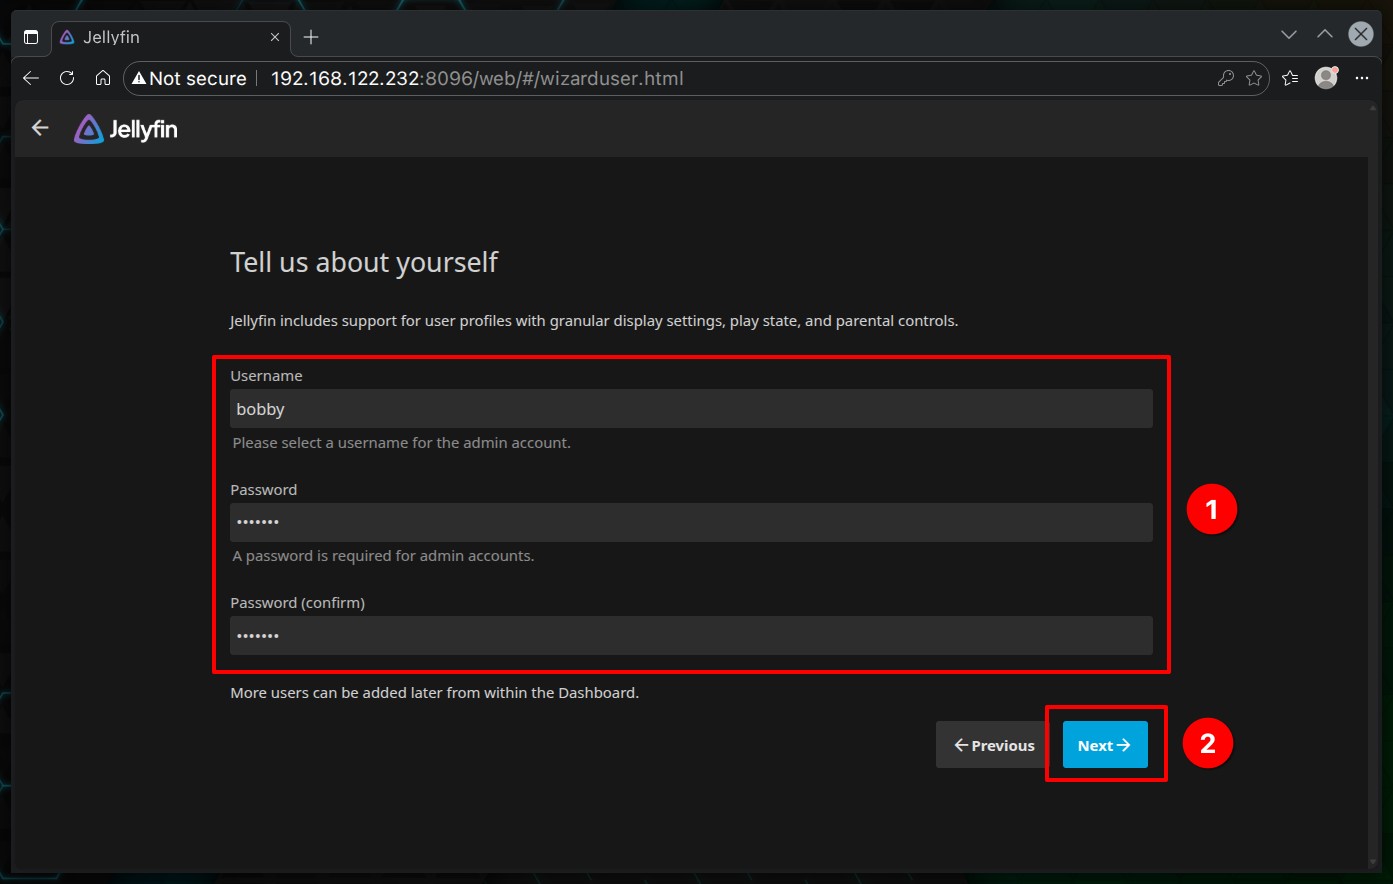
The Jellyfin server’s admin account will be created on the next screen. Enter a username and password of your choice and continue by clicking “Next.”
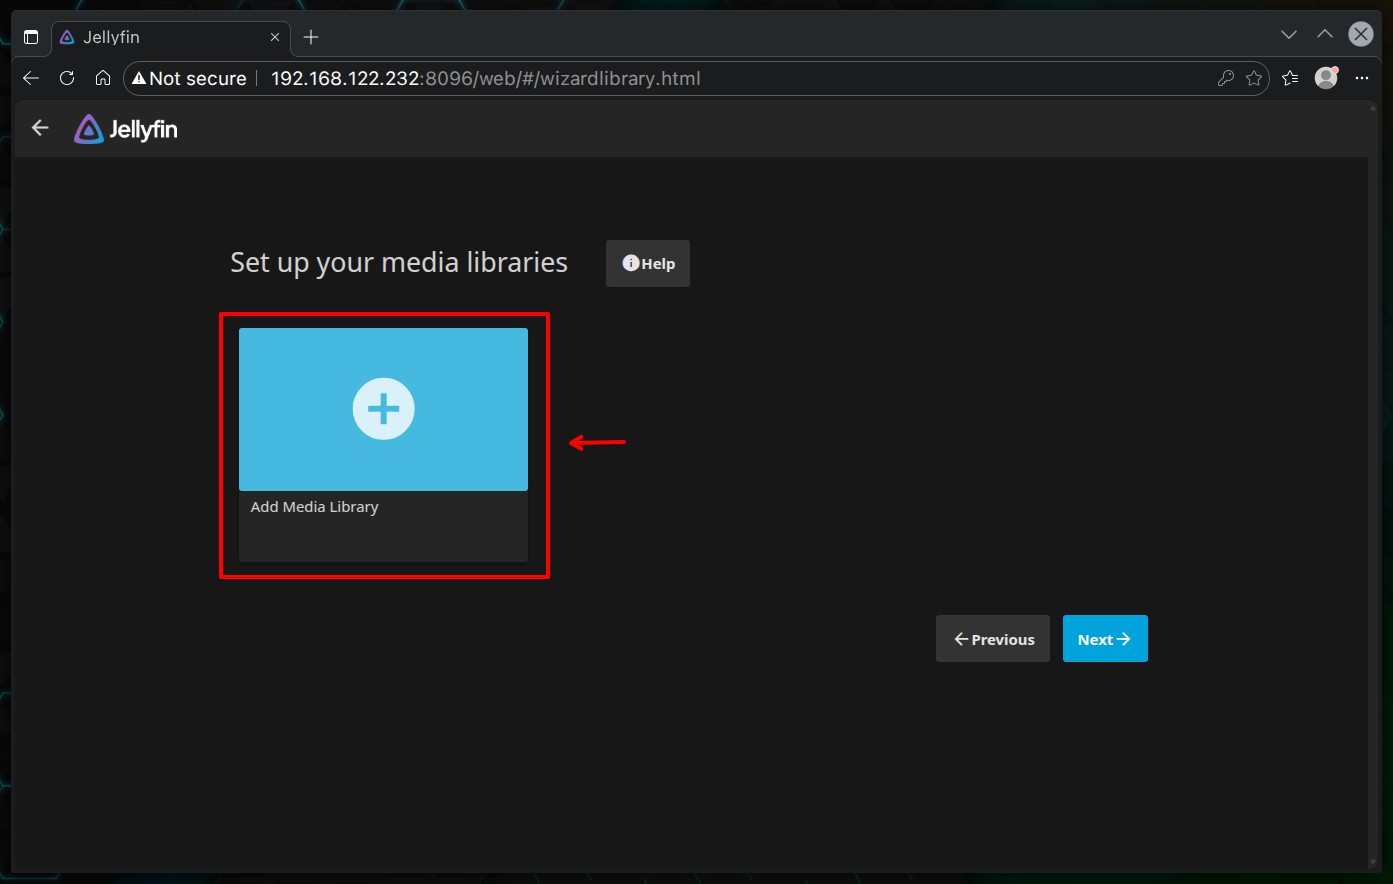
It is time to tell Jellyfin where our media content is. Click on the “Add Media Library” button.
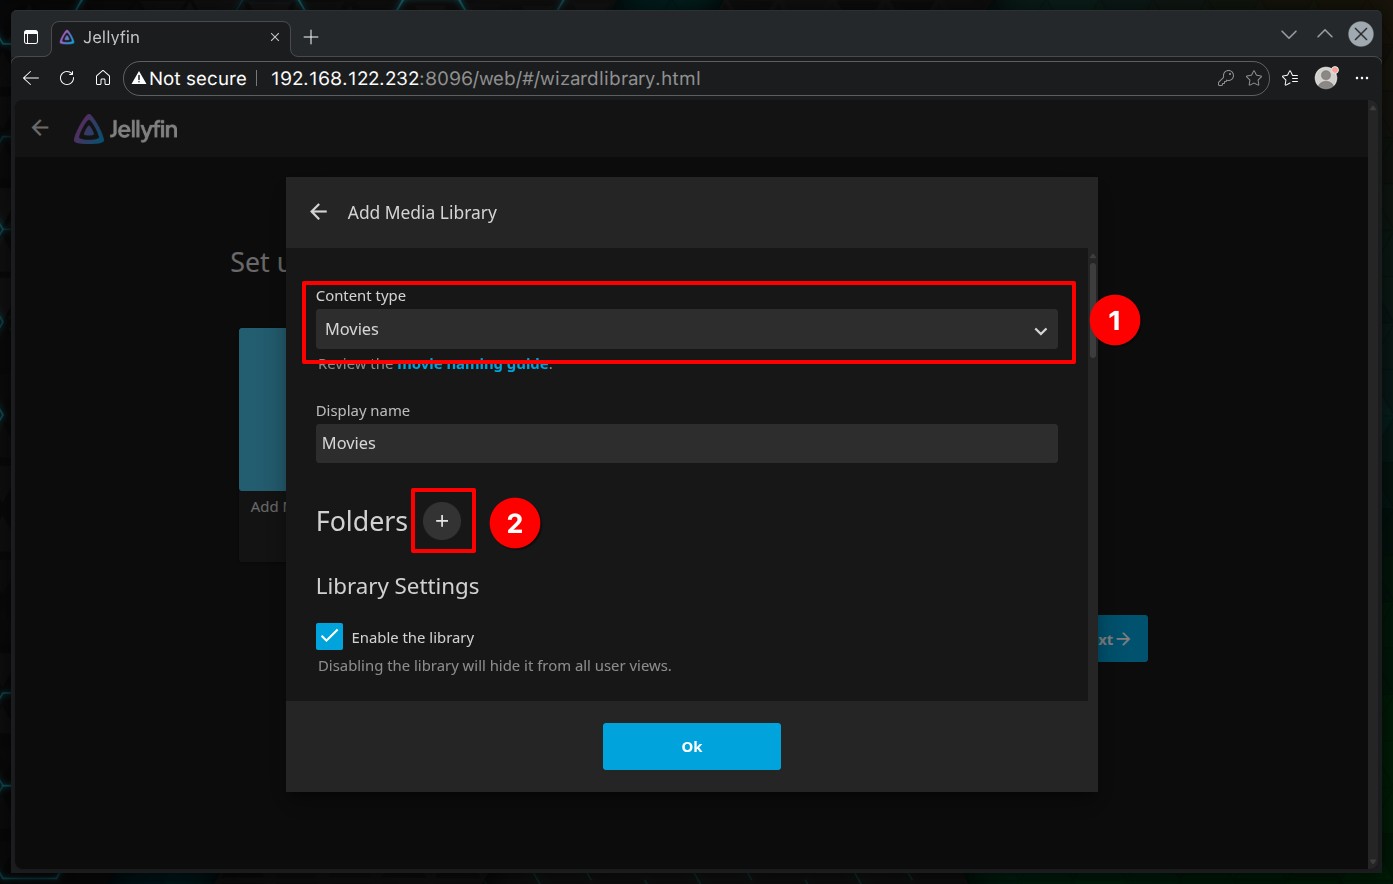
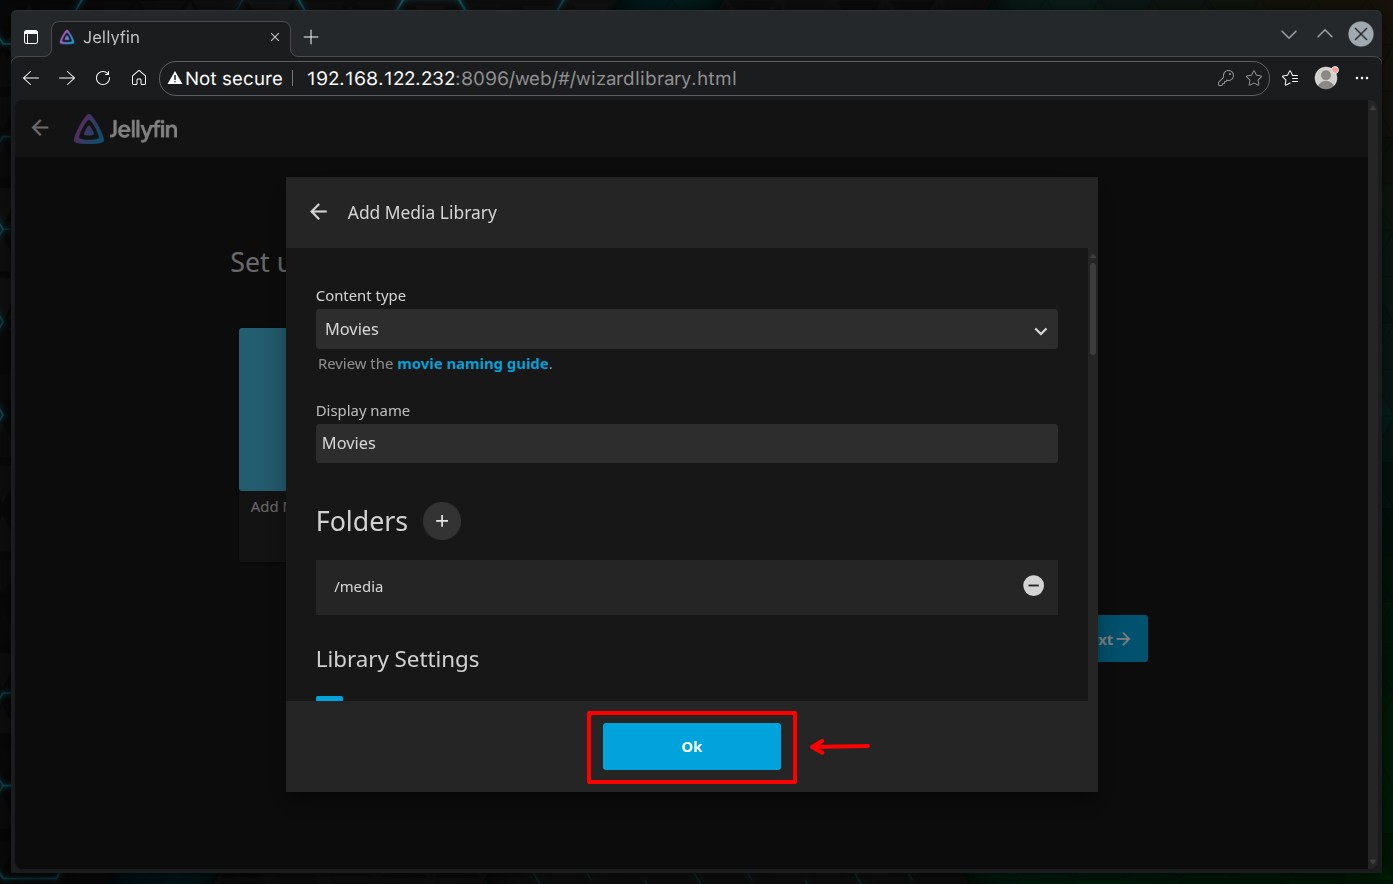
Select the content type, such as “Movies,” “Music,” “Photos,” etc., then click on the plus (“+ “) button to specify where the directory is physically located in the container’s file system. In our case, we will add a directory containing movies.
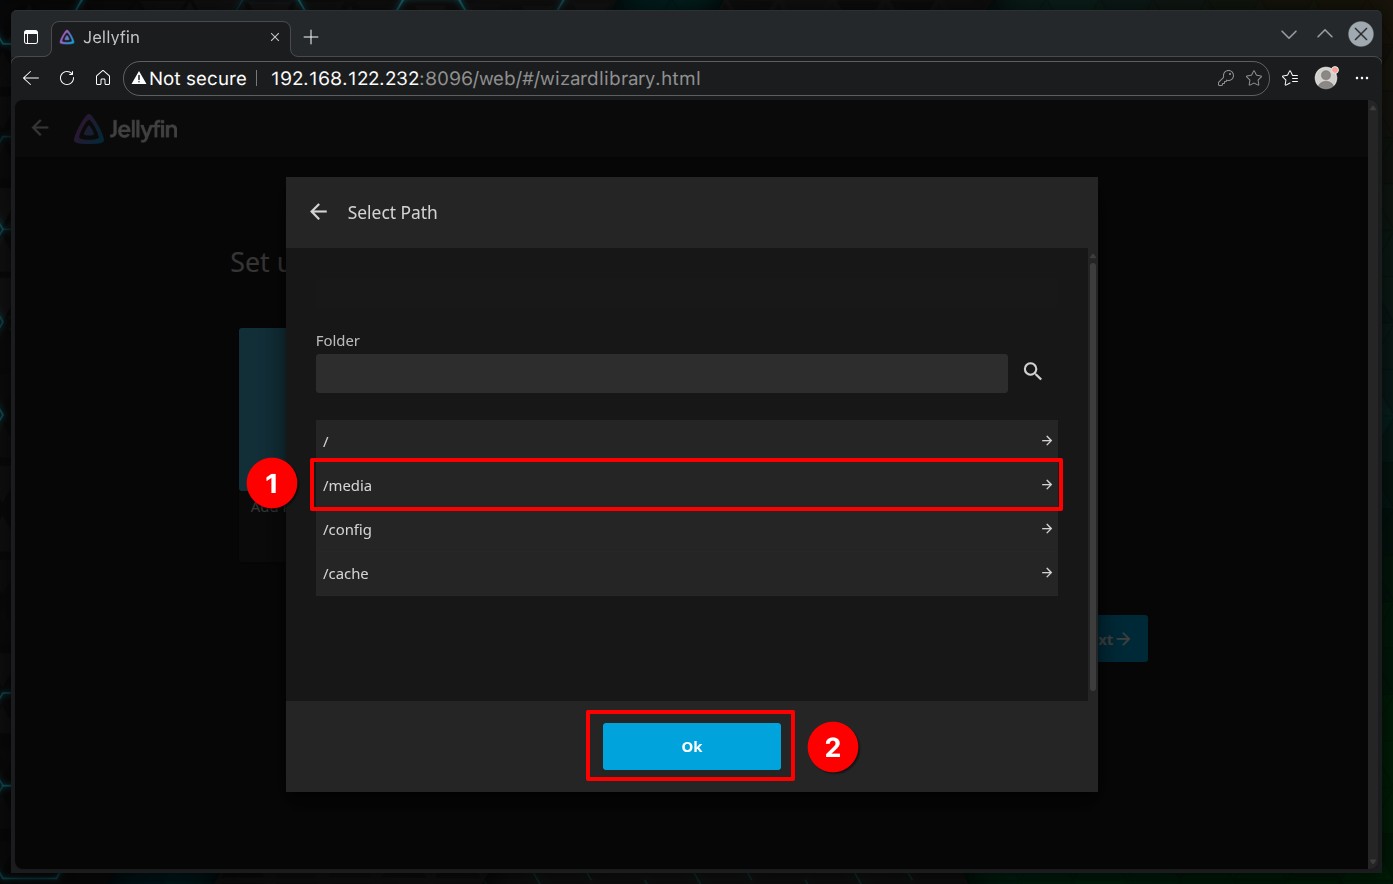
To navigate, simply click on the directory names that you see until the complete path – for example, “/media/movies” – is presented in the “Folder” field.
Important clarification! This is the path to the filesystem inside the container, referenced in the “volumes” part of our “docker-compose.yaml” file. Not to be confused with that of the server on which the container itself is running.
In other words, on our host, the directory is, for example, “/home/linuxiac/media,” but inside the container, it is mounted as “/media.”
The directory will be previewed in the “Folders” section, so we can move on by clicking the “OK” button, keeping the other settings at the default.
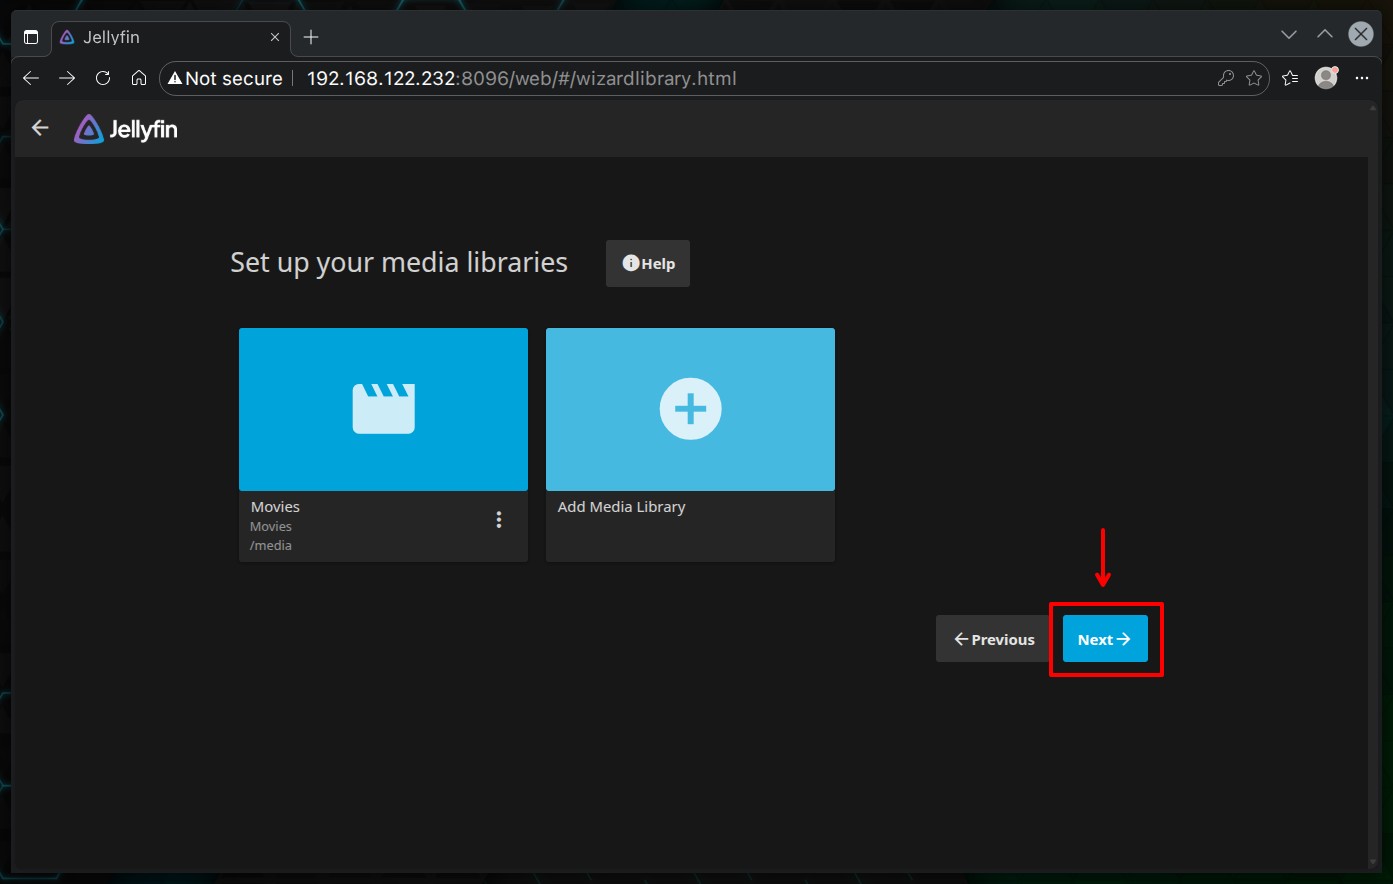
On the next screen, you will view the currently added directories. If you want, add others following the steps described above.
Don’t worry about having to add all at once now. At a later stage, you can modify the settings of each one, remove, or add a new one, as we will show you at the end of this guide. So, just click on the “Next” button to continue. We’re almost done.
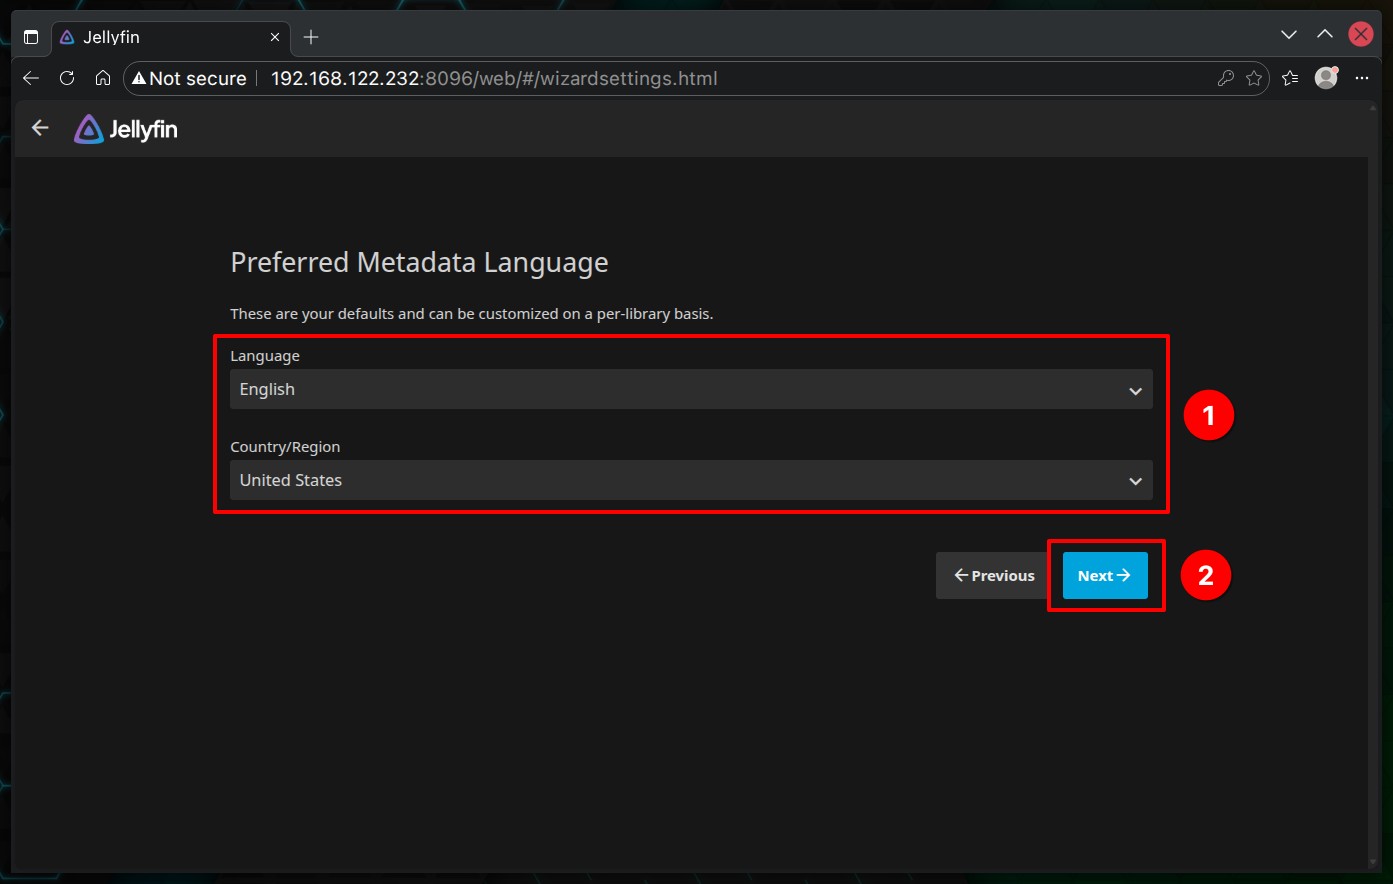
Choose the language you prefer to retrieve metadata for library media content and click “Next.”
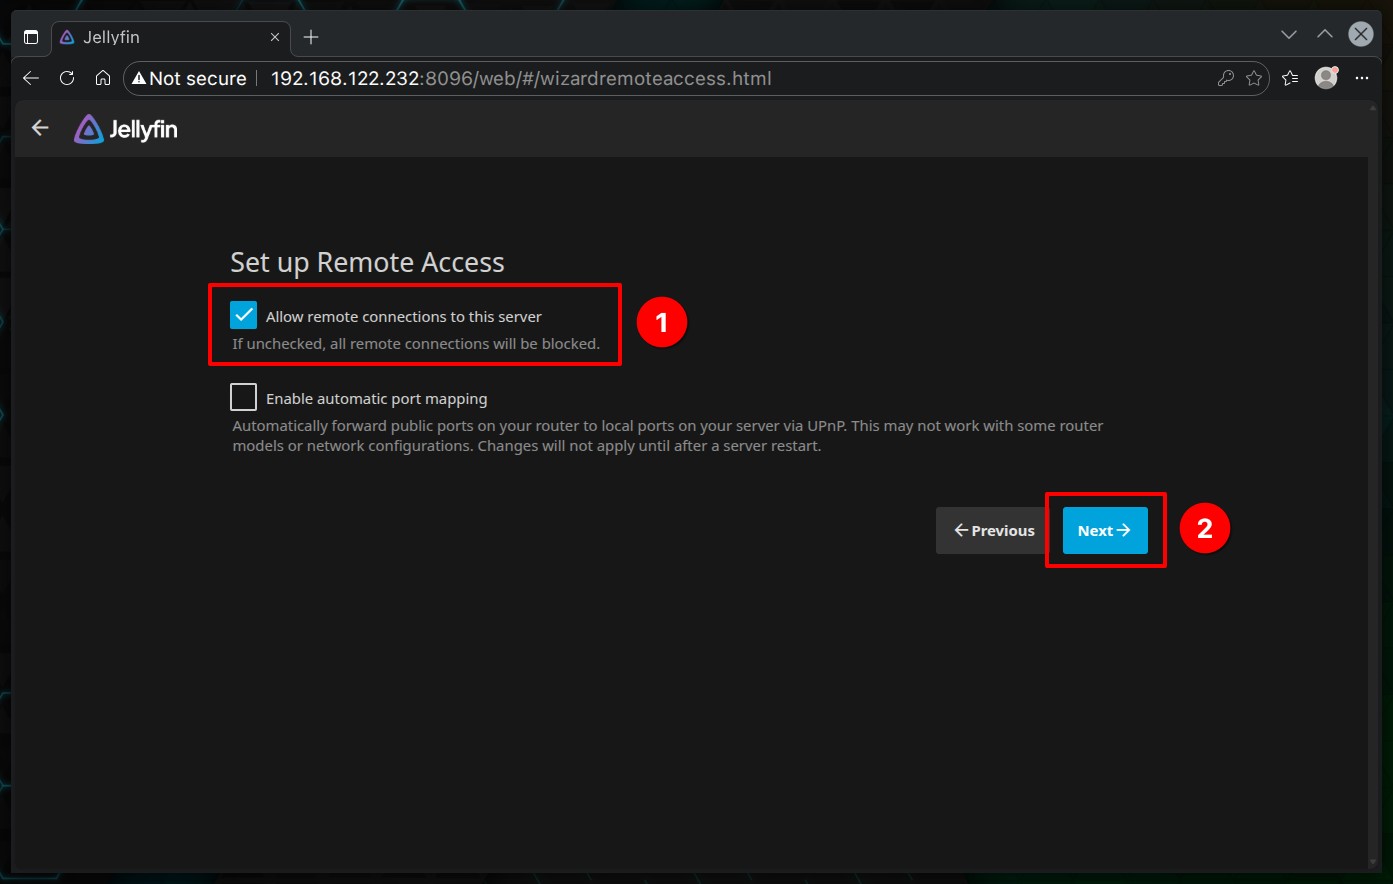
On the next screen, keep “Allow remote connections to this server” checked. Otherwise, you won’t be able to connect other devices, such as your phone, tablet, smart TV, etc., to the Jellyfin server.
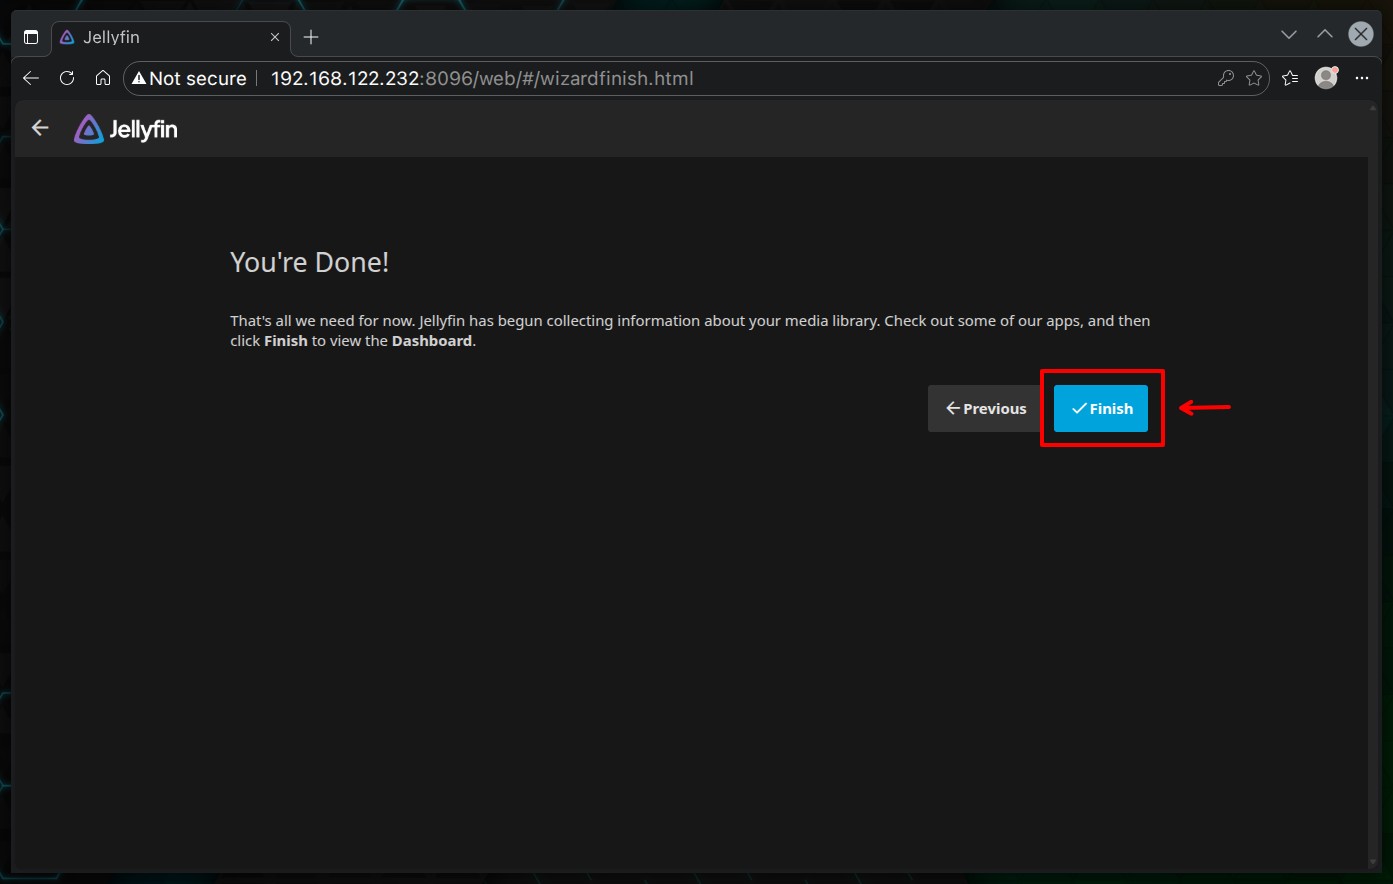
And that’s it! Click the “Finish” button to complete and save the settings you made to the Jellyfin server.
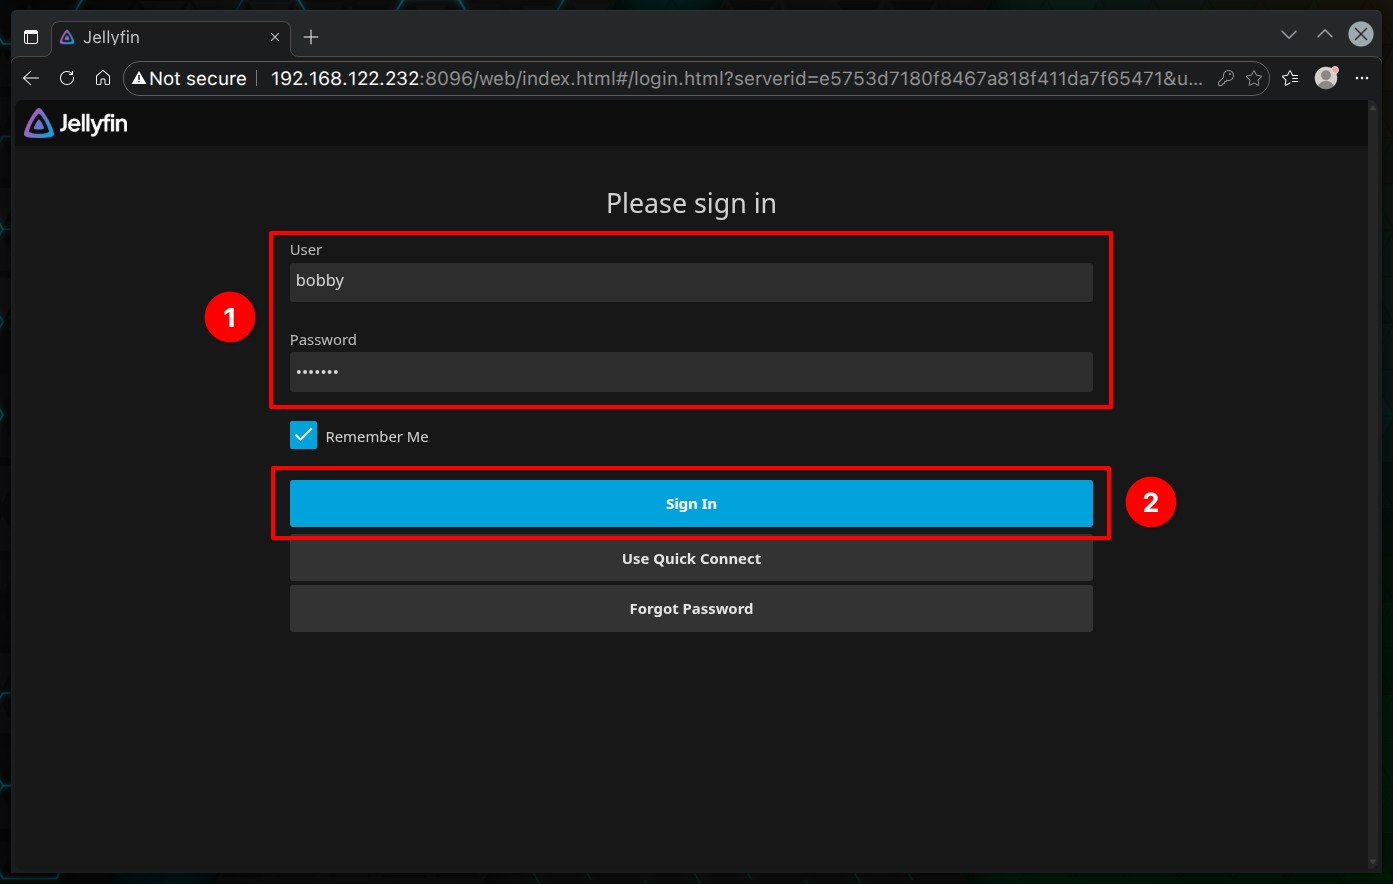
You will be redirected to a screen to log in to your Jellyfin server. Enter the admin username and password you created earlier and hit “Sign In.”
The dashboard of your brand new Jellyfin server will welcome you, and as we can see, our “Movies” library is there. You can click on it to explore its content.

Add, Edit, Remove Media Libraries
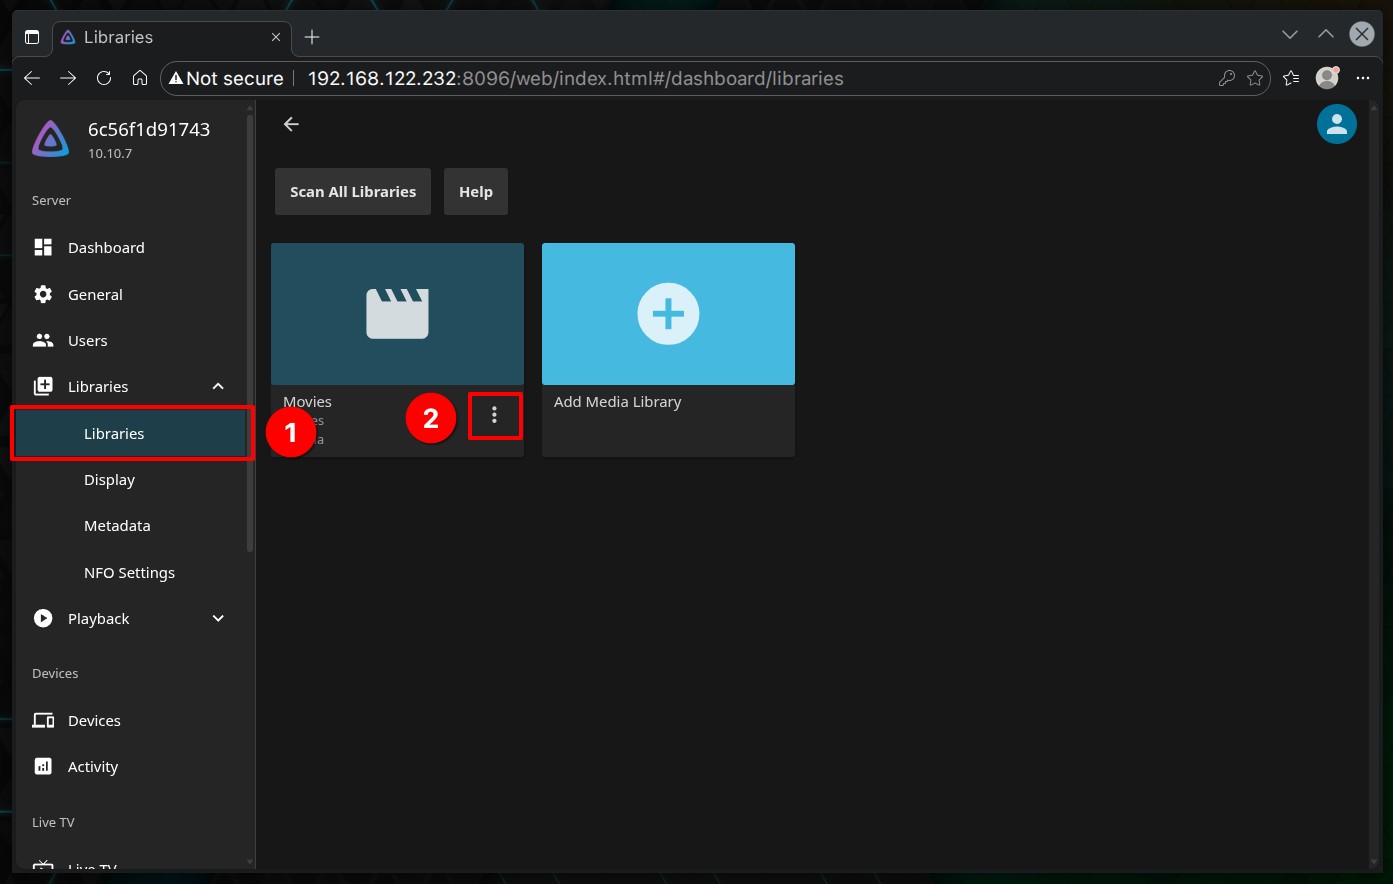
Click the hamburger menu in the upper left corner of the screen and choose “Dashboard” from the list of options to add, edit, and remove a library from the Jellyfin server.
Then, choose “Libraries” from the left and hit the “+” button to add a new one. To edit the settings of an existing one or remove it, use the icon with the three vertical dots on it.
Jellyfin Client Applications
To install and connect to your Jellyfin media server, click this link to get the client apps for various devices, including smartphones, tablets, and smart TVs.
Conclusion
And there you have it – a powerful, flexible, and open-source media server at your fingertips, ready to stream content to all your devices. Remember, the beauty of this setup is that it is entirely yours to customize, explore, and expand as your media collection grows and evolves.
As you can see, deploying the Jellyfin media server with Docker Compose simplifies the installation and management of the media server, making it accessible and easy to set up.
Finally, I highly recommend you check out our “How to Install and Use Docker Compose” guide to familiarize yourself with the basic Docker Compose commands and easily manage your new Jellyfin deployment.
For more information, check out the official documentation. Happy watching!


Thanks, I followed this and it worked!
For some reason I had to manually change my DNS server, but that's probably something weird on my end.
But when you add Music library there is no possibility to play it on Android TV 😛