
In the world of containerization, where Docker has emerged as the leading platform for developing, shipping, and running applications, the ability to monitor application performance and health is critical.
However, sifting through logs can be daunting without the right tools. Enter Dozzle, a user-friendly, real-time log monitoring solution designed specifically for Docker.
It helps quickly identify and address issues, understand system behavior, and ensure that applications are running smoothly. In this guide, we’ll walk you through a quick and easy installation process that significantly enhances your capacity to oversee the activities within your containerized services.
But before we proceed with the installation, let’s introduce Dozzle and explore its features.
What’s Dozzle?
Dozzle is a lightweight, web-based application that provides real-time log monitoring for Docker containers. It stands out for its user-friendly interface and easy integration, making it a go-to solution for developers and system administrators who want to monitor their Dockerized environments closely.
Here are some of the key features that highlight Dozzle’s capabilities as a real-time Docker log files viewer:
- Real-time Monitoring: Dozzle captures logs from Docker containers in real-time, allowing users to see what’s happening within their applications at any given moment. This immediate feedback is crucial for diagnosing issues quickly and efficiently.
- Easy Installation and Use: Dozzle can run in minutes with a simple setup process. It requires minimal configuration, making it accessible even to those who are not deeply familiar with Docker’s intricacies.
- Web-based Interface: Dozzle provides a sleek, web-based GUI that can be accessed from any web browser, offering convenience and accessibility. The interface is intuitive, ensuring users can easily find and monitor the logs they care about.
- Container Selection: Users can select specific containers to monitor, making it easier to sift through logs when running multiple containers. This selective monitoring helps in focusing on the logs that matter most.
- Search and Filter: Dozzle includes search and filtering capabilities, enabling users to locate specific log entries quickly. This feature is particularly useful in pinpointing the cause of an issue without manually combing through thousands of log lines.
- Live Tail Feature: Similar to the
tail -fcommand, Dozzle’s live tail feature allows users to continuously monitor log output in real time. This feature is indispensable for tracking down real-time issues or monitoring system behavior live. - No Database Required: Dozzle doesn’t store logs in a database. Instead, it streams them directly from Docker, ensuring that it remains lightweight and doesn’t introduce additional overhead or complexity to your system.
- Support for Multiple Containers: Dozzle can monitor logs from multiple containers simultaneously, providing a comprehensive overview of your Docker environment in a single dashboard.
- Customizable Viewing Options: Users can customize how logs are displayed, including adjusting the refresh rate and choosing between light and dark themes for better visibility according to individual preferences.
With that out of the way, let’s proceed to the main task: installing Dozzle.
Prerequisites
Before we set sail, let’s ensure we have all our digital tools in the box. In light of this, installing Docker and Docker Compose is required to deploy a containerized Dozzle.
So, if you don’t already have Docker installed, any of the following guides will be helpful:
- How to Install Docker on Ubuntu 24.04
- How to Install Docker on Debian 12 (Bookworm)
- How to Install Docker on Arch Linux
- How to Install Docker on AlmaLinux / Rocky Linux
- How to Install Docker on Fedora
- How to Install Docker on Linux Mint 22
- How to Install Docker on Raspberry Pi
The other essential component is Docker Compose. Remember, it’s provided separately from Docker. Therefore, you must have the Docker installed before adding Docker Compose to the picture; otherwise, Compose will not function.
But fear not – installing it is pretty simple, even if it is not already on your Linux system. To install Docker Compose, type the following two commands:
sudo curl -L "https://github.com/docker/compose/releases/latest/download/docker-compose-linux-$(uname -m)" -o /usr/local/bin/docker-compose
sudo chmod +x /usr/local/bin/docker-composeCode language: Bash (bash)
Install Dozzle with Docker Compose
It’s time to get to the installation, armed with all the necessary tools.
Step 1: Setting up Working Directory
The first step is to create the project directory in which our Docker Compose deployment file will be placed. Then switch to it; from here on, you need to execute all commands further down in this guide from that location.
mkdir dozzle
cd dozzleCode language: Bash (bash)
Step 2: Configuring a User to Access Dozzle
Dozzle is designed to be easily accessible without needing to log in by default. However, if you prefer, there’s an option to set up a username and password for added security.
So, before we dive into deployment, let’s first set up everything needed to ensure Dozzle’s web interface is secure and requires login credentials for access.
Let’s set up a folder to store our YML file, including the username and password configuration. This folder will also serve as a permanent storage solution for user data.
mkdir dozzle-dataCode language: Bash (bash)Now, let’s create a hashed password using sha256. Run the command below, and don’t forget to swap out “mypass” with the password you’d like to use.
echo -n 'mypass' | sha256sumCode language: Bash (bash)
Once you run the command, you’ll get a lengthy string of text. Make sure to save it somewhere. You might be wondering which user this password belongs to. Don’t worry; we’ll assign this password to a user right now.
Open up the terminal text editor you’re using and make a new file called “users.yml” inside the “dozzle-data” directory we set up just a little while back.
nano dozzle-data/users.ymlCode language: Bash (bash)Then, go ahead and copy and paste the content provided into that file.
users:
  admin:
    name: "Admin"
    password: "ea71c25a7a602246b4c39824b855678894a96f43bb9b71319c39700a1e045222"Code language: YAML (yaml)
Save the file, then exit. You might have noticed that the password we hashed just a bit earlier is assigned to a user called “admin.” Of course, you’re free to pick any username you like.
To add multiple users, just create a new password using the method you’re used to, enter the user’s name in the file, and include the password. For example, to add a user named John Doe with the username “john,” your “users.yml” file should end up looking something like this:
users:
  admin:
    name: "Admin"
    password: "ea71c25a7a602246b4c39824b855678894a96f43bb9b71319c39700a1e045222"
  john:
    name: "John Doe"
    password: "605fcc4bcef3ce81c818304b6e9e9074977a84be7493acae33ac1ab2e56d99dc"Code language: YAML (yaml)
Step 3: Create a Docker Compose File
Next, we must create a “docker-compose.yml” file, like a blueprint for our Docker setup. This file will define the services, volumes, ports, etc., telling Docker Compose what to do and how to set up our Dozzle instance.
So, open your favorite text editor and paste the following content into it:
nano docker-compose.yamlCode language: Bash (bash)services:
dozzle:
container_name: dozzle
image: amir20/dozzle:latest
ports:
- 9999:8080
environment:
- DOZZLE_AUTH_PROVIDER=simple
- DOZZLE_HOSTNAME=Lab2 Server
volumes:
- /var/run/docker.sock:/var/run/docker.sock
- ./dozzle-data:/dataCode language: YAML (yaml)The file’s content is straightforward. In the “ports” section, we’re setting up a connection where our local port 9999 is linked to port 8080 inside the container. This is the port we use to access the Dozzle web interface.
By setting the “DOZZLE_AUTH_PROVIDER,” we’re choosing to use a simple login system, which means you’ll just need a username and password that we’ve set up beforehand.
The “DOZZLE_HOSTNAME” setting is optional, allowing you to choose a descriptive name for your server. Without it, “localhost” will appear as the name in the web interface.
In the “volumes” section, we’re doing a couple of things. First, we connect the Docker socket inside the container to the one on the host machine. This allows the container to capture all the output (stdout/stderr) from other containers.
Then, we link our local “dozzle-data” folder to the container’s “/data” directory. Dozzle uses this location by default to look for the “users.yml” file, which is crucial for our simple authentication setup.
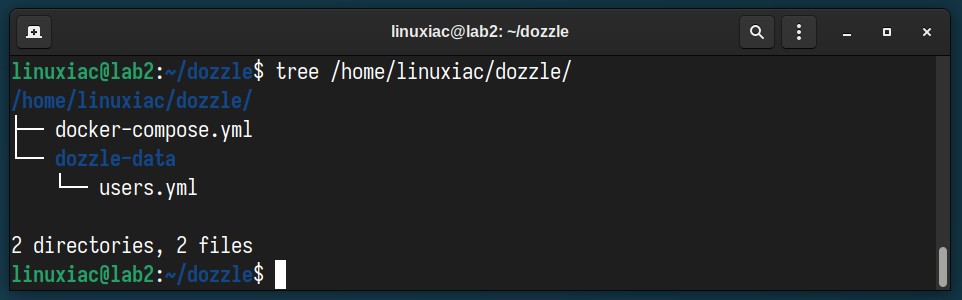
Before we start the deployment, please ensure your file structure is neatly organized, as shown below.
Step 4: Deploy Dozzle with Docker Compose
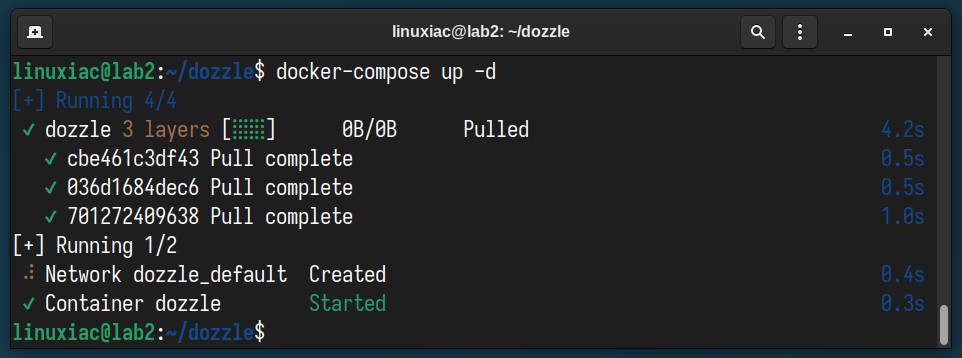
With the “docker-compose.yml” and “users.yml” files defined, we are all set to run our dockerized Dozzle instance using Docker Compose. So, ensure you are in the “dozzle” directory, and execute the following command to start and run the container in the background:
docker-compose up -dCode language: Bash (bash)The Docker image will start downloading. At the end, you should see a screen similar to the one below, informing you that your Dozzle installation has been successfully deployed and the container is up and running.
Access Dozzle’s Web UI
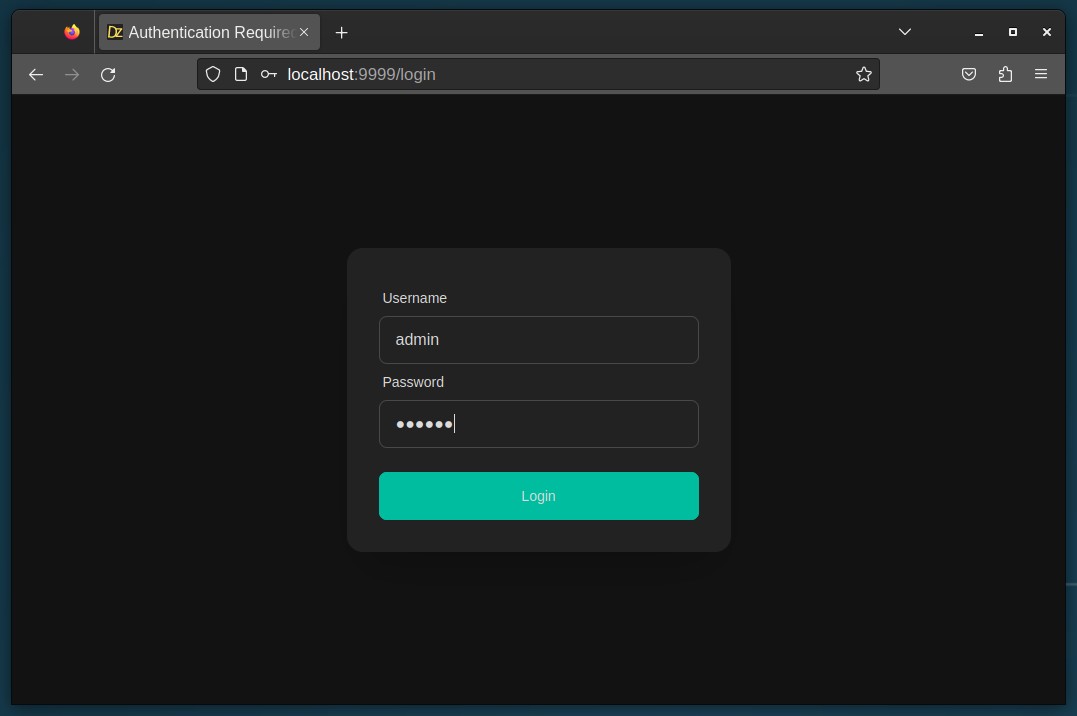
Once the container is up and running, you can access the Dozzle web interface by navigating to “http://your-server-ip:9999” in your web browser. If you are accessing it from the same machine the container is running on, you can also use “http://localhost:9999.”
You will be greeted by Dozzle’s login screen. Enter the username and password we created earlier and hit the “Login” button.
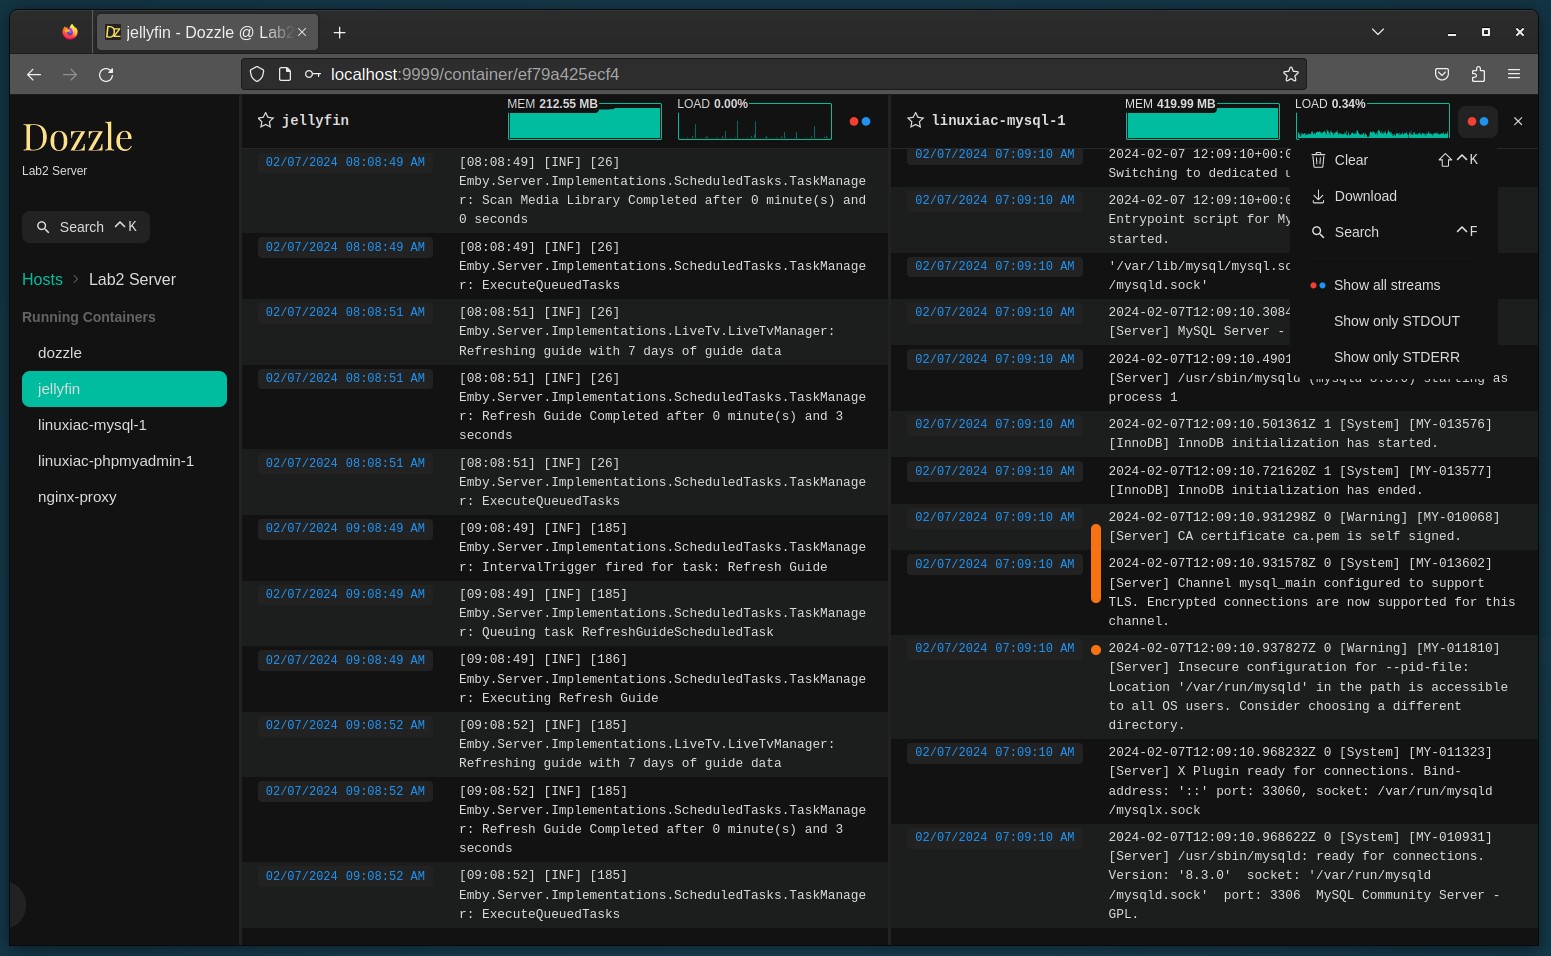
And that’s it – you’ve made it! Take a moment to pat yourself on the back for completing the task. Dozzle provides an intuitive web interface, allowing you to select any Docker container on the host and monitor its logs in real time.
Bottom Line
Congratulations on successfully navigating through the installation process of Dozzle, your new real-time Docker log viewer! By following the steps outlined in this guide, you’ve equipped yourself with a powerful tool designed to simplify and enhance the monitoring of your Docker containers.
As you explore Dozzle’s capabilities, remember that this tool is more than just a convenience; it’s a bridge to deeper insights into your applications’ performance and behavior. So, dive in, select your containers, and monitor their real-time activities.
Just a quick note—while our setup doesn’t use HTTPS, we strongly suggest adding an extra layer of security for production use. To enable HTTPS functionality, simply put Dozzle behind a reverse proxy such as Traefik, Nginx Proxy Manager, Caddy, etc.
I also highly recommend you check out our “How to Install and Use Docker Compose” guide to familiarize yourself with the basic Docker Compose commands and easily manage your new Dozzle deployment.
Furthermore, if you’re wondering, “OK, but how can I update the Dozzle container when a new version comes out?” there’s no room for worry. With the help of WUD and our detailed and easy-to-follow guide, “How to Keep Containers Up-to-Date with What’s Up Docker (WUD),” you’ll always have the most up-to-date Dozzle version.
Finally, for more information, visit the project documentation or its website. Thanks for your time! Please let me know in the comments section below if you have any questions.


I really like Dozzle. It’s a well-maintained and useful tool.
For an extra layer of security I run Dozzle as an unprivileged user and mount the docker socket via a socket proxy: https://github.com/wollomatic/socket-proxy/wiki
I also use this socket-proxy in another configuration for Watchtower.
(Note: https://github.com/wollomatic/socket-proxy is made by me. It works similar with another socket-proxy like https://github.com/Tecnativa/docker-socket-proxy )