
On June 30, 2024, CentOS 7 will reach End of Life (EOL). This means no more updates, which essentially sidelines it from the server lineup.
With that said, it’s not the best idea to wait until the eleventh hour to make a move. Being proactive is the way to go. So, if your Linux server is still rocking CentOS 7, there’s no need to fret. You’ve come to the right place.
Since you’re here, by all appearances, you’re leaning toward Rocky Linux, so welcome to the family! We’re here to guide you smoothly through the transition from CentOS 7 to Rocky 8. As you will see, with the right instructions, this change is much simpler than you might think.
However, before we get to the action, there are a few key points we need to clear up.
CentOS 7 to Rocky Linux Upgrade Path
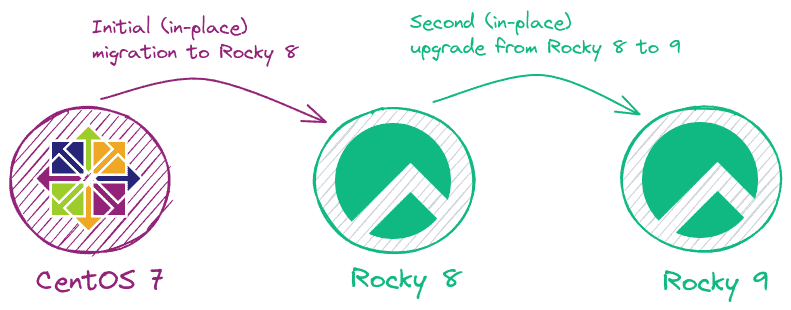
I’m sure one of the burning questions you might have is, “Why should I upgrade to Rocky 8 first instead of jumping directly to Rocky 9?” Here’s a crucial bit of info to keep in mind: it’s not possible to migrate from CentOS 7 to Rocky 9 directly.
So, if you aim to transition to Rocky 9, the path involves initially migrating your current CentOS 7 system to Rocky 8. Once that’s done, you can then move on to upgrade from Rocky 8 to Rocky 9. This two-step process ensures a smooth transition and compatibility across versions.
Additionally, no need to worry about transitioning from Rocky 8 to 9; we’ve got your back! While it’s true that Rocky doesn’t officially support this upgrade path and usually recommends starting fresh, we’ve paved the way for those who wish to proceed.
Our detailed guide, “How to Upgrade from Rocky Linux 8 to 9,” is here to help. So, after you’re through with your current migration, peek into our guide for the steps to seamlessly migrate to Rocky 9 if that’s the goal.
What Is In-Place Upgrade?
As you noticed in the diagram above, it explicitly states that we will perform an in-place upgrade. Here’s what that means.
An in-place upgrade refers to updating the current operating system to a newer version without removing the existing one and manually reinstalling or reconfiguring the system and applications.
This means you’re essentially upgrading the OS while it’s running to retain your files, settings, applications, and custom configurations intact.
In light of this, the in-place upgrade process involves:
- Replacing old packages with newer versions.
- Resolving dependencies.
- Making necessary adjustments to the system configuration to ensure compatibility with the new version.
Okay, everything is all set now, so it’s time to act. Let’s help you switch your current CentOS 7 server to Rocky 8!
Step 1: Take System Backup
It is highly recommended that you back up your essential files and configurations. We recommend making a full system backup so that you can restore your system with all the vital data to its previous state if something goes wrong.
For this purpose, we recommend using specialized software like the ones mentioned here to take a complete snapshot of the partitions on which CentOS 7 is installed.
In addition, you can always use a command like the one shown below, which will archive all of the more critical directories and their contents in a tar.gz archive.
sudo tar czf /centos7.tar.gz \
     --exclude=/centos7.tar.gz \
     --exclude=/dev \
     --exclude=/mnt \
     --exclude=/proc \
     --exclude=/sys \
     --exclude=/tmp \
     --exclude=/media \
     --exclude=/lost+found \
     /Code language: Bash (bash)
Feel free to add more “–exclude=” parameters if needed. Finally, the command creates a backup of all files in “centos7.tar.gz” located on the root partition (/), which you should ideally transfer to another computer or drive, for example, using the SCP command.
Step 2: Update All Software
Ensure your current CentOS 7 system is fully upgraded and has no packages waiting to be updated.
sudo yum updateCode language: Bash (bash)If any updates are available, install them and, if necessary, reboot the system. Below is our current fully updated CentOS 7 server before we migrate to Rocky 8.
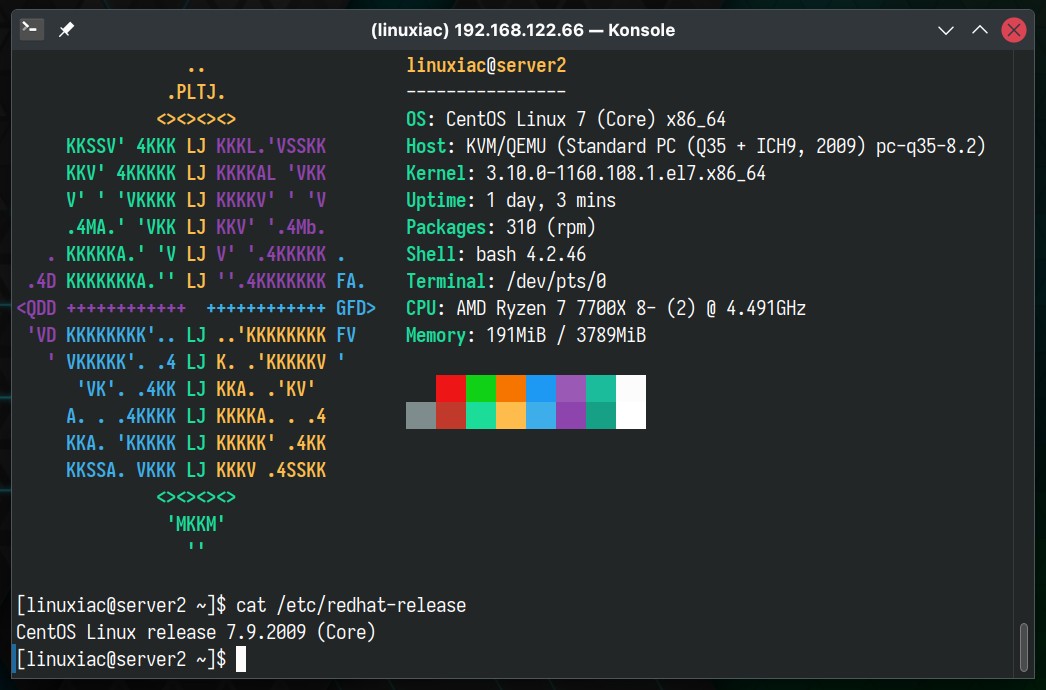
As you can see, the system runs CentOS 7.9, the latest CentOS version in the 7.x branch.
Step 3: Migrate CentOS 7 to Rocky Linux 8
Let’s say a few words about the tool that will help us with the migration, called ELevate. Designed by AlmaLinux, it supports migrations between major versions of Red Hat Enterprise Linux (RHEL) derivatives, allowing users to migrate from CentOS 7.x to 8.x versions of the RHEL derivative of their choice or upgrade from 8.x to 9.x within the same derivative.
The good part is that ELevate is developed with the entire RHEL-based ecosystem in mind, not just Alma, and supports migrating to and from other distributions. In our case, we’ll be using it to migrate from CentOS 7 to Rocky 8. For more information, visit the project’s page.
Step 3.1: Install ELevate
The first step in the upgrade process is installing the “elevate-release” package on your current CentOS 7 system.
sudo yum install http://repo.almalinux.org/elevate/elevate-release-latest-el7.noarch.rpmCode language: Bash (bash)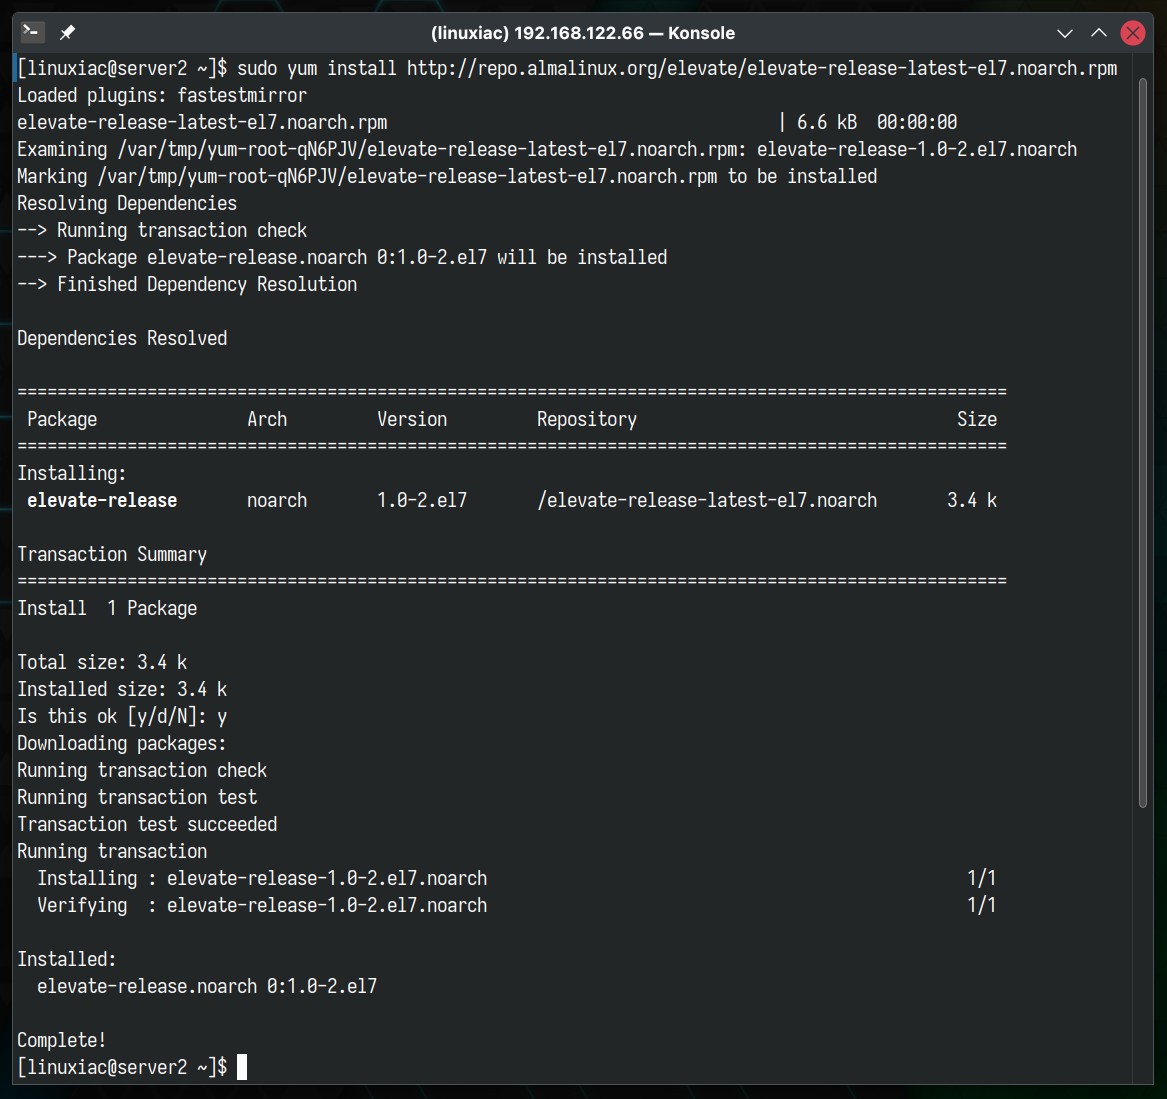
Step 3.2: Install Leapp and Migration Data
The migration process is based on a combination of Red Hat’s Leapp, a tool designed to facilitate in-place upgrades of RHEL systems from one major version to another, and a community-created library containing the migration metadata set. So, let’s install them:
sudo yum install leapp-upgrade leapp-data-rockyCode language: Bash (bash)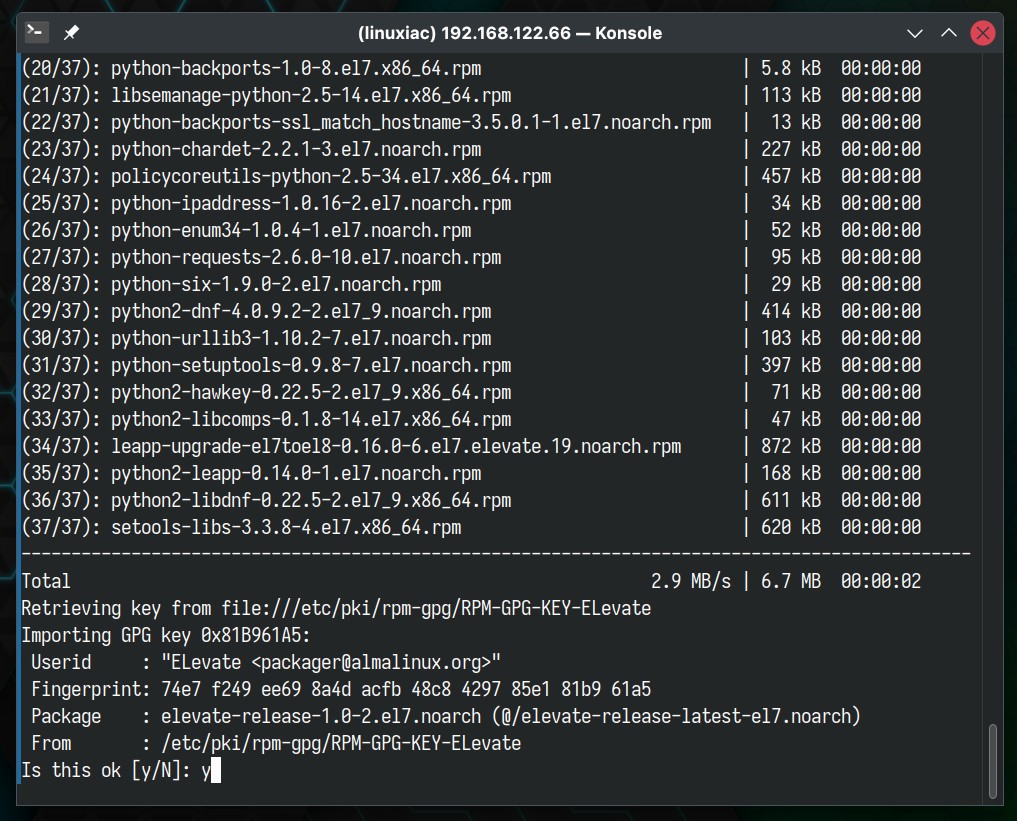
When you run the above command, it will install more than 30 extra packages, mostly Python-related dependencies. This is completely expected. Also, you’ll see a prompt asking you to accept the GPG key for Alma’s ELevate repository. Just go ahead and accept it.
Step 3.3: Start Pre-Upgrade Checks
The next step is to start a pre-upgrade check. The command below verifies server compatibility without making any actual changes and creates a “/var/log/leapp/leapp-report.txt” file that contains possible problems and recommended solutions:
sudo leapp preupgradeCode language: Bash (bash)Most likely, some of the checks will fail, but there is no room for worry! That’s normal because some tweaks are required in advance.
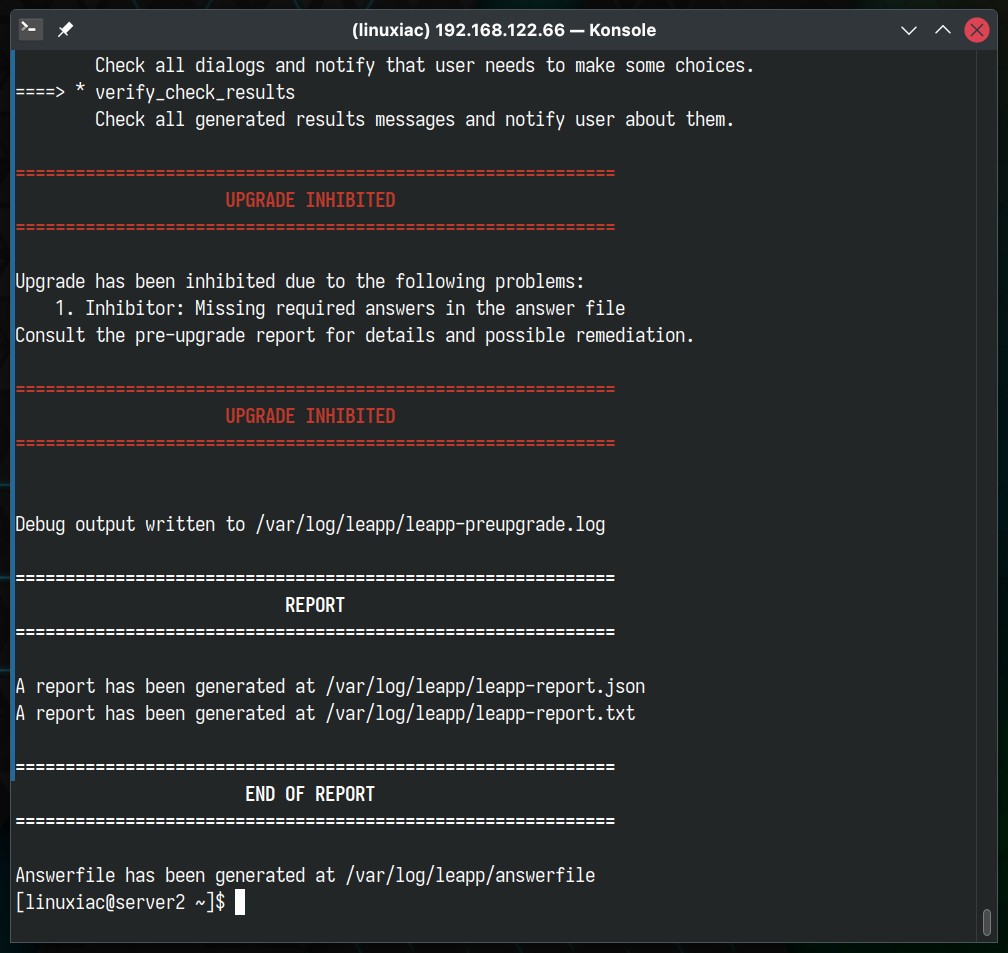
According to the official documentation, the three commands below solve the issue. Just run them one after the other:
sudo rmmod pata_acpi
echo PermitRootLogin yes | sudo tee -a /etc/ssh/sshd_config
sudo leapp answer --section remove_pam_pkcs11_module_check.confirm=TrueCode language: Bash (bash)
Rerun the pre-upgrade check, and you’ll see a green report confirming everything is in order. This means you’re all set to proceed safely with the upgrade.
sudo leapp preupgradeCode language: Bash (bash)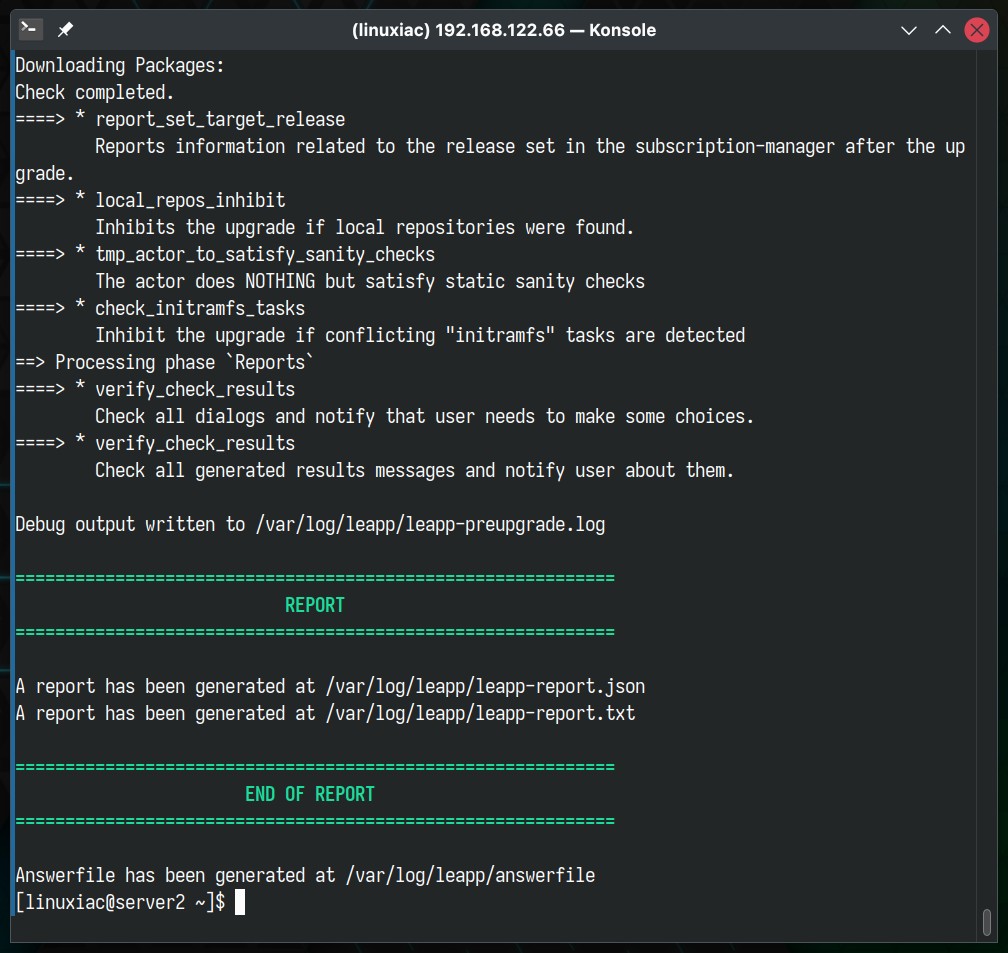
Step 3.4: Start the Actual Migration from CentOS 7 to Rocky 8
Run the following command to migrate your CentOS 7 system to Rocky Linux 8.
sudo leapp upgradeCode language: Bash (bash)Please be aware that upgrading can occasionally lead to errors if you are using packages from external repositories, such as EPEL. A common example is encountering an issue with the “openssl11-libs” package from the EPEL repo.
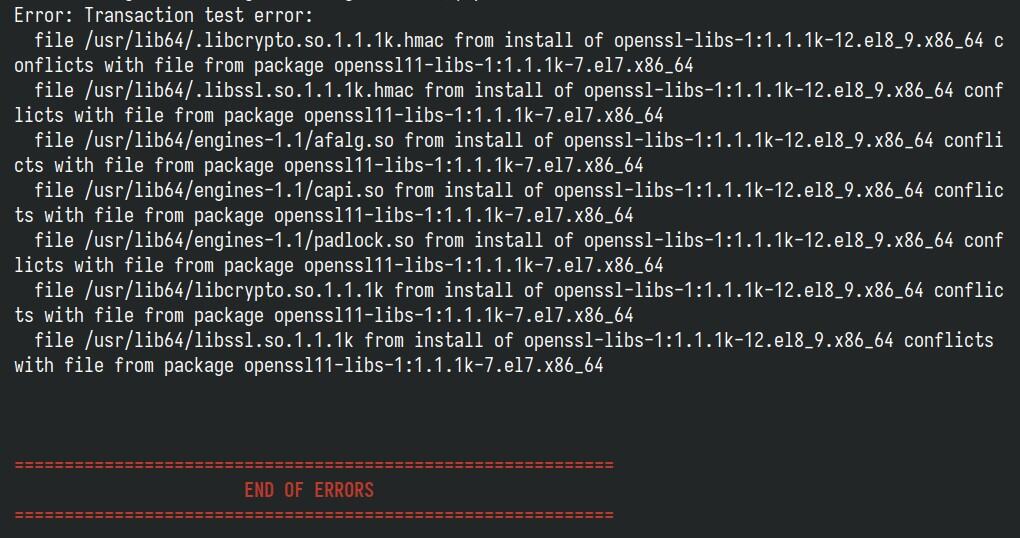
To fix it, uninstall the package by executing yum remove <package_name>. Afterward, rerun the sudo leap upgrade command, which should proceed without issues.
Now’s the perfect time to grab a coffee and settle in – it will take a little while. Once the migration is completed, you’ll be offered to reboot the system. Okay, the moment of truth!
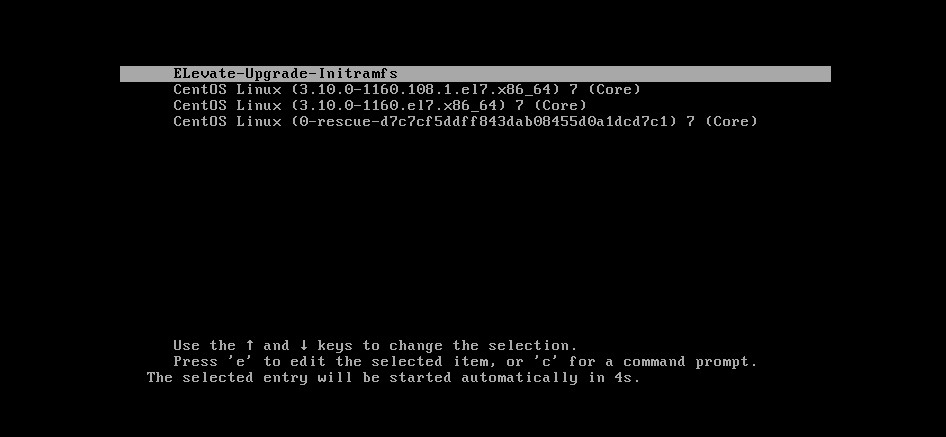
sudo rebootCode language: Bash (bash)After restart, you’ll notice a new option called “ELevate-Upgrade-Initramfs” pop up in the GRUB menu. Your computer will pick it up automatically and start on its own in just a few moments. This part calls for a bit of your patience again.
It will be busy working behind the scenes, installing packages, and getting them in order. Just hang tight and give it the time it needs to finish up all its tasks. It’s like baking a cake – waiting is hard, but the result is worth it.
Since the package upgrades involve a lot of background activity, the process might take a while. Please be patient if you cannot access the terminal to track these changes. Depending on your hardware’s capabilities and the number of packages being updated, it could take anywhere from a few minutes to half an hour.

After everything’s wrapped up, your computer will smoothly restart. And guess what? Your screen will proudly show off the GRUB boot options for Rocky 8, sporting the cool name “Green Obsidian.”
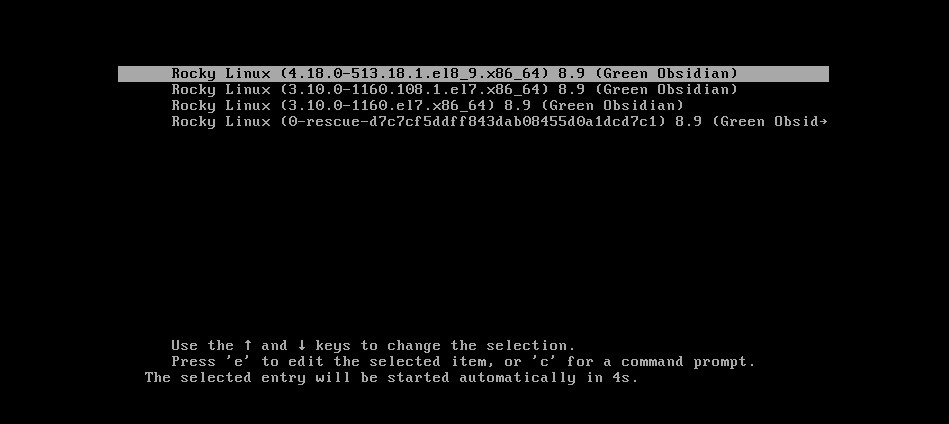
Congratulations! Just like that, you’ve successfully transitioned your system from CentOS 7 to Rocky Linux 8. A big congrats from me as well!
Step 4: Check the OS Version (Optional)
To ensure everything’s gone according to plan, why not take a quick peek at the OS version? It’s a great way to double-check and feel good about the update.
cat /etc/redhat-releaseCode language: Bash (bash)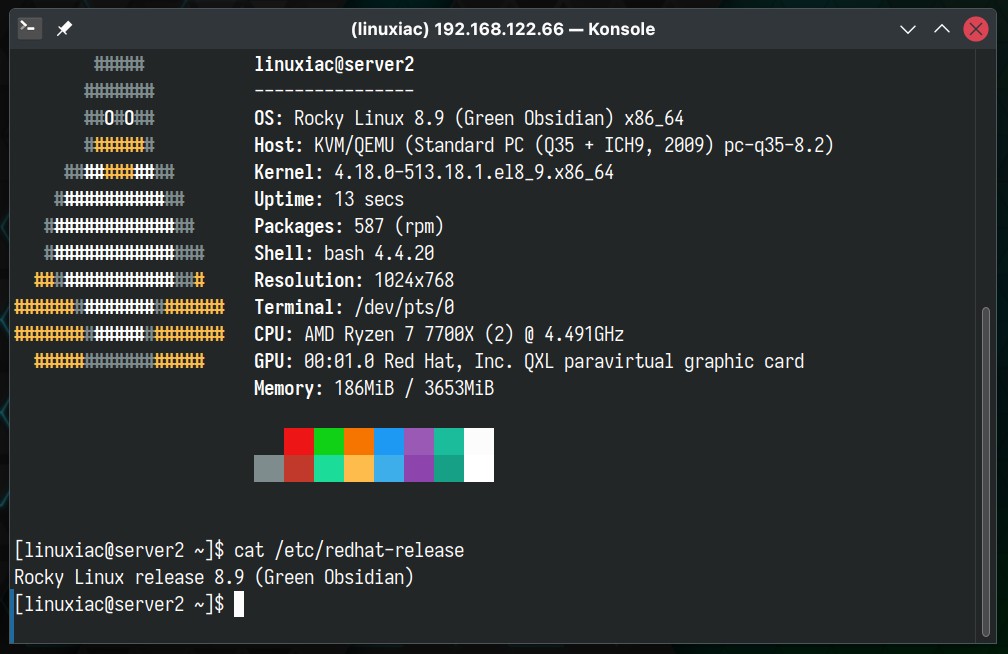
Post-Installation Steps
We recommend starting by removing the EPEL repository if you’re using it. It still targets the older CentOS 7 and could lead to errors due to compatibility issues when you try to upgrade your system or install new packages. To remove it, execute:
sudo dnf remove epel-releaseCode language: Bash (bash)Then, you can add it again. The installer will recognize that your system is RHEL 8 compatible and will install the appropriate EPEL 8 repository.
sudo dnf install epel-releaseCode language: Bash (bash)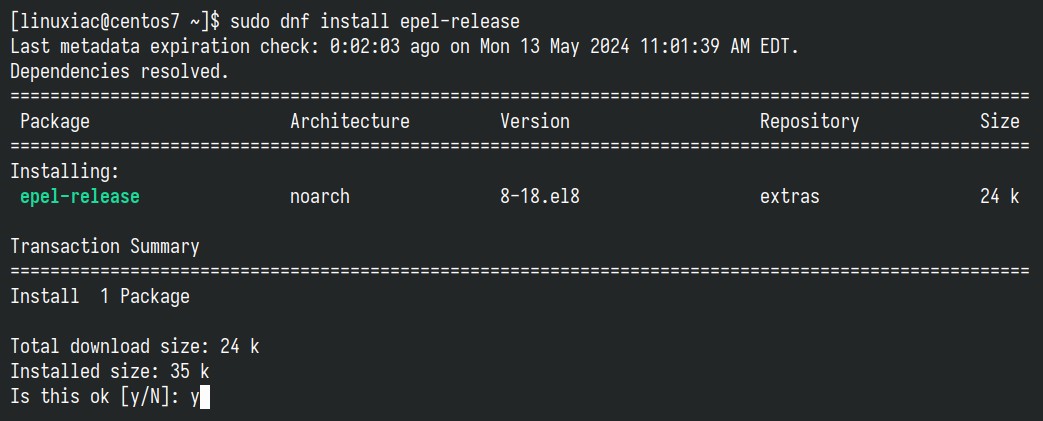
Refresh the package base:
sudo dnf updateCode language: Bash (bash)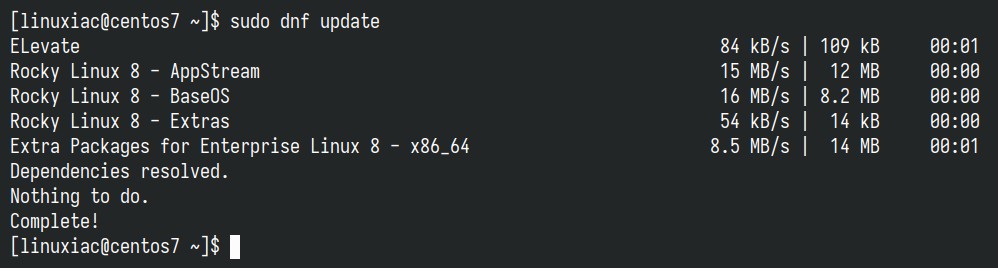
Remove all CentOS 7-related packages. To find them, run the command below:
sudo rpm -aq | grep el7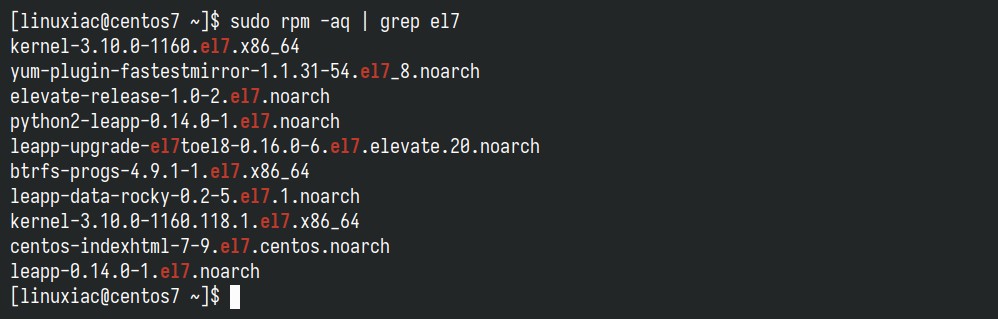
Then open the “/etc/yum.conf” file and comment out the “exclude” line shown below.
sudo nano /etc/yum.conf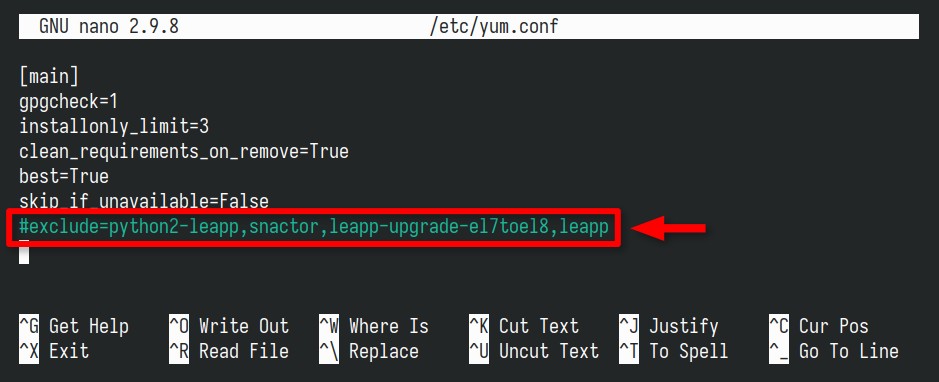
Finally, to remove them, list them individually as arguments to the dnf remove command. In our case, it looks like this:
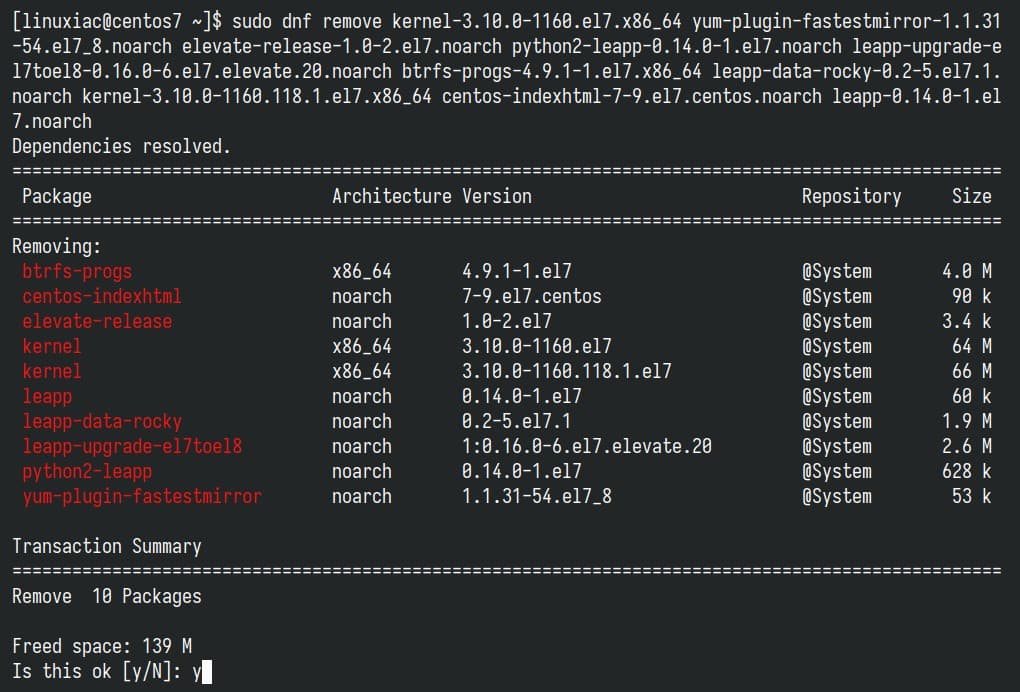
For a more in-depth introduction to the DNF command, we highly recommend consulting our article on the subject, “DNF Command-Line Package Manager in Linux: A Complete Guide.”
Bottom Line
With our meticulously crafted step-by-step guide in hand, migrating from CentOS 7 to Rocky Linux 8 not only sounds like a breeze but actually is one.
Moreover, if you’re looking for a different upgrade path to another enterprise Linux distro, we’re here to help. Check out our detailed guide on migrating from CentOS 7 to AlmaLinux 8 or Oracle Linux 8.
Lastly, but definitely not least, thank you for your trust in us – it truly means the world! We’d love to hear your feedback or thoughts, so please don’t hesitate to drop them in the comment box below.


PermitRootLogin = yes, please set it to no after upgrade
Just like to drop a line to thank Bobby Borisov or the writer. I followed these steps and completed the migration from CentOS 7 to Rocky 8. Be aware that the yum will no longer work as after CentOS 7 reached EOL the mirrorlist no longer works. You need to adjust the /etc/yum.repos.d => CentOS-Base.repo (default). I’d followed this URL: https://support.cpanel.net/hc/en-us/articles/24571139547415-Could-not-retrieve-mirrorlist-http-mirrorlist-centos-org-on-CentOS-7 and copied the new content to CentOS-Base.repo … after that you should be good to go. Thanks again!
Yes Louie!!! Thanks for posting this.
Nice instruction.
Unfortunately now this shit hangs since one hour at step 1064
(1063/1065): epel-release-8-18.el8.noarch.rpm 113 kB/s | 24 kB 00:00(1064/1065): selinux-policy-targeted-3.14.3-139 92 kB/s | 15 MB 02:51
Question… have you faced any questions about this migration while the admin of that particular migration was running KVM VMs? If so, or maybe just off the cuff… would there be any issues with the exist environment when changing versions of code? Maybe KVM is not the supported VM emulator on Rocky 8? or the backend structures are different (COWS for example)? Just curious. I want to get my migration completed this weekend but I am hesitant since I have my home network Windows Domain on one of the VMs in question.
Question… has this been tested on a CENTOS 7 server that is hosting 3 VMs from the KVM virtual server?
Going from 8 to 8 use the migrate2rocky script.
This worked well for me with one difference: the types of errors you have in the “updgrade” step in section 3.4, requiring certain packages to be removed, I got during the “preupgrade” step. Removing them and re-running the “preupgrade” did the trick. Anyway thanks for the article. It is making my life much easier!
After running leapp upgradeERROR PID: 17481 leapp: Upgrade workflow failed, check log for detailsleapp-upgrade.log2024-05-02 13:29:10.317 WARNING PID: 17481 leapp.reporting: Stable Key report entry not provided, dynamically generating one – 726b835c1f4b09850ad50141a24d45e1937815f82024-05-02 13:29:10.449 WARNING PID: 17481 leapp.reporting: Stable Key report entry not provided, dynamically generating one – 726b835c1f4b09850ad50141a24d45e1937815f82024-05-02 13:29:10.557 WARNING PID: 17481 leapp.reporting: Stable Key report entry not provided, dynamically generating one – 726b835c1f4b09850ad50141a24d45e1937815f82024-05-02 13:29:10.661 ERROR PID: 17481 leapp: Upgrade workflow failed, check log for details
Hi, Everything running smooth like your results, but the last step during leapp upgrade, it shows error, the error log shows as below, how should I do?
STDERR:
No matches found for the following disable plugin patterns: subscription-manager
Repository extras is listed more than once in the configuration
Warning: Package marked by Leapp to upgrade not found in repositories metadata: gpg-pubkey
RPM: warning: Generating 6 missing index(es), please wait…
Error: Transaction test error:
file /usr/lib64/libwebp.so.7 from install of libwebp-1.0.0-9.el8_9.1.x86_64 conflicts with file from package libwebp7-1.0.3-2.el7.remi.x86_64
file /usr/lib64/libwebpdecoder.so.3 from install of libwebp-1.0.0-9.el8_9.1.x86_64 conflicts with file from package libwebp7-1.0.3-2.el7.remi.x86_64
file /usr/lib64/libwebpdemux.so.2 from install of libwebp-1.0.0-9.el8_9.1.x86_64 conflicts with file from package libwebp7-1.0.3-2.el7.remi.x86_64
file /usr/lib64/libwebpmux.so.3 from install of libwebp-1.0.0-9.el8_9.1.x86_64 conflicts with file from package libwebp7-1.0.3-2.el7.remi.x86_64
2024-04-09 09:13:47.550 WARNING PID: 66871 leapp.reporting: Stable Key report entry not provided, dynamically generating one – 0d49620cd9b90a0543f9c0dd0dec0e0273d64459
2024-04-09 09:13:47.891 WARNING PID: 66871 leapp.reporting: Stable Key report entry not provided, dynamically generating one – 0d49620cd9b90a0543f9c0dd0dec0e0273d64459
2024-04-09 09:13:48.63 WARNING PID: 66871 leapp.reporting: Stable Key report entry not provided, dynamically generating one – 0d49620cd9b90a0543f9c0dd0dec0e0273d64459
2024-04-09 09:13:48.145 ERROR PID: 66871 leapp: Upgrade workflow failed, check log for details
Maybe do you have an correct step by step guide to centos 8 – rocky 8? Many thanks Bobby!
Hi,
is this also working with centos 8 to rocky linux 8?
Hi Janos,
No. It’s a whole different story there. As the title says, this guide only applies to CentOS 7 to Rocky 8 migration.
Best,
Bobby
Please let us know how to overcome below error
After leapp upgrade successful rebooted, the server as suggested.
While booting the server we are getting error as per below
Generating /run/initramfs/rdsosreport.txt
Entering emergency mode. Exit the shell to continue.”
Type “journalctl” to view system logs.
You might want to save “/run/initramfs/rdsosreport.txt” to a usb stick or
/boot after mounting them and attach it to a bug report.