On April 21, 2022, Ubuntu 22.04 LTS (Jammy Jellyfish) was officially released. This is the most recent Ubuntu LTS release, with security fixes and updates available until April 2027.
Suppose you still use the previous LTS version of Ubuntu Server, 20.04 (Focal Fossa). In that case, you should consider switching to the most recent LTS version to take advantage of its new features and updated software packages.
The upgrade procedure is simple to carry out. All you need to do is follow the instructions in this article. Then, following best practices, it will guide you step by step through the whole process of updating your Ubuntu server from Ubuntu 20.04 to Ubuntu 22.04.
So without further ado, let us get down to work.
Step 1: Backing Up Your System
Before we begin upgrading our server to Ubuntu 22.04 from Ubuntu 20.04, we strongly recommend that you backup your system. This ensures that if something goes wrong, you can restore all of the vital data to its previous state.
We recommend you use software that takes a snapshot of your whole operating system. You can use one of the freely available disk imaging software that has been proven effective over the years for this purpose.
If you’re unsure which one to use, we recommend one of the ones listed in our dedicated article on the subject, “3 Best Free Hard Disk Imaging Software.”
Of course, you can always use a command like the one shown below, which will archive all of the more important directories and their contents in a tar.gz archive.
sudo tar czf /ubuntu-server-backup.tar.gz \
     --exclude=/ubuntu-server-backup.tar.gz \
     --exclude=/dev \
     --exclude=/mnt \
     --exclude=/proc \
     --exclude=/sys \
     --exclude=/tmp \
     --exclude=/media \
     --exclude=/lost+found \
     /Code language: JavaScript (javascript)
Add more --exclude= parameters if you need to. The command creates a backup of all files in ubuntu-server-backup.tar.gz located under the root partition (/), which should be transferred to another computer or drive, for example, using the SCP command.
Step 2: Update All Currently Installed Packages
Before upgrading, ensure your currently installed Ubuntu 20.04 server is up to date. In the terminal, type the following apt commands.
sudo apt update
sudo apt upgrade
Now you can clean any leftover packages.
sudo apt --purge autoremoveThen reboot your Ubuntu 22.04 server for the changes made to apply.
sudo rebootStep 3: Verify the Currently Installed Ubuntu Server Version
We’ll start by ensuring we’re running the most recent Ubuntu 20.04 server point release. The most straightforward approach to determine what Ubuntu version you are running is to use commands such as neofetch or lsb_release.
neofetch
lsb_release -a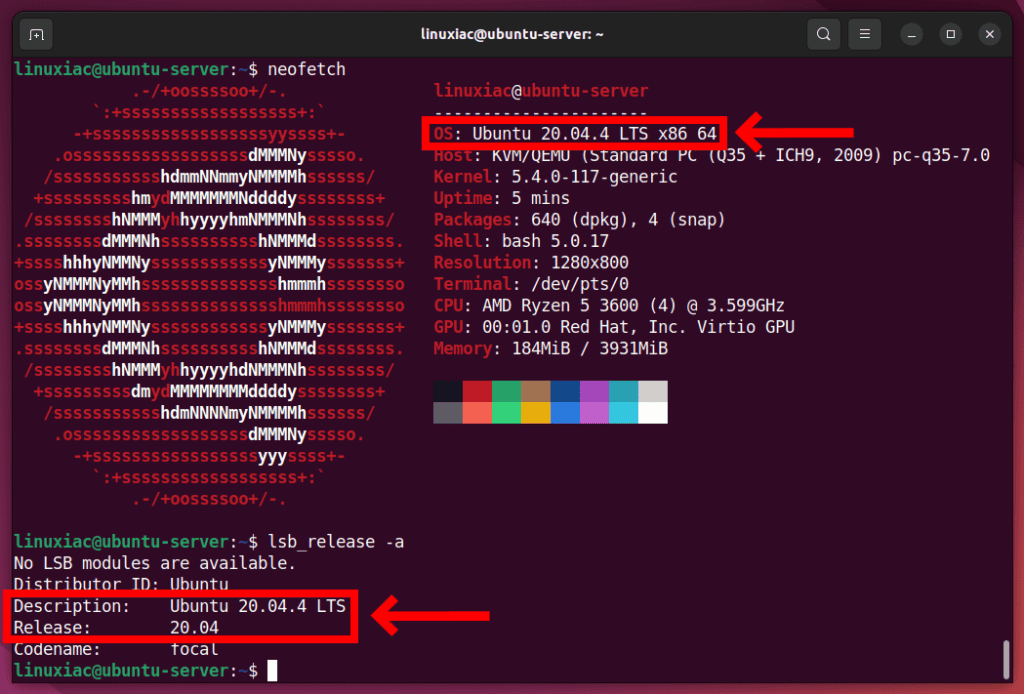
Step 4: Upgrade to Ubuntu 22.04 Server from Ubuntu 20.04 Server
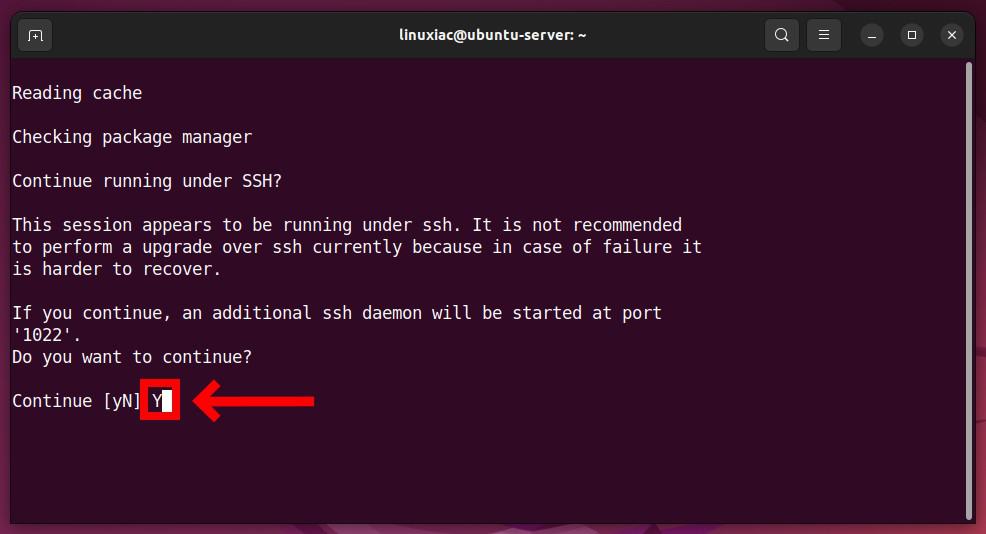
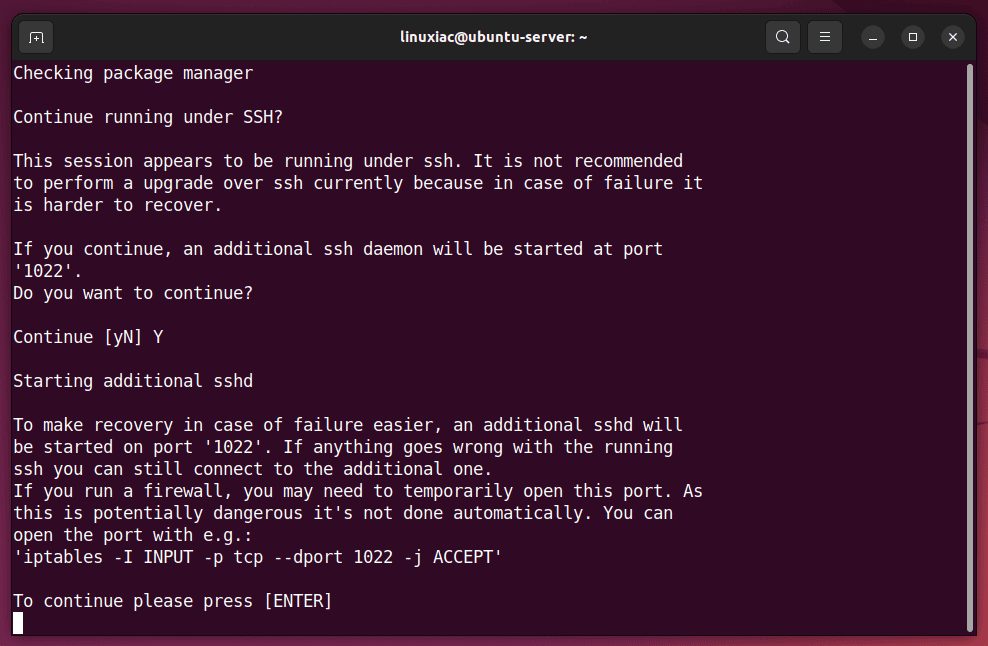
In this tutorial, we upgrade our Ubuntu server using an SSH session, as you probably do. However, during the upgrade, Ubuntu will automatically start an additional SSH server on port 1022. This ensures you will have an extra secure channel to connect to the server if an error occurs.
So first, ensure that port 1022 is not currently blocked on your Ubuntu server. Then, you can enable it explicitly using the following command.
sudo ufw allow 1022/tcpEverything is now in place to begin the actual upgrade process. Type the below command on the command line as follows:
sudo do-release-upgrade -dCode language: JavaScript (javascript)The following notice will be displayed to SSH users. To confirm, type Y and hit Enter.
A second notice will appear notifying you of the same thing. To proceed, press Enter.
Your Ubuntu 20.04 server will connect to the Ubuntu 22.04 package repository to obtain the information required to upgrade your system.
The upgrade summary should now be shown in your terminal. To confirm the upgrade, you must type Y and hit Enter again.
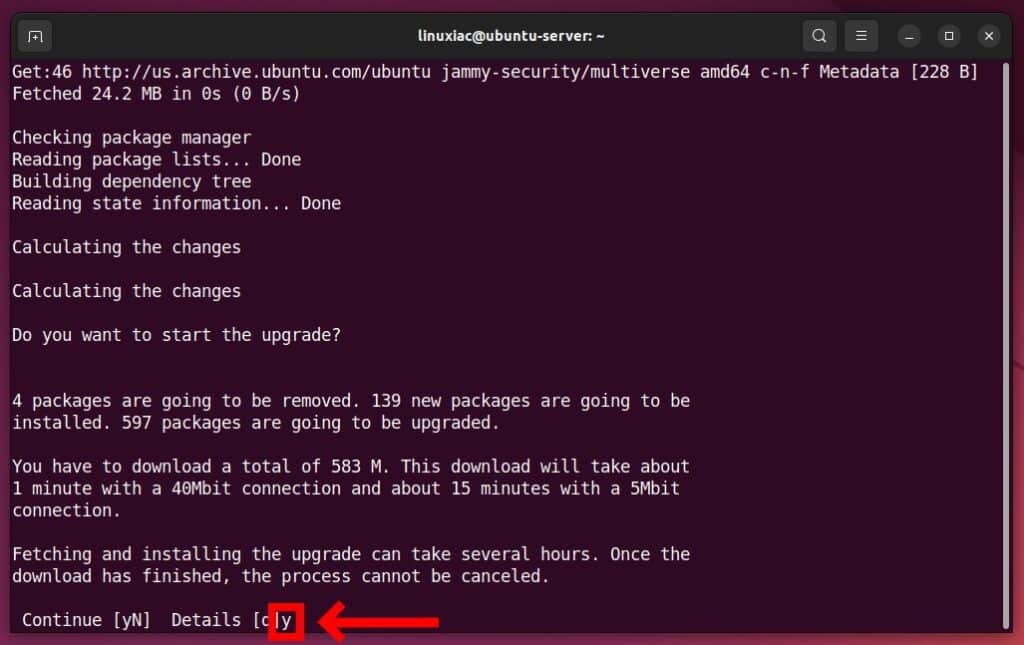
All packages needed for the upgrade will start downloading. Be patient, as this will take some time.
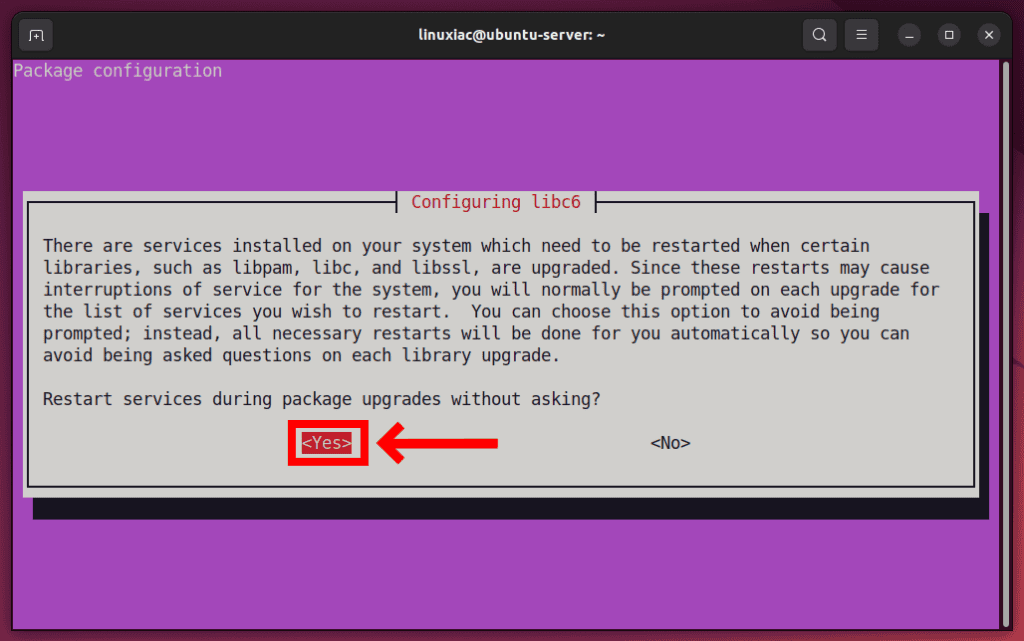
You will be asked if you want the server’s services to be restarted automatically during the upgrade. We recommend that you choose Yes. Then press Enter to continue the upgrading.
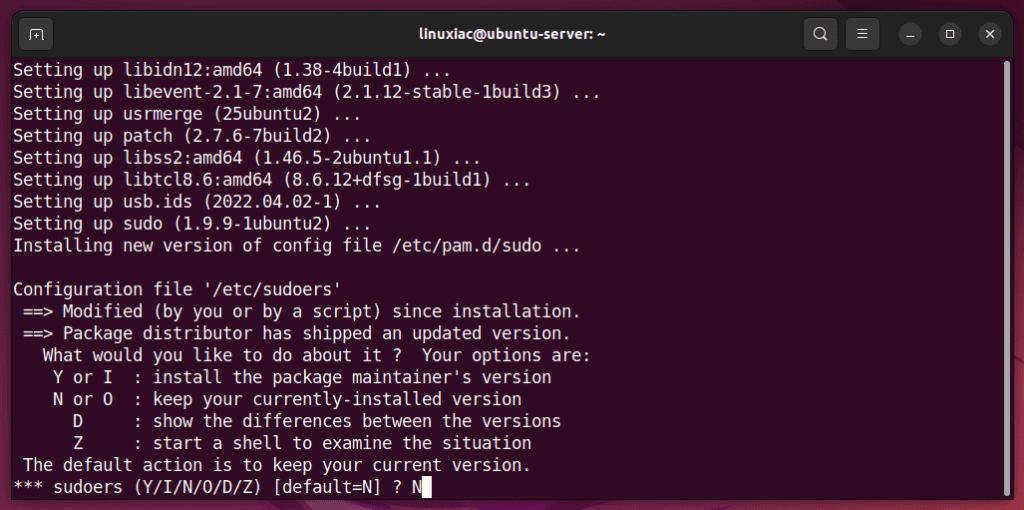
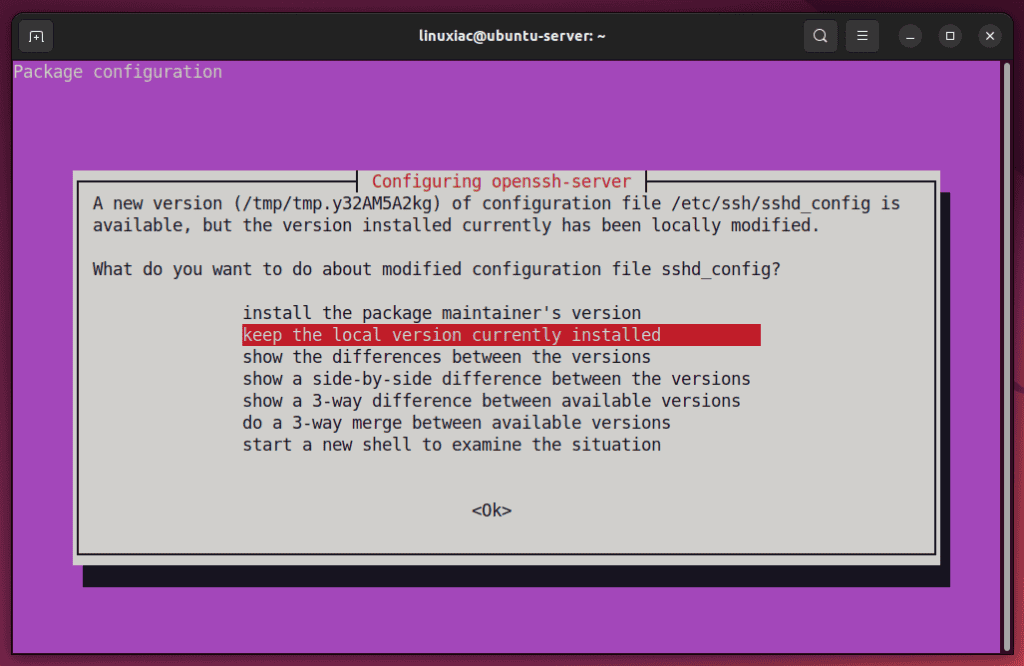
If you have made changes to any system or services configuration files, you will be asked whether you wish to preserve them or replace them with the new ones included with Ubuntu 22.04. To proceed, select your chosen action and press Enter.
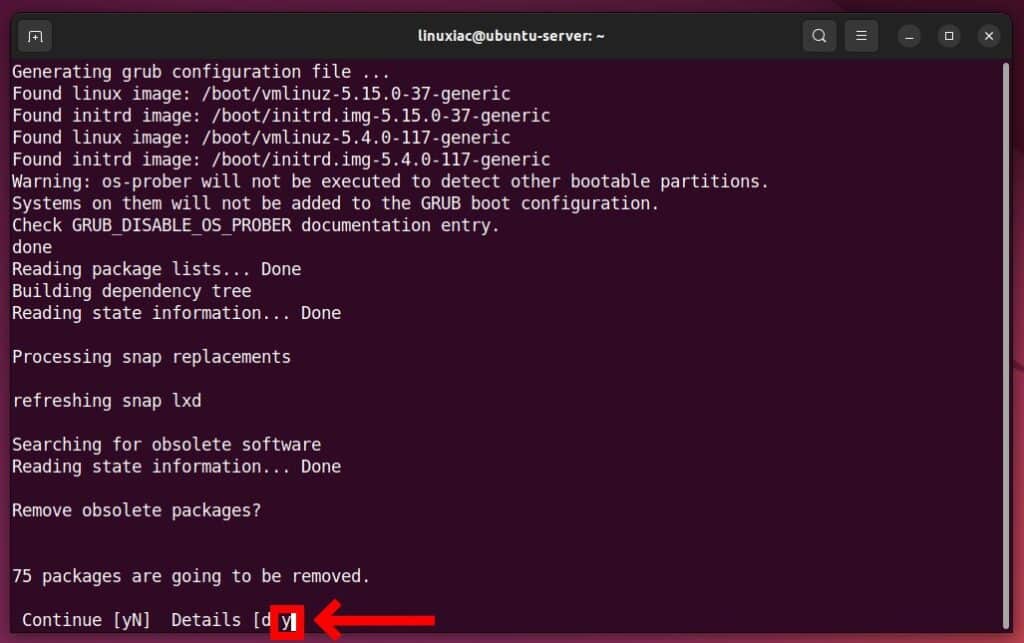
Finally, you will be asked if you want old obsolete packages to be automatically removed from the system. Since the system no longer needs them, type y to confirm and press Enter.
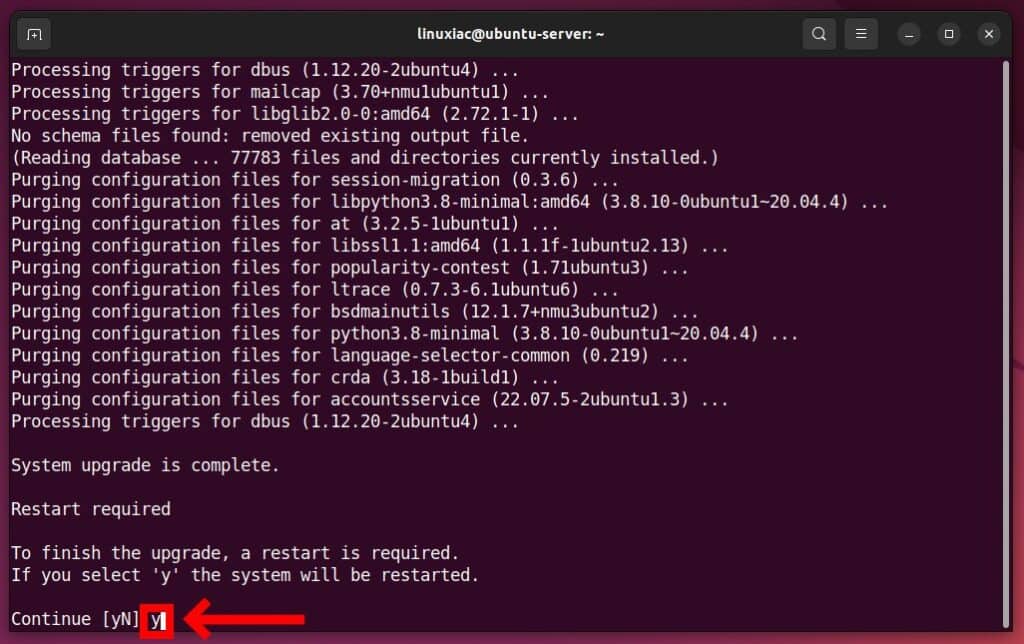
After successfully upgrading an Ubuntu 20.04 server to an Ubuntu 22.04 server, you will be notified that the server must be restarted to complete the process. To confirm the reboot, type Y and press Enter.
Step 5: Confirm Successful Upgrade
After rebooting the system, use SSH to connect to our upgraded system and validate that the upgrade from Ubuntu 20.04 to Ubuntu 22.04 was successful. We’ll utilize the commands we already know.
neofetch
lsb_release -a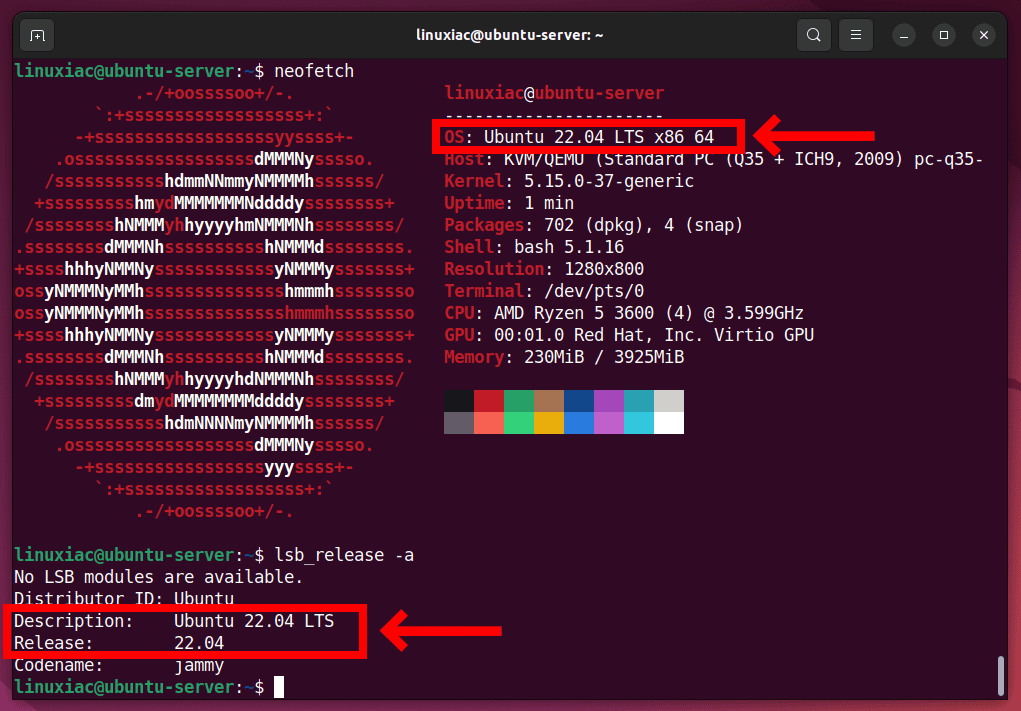
Congratulations! You did it. Now you can enjoy your newly upgraded system. All you have to do is check that the available services are working as expected.
Conclusion
You learned how to upgrade your current Ubuntu system from Ubuntu 20.04 server to Ubuntu 22.04 server. Ubuntu 22.04 (Jammy Jellyfish) is the most recent LTS (Long Term Support) release, and it will receive free system updates until April 2027.
However, suppose you are using the desktop version of Ubuntu 20.04 and want to upgrade to the most recent LTS release. In that case, we strongly advise you to follow our excellent guide, “How to Upgrade Ubuntu 20.04 LTS to 22.04 LTS: A Step-by-Step Guide.”
We have tried to make this tutorial as simple as possible. Thanks for using it! Your feedback and comments are most welcome.

So do you just leave the firewall rule in place?
sudo ufw allow 1022/tcp
or do you revert the command?