
Mounting an ISO file on Linux is a simple process, but it can confuse those new to the Linux operating system. Fear not, as this article aims to demystify the procedure and guide you to mount ISO files on Linux effortlessly.
What’s ISO File?
ISO files (or ISO images) are a common and indispensable format for distributing software, operating systems, and other digital content. They are a perfect replica of a CD, DVD, or Blu-ray disc, containing all the data and files from the original disc in a single file.
ISO files are commonly used in Linux distributions to distribute installation media. In addition, they can also be used to create bootable USB drives or virtual machines.
The name ISO originates from the file system used by optical media, ISO 9660 – an international standard from the International Organization for Standardization (ISO).
How to Mount ISO Files on Linux
Mounting an ISO file in Linux allows the user to access its contents like a physical disc. This can be done using the mount command or a graphical user interface. Below we show you how to use both approaches.
Users can browse its contents once the ISO file is mounted and copy files to their system. When finished, the ISO file can be unmounted to release the system resources it was using.
Mount ISO file from Command Line
The first step is to create the mount point where our ISO file will be mounted. The “mnt” directory is a good candidate, so we will create a subdirectory “iso” where to mount the ISO image.
sudo mkdir -p /mnt/isoNow, let’s mount the ISO file itself. Assume we downloaded one named “debian-12.1.0-amd64-netinst.iso” in our “Downloads” directory. To mount it to our local file system, use the following command:
sudo mount -o loop Downloads/debian-12.1.0-amd64-netinst.iso /mnt/iso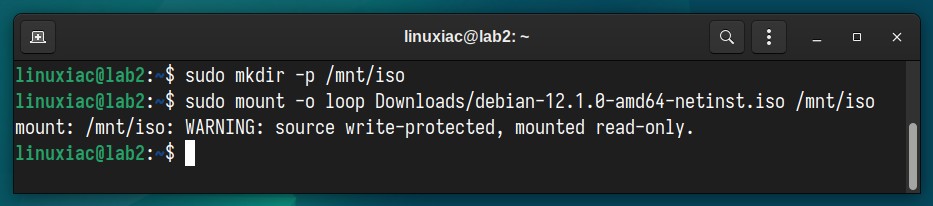
The message “WARNING: source write-protected, mounted read-only.” should not bother you. It is perfectly fine. Why? Because ISO files are always mounted as read-only by default.
To mount the ISO file from the command line, we used the mount command, which instructs the operating system to make a file system available for use at a specified location.
To it, we passed the “loop” option, which specifies the so-called loop device, which is a pseudo (“fake”) device, actually just a file, that makes a file accessible as a block-based device.
Now, we can access the contents of the ISO file by running the well-known “ls -l” command.
ls -l /mnt/iso/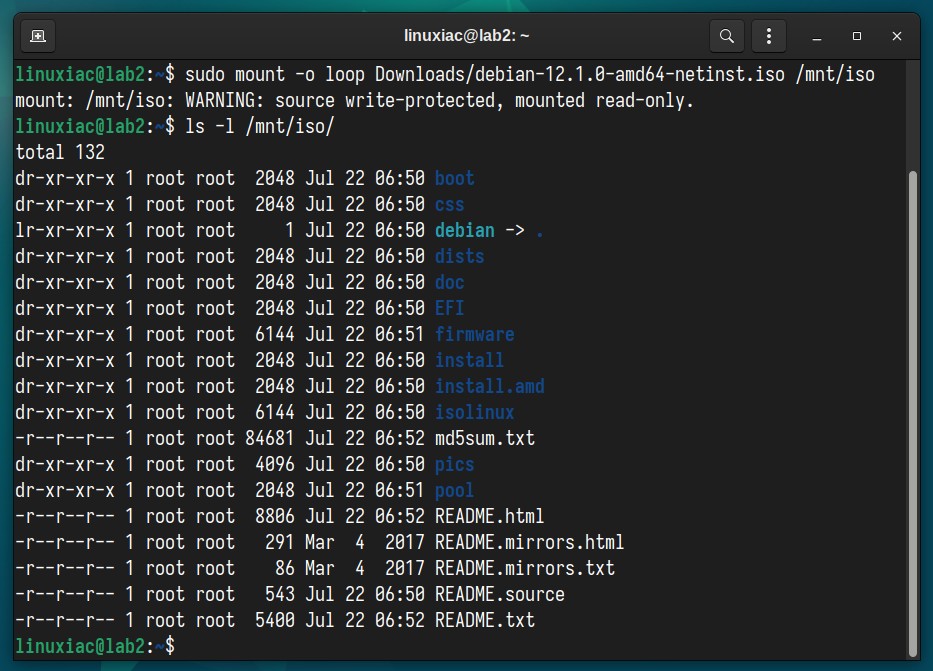
Alternatively, you can use the file manager of your desktop environment by navigating to the “/mnt/iso” directory.

Mount ISO Files using GNOME
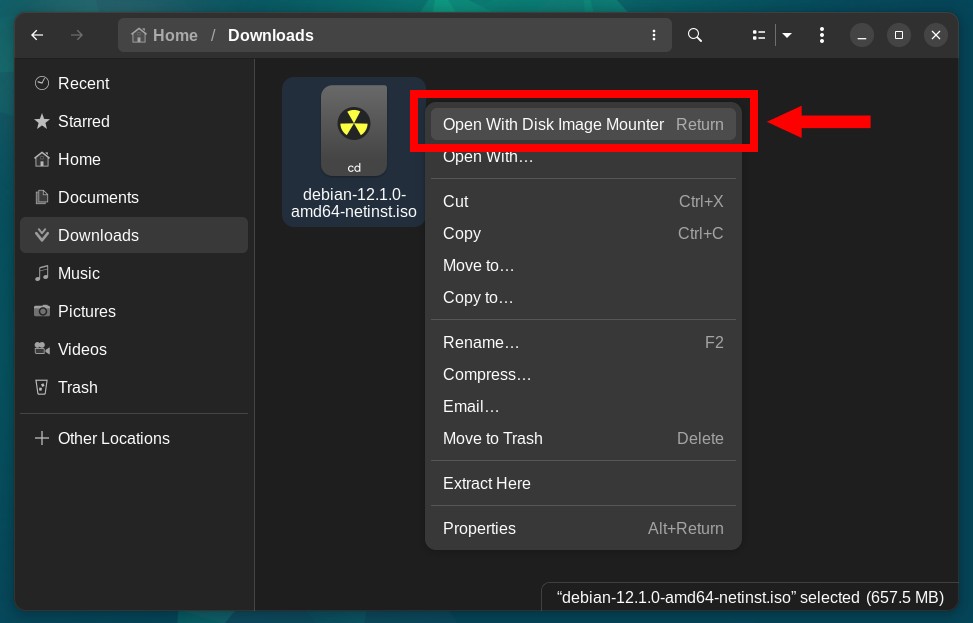
Mounting an ISO file using the GNOME’s Files application is extremely easy, thanks to the “gnome-disk-utility” package, usually preinstalled by default with the GNOME desktop environment.
Navigate to the file, then right-click on it and select “Open With Disk Image Mounter” from the context menu that appears.
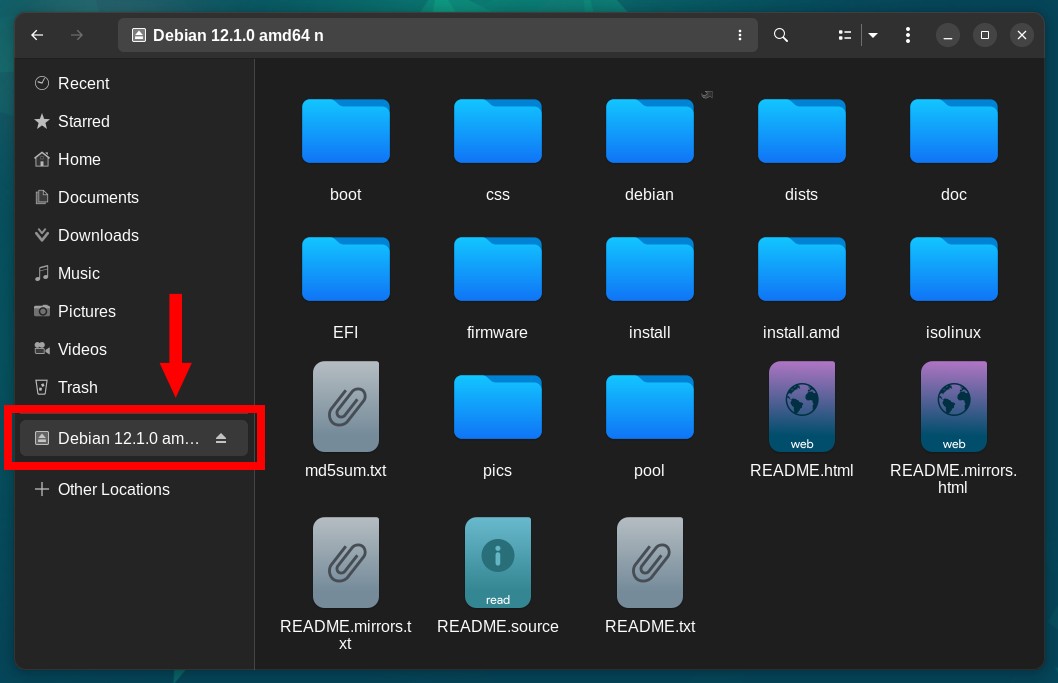
The ISO file will be automatically mounted and displayed in the File app sidebar. To view a list of its contents, click on it.
Mount ISO Files using KDE Plasma
Dolphin, the file manager of the Plasma desktop environment, has supported ISO file mounting since version 20.08 of the KDE App suite. However, make sure the “dolphin-plugins” package is installed on your system; if it isn’t, you installed it.
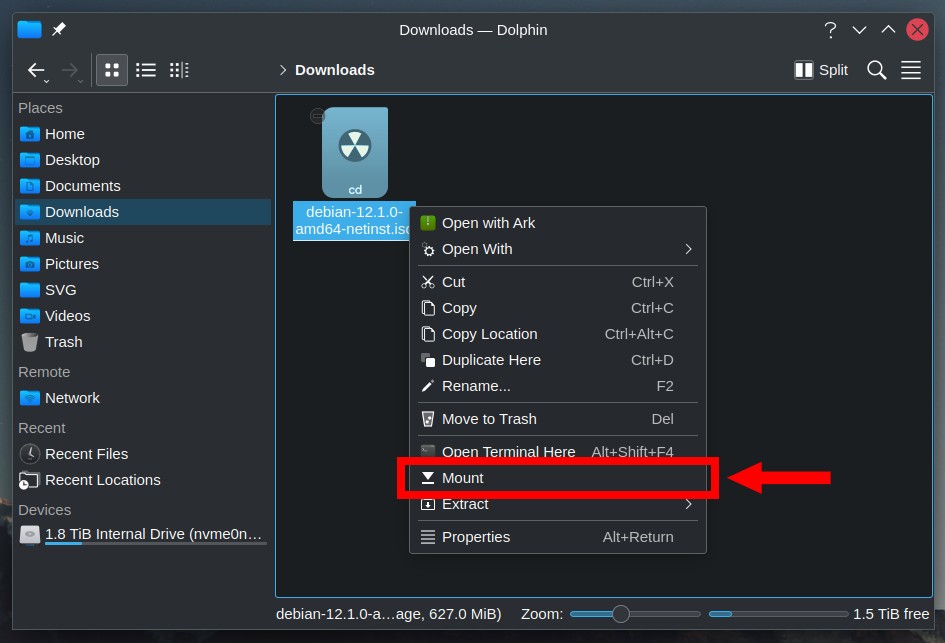
Hover your mouse over the ISO file and right-click to open the context menu. “Mount” is one of the available options. Choose it.
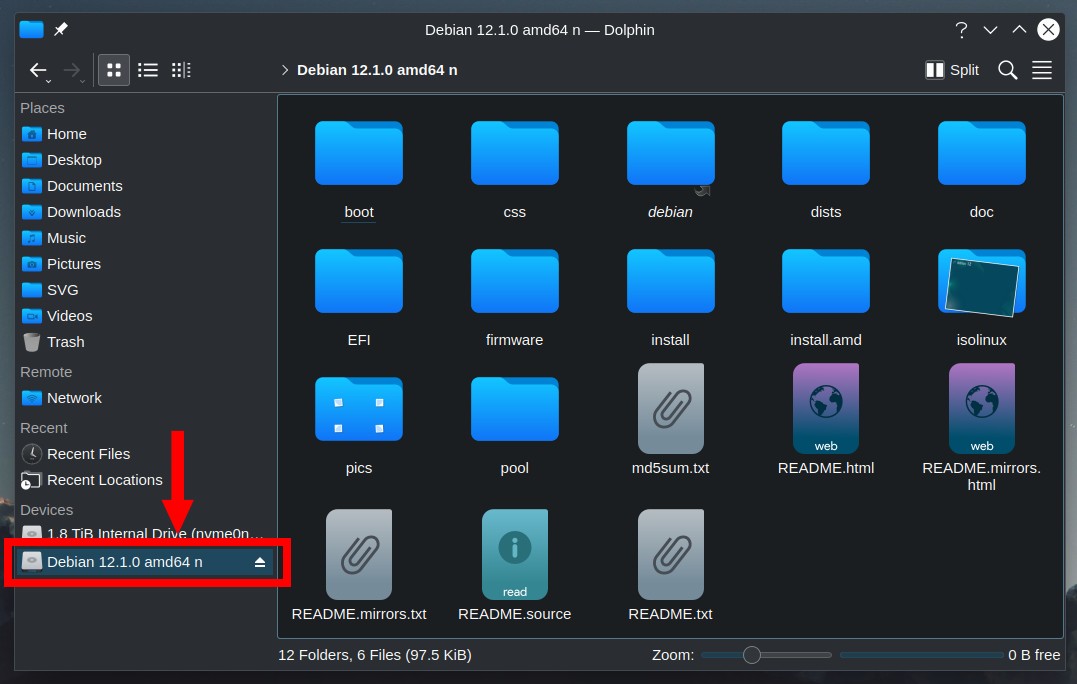
The ISO file will be automatically mounted and appear as a link in the Dolphin file manager sidebar. Click on the name to view the contents of the mounted ISO file.
To unmount it, right-click on the device name and choose “Unmount.”
How to Unmount ISO Files on Linux
Remember to unmount it when you’re done working with the ISO file. Unmounting a mounted ISO file in Linux is very easy.
To do this, type the umount command followed by the path to the location on the filesystem where you mounted the ISO image.
sudo umount /mnt/isoThe command will not return any output.
Conclusion
This article explored the step-by-step process of mounting ISO files on Linux, ranging from the straightforward command-line methods to the user-friendly GUI tools available.
By following these instructions, you can now seamlessly access the content within ISO files, whether installing software, extracting specific files, or exploring the contents of an operating system image.
Thanks for using our guide! If you have any questions or feedback, feel free to comment.


Or, you could just use Ventoy.
Hi Jed,
Yes, we’ve covered it here, but the idea of this article is different than how to burn an ISO on a USB drive.
Best,
Bobby