
The guide has been updated to reflect the latest Fedora version—42—now supported by VirtualBox.
VirtualBox 7 is a popular virtualization solution that allows you to run multiple operating systems on a single physical host. This guide will show you how to install it on Fedora 42, a Red Hat-supported Linux distro known for its cutting-edge software, user-friendliness, and great support.
Simply follow the steps outlined below, which I have tested and proven to work, and you’ll be up and running in no time with a system ready to meet all your virtualization needs.
Install VirtualBox on Fedora Linux
Disclaimer: While this guide focuses on installing VirtualBox on Fedora 42, it’s equally applicable to earlier versions, such as 41, 40, etc.
Step 1: Install VirtualBox Dependencies
First, you need to install some dependencies. These are specific software packages that are required for VirtualBox to run properly.
Using the DNF package manager, we will install the “development-tools” meta package and several kernel-related packages required for VirtualBox to function.
Open the terminal and run the following two commands:
sudo dnf install @development-tools
sudo dnf install kernel-headers kernel-devel dkmsCode language: Bash (bash)
Step 2: Import VirtualBox’s Repo GPG Key
First, we’ll import the GPG key from the VirtualBox repository to ensure the authenticity of the software we install from it.
curl -fL https://www.virtualbox.org/download/oracle_vbox_2016.asc \
  | sudo tee /etc/pki/rpm-gpg/RPM-GPG-KEY-virtualbox >/dev/nullCode language: Bash (bash)
Step 3: Add VirtualBox Repository to Fedora
Next, we will add the official VirtualBox repository to our Fedora 42 system. This implies that if a new version is released, the update package will be made available with the rest of your system’s regular updates.
Using your preferred terminal text editor, create the “/etc/yum.repos.d/virtualbox.repo” file:
sudo nano /etc/yum.repos.d/virtualbox.repoCode language: Bash (bash)Next, insert the content provided below, save the file, and then exit.
[virtualbox]
name=Fedora $releasever - $basearch - VirtualBox
baseurl=http://download.virtualbox.org/virtualbox/rpm/fedora/$releasever/$basearch
enabled=1
gpgcheck=1
repo_gpgcheck=1
gpgkey=file:///etc/pki/rpm-gpg/RPM-GPG-KEY-virtualboxCode language: Bash (bash)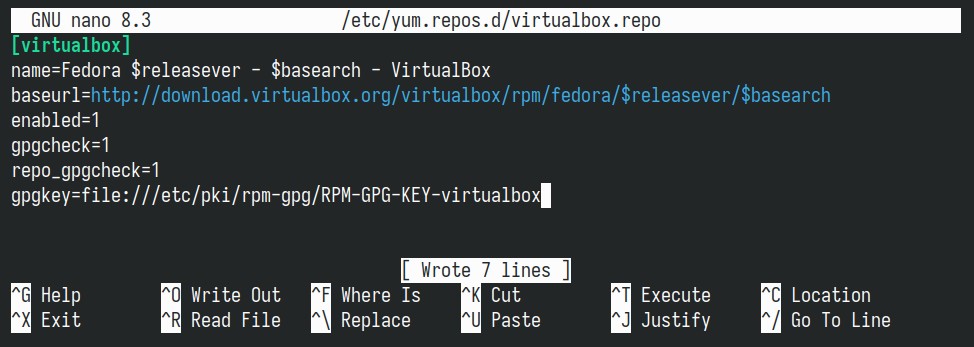
Next, refresh the package list. When prompted, type “y” to agree to import the GPG key signing packages from Oracle’s official VirtualBox repository.
sudo dnf updateCode language: Bash (bash)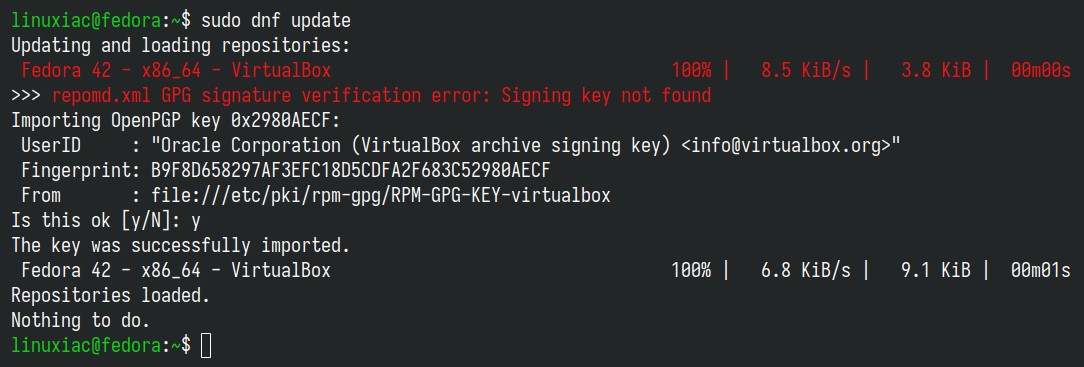
You can safely ignore the error shown above. It’s not something you can fix on your side since it’s tied to the repository itself (come on, Oracle, do something), but don’t worry—it doesn’t affect the installation of VirtualBox at all.
Step 4: Install VirtualBox on Fedora 42
Finally, we are all set for the actual installation. Now, to install VirtualBox on your Fedora 42 system, run the following commands:
sudo dnf install VirtualBox-7.2Code language: CSS (css)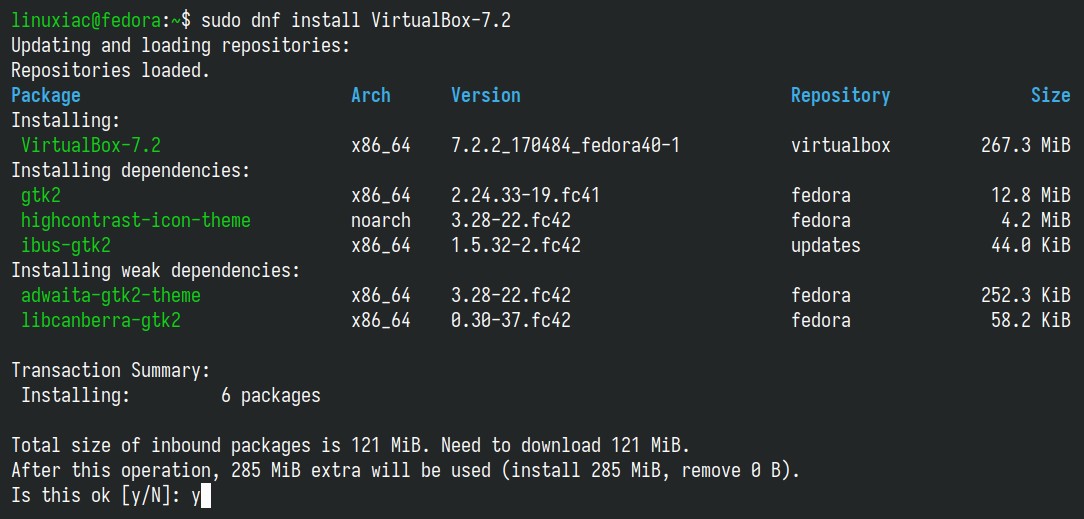
You will be prompted to import the GPG key again during installation. Type “y” and press “Enter.”
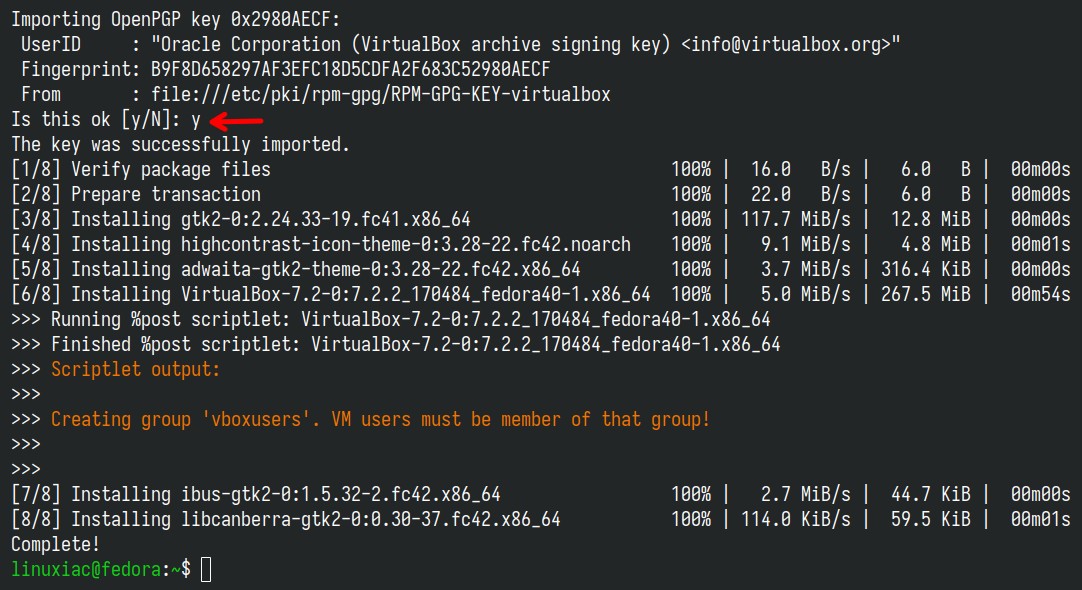
Wait for the installation to complete. Now that VirtualBox is installed and ready to roll on your Fedora 42 system, there’s one more step before we seize its opportunities.
Install VirtualBox Extension Pack
This is an optional step, but I strongly encourage it because it will make working with VirtualBox on your Fedora system easier and more convenient. VirtualBox Extension Pack unlocks many great features, such as:
- USB 2 and USB 3 support
- VirtualBox Remote Desktop Protocol (VRDP)
- Host webcam passthrough
- Disk image encryption with the AES algorithm
- Intel PXE boot ROM
Here’s an interesting point: Although not obligatory, it’s strongly advised that you ensure the version of the VirtualBox Extension Pack you install matches the version of VirtualBox on your Fedora 42 system.
To verify the exact version of the locally installed VirtualBox, you can use vboxmanage, a built-in VirtualBox command:
vboxmanage -v | cut -dr -f1Code language: Bash (bash)
As you can see, VirtualBox’s installed version is “7.2.2.” So, we’ll use the below wget command to download VirtualBox’s Extension Pack with the same version.
If your installation is different, replace both places containing “7.2.2” in the command below with the current version. You can also go straight to the downloads page and look at the available versions.
wget https://download.virtualbox.org/virtualbox/7.2.2/Oracle_VirtualBox_Extension_Pack-7.2.2.vbox-extpackCode language: Bash (bash)Next, to install the VirtualBox Extension pack, run the vboxmanage command as follows:
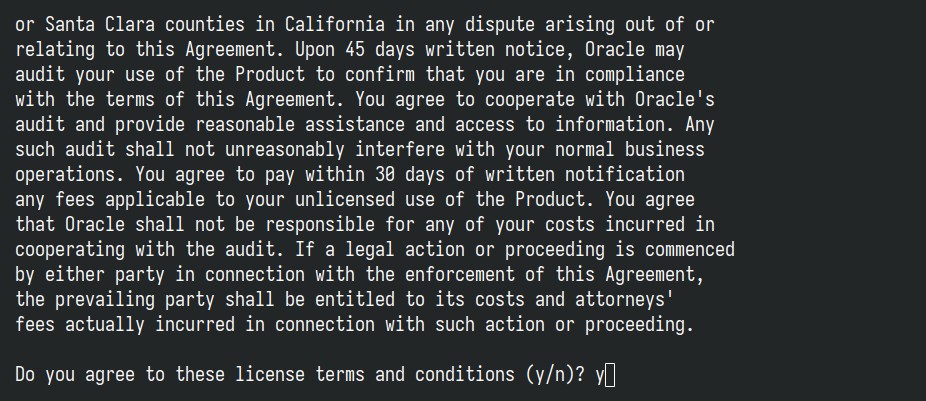
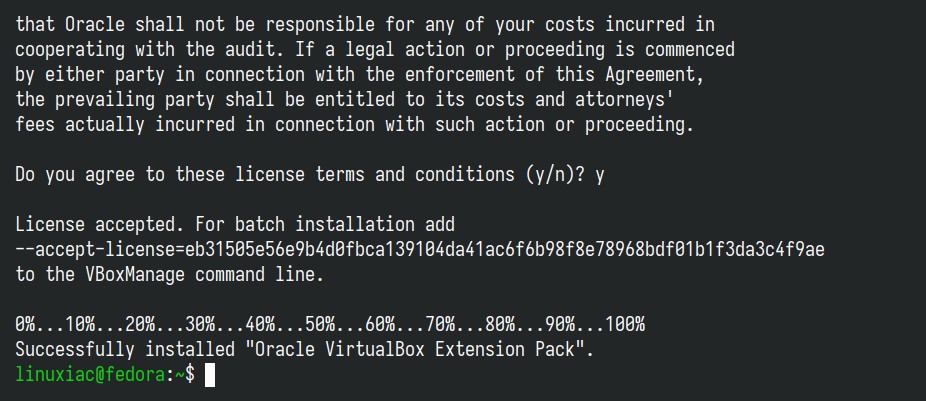
sudo vboxmanage extpack install Oracle_VirtualBox_Extension_Pack-7.2.2.vbox-extpackCode language: Bash (bash)You will be prompted to agree to Oracle’s license terms and conditions. To confirm, type “y” and press “Enter.”
Additionally, you can verify the installed VirtualBox extension pack version by running the following:
vboxmanage list extpacksCode language: Bash (bash)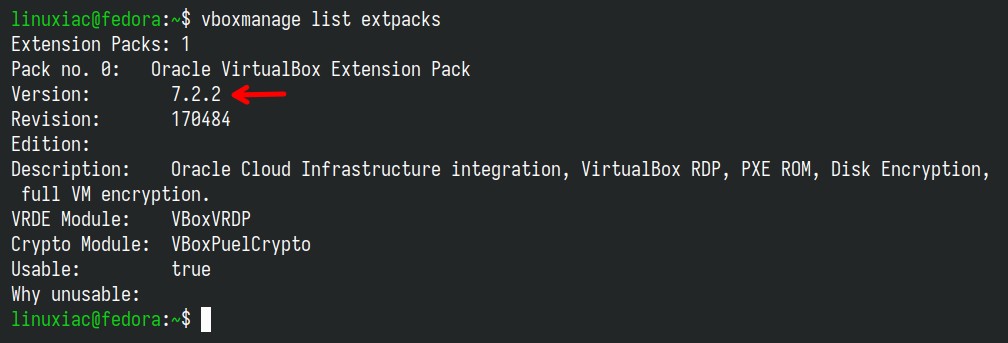
Add User to vboxusers Group
Before using VirtualBox, add your user account to the “vboxusers” group. This is quick and simple to accomplish by running:
sudo usermod -a -G vboxusers $USERCode language: Bash (bash)Now, perform a reboot. After login, check that you are in the “vboxusers” group with this command:
groups $USERCode language: Bash (bash)
Running VirtualBox on Fedora 42
Launching it from the desktop environment’s application menu, you can now start using VirtualBox. Type “virtualbox” and click on the icon when it appears.

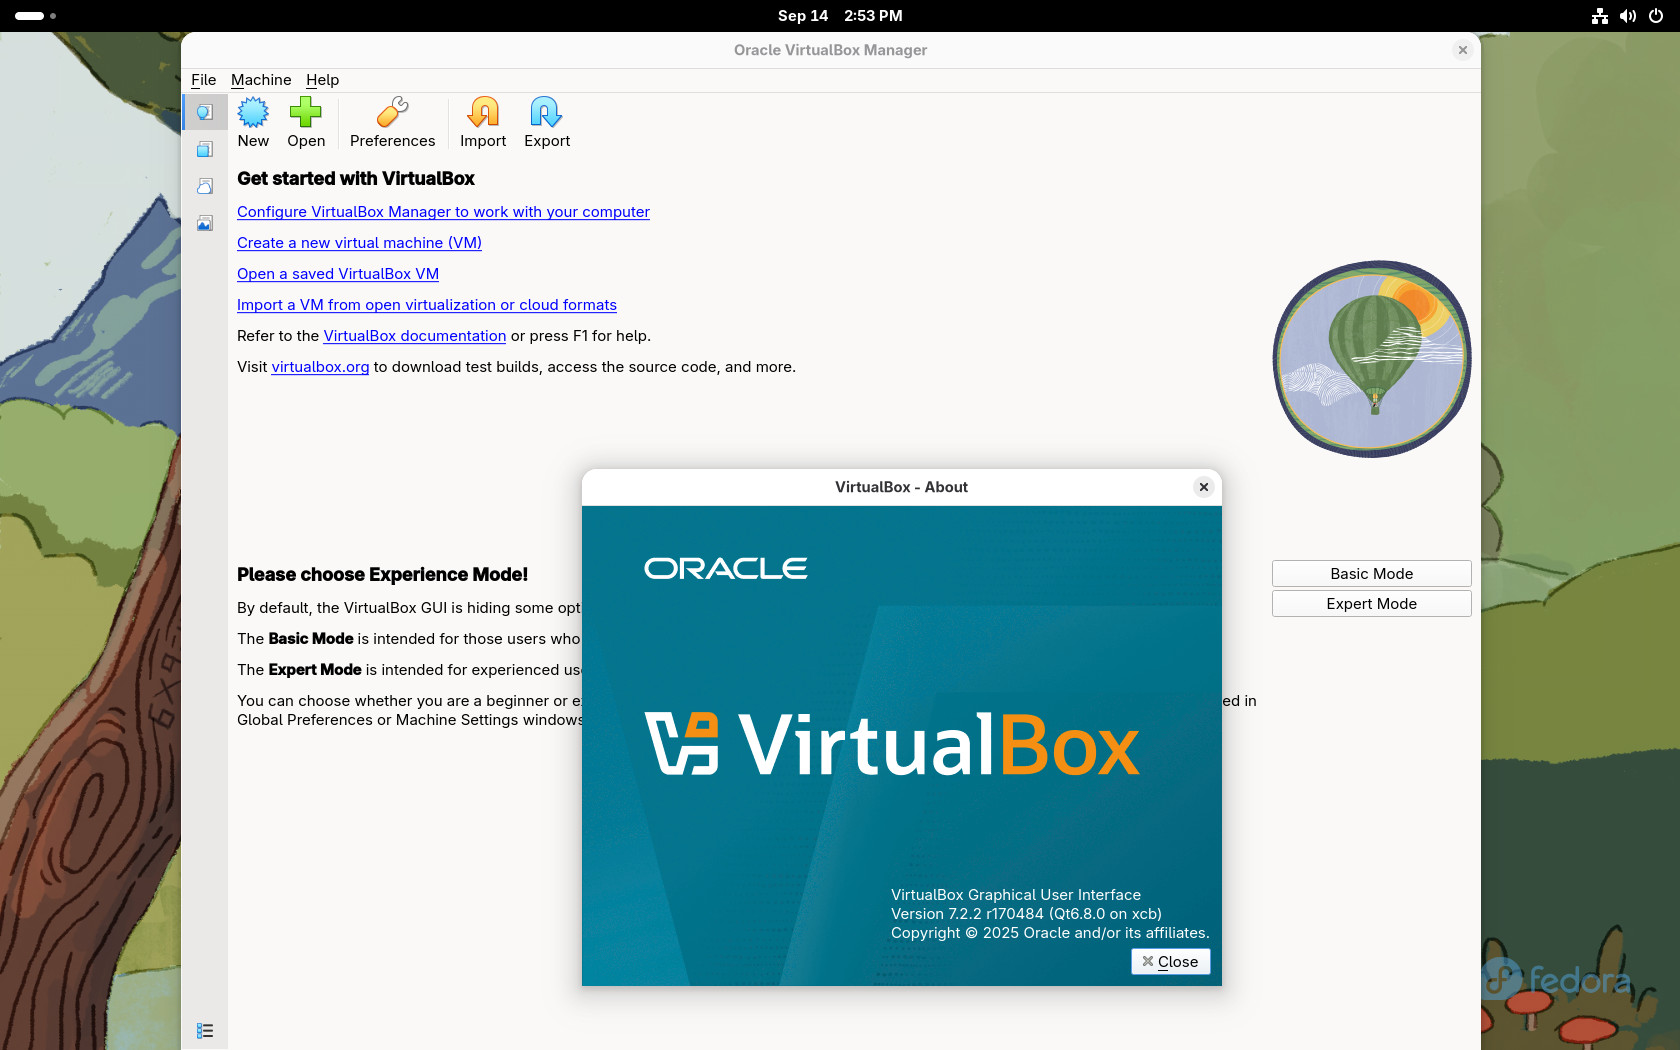
To start creating a new virtual machine, use the “New” button.
How to Uninstall VirtualBox
If you want to uninstall VirtualBox from your Fedora system for some reason, you can easily do so by running the command below.
sudo dnf remove VirtualBox-7.2Code language: Bash (bash)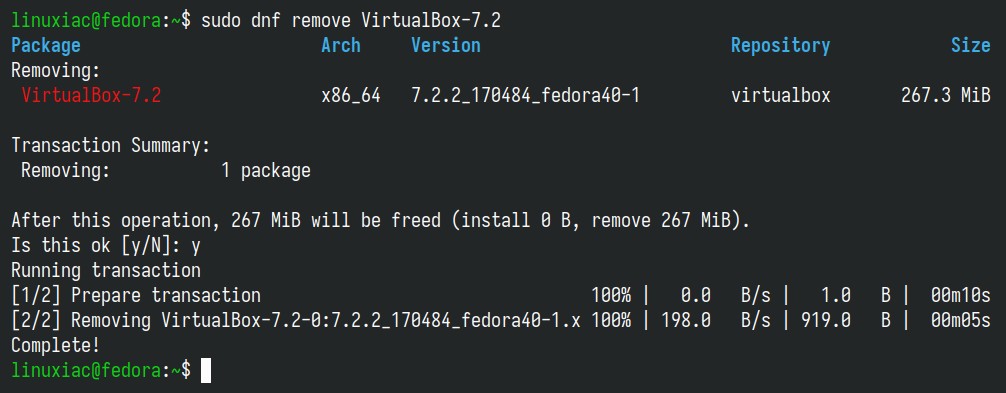
Then you have two choices: disable the VirtualBox repository on your Fedora system:
sudo dnf config-manager setopt virtualbox.enabled=0Code language: Bash (bash)Or completely remove it by deleting the repo’s file:
sudo rm /etc/yum.repos.d/virtualbox.repoCode language: Bash (bash)Conclusion
Installing VirtualBox 7.2 on Fedora 42 can give users a powerful and versatile virtualization solution for running multiple operating systems on a single machine.
With Fedora 42 as the host operating system, you can now take advantage of its stability, security, and cutting-edge software, making it a reliable platform for virtualization.
However, VirtualBox isn’t the only player in the virtualization game—VMware Workstation is another excellent and reliable option. If you’re considering trying it, we’ve got you covered with a step-by-step guide on setting it up on Fedora.
Thanks for using this tutorial! Any feedback is welcome in the section below.


Thanks for this guide! It did exaclty what I needed, and VirtualBox is installed on Fedora 43.
Thank you for the guide I was having troubles with Version 7.0, but upgrading to 7.2 fixed everything.
I tried adding the repository and I get the following errors:
>>> repomd.xml GPG signature verification error: Signing key not found
https://www.virtualbox.org/download/oracle_vbox_2016.asc 100% | 805.0 B/s | 521.0 B | 00m01s
>>> Status code: 402 for https://www.virtualbox.org/download/oracle_vbox_2016.asc (IP: x.x.x.x) – https://
>>> Status code: 402 for https://www.virtualbox.org/download/oracle_vbox_2016.asc (IP: x.x.x.x)
Repositories loaded.
Nothing to do.
I double checked my editing of the virtualbox.repo file and I think it looks okay. Can you suggest what’s going wrong? Obviously, installing VirtBox 7.1 afterward fails. Thanks in advance.
This is due to a bug that appeared in the latest DNF5 updates and remains unfixed. Anyway. I updated the guide with a workaround—locally downloading and importing the key—so the installation goes through without issues.
Also getting this 402 error, I guess this is a new issue…
402 is a Payment Required error? But I tried navigating to the URL that it’s complaining about in my browser, and it downloads the asc file without issue, so I’m not sure what the problem is.
Thank you very much from Brazil! I’ve been trying to install it for several days and I couldn’t!
Thank you very much for the tutorial – it worked great !!!
Hello,
thanks for this guide.
Unfortunately I get this on any VM start:
Ripping out features from the kernel and recompile is obviously not a feasible solution. So how do I fix this?
I just disable kvm+kvm_intel on boot and it works after that.
Hallo,
unfortunately I get this error:
when I try to start a VM according to this tutorial. How can I fix this?
This was a great thank you.
Ran sudo vboxmanage extpack install Oracle_VirtualBox_Extension_Pack-7.1.0.vbox-extpack and recieved the error sudo: vboxmanage: command not foundHow do I fix this. Not able to find a solution by googling. Thanks.
Thanks a million for this!!!! I have been struggling to get Virtualbox working for weeks
The instructions look pretty straight forward except for adding the content after "sudo nano /etc/yum.repos.d/virtualbox.repo".I cut and pasted the content: "[virtualbox] name=Fedora $releasever – $basearch – VirtualBox baseurl=http://download.virtualbox.org/virtualbox/rpm/fedora/$releasever/$basearch enabled=1 gpgcheck=1 repo_gpgcheck=1 gpgkey=https://www.virtualbox.org/download/oracle_vbox_2016.asc" but I am not clear on what is meant by saving it and exiting. There does not appear anything happening after adding the preceding content. Could you clarify the instruction?
Finally straight-forward instructions on how to reliably install VirtualBox without having to take a technical college course on virtualization! Thank you for saving my sanity, Bobby. I have little enough of it left as is! 😆
Excellent. Thank you! Completed in July 2024
Thank you for a very cogent guide. I am on the dump windows train. This helps.
Exellent step-by-step quide! Works fine for Feroda 39 Workstation, too. I immediately must bookmark the ‘https://linuxiac.com’. What a treasure house 🙂 Btw, this is the 1st comment I’ve ever needed to left on the various net-“guides” before.
Hey Joe,
Words like these made my day. 🙂 Thank you! I am glad to have been of help.
Best,
Bobby
Thank you Bobby,
My first ever installation on a Linux system was a great experience, great post.
There is a fix to the problem of virtualbox not starting on kernel 6.3.x. Just execute the following command as root and then reboot:
grubby –args=”ibt=off” –update-kernel $(grubby –default-kernel)
Hi,
It is worth noting that the current VirtualBox version (7.0.8) does not support correctly the 6.3.x kernels that are the latest in Fedora 38.
In many cases, booting on 6.2.x is the only solution.
… avoid updating Fedora if it removes that 6.2.x kernel, at least until VB has a better support (in 7.0.8 changelog it says « initial kernel 6.3 support »).
I found a missing dependency
$virtualbox
WARNING: The vboxdrv kernel module is not loaded. Either there is no module
available for the current kernel (6.2.9-300.fc38.x86_64) or it failed to
load. Please recompile the kernel module and install it by
It appears this is the correct dependency:
[cpvmuser@fedora ~]$ sudo dnf install kernel-devel-6.2.9-300.fc38.x86_64
$ sudo /sbin/vboxconfig
vboxdrv.sh: Stopping VirtualBox services.
vboxdrv.sh: Starting VirtualBox services.
vboxdrv.sh: Building VirtualBox kernel modules.
I have unsuccessfully tried to install and use Virtual Box several times. This guide, accompanied by the helpful tips provided by VBoxManage helped me to get the job done very easily. This is a tip for those who follow: If your PC has Secure Boot enabled read this. Automatic driver signing failed for me. Fortunately the installer gave me instructions to manually sign the drivers using MOK enrollment. I followed them, step by step up to the point where I was directed to reboot. Before rebooting, I copied the remaining instructions to a text document so I would have them after the reboot. When I rebooted, I was greeted with the MOK enrollment dialog. I chose to enroll the key, then rebooted back into Fedora 38. I then ran ‘/sbin/vboxconfig’ to restart the setup process. This time it completed successfully. My last steps were to download and install the extension pack, then install Windows 11 in VBox. It’s working great! I wanted to install Windows 11 in a VM hosted by Fedora so I could potentially remove it from by bare-metal PC and run it in a VM ( there are a few games I’m nearly addicted to that are only available for Windows), but I.m becoming increasingly fed up with the direction Microsoft is taking. If I,m running Fedora as my daily production environment, with VBox installed and working correctly, I can still have my favorite games!
I hope this helps others,
Ernie
I get these errors:
file /usr/bin/VBox from install of VirtualBox-7.0-7.0.8_156879_fedora36-1.x86_64 conflicts with file from package VirtualBox-server-7.0.8-1.fc38.x86_64
file /usr/bin/vbox-img from install of VirtualBox-7.0-7.0.8_156879_fedora36-1.x86_64 conflicts with file from package VirtualBox-server-7.0.8-1.fc38.x86_64
file /usr/bin/vboximg-mount from install of VirtualBox-7.0-7.0.8_156879_fedora36-1.x86_64 conflicts with file from package VirtualBox-server-7.0.8-1.fc38.x86_64
Hi Peter,
It looks like there are already VirtualBox-related packages installed on your system. Did you try to install it from other sources? Anyway.
My advice is to run “
sudo rpm -aq | grep VirtualBox” and then use “sudo yum remove package_name” to remove all VirtualBox-related packages from your system.Once you’ve done that, follow the steps in this guide again, and everything should be fine.
Best,
Bobby
I would like up to date and detailed instruction on how to install VirtualBox in Fedora 38 on an EFI system. All the instruction I have tried did not prove out. Kubuntu as well as other Debian based distributions build the Mok built into the installation process. I hope Fedora will follow suit or if I can find instruction that actually works. Can you assist? Thanks.