- How Rsync Command Works
- Rsync Command Syntax
- How to Use Rsync Command in Linux
- Copy/Sync a Single File Locally
- Copy/Sync Multiple Files and Directory Recursively Locally
- Copy/Sync Multiple Files and Directory Recursively from Local to Remote Machine
- Copy/Sync Multiple Files and Directory Recursively from Remote to Local Machine
- Exclude Files and Directories from Sync
- Include Files for Sync
- Delete Files
- Performing a Dry Run With Rsync
- Delete Source Files After Transfer
- Avoid Rsync to Overwrite Modified Destination Files
- Show Progress during Transfer
- Set Maximum and Minimum File Size for Transfer
- Set Bandwidth Limit
- Conclusion
Rsync is a command part of every Linux administrator’s must-have skills. It’s a command-line tool for mirroring files and directories, making backups, and migrating data to other servers.
The use of the rsync command is functionally similar to the SCP command but provides some advantages and more flexibility.
This guide will show you how to use the rsync command to efficiently perform file and directory synchronization under Linux, using simple examples. Most of them will require the use of two Linux machines.
Hence, rsync must be available. Fortunately, it is pre-installed and available in most Linux distributions. But if you don’t have it, you can easily install it using your distribution’s package manager, such as APT, DNF, Pacman, XBPS, and so on, and the package name is rsync.
How Rsync Command Works
Rsync does a one-way sync, and by default, it uses SSH to ensure transfer security. In addition, a rsync process operates by communicating with another rsync process.
Therefore, if you want to synchronize files or directories between two remote servers, the rsync command must first be installed on both.
Rsync, as previously mentioned, utilizes SSH behind the scenes. As a result, regardless of the type of Linux machine you’re using, it’s strongly recommended that you create SSH keys on both ahead of time. If you’re unsure how to check out our excellent guide, “How to Generate an SSH Key Pair (with Examples).”
Then it would be best to exchange those SSH keys between the hosts to ensure passwordless operation. But, again, you can rely on our “How to Setup SSH Login Without Password” guidance for assistance.
When a client requests synchronization with a remote server, rsync determines which files need to be transferred. This means that rsync will only transfer files (delta-transfer algorithm) that have been modified in the meantime.
The most basic approach rsync uses for this purpose is simply recursively scanning folders and evaluating modification dates and exact file sizes.
Now that you know how Rsync works, let’s explore how to use it.
Rsync Command Syntax
However, before we go into how to use rsync, it’s a smart move to understand the syntax of the rsync command. Then, we can keep the syntax in mind while going through the examples.
rsync [OPTIONS] SOURCE DESTINATIONCode language: CSS (css)The most important thing to remember is that SOURCE is the location from which the files or directories will be copied, and DESTINATION is the location into which the files and directories will be transferred.
Here’s a quick cheat sheet highlighting the most important arguments of the rsync command.
-a,--archive: archive mode permits recursive file copying while still preserving symbolic links, file permissions, user and group ownership, and timestamps.-h,--human-readable: the numbers in the output are displayed in a human-readable format.-n,--dry-run: perform a trial run with no changes.-r,--recursive: copies data recursively but doesn’t preserve timestamps and permission while transferring data.-v,--verbose: increase verbose.-z,--compress: used to save space by compressing data during transmissions.
How to Use Rsync Command in Linux
Most examples below using a scenario involving two Linux machines, symbolically labeled east and west. With that clarification made, let’s get to the meat of the guide.
Copy/Sync a Single File Locally
The following command will sync a single file (logo.jpg) from one directory (/srv/dir1) to another (/srv/dir2) on a local machine. If the destination directory does not already exist, rsync will create it automatically.
rsync /srv/dir1/logo.jpg /srv/dir2/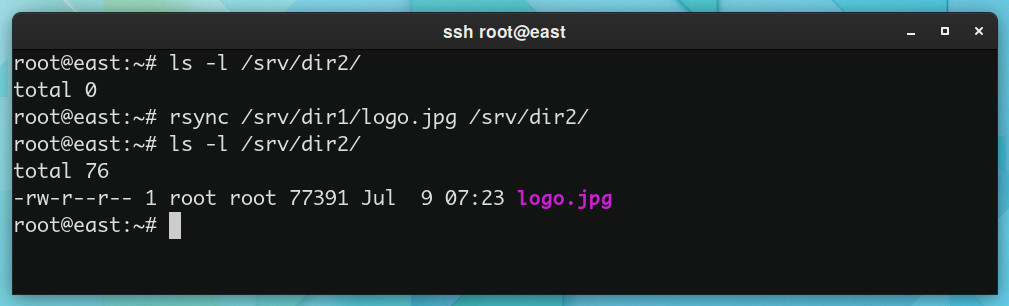
As you can see, rsync functions similarly to the well-known cp command in this case.
The file with the current name is copied when the filename is omitted from the destination location. However, if you want to save the file under a different name, enter the new name in the destination part.
rsync /srv/dir1/logo.jpg /srv/dir2/new-logo.jpgCode language: JavaScript (javascript)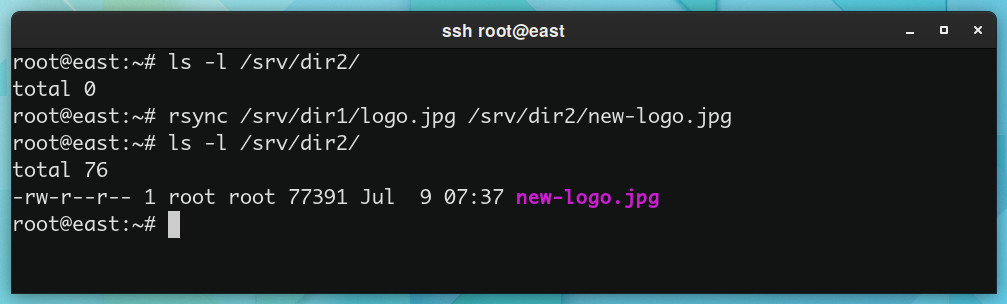
Copy/Sync Multiple Files and Directory Recursively Locally
The true power of the rsync command comes into play when we synchronize entire directories.
But before we get to the actual example, let us clarify something important. When you use the rsync command to synchronize one directory and its subdirectories to another, you usually want to retain file modification times, file permissions, symbolic links, etc.
To achieve this, you need to combine several options. The final result looks like -rlptgoD, which is hard to remember. Fortunately, rsync provides a reduced version of the preceding options merged into a single option, -a.
Therefore, by adding the -a argument to your command, you get:
- (
-r) recurse into directories - (
-l) copy symlinks as symlinks - (
-p) preserve permissions - (
-t) preserve modification times - (
-o) preserve owner - (
-g) preserve group - (
-D) preserve device files
in a single easy-to-remember and use -a (archive) parameter.
With these clarifications, the command below will transfer all files from the /srv/dir1 directory to the /srv/dir2 directory on the same machine.
rsync -a /srv/dir1/ /srv/dir2/Code language: JavaScript (javascript)However, when run in this manner, the rsync command does not return any extra information about the activities it performs. So we’ll add three more parameters to the -a option to see what happens: -v, -z, and -h.
This brings us to the classic and most widely used rsync command with the -avzh parameters.
The -v option provides extra information about the transfer, -z compresses the files during the transfer to save space, and -h displays the size of the transferred files in an easy-to-understand format.
We can run the command again, and the output is significantly more informative.
rsync -avzh /srv/dir1/ /srv/dir2/Code language: JavaScript (javascript)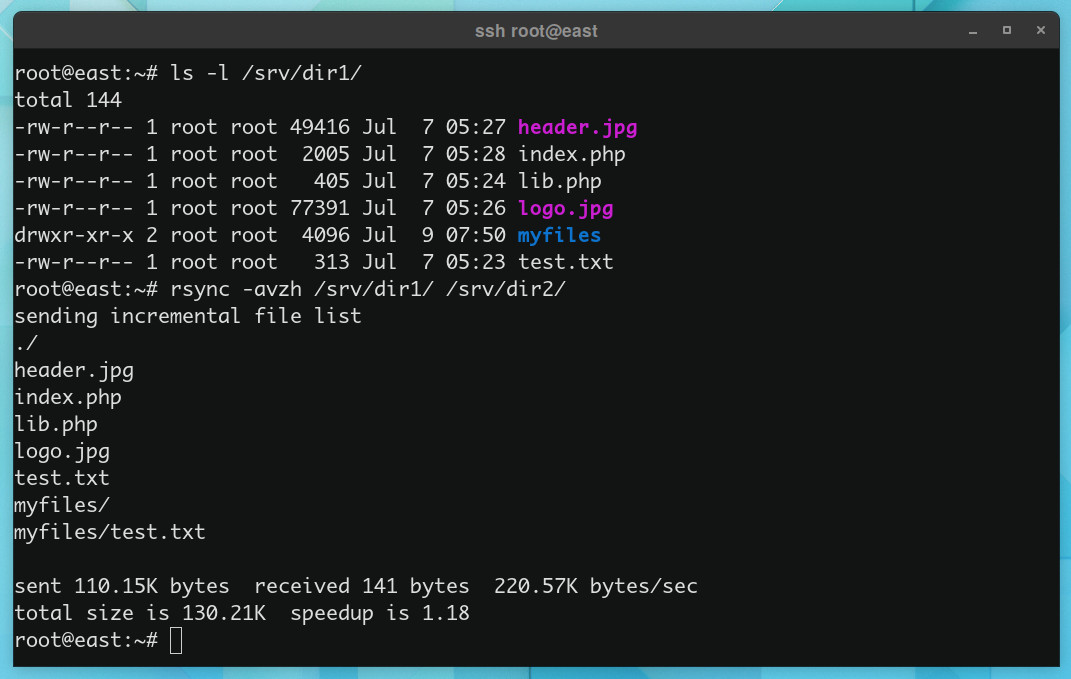
Copy/Sync Multiple Files and Directory Recursively from Local to Remote Machine
Although rsync is excellent for synchronizing files locally on your system, it is most commonly used to synchronize files between two remote Linux machines.
To transfer the entire contents of the /srv/dir1 directory from local machine (east) to /tmp/dir1 on a remote machine (west), type:
rsync -avzh /srv/dir1/ root@west:/tmp/dir1/Code language: JavaScript (javascript)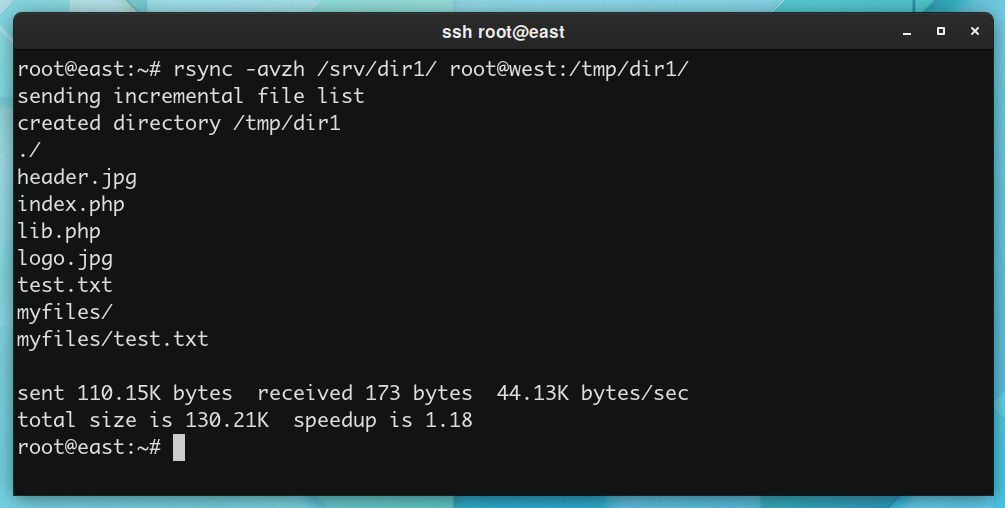
Let us now focus on syntax. The first portion (the source), as you can see, is the path to our local directory (/srv/dir1). The second portion, on the other hand, specifies the remote host using the familiar user@host syntax from SSH.
This is followed by the colon (:) as a separator, followed by the full path to the directory (/tmp/dir1) on the remote system to which the files should be transferred.
Copy/Sync Multiple Files and Directory Recursively from Remote to Local Machine
Transferring files from a remote machine to our local machine is identical to the preceding example. The only difference is that the source and destination locations have been switched.
To put it another way, we’ll use the remote machine as the source and our local machine as the destination.
So, to transfer the entire contents of the remote directory /tmp/dir1 on a system named west to its /srv/dir1 on our local machine, run:
rsync -avzh root@west:/tmp/dir1/ /srv/dir1/Code language: JavaScript (javascript)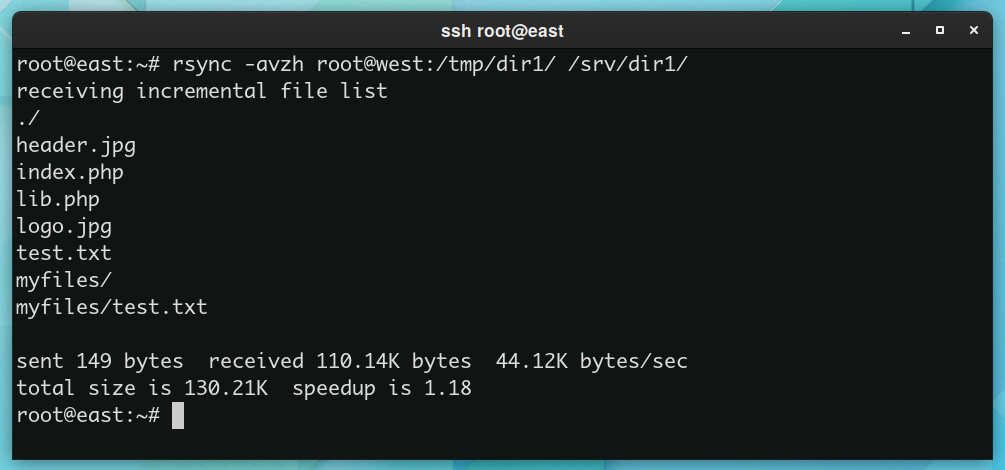
Exclude Files and Directories from Sync
One helpful feature of the rsync command is the ability to specify which files or directories should be excluded from the synchronization operation.
This can be done in two ways: directly listing them from the command line (--exclude) or by specifying these files and directories in the separate text file (--exclude-from). Let us demonstrate both approaches.
For example, we will synchronize the remote directory /tmp/dir1 on server west with our local directory /srv/dir1. However, we will specify that the myfiles directory and the test.txt file be excluded from the synchronization process.
With these clarifications, our command would be as follows:
rsync -avzh --exclude=myfiles --exclude=test.txt root@west:/tmp/dir1/ /srv/dir1/Code language: JavaScript (javascript)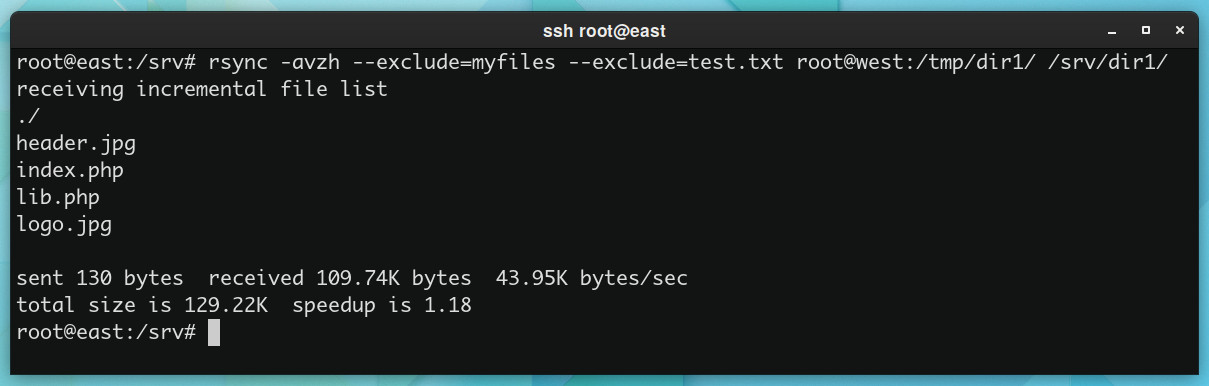
Please pay attention that we provide the relative path (test.txt) rather than the full (/srv/dir1/test.txt) path to the files and directories we want to exclude.
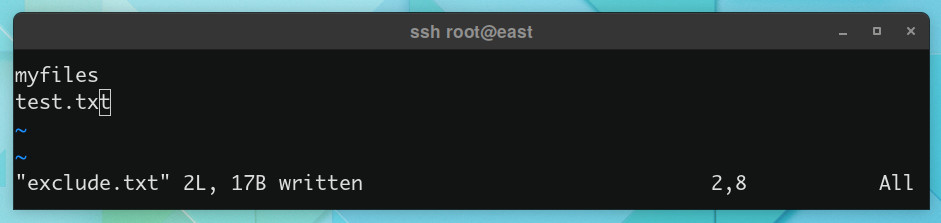
Consider the second approach now. To do this, create a text file with a list of the files and directories we want to exclude, then pass that file as an argument to the rsync command.
To achieve this, we create a test file called exclude.txt, which looks as follows:
Then we execute:
rsync -avzh --exclude-from=exclude.txt root@west:/tmp/dir1/ /srv/dir1/Code language: JavaScript (javascript)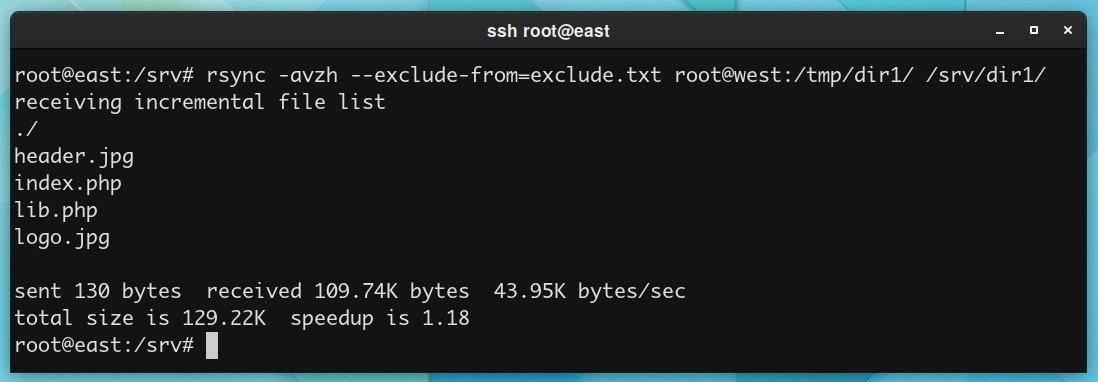
Of course, you can use the --exclude option with a wildcard (*). For example, if you want to exclude all JPG files from synchronization, you may use --exclude=*.jpg.
Include Files for Sync
Similar to the --exclude option, --include allows us to specify which files we want to include in the synchronization. However, this option works best when combined with --exclude. This allows us to limit the types of files that can be transferred.
For example, if we want to transfer only JPG files while excluding all others, the command would be as follows:
rsync -avzh --include='*.jpg' --exclude='*' root@west:/tmp/dir1/ /srv/dir1/Code language: JavaScript (javascript)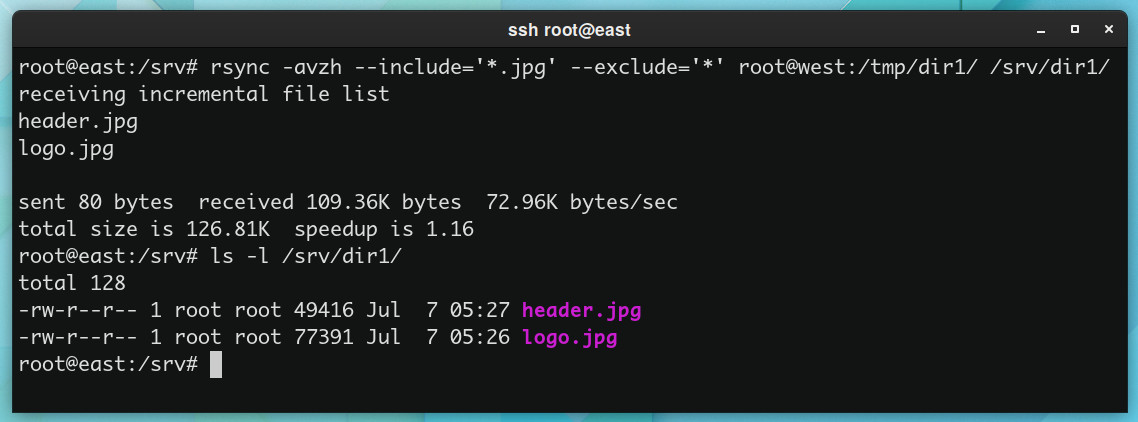
Delete Files
Deleting files not present in the source but available in the destination is another helpful option when synchronizing files. We can achieve this functionality using the --delete option.
Currently, our local /srv/dir1 directory looks like this:

We assume that only the index.php and logo.jpg files are available on the remote server (west) in the directory we want to synchronize (/tmp/dir1). We run rsync with the --delete option:
rsync -avzh --delete root@west:/tmp/dir1/ /srv/dir1/Code language: JavaScript (javascript)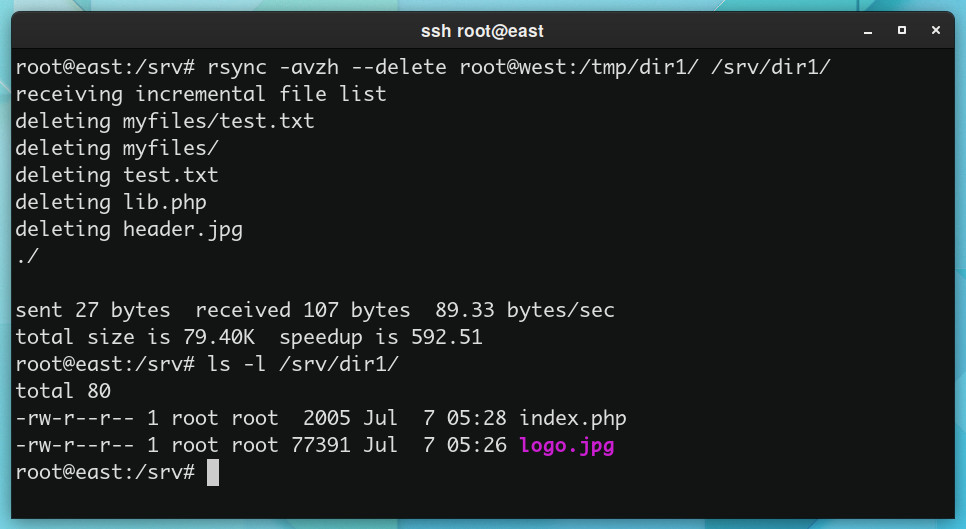
As you can see, after running rsync with the --delete option, the files present on our machine (destination) but not in the source directory from which we are synchronizing are automatically deleted.
But there is one thing we must highlight. Use considerable caution while running rsync with the --delete option. If you make a mistake when specifying your source, everything on your destination will be removed.
Therefore, it is strongly recommended that before using --delete, you test the execution of the rsync command with the --dry-run option added, which we will describe in the following section.
Performing a Dry Run With Rsync
Using this option can save you a lot of trouble caused by mistake. The --dry-run option instructs rsync to execute a trial run that makes no changes and produces identical results to a real run.
Referring to the example above, we may run the --delete command with the --dry-run option to test if the result is as expected.
rsync -avzh --delete --dry-run root@west:/tmp/dir1/ /srv/dir1/Code language: JavaScript (javascript)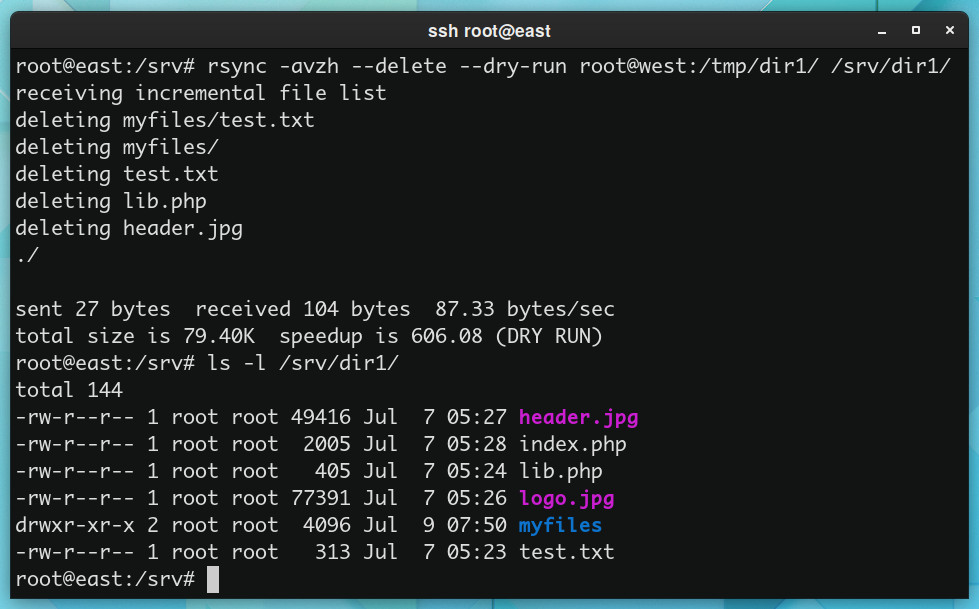
While no changes are made to the files, we can see what operations will be performed during synchronization.
Delete Source Files After Transfer
Sometimes, you may want to delete the source files after the transfer. For example, you could transfer a daily backup to a new server. So once the transfer is completed, the source files on the old server are no longer required.
You can use the --remove-source-files option to delete the source file.
rsync -avzh --remove-source-files root@west:/tmp/dir1/ /srv/dir1/Code language: JavaScript (javascript)The important thing to remember here is that executing rsync with the --remove-source-files option only removes files from the source, not directories.
Avoid Rsync to Overwrite Modified Destination Files
As previously stated, when using rsync to synchronize files between two directories, they are not transferred if the files are present and identical in both the source and destination.
However, if you make changes to a file in the destination in the meantime, they will be replaced with the original in the source on a subsequent transfer.
In that case, you can add the -u (--update) option to skip overwriting updated destination files.
rsync -avzhu root@west:/tmp/dir1/ /srv/dir1/Code language: JavaScript (javascript)Show Progress during Transfer
You can use the --progress option to show the progress while transferring data. So when the transfer for a specific file is complete, rsync displays a summary line, as shown below.
rsync -avzh --progress root@west:/tmp/dir1/ /srv/dir1/Code language: JavaScript (javascript)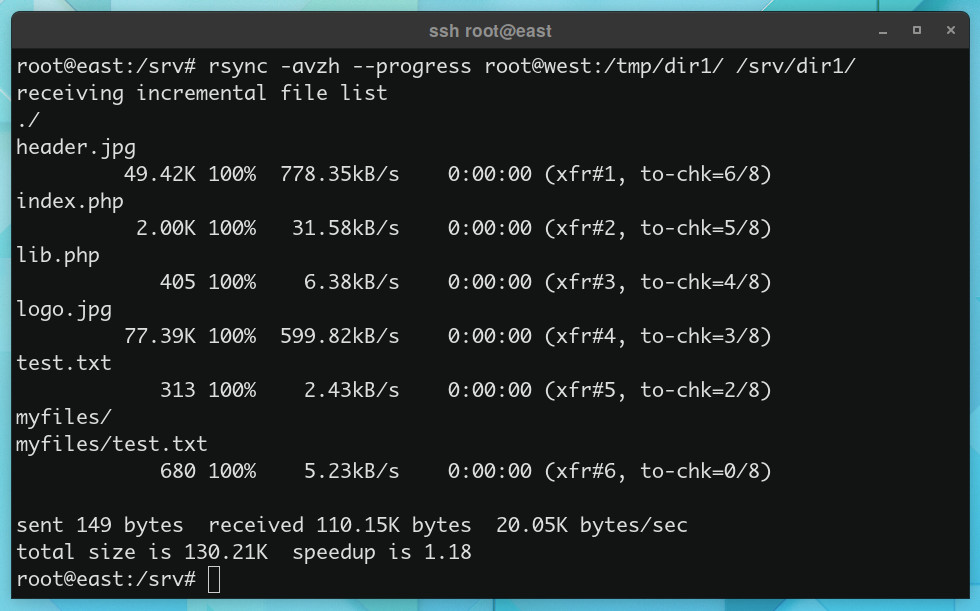
Set Maximum and Minimum File Size for Transfer
Another helpful feature of the rsync command is the ability to specify the maximum (--max-size) or minimum (--min-size) size of the files to be synchronized.
Run the following command to skip any file smaller than 100KB:
rsync -avzh --min-size=100k root@west:/tmp/dir1/ /srv/dir1/Code language: JavaScript (javascript)Similarly, to transfer files no larger than 1MB, use the following command:
rsync -avzh --max-size=1m root@west:/tmp/dir1/ /srv/dir1/Code language: JavaScript (javascript)Set Bandwidth Limit
Use the --bwlimit option to set the bandwidth limit during data transfer between machines. This option is useful when you don’t want to overload your network’s throughput. In addition, the rsync command uses kilobytes per second (KB/s) as its measuring unit.
For example, to set the maximum transfer speed to 500KB/s, type:
rsync -avzh --bwlimit=500 root@west:/tmp/dir1/ /srv/dir1/Code language: JavaScript (javascript)Conclusion
In this article, we’ve covered the most frequent ways for using the rsync command to synchronize files under Linux. We hope we have been of help to you.
More information regarding the rsync command can be found on its manual page.
Please feel free to leave your comments, suggestions, and additions in the section below.