
Nextcloud is a self-hosted file-sharing application server that allows you to store your files, documents, and contacts from a centralized location. It is a true open-source platform similar to Dropbox, Google Drive, OneDrive, and other proprietary online storage services.
The problem with the big players is that you don’t know where your data is exactly and whether it is safe from access by others. So when it comes to some classified data that you don’t want to store on some third-party servers, it is good to go for something you can control completely.
With Nextcloud, you can synchronize everything between your devices and share files with others. Furthermore, you can create multiple accounts for friends/family. They will then be able to log into the server and store data, very similar to Dropbox, etc.
The server-side program of Nextcloud is meant to work on Linux operating systems; therefore, any Linux user, even the beginner, can easily install it. So without further ado, let’s get down to installation.
1. Install Apache Web Server
Since Nexcloud will run on a web browser, the first step will be to install the Apache Web Server.
sudo apt install apache2Once installed, verify the status of Apache:
sudo systemctl status apache2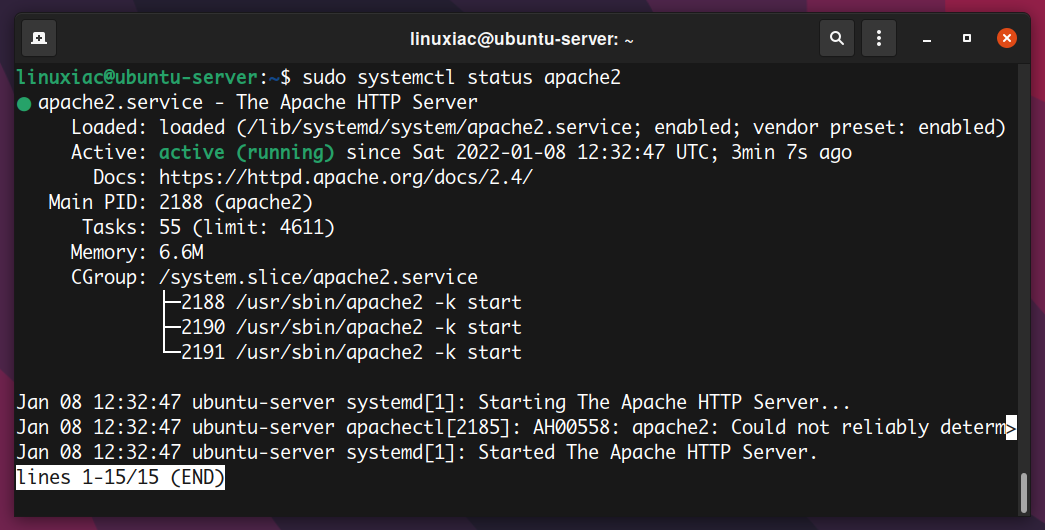
We can see that the Apache Web Server is up and running from the output above.
2. Install PHP
Nextcloud is written in PHP programing language, so PHP is an essential requirement for Nextcloud code. Run the following commands to install PHP modules required or recommended by Nextcloud.
sudo apt install php libapache2-mod-php php-imagick php-common php-mysql php-gd php-json php-curl php-zip php-xml php-mbstring php-bz2 php-intl php-bcmath php-gmp php-dom unzipConfirm your PHP version:
php -v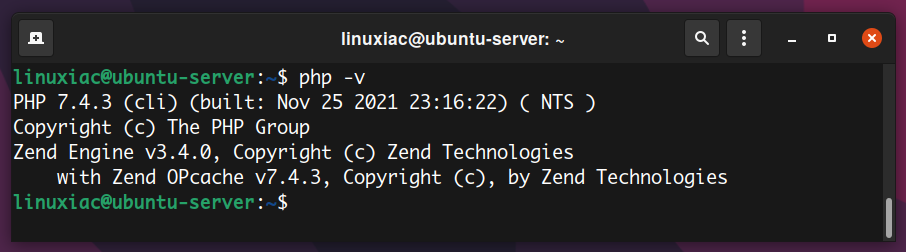
Reload Apache for the changes to take effect.
sudo systemctl reload apache23. Install and Configure MariaDB Database Server
Nextcloud can use MySQL, MariaDB, PostgreSQL, or SQLite database to store its data. In this guide, we will use MariaDB, so let’s install it.
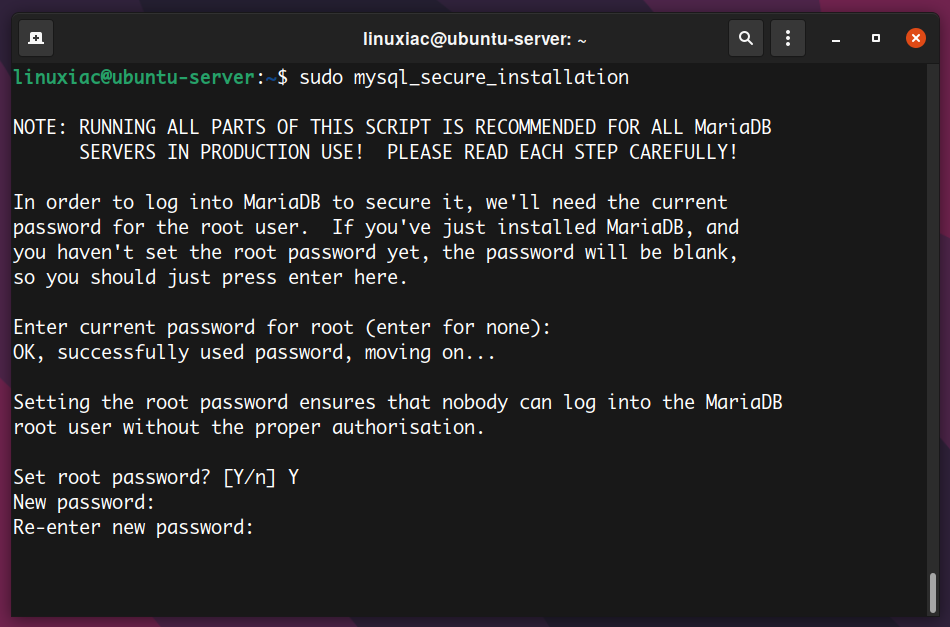
sudo apt install mariadb-serverWith the MariaDB servers installed, we need to set a password for the MariaDB admin user:
sudo mysql_secure_installationWhen it asks you to enter the MariaDB root password, press Enter key as the root password isn’t set yet. Then enter Y to set the root password for the MariaDB server. Remember to give the MariaDB root user a strong password.
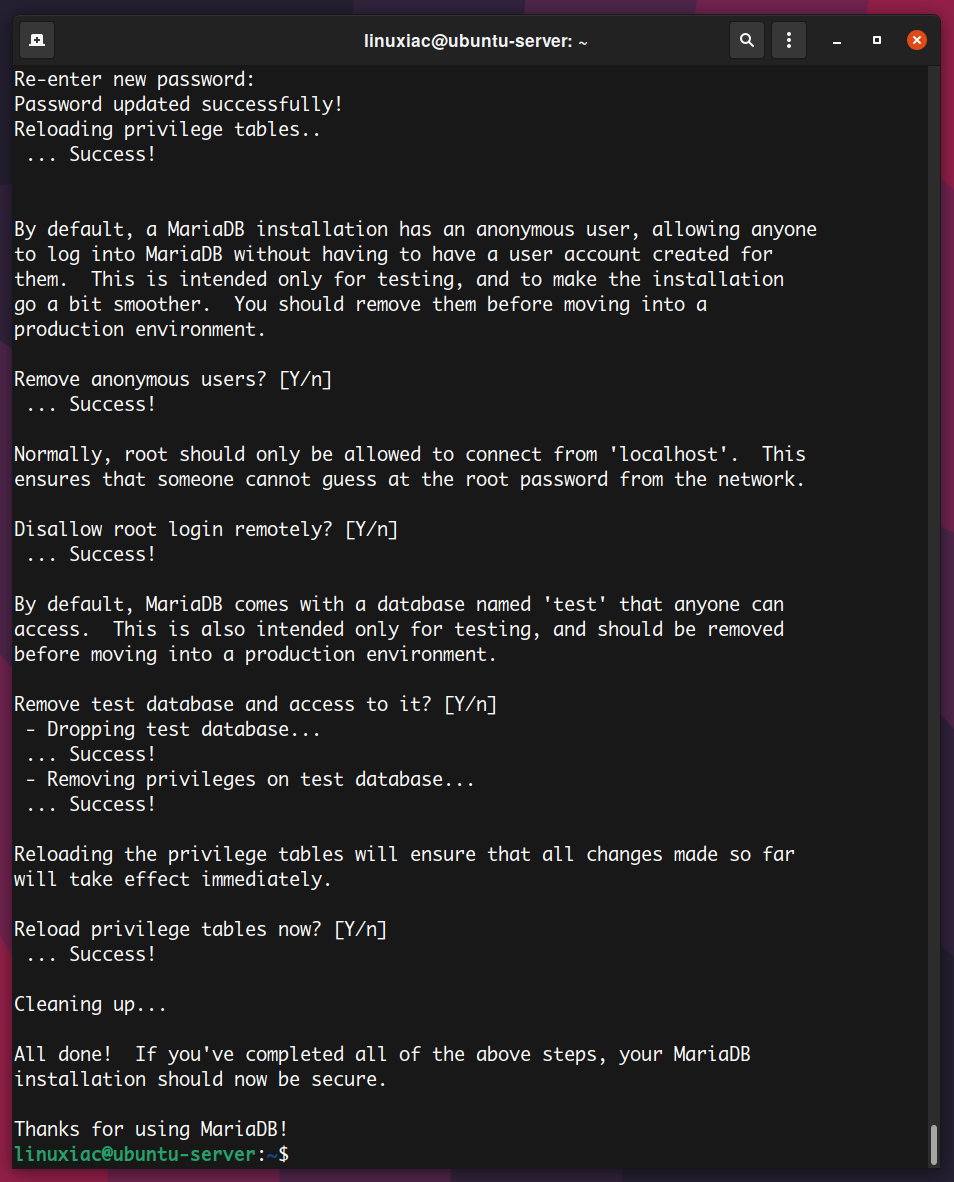
Next, you can press Enter to answer all remaining questions, remove anonymous users, disable remote root login, and remove the test database.
4. Create a Database and User for Nextcloud
Login as a root user to MariaDB:
sudo mysql -u root -p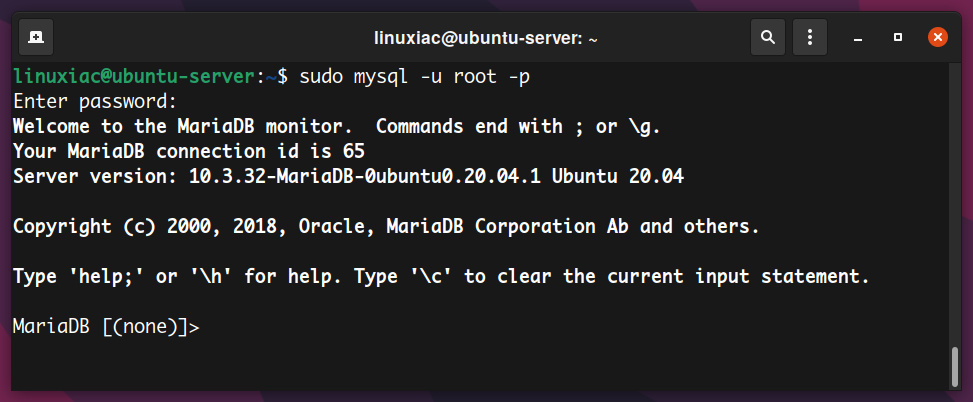
Then create a new database for Nextcloud. This tutorial names the database nextcloud, but you can use whatever name you like.
CREATE DATABASE nextcloud;Next, create the database user and grant permissions to the nextcloud database. I choose nextcloud-user for a username, but you can use your preferred name for this user.
Don’t forget to replace your-password with your preferred password.
GRANT ALL ON nextcloud.* TO 'nextcloud-user'@'localhost' IDENTIFIED BY 'your-password';Code language: JavaScript (javascript)Reload privileges and exit.
FLUSH PRIVILEGES;
EXIT;Code language: PHP (php)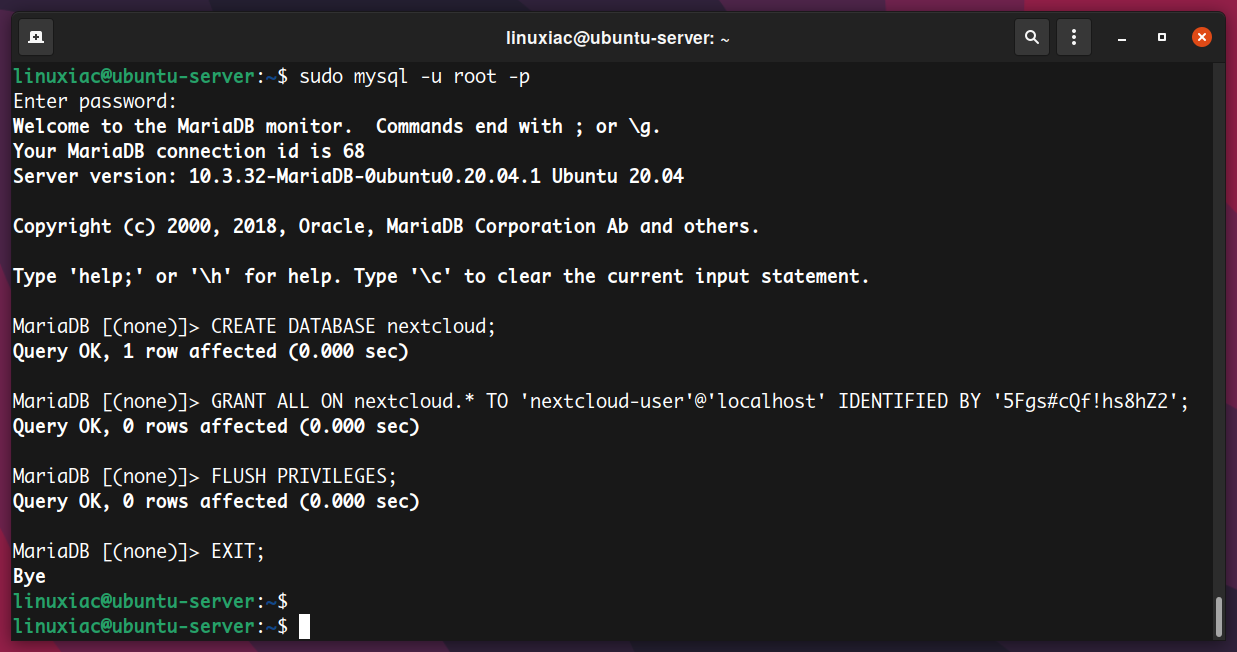
Confirm if the user can connect to the database with the provided password:
mysql -u nextcloud-user -p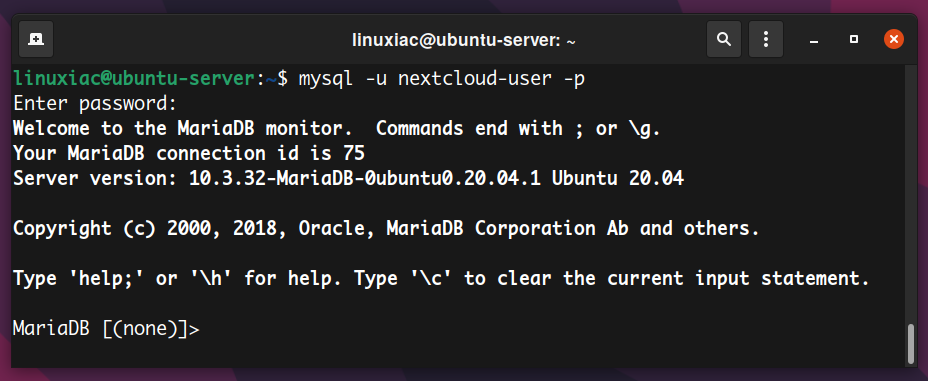
5. Download and Install Nextcloud
With the database configured, now it’s time to download Nextcloud. Nextcloud is distributed as a zip file. Check for the latest release from the Nextcloud download page before pulling the archive.
As of this writing, the latest release is 23.0. Use the following command to download NextCloud:
wget https://download.nextcloud.com/server/releases/nextcloud-23.0.0.zipCode language: JavaScript (javascript)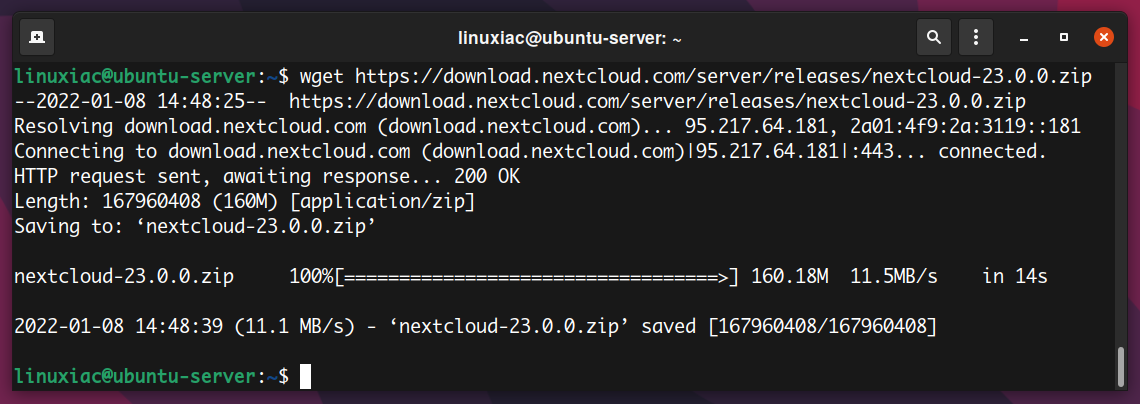
Execute the below commands to unzip the package into /var/www/html, create data directory where Nextcloud to store the user data, and set appropriate directory permissions:
sudo unzip nextcloud-23.0.0.zip -d /var/www/html/
sudo mkdir /var/www/html/nextcloud/data
sudo chown -R www-data:www-data /var/www/html/nextcloud/Code language: JavaScript (javascript)
6. Configure Nextcloud
Nextcloud is now successfully installed. Next, open a web browser and point it to http://server-ip/nextcloud/ to complete the final steps.
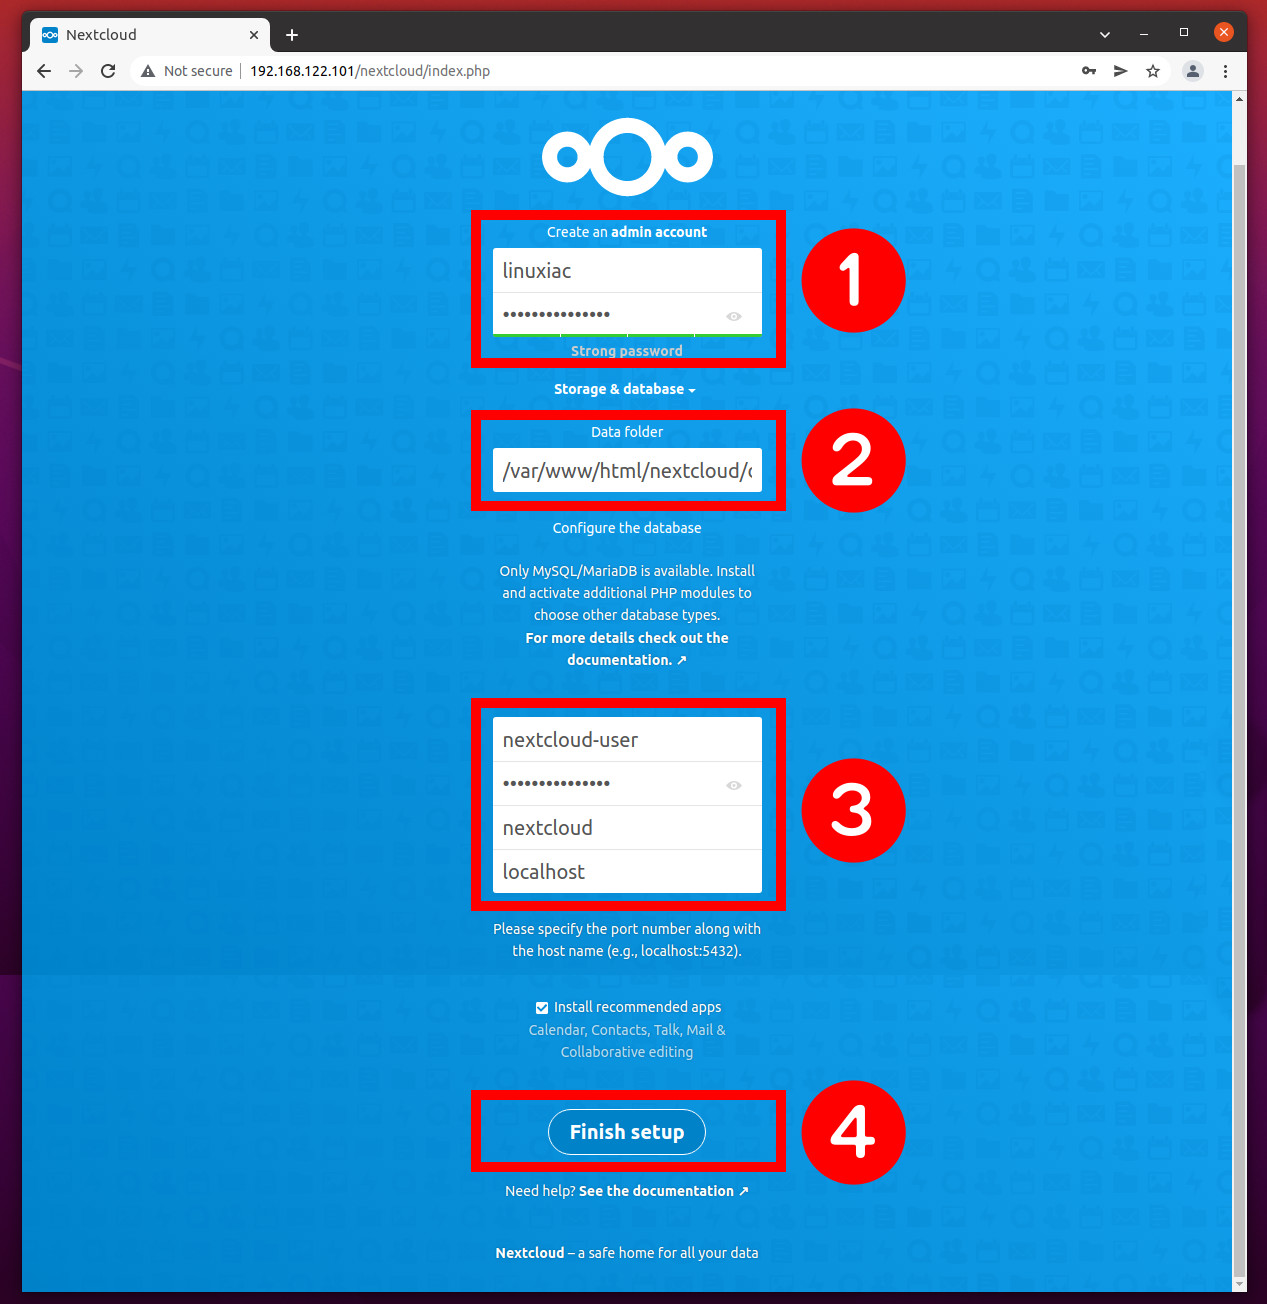
- Enter your Username and Password to create an admin account.
- Specify the Data folder. In our case it is
/var/www/html/nextcloud/data. - Provide database connection settings (user, password, and database name) as created in Step 4.
- Click the Finish setup button to complete the installation of Nextcloud on Ubuntu.
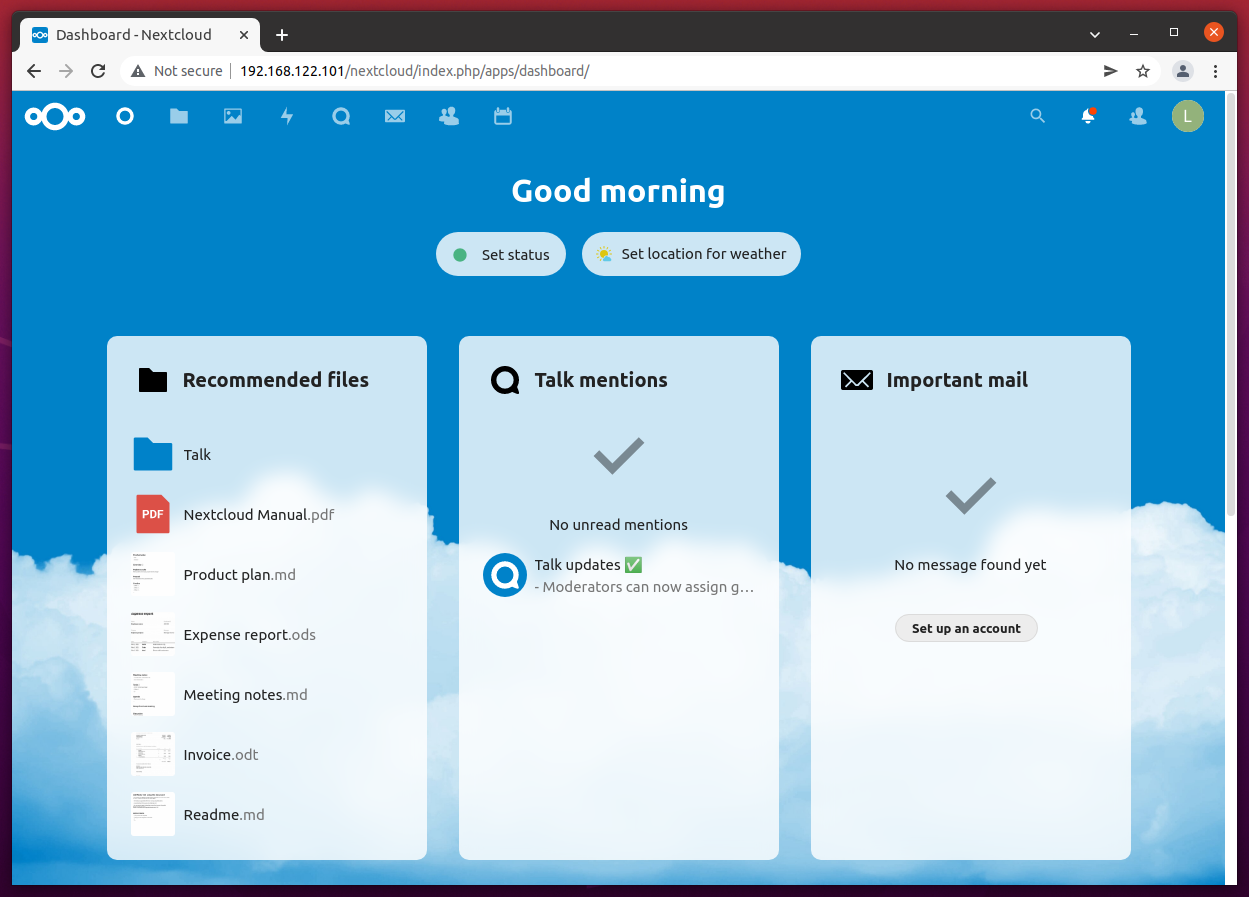
You’ll find yourself logged in as the admin user, where you can start customizing your Nextcloud instance. Congratulation! You can start using it as your private cloud storage.
You can secure your Nextcloud installation with a free Let’s Encrypt SSL Certificate for your domain.
Thanks for using our tutorial to install Nextcloud on Ubuntu. I hope this was helpful.


Hey
By default apache2 sets DocumentRoot to /var/www/html/var/www/html is where your default apache index.html sits.you need to edit file/etc/apache2/sites-enabled/000-default.confand change the value of DocumentRootfrom: DocumentRoot /var/www/htmlto:DocumentRoot /var/www/nextcloud
this will need a apache server restart to kick in
I had been struggling with putting together #1 the SQL user name and password and access steps and #2 the initial web login step. there are a few sites trying to answer this and your site worked for me thanks.
Doesn’t work.
Login to Nextcloud at the end, create admin account and then you can’t login with that account ever again.
This version of Nextcloud is not compatible with > PHP 8.0.
You are currently running 8.1.12-1ubuntu4.3. ._.
Thanks for this tutorial. It works. however, I would like for example to access nexcloud on the main ip. for example I would like to see the nextcloud screen on 192.168.10.1. Currently, I am seeing the default apache web page.
Hi Bobby,
First off, thank you for this! Secondly, as some of us are new to Ubuntu/linux, it may be useful to have a step between 5 and 6 that has users find their ip address, e.g., “$ hostname -I” or “$ ip a”
May clear up some confusion for what to put in “http://[your server ip]/nextcloud”
Best,
Daniel
Hey
everything was fine until I got to step 6: Configure Nextcloud.. When I type that link in my browser http://server-ip/nextcloud/ I just get Server not found
What would cause this and how do I fix it?
Hi Lasua,
Are you sure you replaced the “server-ip” part in the address with the actual IP address of the server you installed Nextcloud on?
Best,
Bobby
Does this guide have any prerequisites?
NC 23 doesnt work with PHP 8.1.2 which is the PHP that will be installed on Ubuntu 22.04. Is there a work around for this?
Try to install an older version of PHP. I installed 7.4 and it works
Hi Bobby Borisov,
Thank you so much bobby for helping and customizing the process of installing and configuring next cloud in ubuntu and all other version. This will help all of us in terms of setting up our own next cloud.
Hi Sidharth,
I’m happy to help 🙂
Thank you for reading Linuxiac!
Hi. Maybe you have tutorial how to make same, but with occ in terminal?
I’m curious about how to find error reports in terminal, i mean to know when region is not set, or missing modules. in web version everything is easy, but i need that info in terminal.
Anw, nice guide, thx.