
Nowadays, having an SSL certificate for every website is considered mandatory. Without it, the service’s trustworthiness would be very low, and the risk of information compromise would be high.
The SSL certificate ensures that information is delivered from the client to the server and vice versa over an encrypted channel.
Unfortunately, the majority of SSL certificates will cost you money. But thankfully, there are free options. Let’s Encrypt is the most well-known and widely used of these. It is open-source, and it is entirely free.
Let’s Encrypt allows anyone to obtain and install a trusted SSL certificate on their website and benefit from an encrypted connection’s enhanced security.
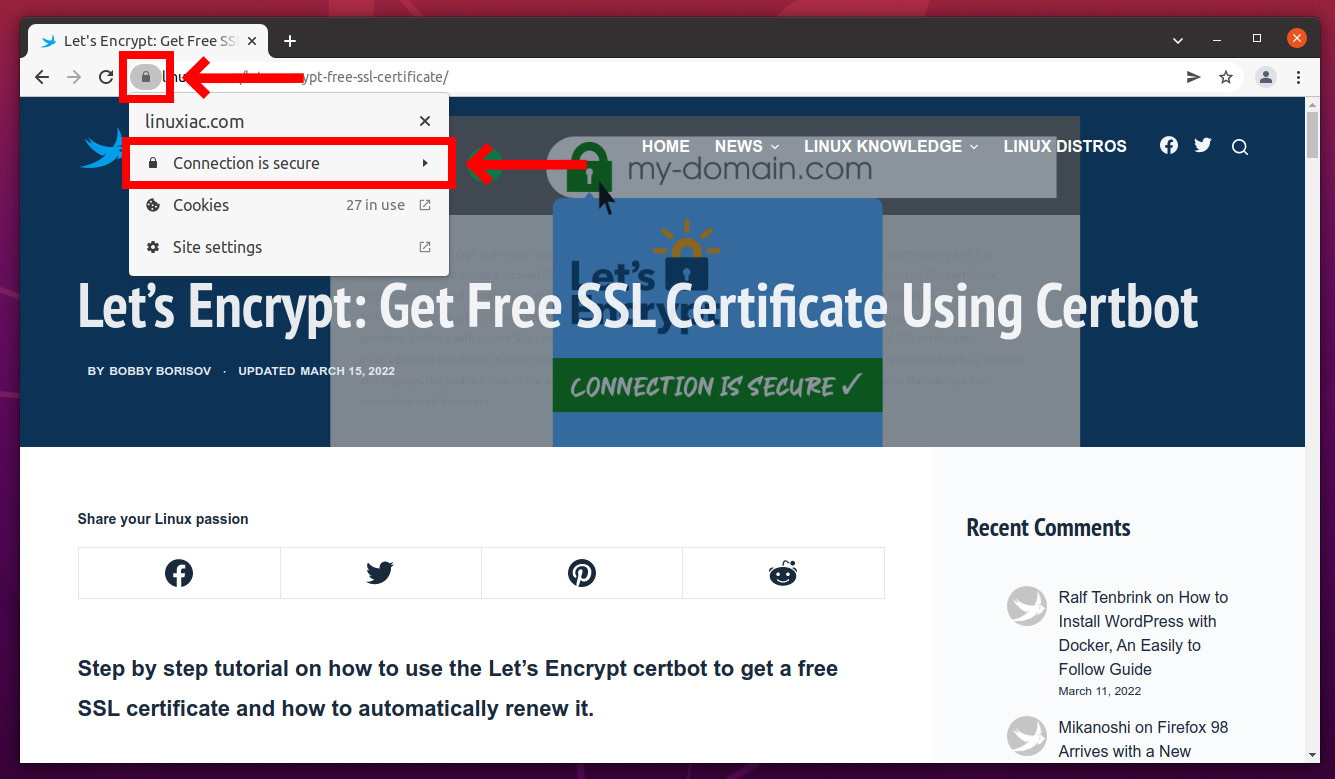
Unlike a self-signed SSL certificate, a Let’s Encrypt certificate is recognized as fully verified and displays the padlock icon in the address bar of modern web browsers.
How Let’s Encrypt Works
Before we get into the meat of this article, which is creating a free SSL certificate, we’d want to explain how Let’s Encrypt works.
First, before issuing a certificate, Let’s Encrypt validates ownership of your domain. Next, the Let’s Encrypt client on your host creates a temporary file (a token) with the required information.
The validation server then makes an HTTP request to retrieve the file and validates the token, which verifies that the DNS record for your domain resolves to the server running the Let’s Encrypt client.
Therefore, the instructions described below must be executed on the server that serves the domain for which the certificate is being issued.
How to Get a Free SSL Certificate from Let’s Encrypt
The steps below will walk you through the process of obtaining a valid free SSL certificate for your website quickly and easily.
Step 1: Install Certbot
Let’s Encrypt has an automated installer called certbot. So the first step to using Let’s Encrypt to obtain an SSL certificate is to install it on your server.
Ubuntu:
sudo apt install certbot python3-certbot-nginxDebian:
sudo apt install certbotCentOS:
sudo yum install epel-release
sudo yum install certbot-nginx
Step 2: Obtain Let’s Encrypt SSL Certificates
Important! Before issuing a Let’s Encrypt free SSL certificate, you must stop your web server service. Otherwise, you will get the following error:
Problem binding to port 80: Could not bind to IPv4 or IPv6If you use Nginx, execute:
sudo systemctl stop nginxNow we can move on to the generation of the Let’s Encrypt free SSL certificate:
sudo certbot certonly --standalone --preferred-challenges http -d my-domain.comCode language: CSS (css)-d option takes a domain name. You can use multiple -d options in a single command. For example:
sudo certbot certonly --standalone --preferred-challenges http -d my-domain.com -d www.my-domain.com Code language: CSS (css)If this is your first time running certbot, you will be prompted to enter an email address and agree to the terms of service.
After doing so, certbot will communicate with the Let’s Encrypt server, then run a challenge to verify that you control the domain you’re requesting a certificate for.
If that’s successful, certbot will wrap up with a message telling you the successful process and where your certificates are stored.
IMPORTANT NOTES:
 - Congratulations! Your certificate and chain have been saved at
   /etc/letsencrypt/live/my-domain.com/fullchain.pem. Your cert will
   expire on 2022-08-08. To obtain a new or tweaked version of this
   certificate in the future, simply run certbot again with the
   "certonly" option. To non-interactively renew <em>all</em> of your
   certificates, run "certbot renew"
 - Your account credentials have been saved in your Certbot
   configuration directory at /etc/letsencrypt. You should make a
   secure backup of this folder now. This configuration directory will
   also contain certificates and private keys obtained by Certbot so
   making regular backups of this folder is ideal.
 - If you like Certbot, please consider supporting our work by:
   Donating to ISRG / Let's Encrypt:   https://letsencrypt.org/donate
   Donating to EFF:                    https://eff.org/donate-le Code language: PHP (php)
Step 3: Verify Certificates
List your certs saved in /etc/letsencrypt/live/my-domain.com directory.
ls -l /etc/letsencrypt/live/my-domain.com/total 4
-rw-r--r-- 1 root root 692 Mar 10 08:24 README
lrwxrwxrwx 1 root root 37 Mar 10 08:24 cert.pem -> ../../archive/my-domain.com/cert1.pem
lrwxrwxrwx 1 root root 38 Mar 10 08:24 chain.pem -> ../../archive/my-domain.com/chain1.pem
lrwxrwxrwx 1 root root 42 Mar 10 08:24 fullchain.pem -> ../../archive/my-domain.com/fullchain1.pem
lrwxrwxrwx 1 root root 40 Mar 10 08:24 privkey.pem -> ../../archive/my-domain.com/privkey1.pemModify the Web Server Configuration
For your web server to use the Let’s Encrypt free SSL certificate, you need to specify them in its configuration. For example, if you use Nginx, you need to add the following block to your domain configuration file /etc/nginx/sites-enabled/my-domain.conf
server {
    listen 443;
    server_name my-domain.com;
    ssl on;
    ssl_certificate /etc/letsencrypt/live/my-domain.com/fullchain.pem;
    ssl_certificate_key /etc/letsencrypt/live/my-domain.com/privkey.pem;
}
That’s it. All things are set and done. Now you only need to start your webserver:
sudo systemctl start nginxFinally, you can check that your website is now SSL protected. Just open the website and check if the padlock icon is available.
Automatically Renew the Let’s Encrypt Certificates
The Let’s Encrypt certificates are valid for 90 days. They can be renewed 30 days before they expire. Here we add a cron job which will automatically renew them.
So first open the crontab file:
sudo crontab -eafter that, add the certbot command to run weekly:
@weekly certbot renew --pre-hook "systemctl stop nginx" --post-hook "systemctl start nginx" --renew-hook "systemctl reload nginx" --quiet Code language: CSS (css)Delete Certbot Certificate
It is occasionally necessary to delete an already generated certificate. Of course, you can do this by going through directories and deleting files. However, some metadata information will remain in the certbot index.
Fortunately, the certbot command makes it very simple to delete the certificate. For example, running the command below will offer an index from which you can select the domain name to delete.
sudo certbot deleteCode language: JavaScript (javascript)Enter the index number of the certificate for the domain name you want to delete and hit “Enter.” Certbot will then remove the issued certificate.
You can also delete a certificate by using the command below, replacing the domain part with the domain for which the certificate is to be removed.
sudo certbot delete --cert-name my-domain.comCode language: JavaScript (javascript)Conclusion
In this tutorial, we saw how to install a free SSL certificate from Let’s Encrypt to secure a website. In addition, you can check the official Let’s Encrypt website for more information and details.

if a nexcloud is installed with lamp stack there might be some issues between apache2 and nginx ? how do I install in this case a certificate from Lets encrypt on a apache Webserver?
regards stefan