Apache Tomcat is a long-lived open-source web server and servlet container that implements Jakarta Enterprise Edition specifications.
Its latest version, Tomcat 10.1, supports Servlet 6.0, JavaServer Pages 3.1, WebSocket 2.1, and JASPIC 3.0 specifications, as well as many other features that make it a handy platform for developing and deploying Java-based web applications and services.
AlmaLinux and Rocky Linux are the most popular Red Hat Enterprise Linux replacements. They are reliable, secure, and stable server-oriented Linux distributions, ensuring your server’s seamless operations.
This guide will walk you through installing and configuring Tomcat 10.1 on AlmaLinux 9 or Rocky Linux 9. On top of that, however, we’ll go a step further.
We’ll install and configure Nginx as a reverse proxy server in front of Tomcat, serving HTTP(S) requests and forwarding them back to Tomcat. Moreover, we will guarantee a secure SSL connection by issuing a free Let’s Encrypt SSL certificate.
Prerequisites
You’ll need access to an AlmaLinux 9 or Rocky Linux 9 server to complete this guide. In addition, all commands shown are run by a regular user with sudo execution permissions. Therefore, you should own one.
Of course, you can skip the sudo portion of the commands and run them directly as a root user. The result will be the same in both cases.
Furthermore, ensure that your firewall does not block ports 80 and 443 to the server.
sudo firewall-cmd --permanent --add-service={http,https}
sudo firewall-cmd --reload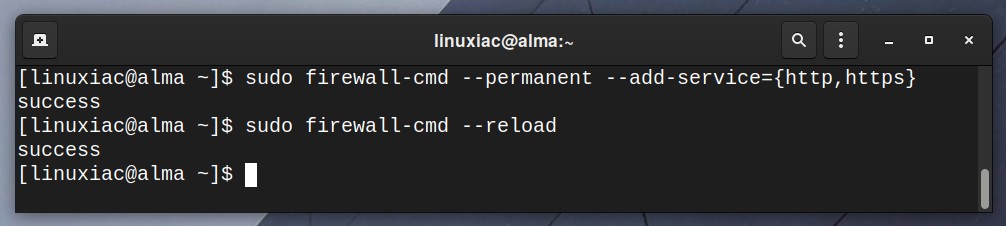
Step 1: Update Software Repositories
First, we will use the DNF command to update the list of available packages. This ensures that only the most recent versions of the packages are used throughout the installation and prevent difficulties.
In addition, make sure the system is fully updated. If packages are waiting to be updated, apply them before moving on.
sudo dnf update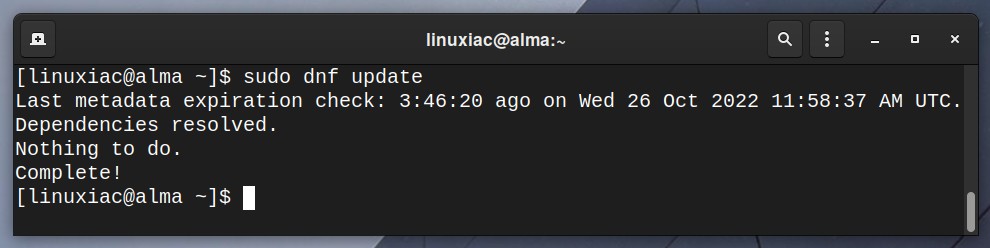
Step 2: Install Java Runtime Environment
Apache Tomcat 10.1 requires version 11 or later of Java Runtime Environment (JRE) Standard Edition. So, we will install OpenJDK 11, the open-source implementation of the Java platform.
sudo dnf install java-11-openjdk-headlessOnce the installation is complete, let’s confirm that we now have a working Java environment.
java -version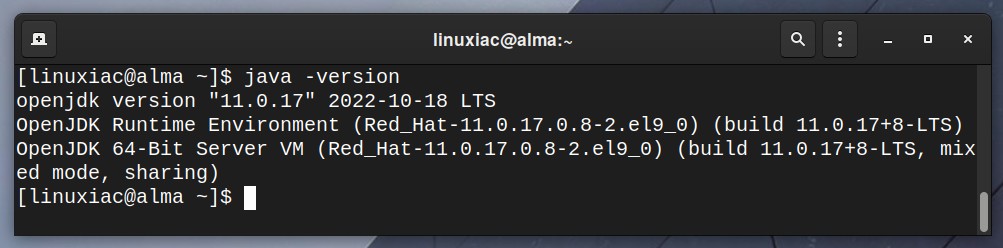
Step 3: Create a Tomcat System User
This step can also be considered optional, but I strongly recommend it. In it, we’ll create a system user who only will be used for Tomcat work.
Doing so reduces the possibility of security complications if, for example, we use the root account for this purpose.
The following command will create a user and group with the name tomcat on your AlmaLinux 9 or Rocky Linux 9 system:
sudo useradd -m -U -d /opt/tomcat -s /bin/false tomcatCode language: JavaScript (javascript)Step 4: Install Tomcat on AlmaLinux / Rocky Linux 9
Tomcat is a platform-independent server, and as long as Java is installed, the installation is straightforward. Unfortunately, by default, Tomcat is not available in Alma Linux 9 or Rocky Linux 9 repositories.
So, first, you need to download the appropriate version. At the time of writing, the most recent version available is Tomcat 10.1.
You can check the latest release before downloading from the Tomcat download page, and if necessary, make adjustments in the wget command below.
Of course, ensure that your Linux system has the wget tool installed. If it isn’t, you can easily install it by typing:
sudo dnf install wgetThen, download the Tomcat server:
wget https://dlcdn.apache.org/tomcat/tomcat-10/v10.1.1/bin/apache-tomcat-10.1.1.tar.gzCode language: JavaScript (javascript)Once the download is complete, extract the tar file to the /opt/tomcat directory:
sudo tar xzvf apache-tomcat-10.*.tar.gz -C /opt/tomcat --strip-components=1Next, set the proper file permissions:
sudo chown -R tomcat:tomcat /opt/tomcat/Step 5: Configure Tomcat Web Management Interface
Tomcat provides a web-based management console, but you should create a user and role to use it. They are defined in the /opt/tomcat/conf/tomcat-users.xml file. So, open the file with your preferred text editor:
sudo vim /opt/tomcat/conf/tomcat-users.xmlPaste the following code inside <tomcat-users> </tomcat-users> tags. Change the “PASSWORD” string for admin and manager access.
<!-- user manager can access only manager section -->
<role rolename="manager-gui" />
<user username="manager" password="PASSWORD" roles="manager-gui" />

<!-- user admin can access manager and admin section both -->
<role rolename="admin-gui" />
<user username="admin" password="PASSWORD" roles="manager-gui,admin-gui" />Code language: HTML, XML (xml)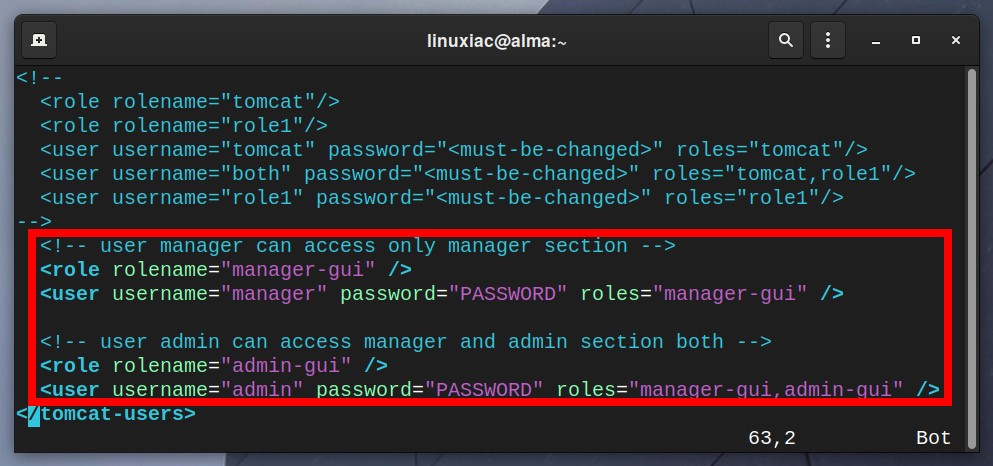
In addition, the Tomcat web management interface is only accessible from the local host by default. So, you must configure it if you want to access it from anywhere.
You need to edit the “/opt/tomcat/webapps/manager/META-INF/context.xml” file and add the IP addresses of the remote system from which you are accessing Tomcat’s web management interface.
Assume this is a system with IP address 1.2.3.4. Open the file with your preferred text editor:
sudo vim /opt/tomcat/webapps/manager/META-INF/context.xmlThen change the line as follows:
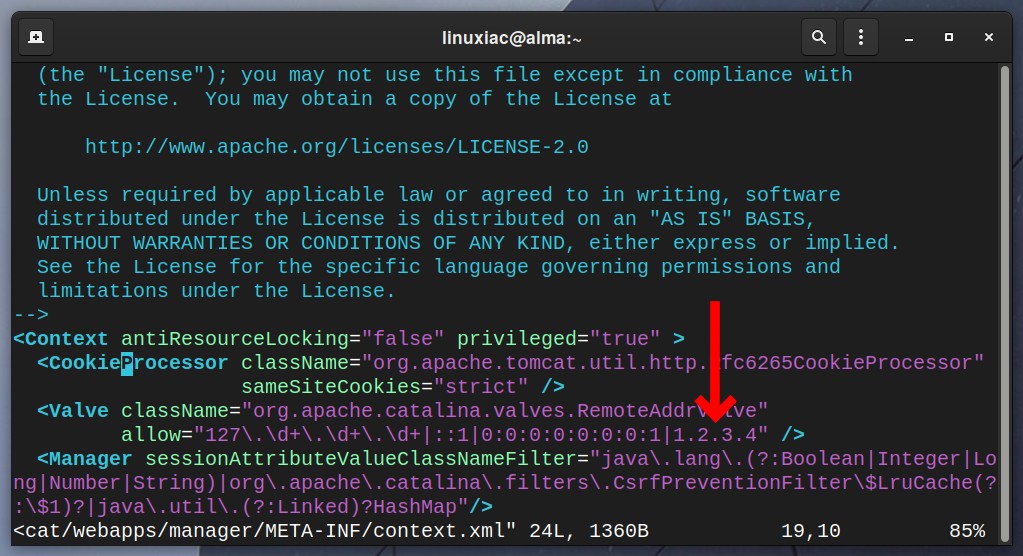
As you can see, the list of allowed IP addresses is separated by a vertical bar “|.” Save and exit the file.
Now, perform the same changes again on the “/opt/tomcat/webapps/host-manager/META-INF/context.xml” file.
sudo vim /opt/tomcat/webapps/host-manager/META-INF/context.xml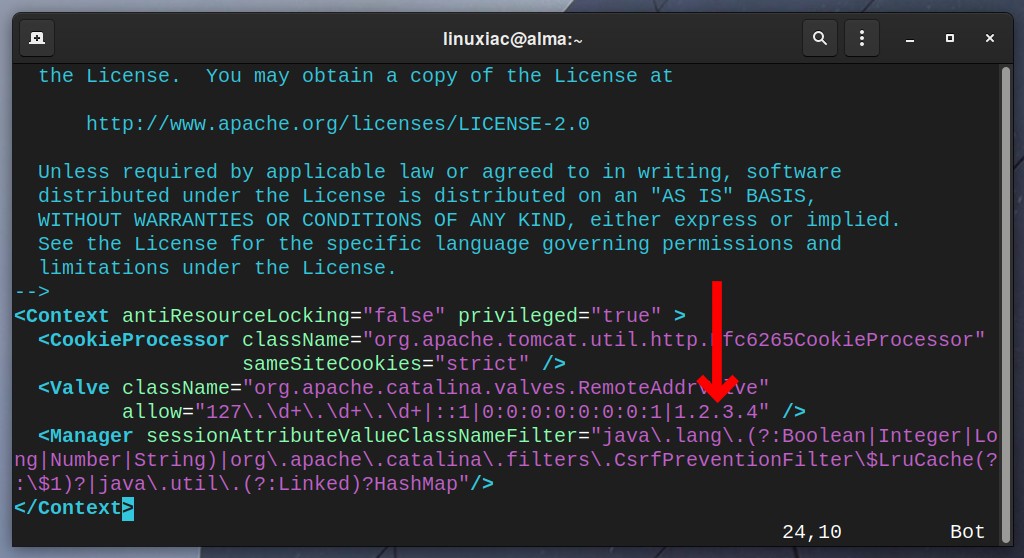
Step 6: Create a Tomcat Systemd Service
We don’t have a systemd unit file for Tomcat by default; therefore, we can’t manage it as a service in the sense of starting, stopping, and restarting. So, let’s create one.
Using your preferred terminal text editor, create the file tomcat.service:
sudo vim /etc/systemd/system/tomcat.servicePaste the following code, then save and exit the file.
[Unit]
Description=Apache Tomcat Server
After=network.target

[Service]
Type=forking

User=tomcat
Group=tomcat

Environment="JAVA_HOME=/usr/lib/jvm/jre"
Environment="JAVA_OPTS=-Djava.awt.headless=true -Djava.security.egd=file:///dev/urandom"

Environment="CATALINA_BASE=/opt/tomcat"
Environment="CATALINA_HOME=/opt/tomcat"
Environment="CATALINA_PID=/opt/tomcat/temp/tomcat.pid"
Environment="CATALINA_OPTS=-Xms512M -Xmx1024M -server -XX:+UseParallelGC"

ExecStart=/opt/tomcat/bin/startup.sh
ExecStop=/opt/tomcat/bin/shutdown.sh

[Install]
WantedBy=multi-user.targetCode language: JavaScript (javascript)
Step 7: Enable and Start the Tomcat Service
First, reload the systemd daemon to apply changes:
sudo systemctl daemon-reloadThen, set Tomcat to start at boot automatically:
sudo systemctl enable tomcatAnd finally, start the Tomcat server on your AlmaLinux / Rocky Linux 9 system:
sudo systemctl start tomcatCheck the status of the Tomcat server to ensure it is up and running:
sudo systemctl status tomcat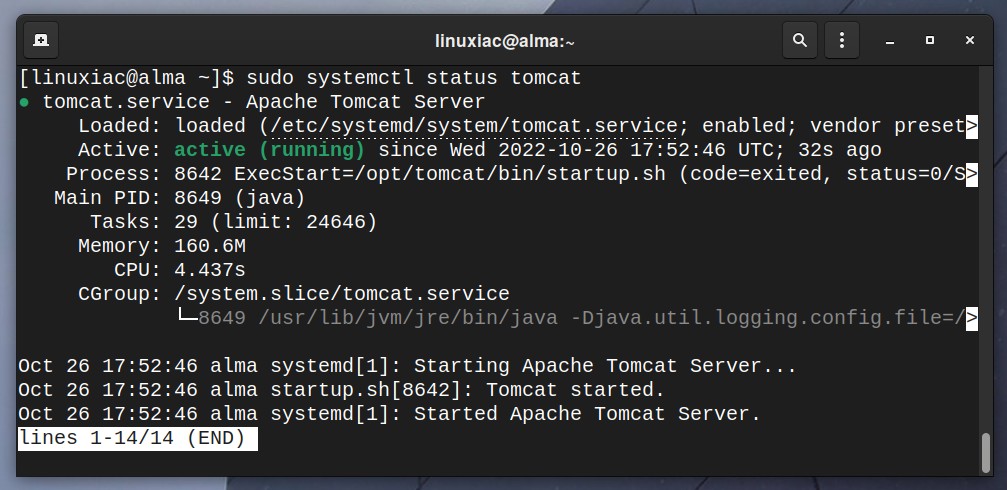
Step 8: Accessing Tomcat
Before we proceed, we’ll ensure that the Tomcat server is correctly installed and functioning as expected on our AlmaLinux 9 or Rocky Linux 9 system.
By default, Tomcat listens on port 8080 for incoming connections. Therefore, you should temporarily use the command below to open this port on your server firewall.
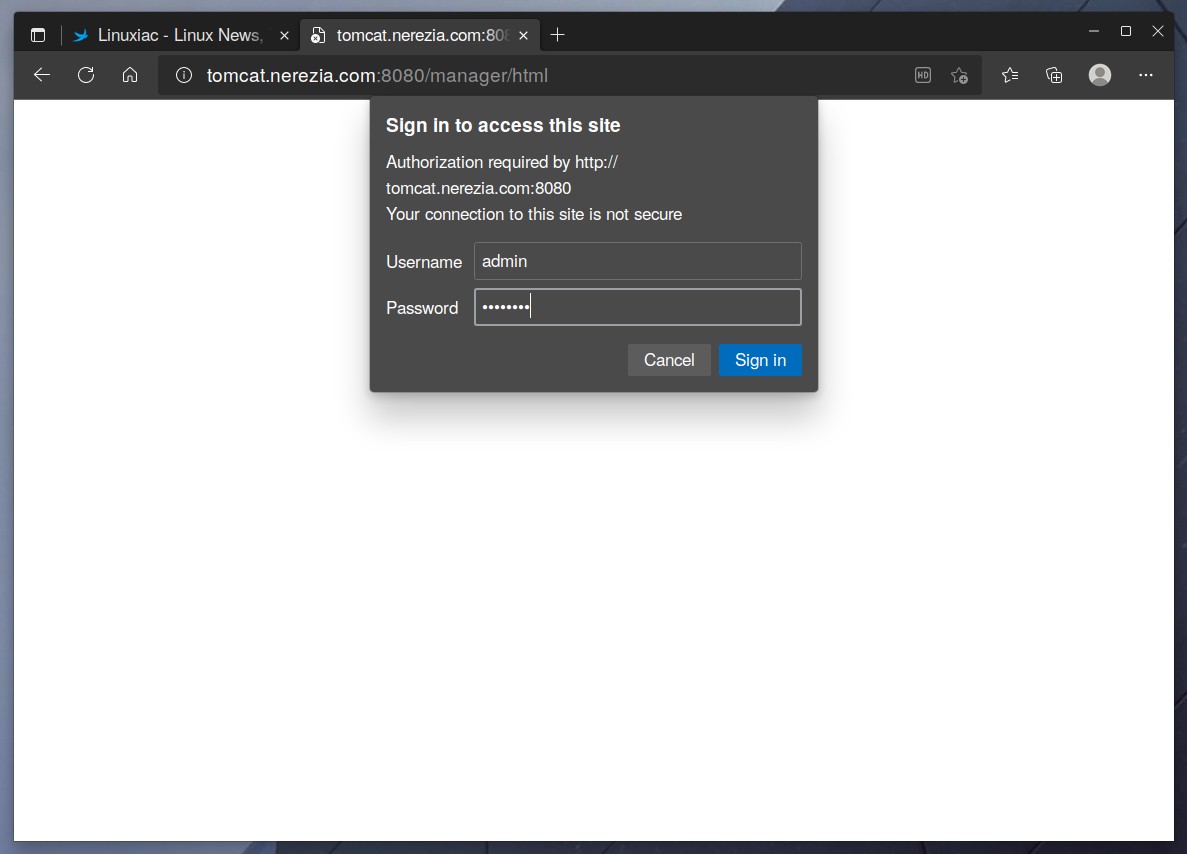
sudo firewall-cmd --add-port=8080/tcpThen point your browser to “http://<SERVER_IP_ADDRESS>:8080” or the domain name associated with the server’s IP address.
For the sake of this guide, we created a temporary subdomain, “tomcat.nerezia.com,” which we will use.

So far, so good. The Tomcat server is successfully installed and is running on our AlmaLinux / Rocky Linux 9 system.
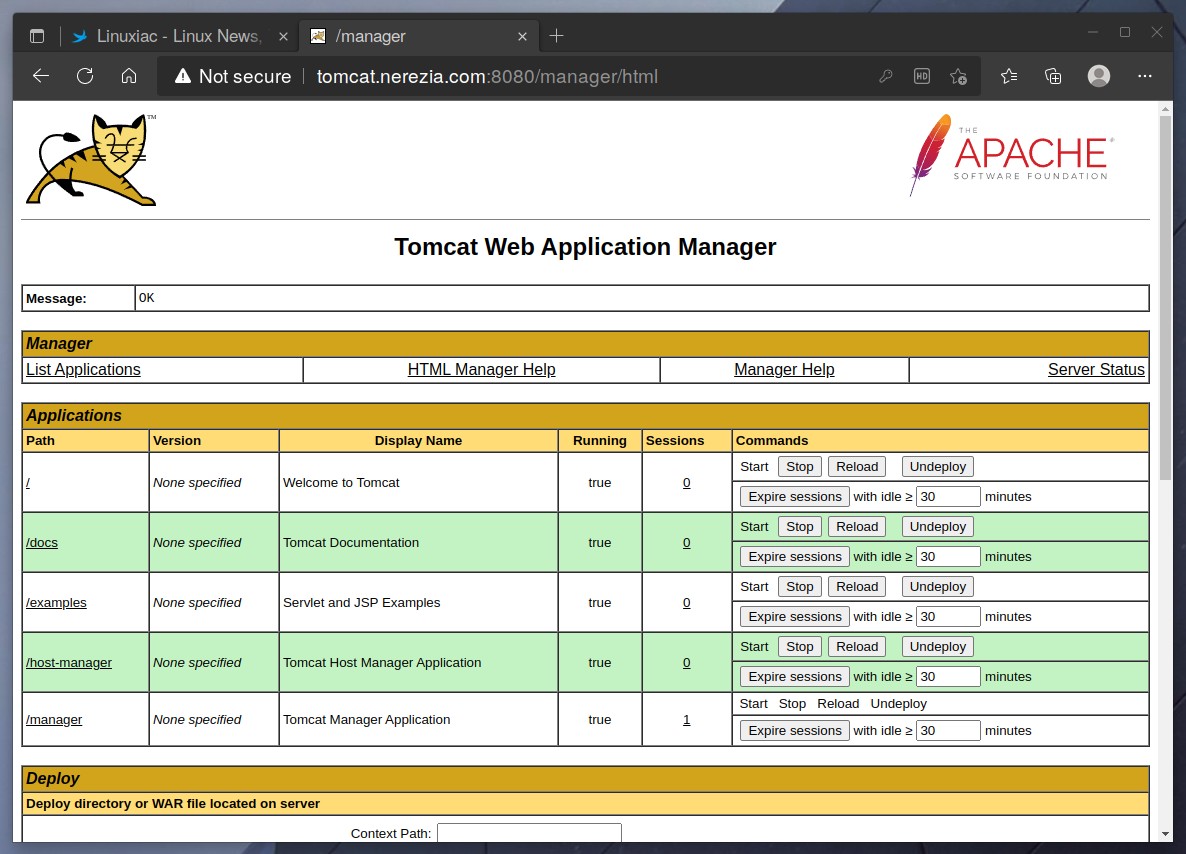
You will be asked for your admin username and password when you click the “Manager App” or “Host Manager” button. Enter your credentials, then log in. On the next page, you should see the Web Application Manager/Host Manager.
Step 9: Securing Tomcat with SSL Certificate
To provide secure and encrypted communication with the Tomcat server, we will use Let’s Encrypt to obtain a free SSL certificate for our subdomain tomcat.nerezia.com, which will give HTTPS capability.
To do this, we need to install several additional packages on our system that are not part of the AlmaLinux / Rocky Linux 9 repositories but exist in the EPEL one. So, let’s add it first.
sudo dnf install epel-release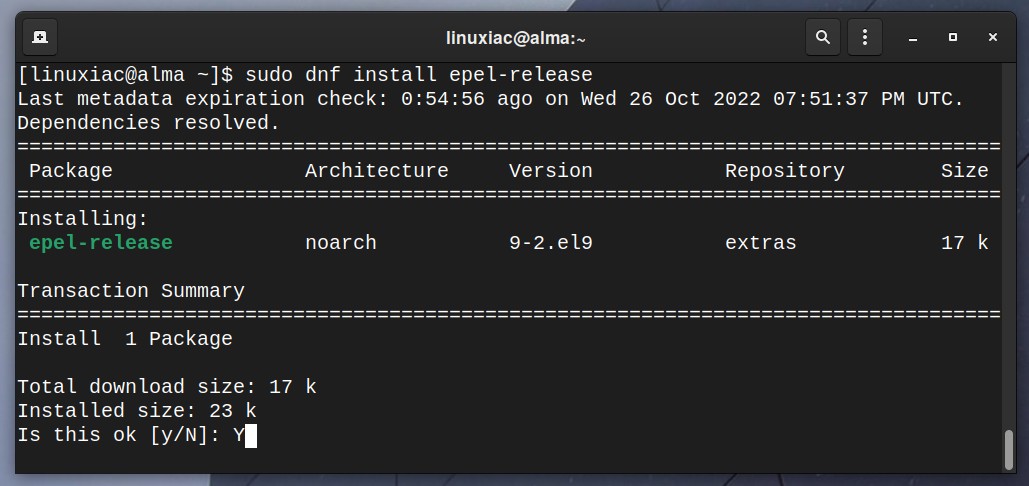
Then, install the certbot package, an automated Let’s Encrypt certificate issuance.
sudo dnf install certbotFinally, let’s generate our free SSL certificate.
sudo certbot certonly --agree-tos -m bobby@linuxiac.com --no-eff-email --standalone --preferred-challenges http -d tomcat.nerezia.comCode language: CSS (css)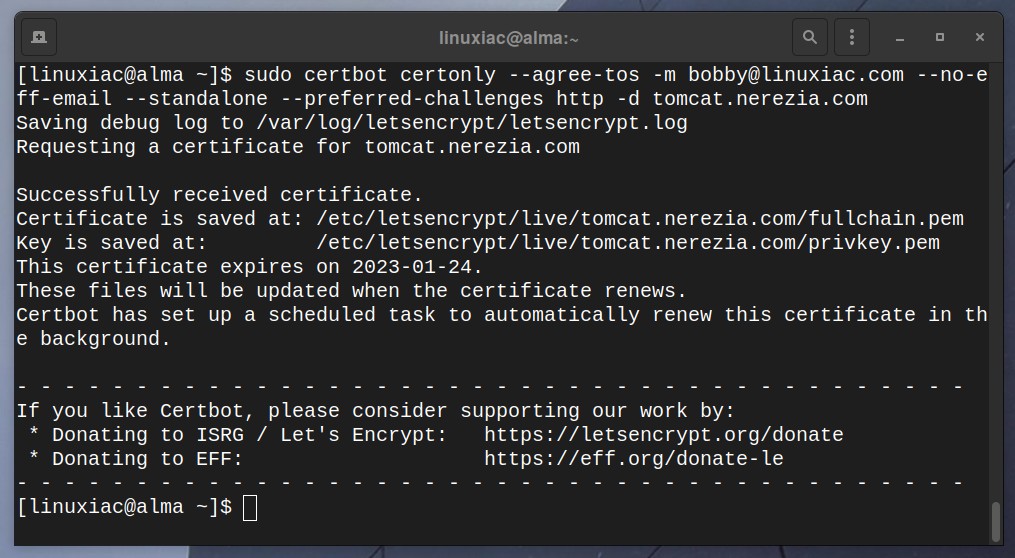
Great, we now have a valid SSL certificate. Of course, replace the part after the ‘-m‘ option with your actual email address. There you will be notified when the certificate is due for renewal. Let’s Encrypt certificates last 90 days.
Remember to replace the portion after ‘-d‘ with your domain’s name. Check our Let’s Encrypt and Certbot articles for more details. Now let’s move on to the final step.
Step 10: Set Up Nginx Reverse Proxy for Tomcat
As already mentioned, Tomcat listens on port 8080 by default. Therefore, we will need to set up Nginx as a reverse proxy to forward HTTP(S) requests to Tomcat’s 8080 port.
First, install the Nginx web server.
sudo dnf install nginxNext, create a new server block (virtual host) configuration file for Tomcat.
sudo vim /etc/nginx/conf.d/tomcat.confPaste the following code into the file, making sure to adjust the domain name and file names of the SSL certificates.
server {
    listen 443 ssl http2;
    listen [::]:443 ssl http2;

    server_name tomcat.nerezia.com;

    ssl_certificate /etc/letsencrypt/live/tomcat.nerezia.com/fullchain.pem;
    ssl_certificate_key /etc/letsencrypt/live/tomcat.nerezia.com/privkey.pem;

    access_log /var/log/nginx/tomcat-access.log;
    error_log /var/log/nginx/tomcat-error.log;

    location / {
        proxy_pass http://127.0.0.1:8080/;
        proxy_set_header X-Real-IP $remote_addr;
        proxy_set_header X-Forwarded-Host $host;
        proxy_set_header X-Forwarded-Server $host;
        proxy_set_header X-Forwarded-For $proxy_add_x_forwarded_for;
  }
}

server {
    listen 80;
    listen [::]:80;
    server_name tomcat.nerezia.com;
    return 301 https://$host$request_uri;
}Code language: PHP (php)
Save and exit the file. Then, to apply the changes, enable the Nginx service and restart the web server:
sudo systemctl enable nginx
sudo systemctl restart nginx
Check that the Nginx service is fully functional:
sudo systemctl status nginx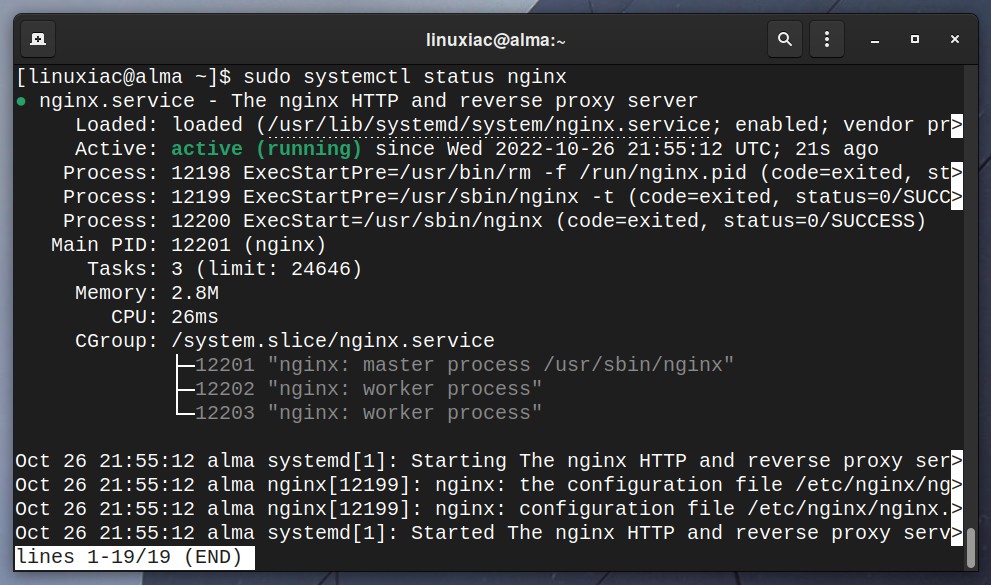
Finally, run the command below to change the SELinux policy. It enables, at the security level, the reverse proxy functionality.
sudo setsebool -P httpd_can_network_relay onNow launch your browser and navigate to your domain’s address. Again, the now-familiar page will greet you, but this time all traffic is secure on HTTPS and served by Nginx.

Remember to disable temporarily allowed access to port 8080 as we no longer need it.
sudo firewall-cmd --remove-port=8080/tcpConclusion
Congratulations! You successfully installed and configured Apache Tomcat 10.1 with Nginx for reverse proxy and Let’s Encrypt SSL certificate on AlmaLinux / Rocky Linux 9. Now your Tomcat server is fully operational and ready for production.
That marks the end of our guide. I hope I have helped you. Any thoughts and suggestions are welcome in the comments section below.
Enjoy using Apache Tomcat. For more information, visit the official documentation at Tomcat Doc.