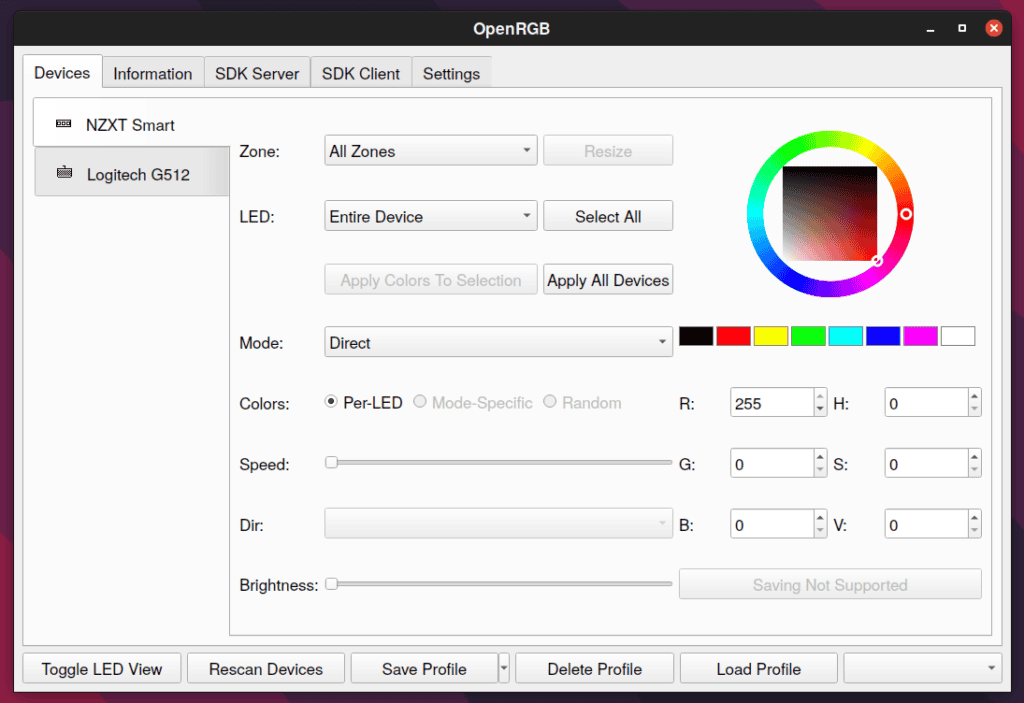
For those who are unfamiliar with OpenRGB, it’s a cross-platform open-source app designed to auto-detect and display supported RGB-enabled devices, allowing you to control them from a centralized interface.
Many gaming machines are equipped with RGB lighting with numerous options. OpenRGB is designed to help users make the most out of their RGB-enabled devices such as motherboards, RAM modules, graphics cards, LED strips and fan controllers, as well as coolers, keyboards, and mice.
Suppose you have upgraded your PC with lighting from different suppliers. In that case, you can end up with an assortment of third-party apps to control them while potentially sacrificing valuable system resources. This is where OpenRGB comes into play by giving you one app to rule them all.
OpenRGB 0.7 New Features

The OpenRGB plugin interface can add additional functionality to the OpenRGB user interface. These can provide new features without having to run external software. In OpenRGB 0.7 the plugin architecture was vastly improved. Plugins can now be easily installed from Settings and are versioned to ensure compatibility.
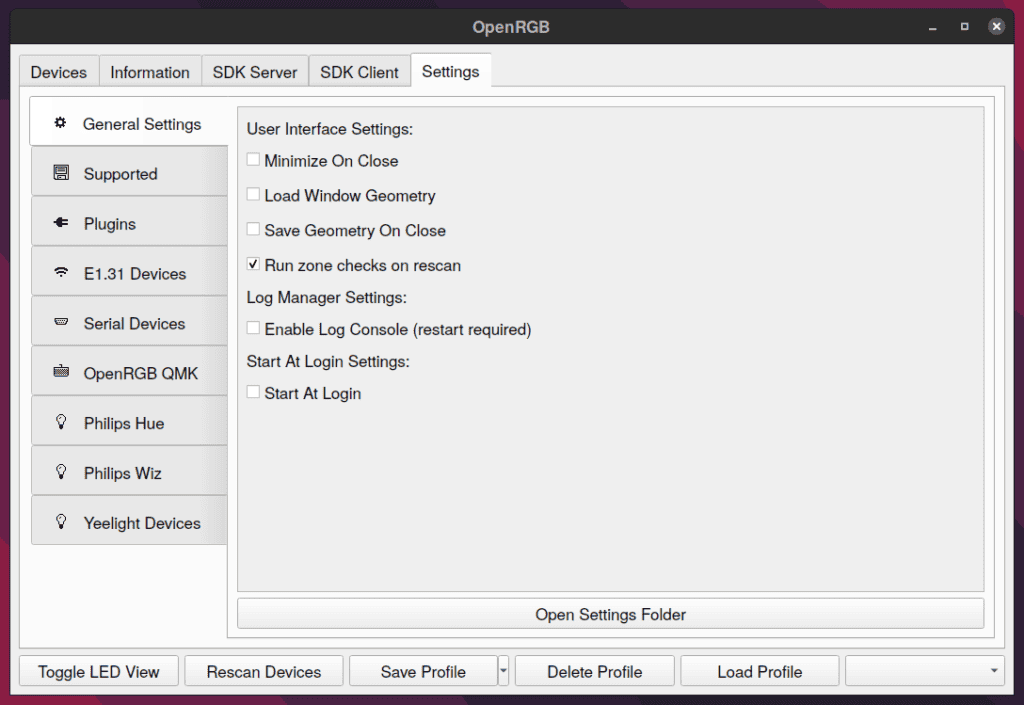
New settings tabs have been added for various configurable features so you don’t have to manually edit the settings file. In the OpenRGB 0.7 settings you can find a new tabs for E1.31 Devices, Serial Devices, QMK OpenRGB Protocol, Philips Hue, Philips Wiz, and Yeelight devices.

Among other noteworthy changes, this release comes with autostart enabled option. Now you can configure OpenRGB to automatically start on login in the Settings tab. Additionally, the log console can be enabled in Settings, which allows you to view the log in the GUI under Information.
We can’t fail to mention that on supported controllers, the new Save To Device button allows you to save the selected mode and color configuration to device internal memory. In addition, OpenRGB 0.7 allows you to adjust the brightness with the Brightness slider, which is quite a useful feature.
Regarding the list of new supported devices, you can consult them here. Finally you can check hardware compatibility that OpenRGB 0.7 currently supports in the following link.
Install
OpenRGB 0.7 is available for download as a portable .AppImage, and native .deb and .rpm package file.
Debian and Ubuntu users need to download the .deb file from the project’s download page and save it locally.
- Ubuntu 20.04 / Debian 10 Buster:
openrgb_0.7_amd64_buster_6128731.deb - Ubuntu 21.04+ / Debian 11 Bullseye:
openrgb_0.7_amd64_bullseye_6128731.deb
Next open your terminal app and run below command. Of course, you need to replace the file name with the one you downloaded.
sudo apt install openrgb_0.7_amd64_buster_6128731.debCode language: CSS (css)If you are not sure exactly how to do it I recommend going through our short and easy to follow guide: How to Install deb File in Ubuntu [with Examples]
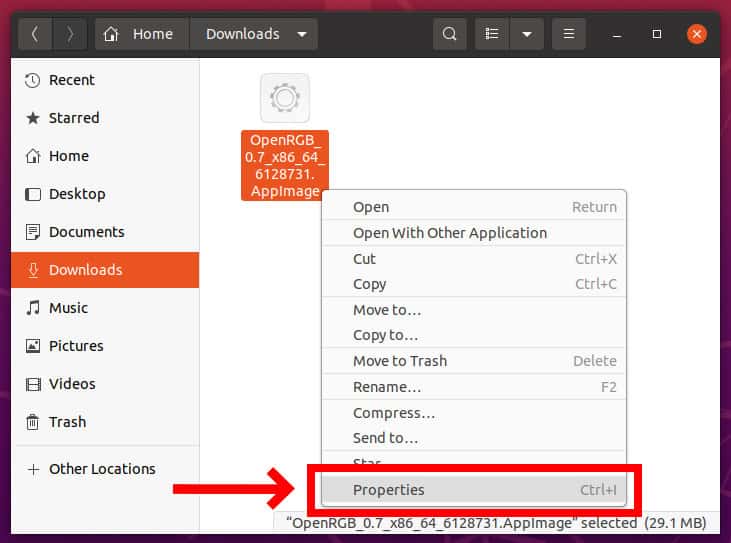
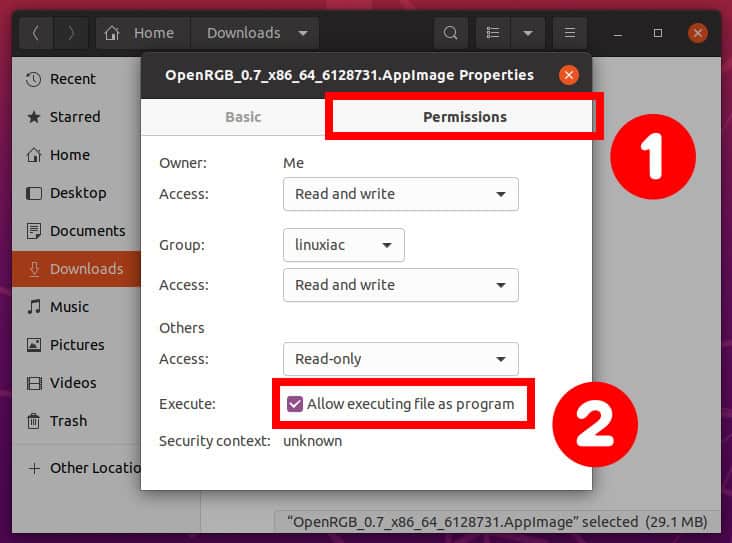
Another and easier way of installing OpenRGB 0.7 is by using the AppImage. Just download the OpenRGB_0.7_x86_64_6128731.AppImage file, right click on it to bring up the context menu, and choose Properties. Make the file executable as shown on the image below.


Next just double-click on the file, and OpenRGB lighting control program will start.
If there are no packages for your Linux distribution, and you don’t want to use the AppImage package, you’ll need to build this from source, as explained here.
