In addition, you will learn how to create a Docker data volume to share information between a container and the host file system.
Nginx is a popular open-source software used for web serving, reverse proxying, caching, load balancing, etc. It is quite popular and used on many high-traffic websites today.
One of the most common workloads of Docker is using it to containerize web servers. We’ll show you how to set it up with Nginx. So, let us walk you through the process.
Related: How to Install and Configure Nginx Web Server
Docker is a containerization platform that packages up your application into one easily manageable container image.
Prerequisites
You have to fulfill the following requirements to complete this tutorial:
- Docker should be installed and locally be running on your system.
- You need a root account, or a user can run sudo commands.
Setting up Nginx Inside Docker
Pulling the Image
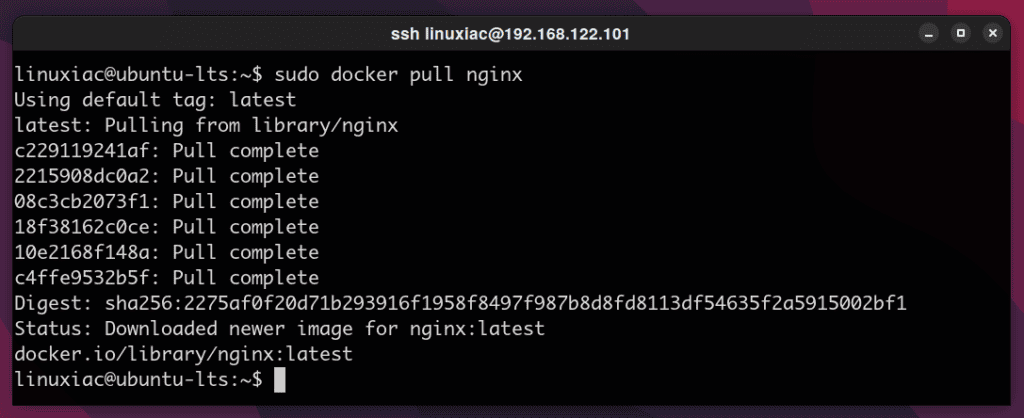
First, we are going to pull the official Nginx image. Run the following Docker pull command on the terminal to download the Nginx latest image from the Docker hub on your Docker host.
sudo docker pull nginx
Run the Nginx Docker Container
We are ready to run the Nginx Docker container and expose its port to your local network. To do this, we run the image with the command:
sudo docker run -d -p 80:80 --name my-nginx-server nginxCode language: CSS (css)
-d– Start a container in detached mode (container is running in the background).-p– Bind a port from container to host (routes host traffic port 80 to container port 80).-name– The name of our Docker container.
The last argument, nginx, tells Docker which image to use for the container.
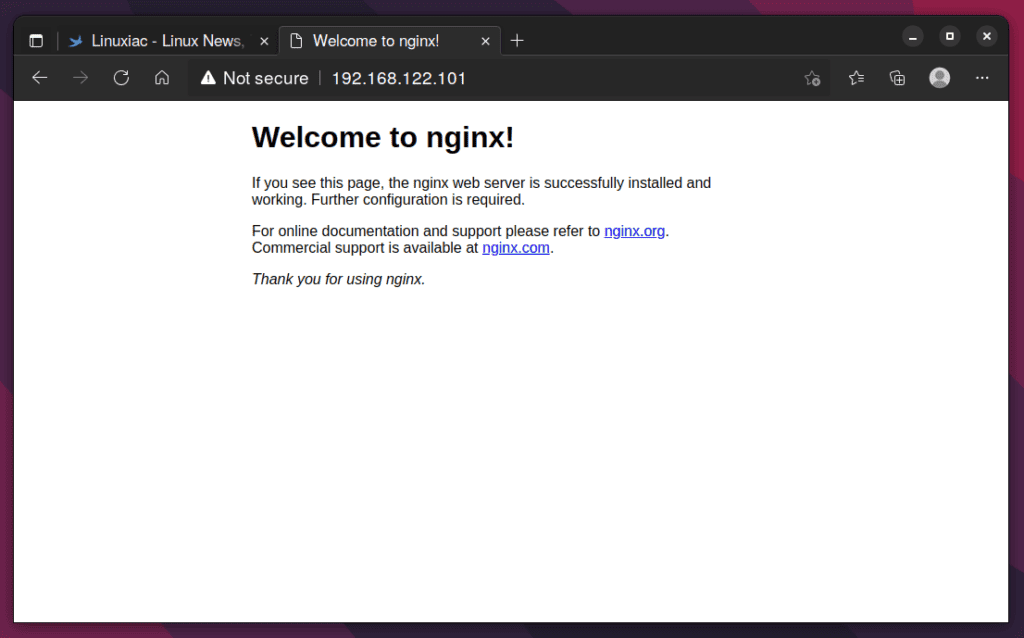
Now open a browser and point it to the address of the host on which you ran your Nginx container. In my case, it’s http://192.168.122.101. The Nginx web server default page should greet you.

There it is. You have a working instance of the Nginx Docker container.
List Docker Containers
To list all running Docker containers, execute the following command:
sudo docker container ls
Based on the above output, we can stop our Nginx Docker container with either of the following two:
sudo docker stop 19411f8b3f35
sudo docker stop my-nginx-server
To see all containers, even those not running, you need to add the -a flag.
sudo docker container ls -aSharing Data Between the Nginx Docker Container and the Host
Docker containers are ephemeral. By default, any data created inside the container is only available from within the container and only while the container is running.
So, let us show you how to make data from inside the container accessible on the host machine. Our target is to create a simple HTML file, host it inside a container and serve it outside using the Nginx Docker container.
This setup allows us to have persistent website content hosted outside the container.
To achieve this functionality, we will use the bind mounting feature in Docker. When you use a bind mount, a file or directory on the host machine is mounted into a container.
So, let’s first create a new directory for your website content within the home directory.
mkdir ~/wwwNow let’s create a simple HTML file and put some text on your index page.
vim ~/www/index.htmlCode language: JavaScript (javascript)<html>
<head>
<title>Nginx Docker</title>
</head>
<body>
<h1>My static page.</h1>
</body>
</html>Code language: HTML, XML (xml)Please copy the above snippet and paste it inside. Then, save the file and exit Vim.
Next, we will run the Nginx Docker container with the attached volume on the container /usr/share/nginx/html to the present on the host www directory where the index.html file is saved.
docker run -d -p 80:80 -v ~/www:/usr/share/nginx/html/ --name my-nginx-server nginxCode language: JavaScript (javascript)
The Nginx container is set up by default to look for an index page at /usr/share/nginx/html/. In the command above, the -v option sets up a bind mount volume that links the / directory from inside the Nginx Docker container to the usr/share/nginx/html/~/www directory on the host machine.
Docker uses a colons symbol (:) to split the host’s path from the container path. Remember, the host path always comes first.
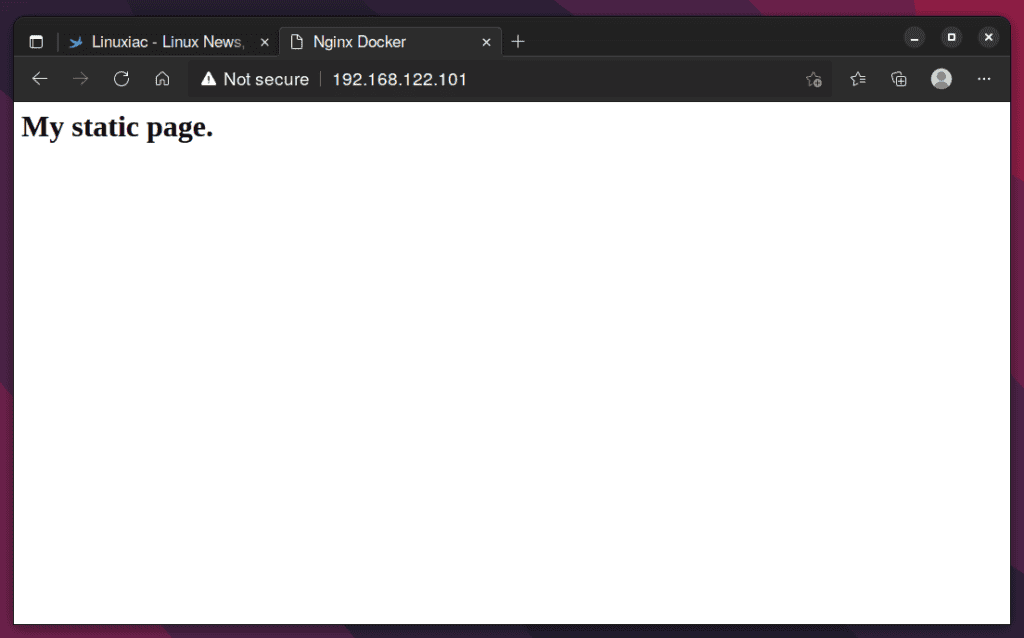
Again, if you browse http://192.168.122.101, you will get the below-given output in the browser window.

That’s all about it. You now have a running Nginx Docker container serving a custom web page.
Conclusion
Nginx and Docker work very well together. This tutorial demonstrated how to set up and use the Nginx Docker container. You also know how to share information between a container and the host file system.
In case of queries, please leave your comments.

Your article is very similar to what I am trying to do. I have a mounted volume which contains my Frontend’s static files. I also want to have some routing configurations for my nginx on the frontend container. This will enable me to use a separate microservice if I navigate to that uri, for e.g., http://myservername:/microservice_name. I wish to set rules that will route me to the respective container. http://myservername: My normal frontend is served from http://myservername:. I have the below configuration:
events {}
http {
server {
listen 80; # Adjust the port if needed
server_name host_name;
location / {
# Configuration for serving the frontend from the first Docker container
proxy_pass http://host_name:8990;
proxy_set_header Host $host;
proxy_set_header X-Real-IP $remote_addr;
proxy_set_header X-Forwarded-For $proxy_add_x_forwarded_for;
proxy_set_header X-Forwarded-Proto $scheme;
# Additional proxy settings if needed
}
location /doi-api {
proxy_pass http://host_name:50012;
# You may need additional proxy settings depending on your requirements
proxy_set_header Host $host;
proxy_set_header X-Real-IP $remote_addr;
proxy_set_header X-Forwarded-For $proxy_add_x_forwarded_for;
proxy_set_header X-Forwarded-Proto $scheme;
}
# Add other server configuration as needed
error_page 500 502 503 504 /50x.html;
location = /50x.html {
root /usr/share/nginx/html;
}
}
}
I am not getting the expected results. Does this look right to you?
This article is the closest I’ve found to what I’m trying to do.
I’ve created a VueJS app which builds the ‘dist’ folder and I run it in Docker with nginx just fine.
Now I want to put the ‘dist’ folder outside of the docker image and use the -v option to point to the ‘dist’ folder on the host to the /usr/share/nginx/html/ folder just like your article.
When I do that, I get “forbidden”.
When I leave the -v and paths off the docker run, I see the “Welcome to nginx” as I would expect.
I am doing some Docker/Environment processing based on this article:
https://medium.com/js-dojo/vue-js-runtime-environment-variables-807fa8f68665
I expected the entrypoint.sh to be executed on the docker run, pointing to the environment variables.
Any thoughts?