How to Create a Database in MySQL using MySQL Workbench
The MySQL Workbench is a graphic tool for working with MySQL Servers and databases. It is cross-platform, open-source, and easy to use.
We’ll assume you already have MySQL Workbench installed. Let us show you how we can use it to create a new database in MySQL.
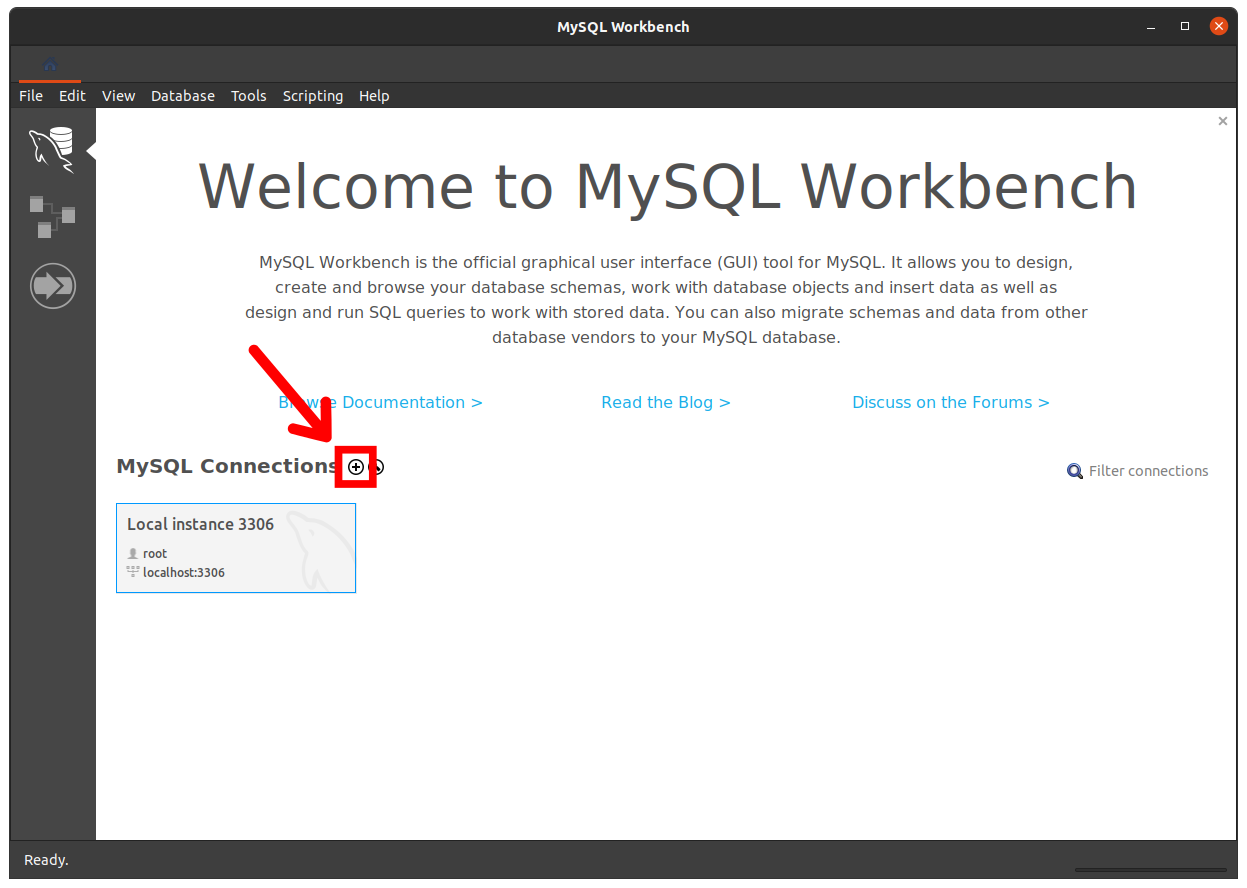
First, launch the MySQL Workbench and click on the button shown in the following screenshot to set up a new connection.
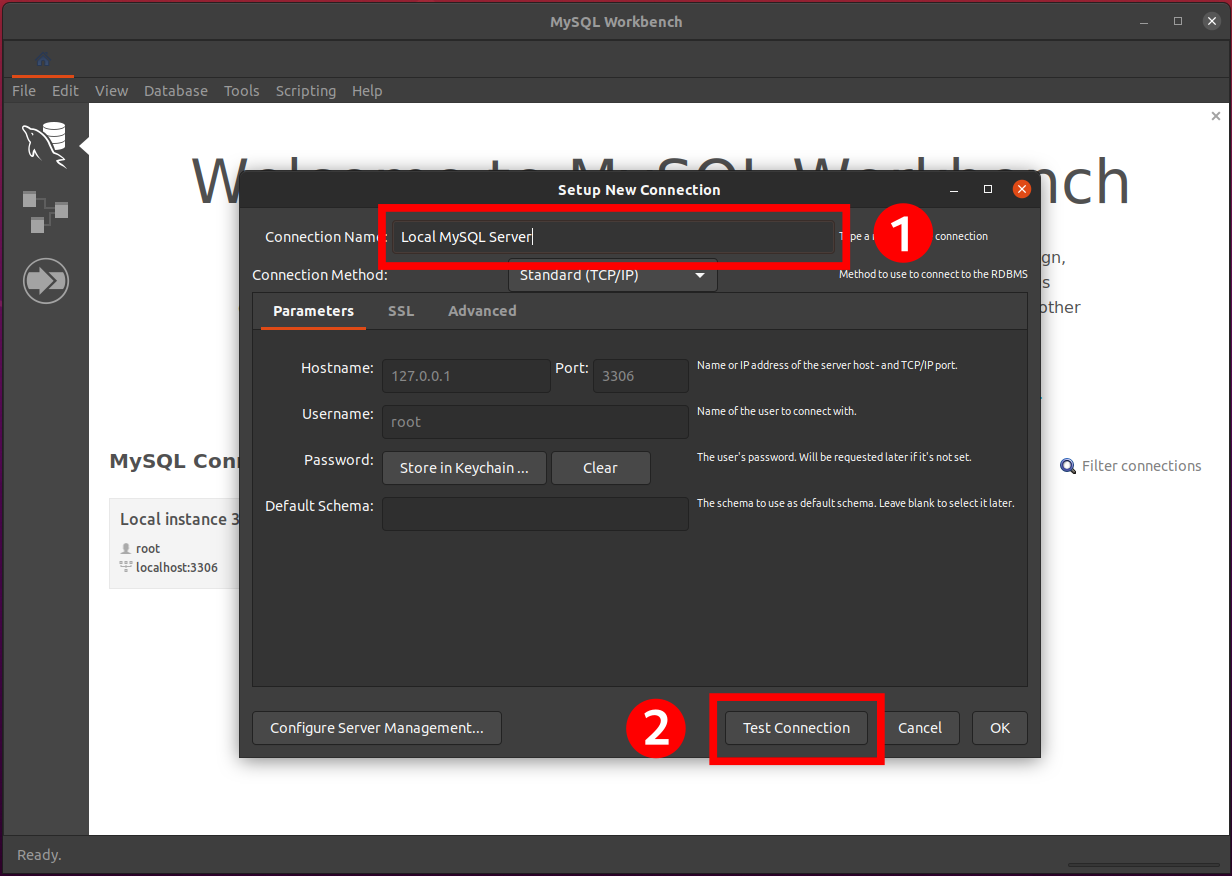
In the “Setup New Connection” dialogue box, type the connection’s name and click the “Test Connection” button.
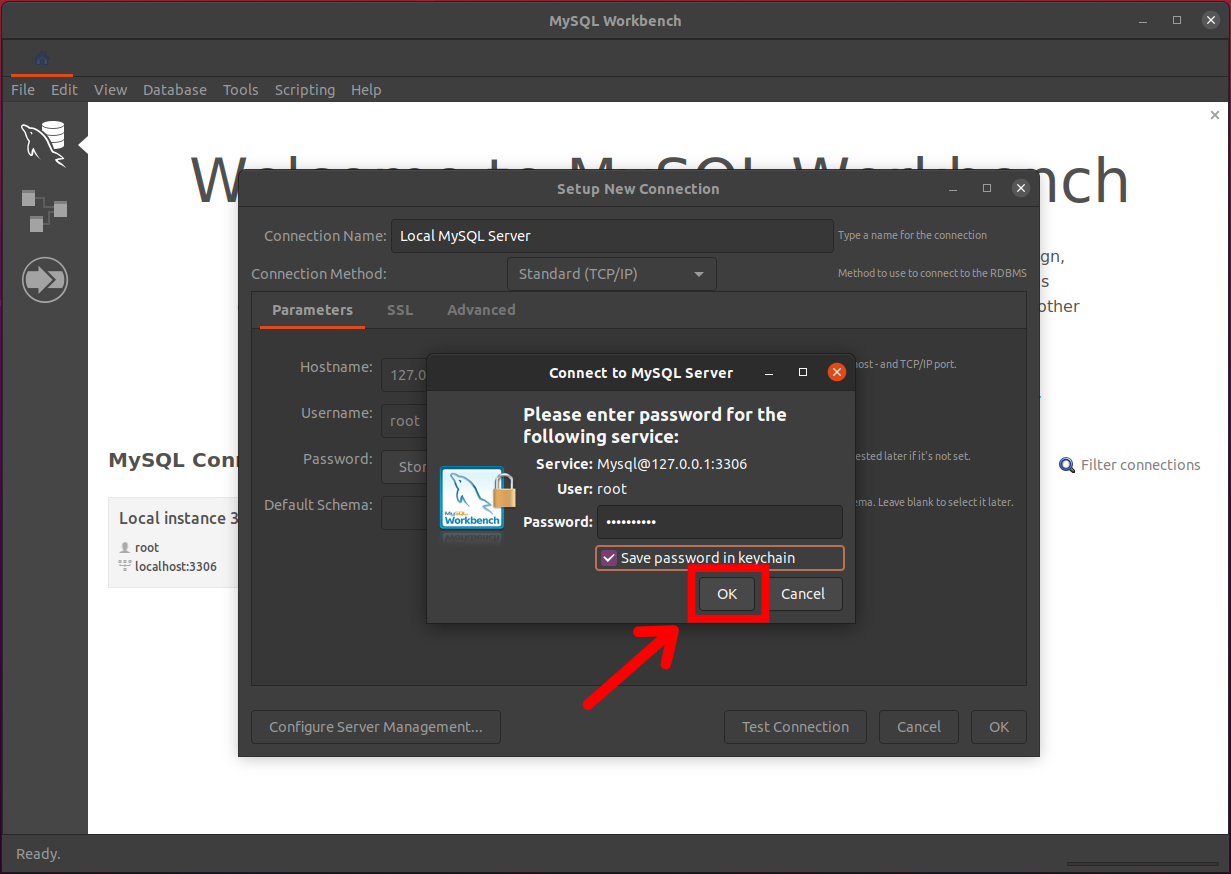
MySQL Workbench will display a dialog window. Type the password for the MySQL root user, check the “Save password in keychain,” and click the “OK” button.
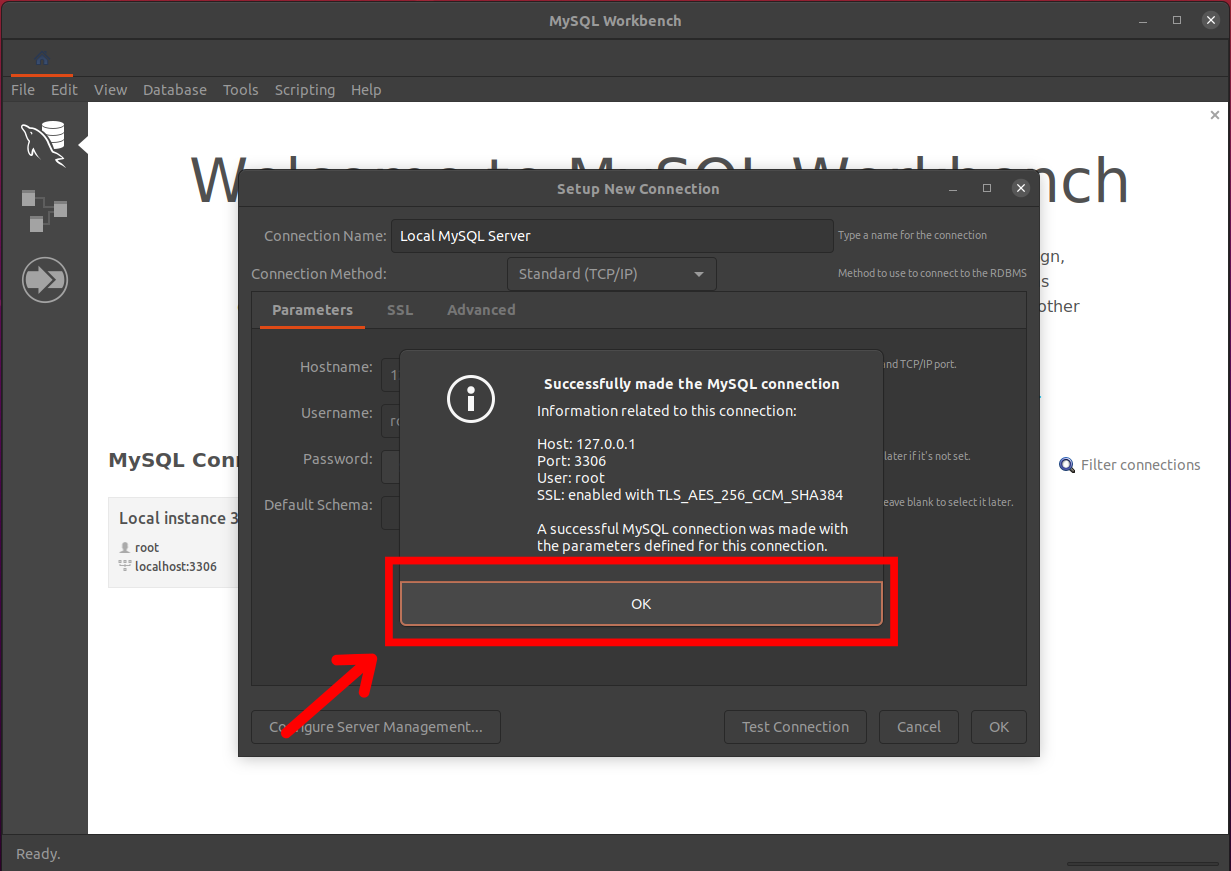
MySQL Workbench should say, “Successfully made the MySQL connection.” Click “OK“.
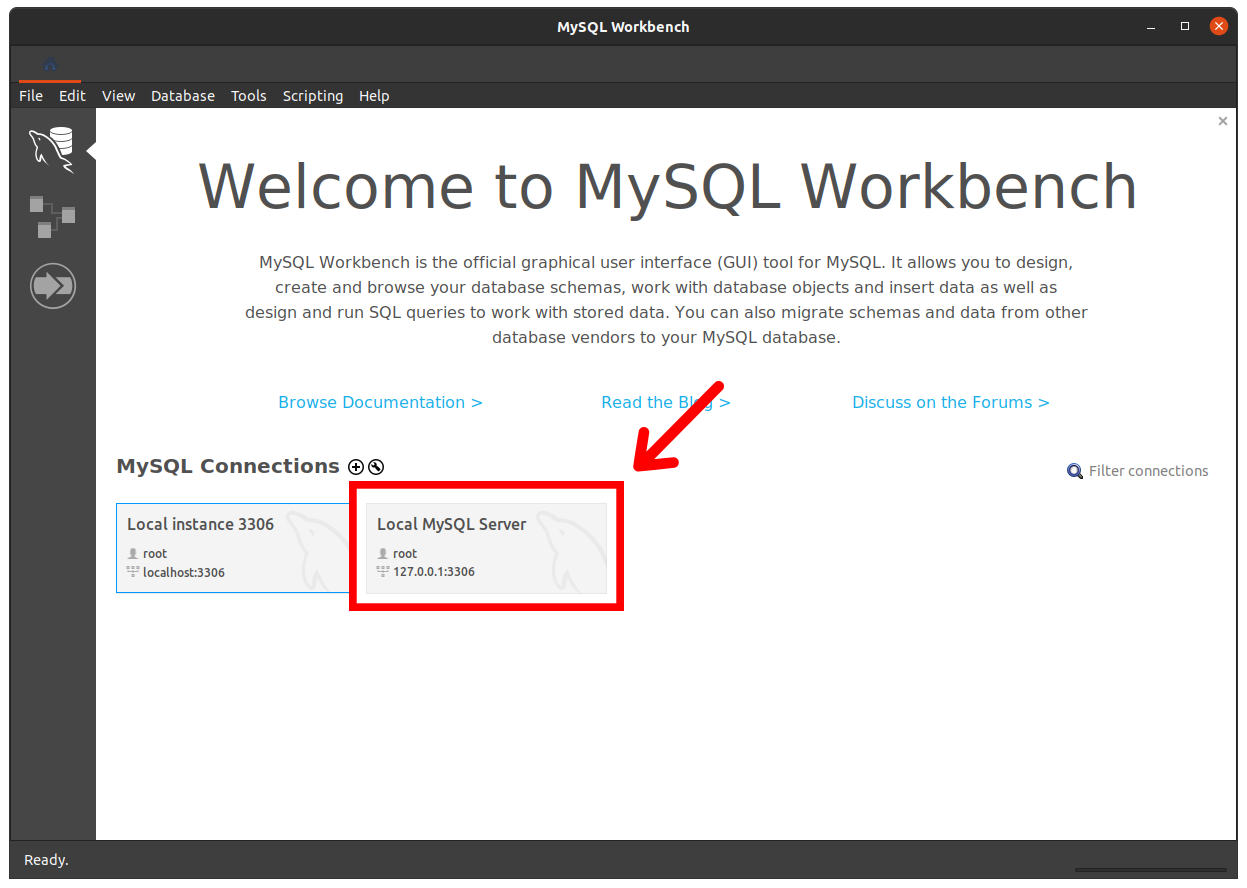
Now under the “MySQL Connections” section, you will see your connection listed. Double-click on it to connect to the MySQL Server.
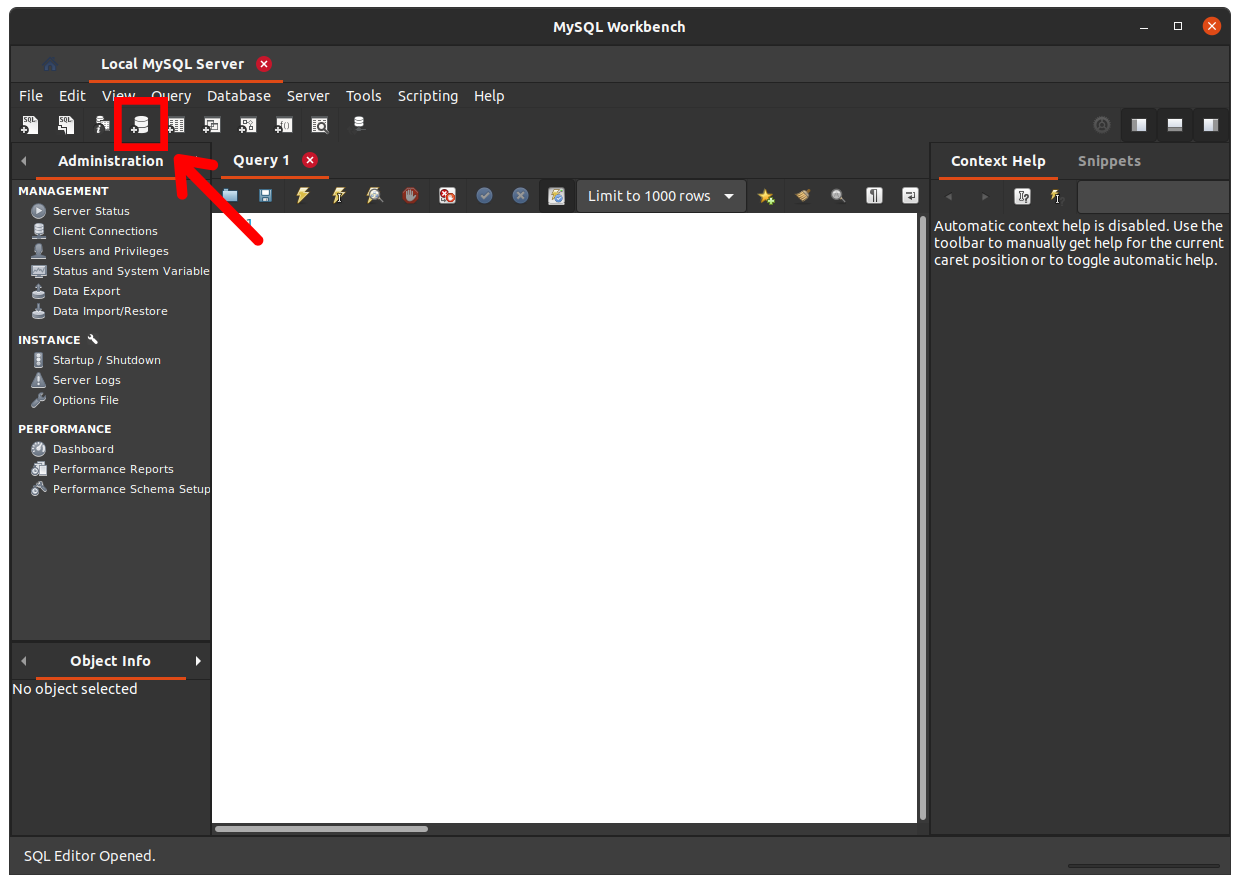
Now we are ready to create the new database in MySQL. MySQL Workbench opens the window as shown in the following screenshot. Click the “Create a new schema in the connected server” button from the toolbar.
You need to enter the “Schema name” in the following window and click the “Apply” button.
In MySQL, a schema is synonymous with a database. Therefore, creating a new schema also means creating a new database in MySQL.
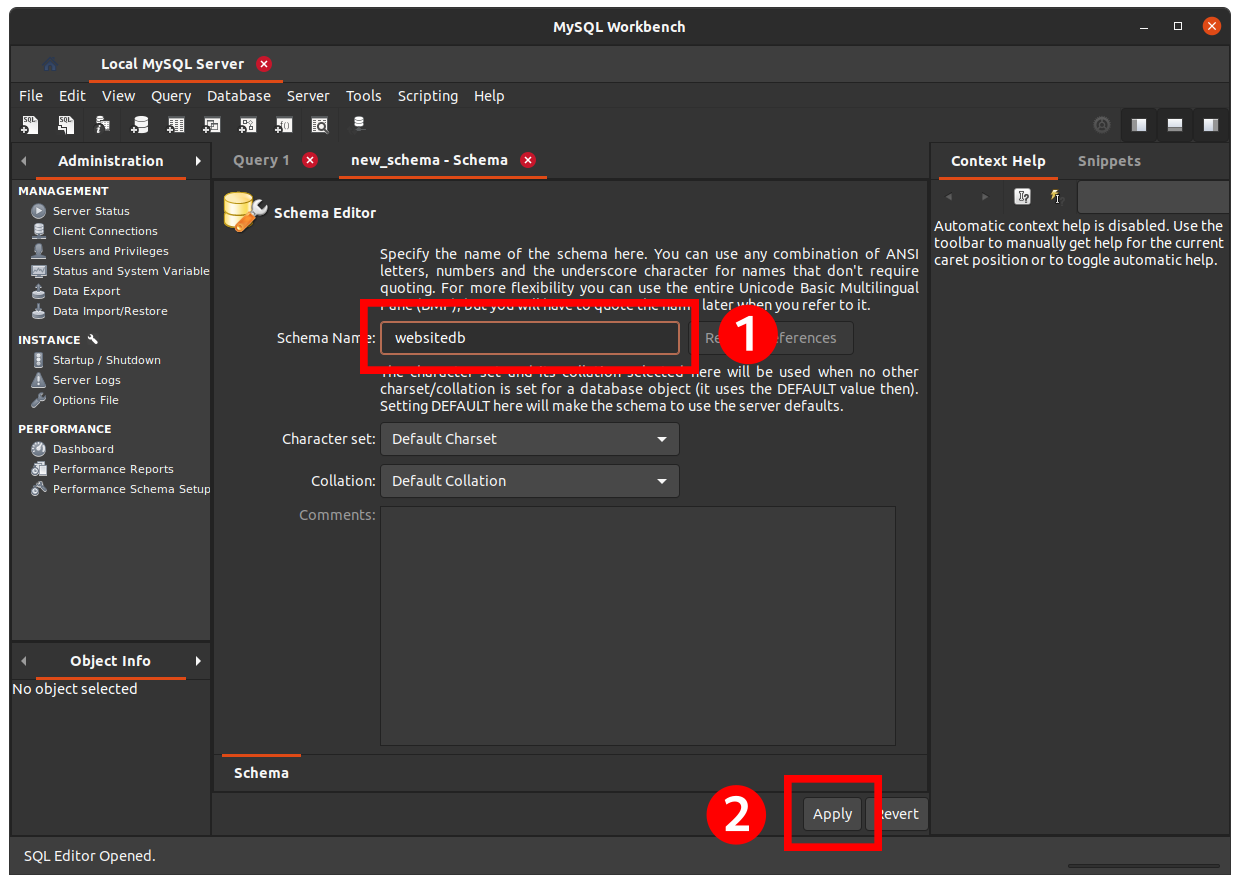
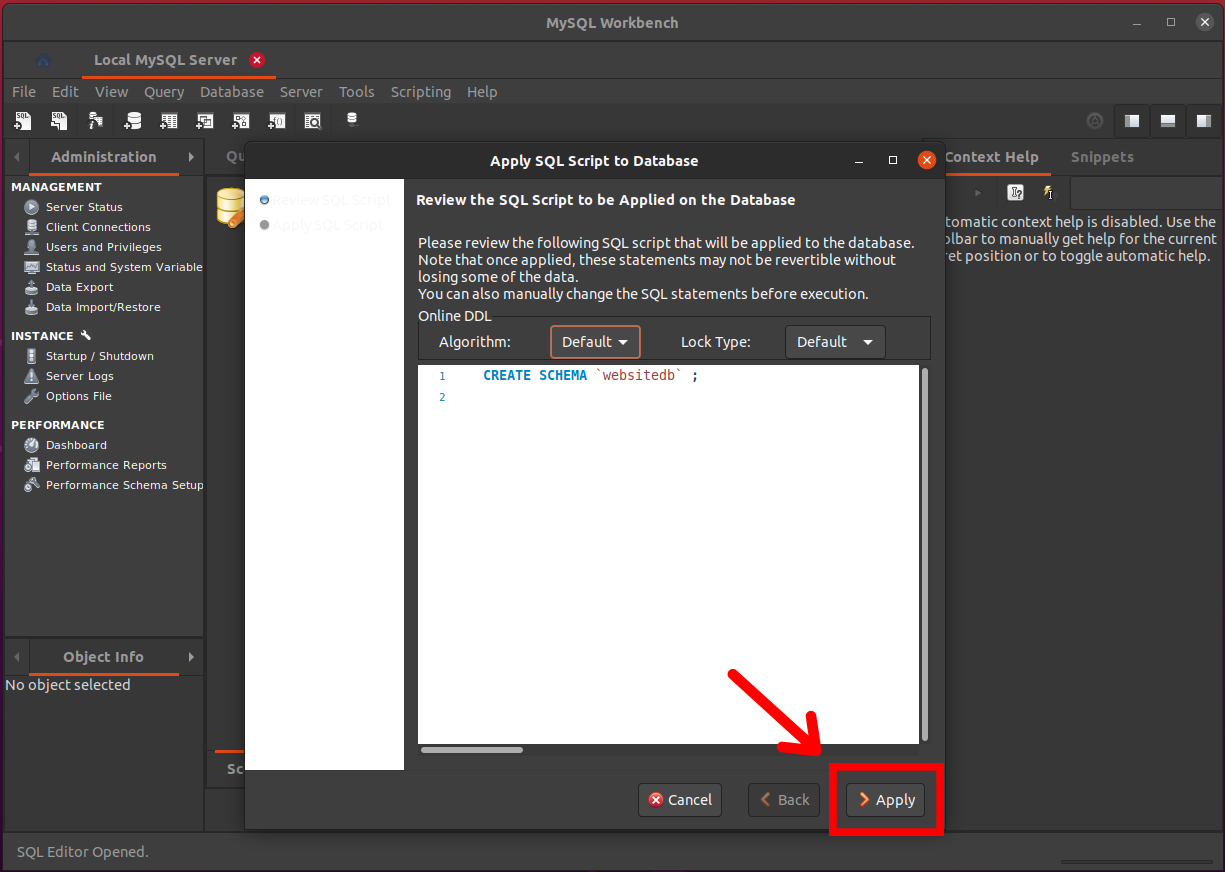
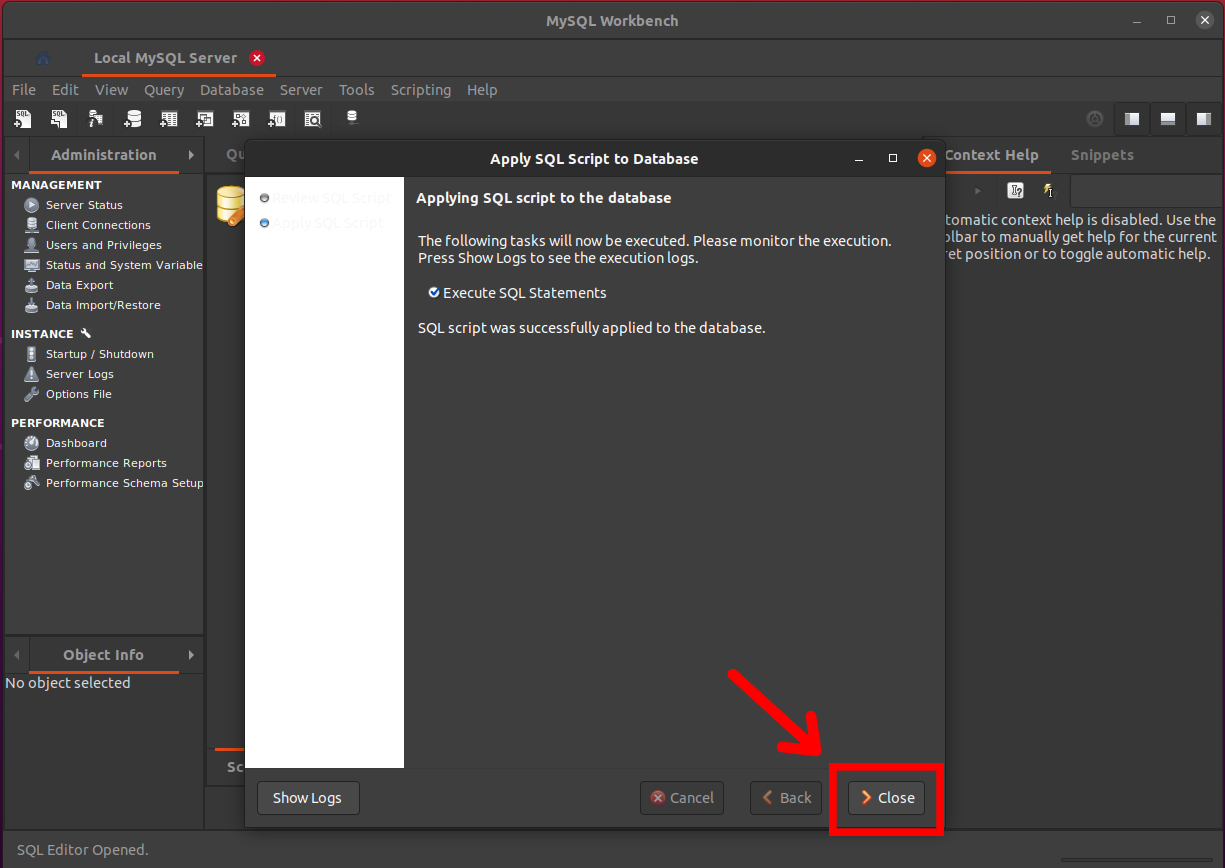
Once you name your schema, click the “Apply” button and, when prompted, review the SQL Script and click “Apply” again.
MySQL Workbench should say, “SQL script was successfully applied to the database.” Click “Close.”
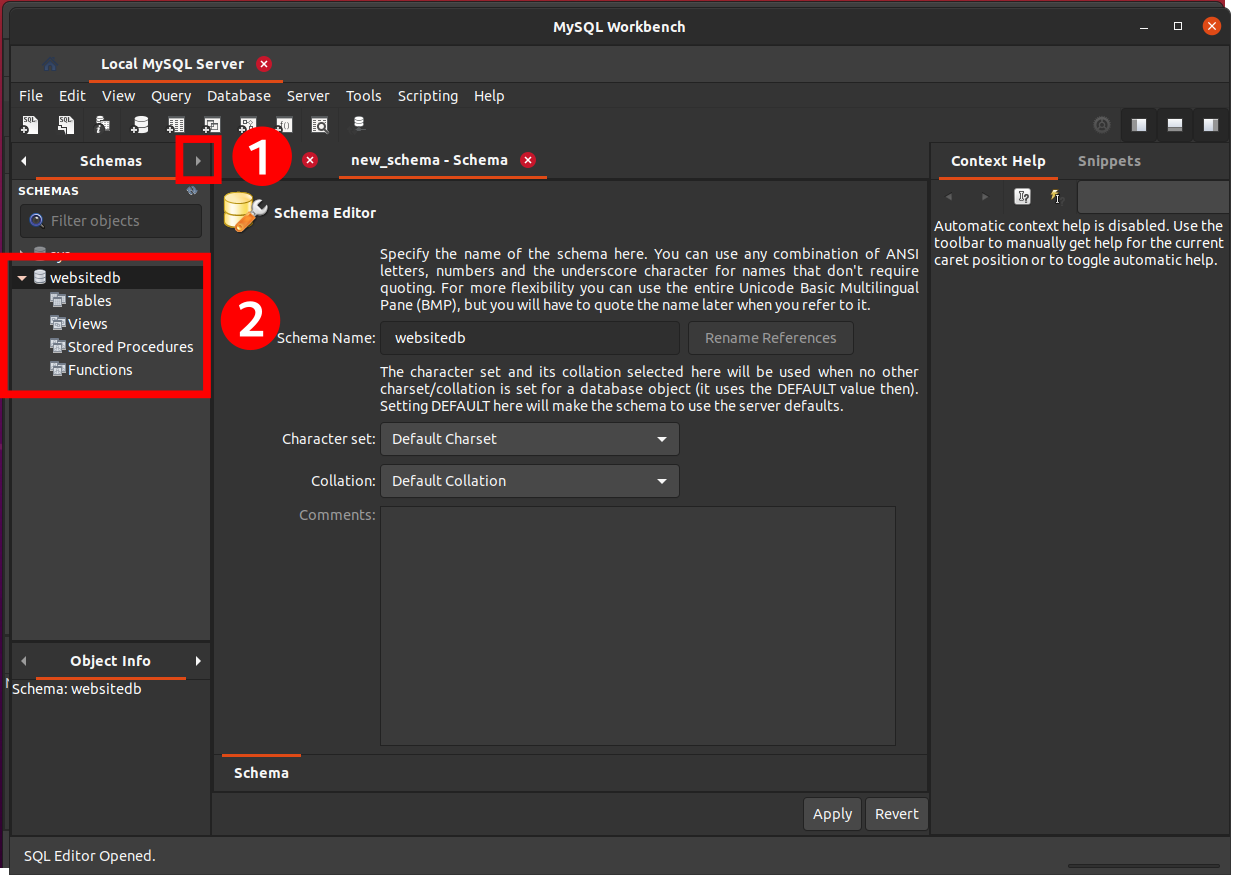
Click on the arrow to the right of “Administration” to switch to the “Schemas” tab. You’ll see the new database created and shown in the “Schemas” tab.
Conclusion
After completing this tutorial, you should have a sense of creating a database in MySQL using MySQL Workbench GUI. As we have seen above, it is pretty straightforward.
Related: MySQL: How to Backup (Dump) and Restore Database Using mysqldump
For more information about MySQL databases, see the MySQL documentation.