
This guide was updated in October 2025 to include steps for upgrading to Fedora Linux 43, the latest version of the distro.
Are you ready to upgrade from Fedora 42 to Fedora 43? You’re in the right place. The new release brings many updates, not just about aesthetic enhancements but also under-the-hood improvements that make your system more secure and efficient.
In this guide, I’ll walk you through the upgrade process step by step, ensuring a smooth transition to Fedora 43 without any hiccups.
Backup Your Data
First, let’s ensure all your important data is safe. Before doing anything else, I strongly recommend making a full system backup so that if something goes wrong, you can restore your system to its previous state with all your vital data.
However, if you do not feel like taking the above approach, you can instead use a command like the one shown below, which will archive all of the more critical directories and their contents in a tar.gz archive.
sudo tar czf /fedora42-data.tar.gz \
     --exclude=/fedora42-data.tar.gz \
     --exclude=/dev \
     --exclude=/mnt \
     --exclude=/proc \
     --exclude=/sys \
     --exclude=/tmp \
     --exclude=/media \
     --exclude=/lost+found \
     /Code language: Bash (bash)
Feel free to add more “–exclude=” parameters if needed. Finally, the command creates a backup of all files in the “fedora42-data.tar.gz” file located on the root partition (/), which you should ideally transfer to another computer or drive, for example, using the SCP command.
Upgrade to Fedora 43 from Fedora 42 Using GUI
Before proceeding, ensure your system is fully updated to guarantee a seamless upgrade. So, open the terminal and type:
sudo dnf update --refreshCode language: Bash (bash)This command refreshes your repository and updates your software packages. Once it’s done, reboot your system to apply any required updates. Then, you can proceed to the next step.
In Fedora, upgrades to the latest version are available immediately whenever a new one is released.
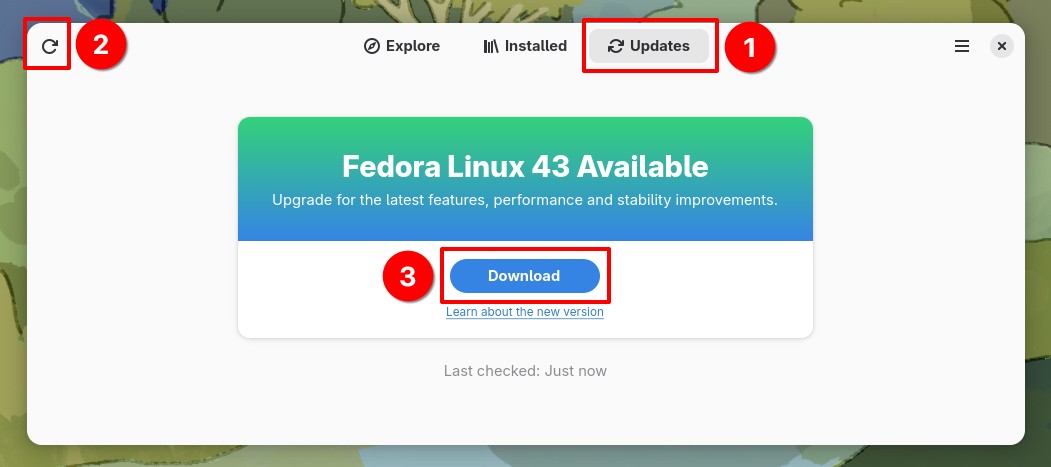
Start the Software app by launching it from the GNOME dash, searching for “software,” and clicking it when its icon appears.

Next, hit the “Refresh” button in the top left corner. Then, go to the “Updates” pane. You will see a notification that says, “Fedora Linux 43 Available”. Click the “Download” button.
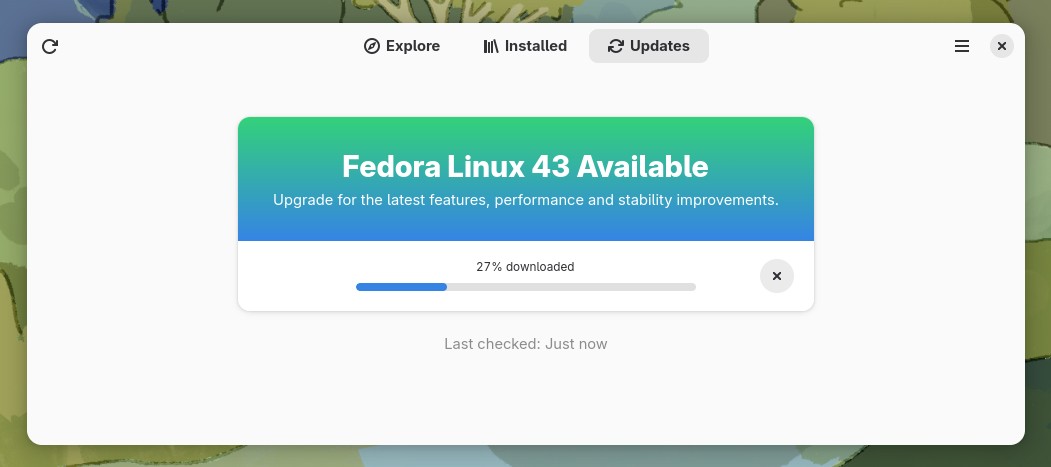
All the packages required to upgrade from Fedora 42 to Fedora 43 will start downloading. Depending on your internet speed, the entire process will take some time, so be patient.
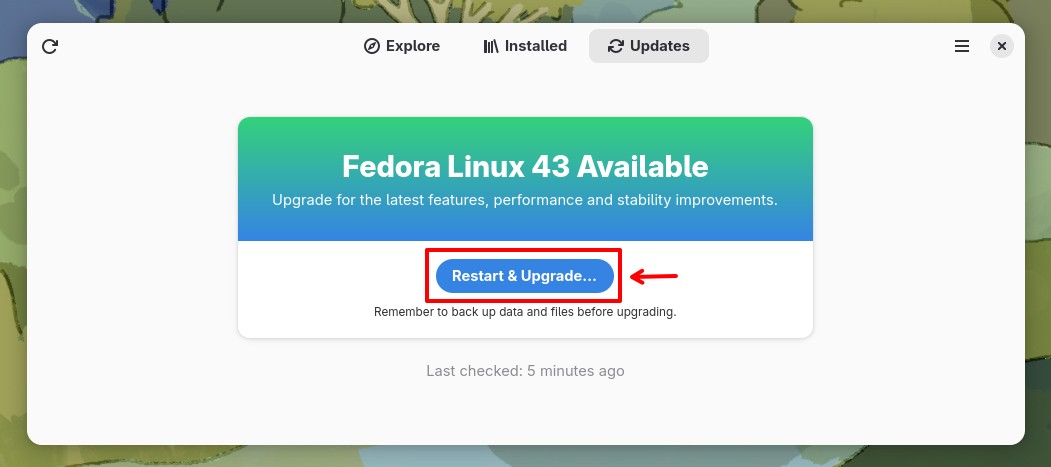
When the download is complete, click the “Restart & Upgrade” button to start the upgrade process to Fedora 43.
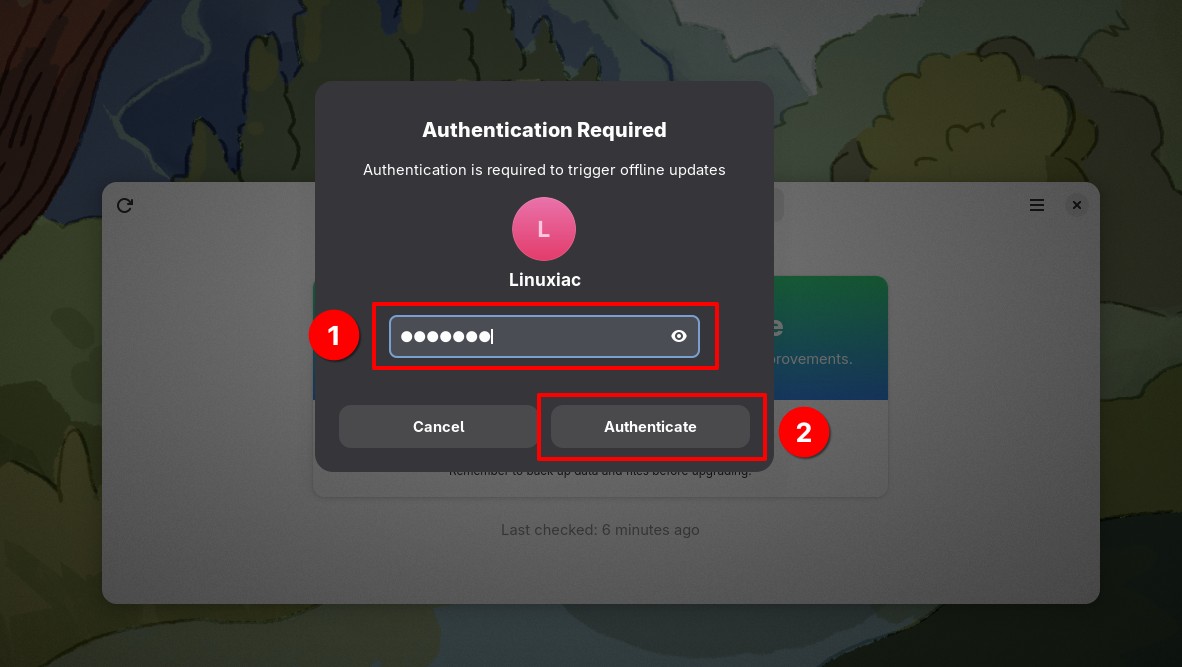
A pop-up window will appear, prompting you to enter your user’s password. Enter it and confirm by clicking the “Authenticate” button.
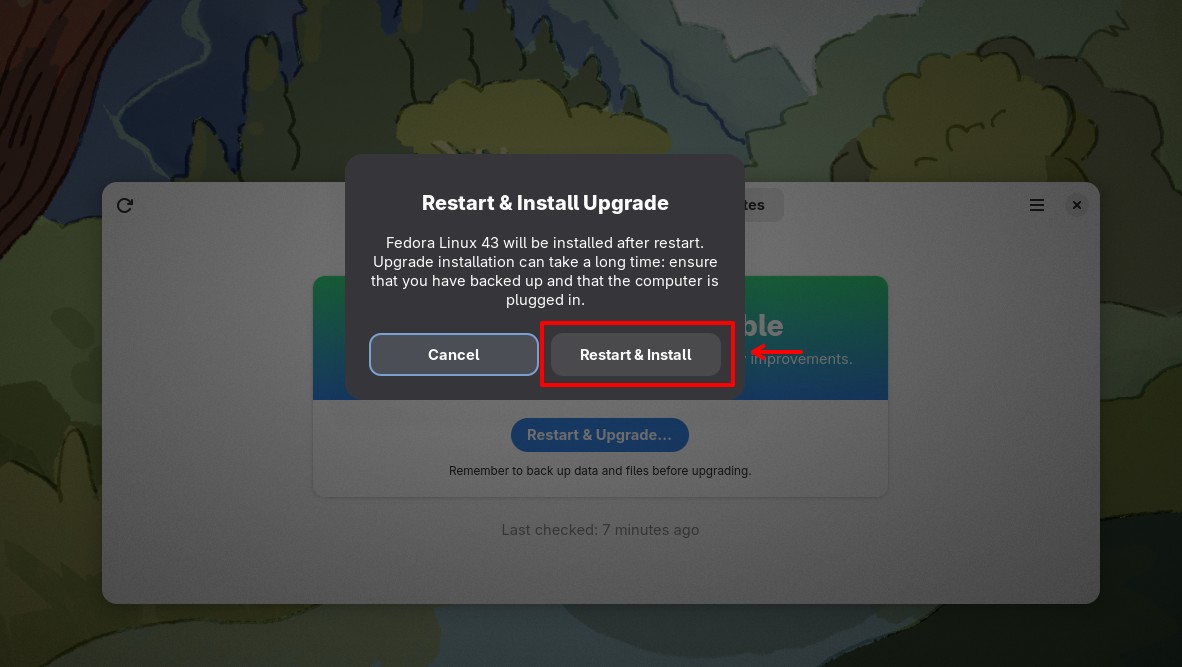
A new pop-up will ask you for confirmation to restart your system and begin the upgrade from Fedora 42 to 43. Next, click on the “Restart & Install” button.
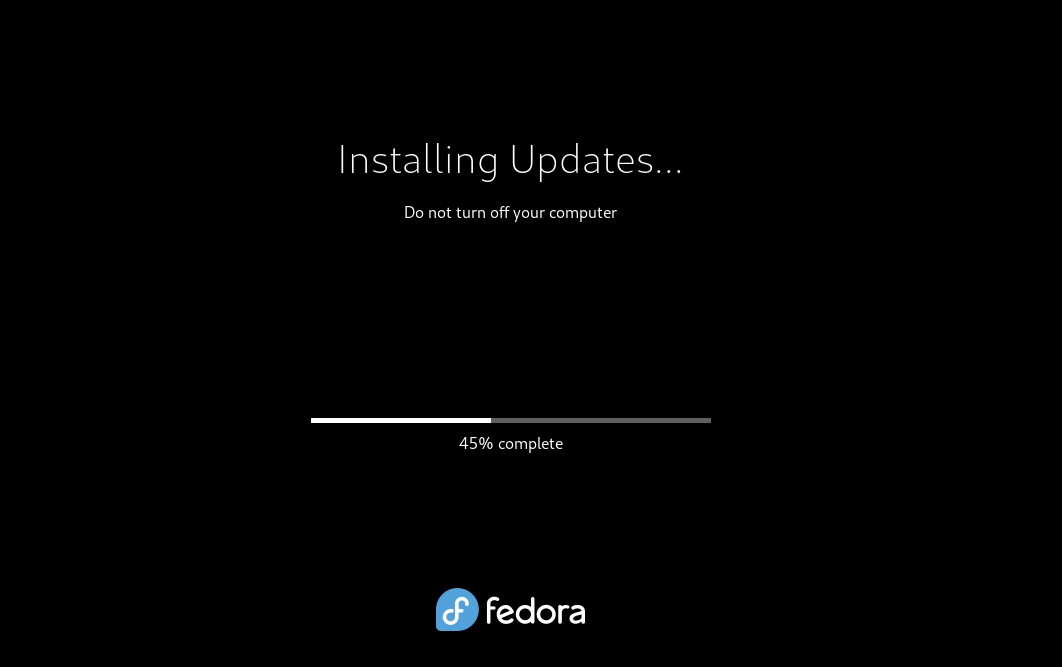
The system will restart to apply the downloaded system upgrades as shown below. This process will take some time, so please be patient and wait for it to finish.
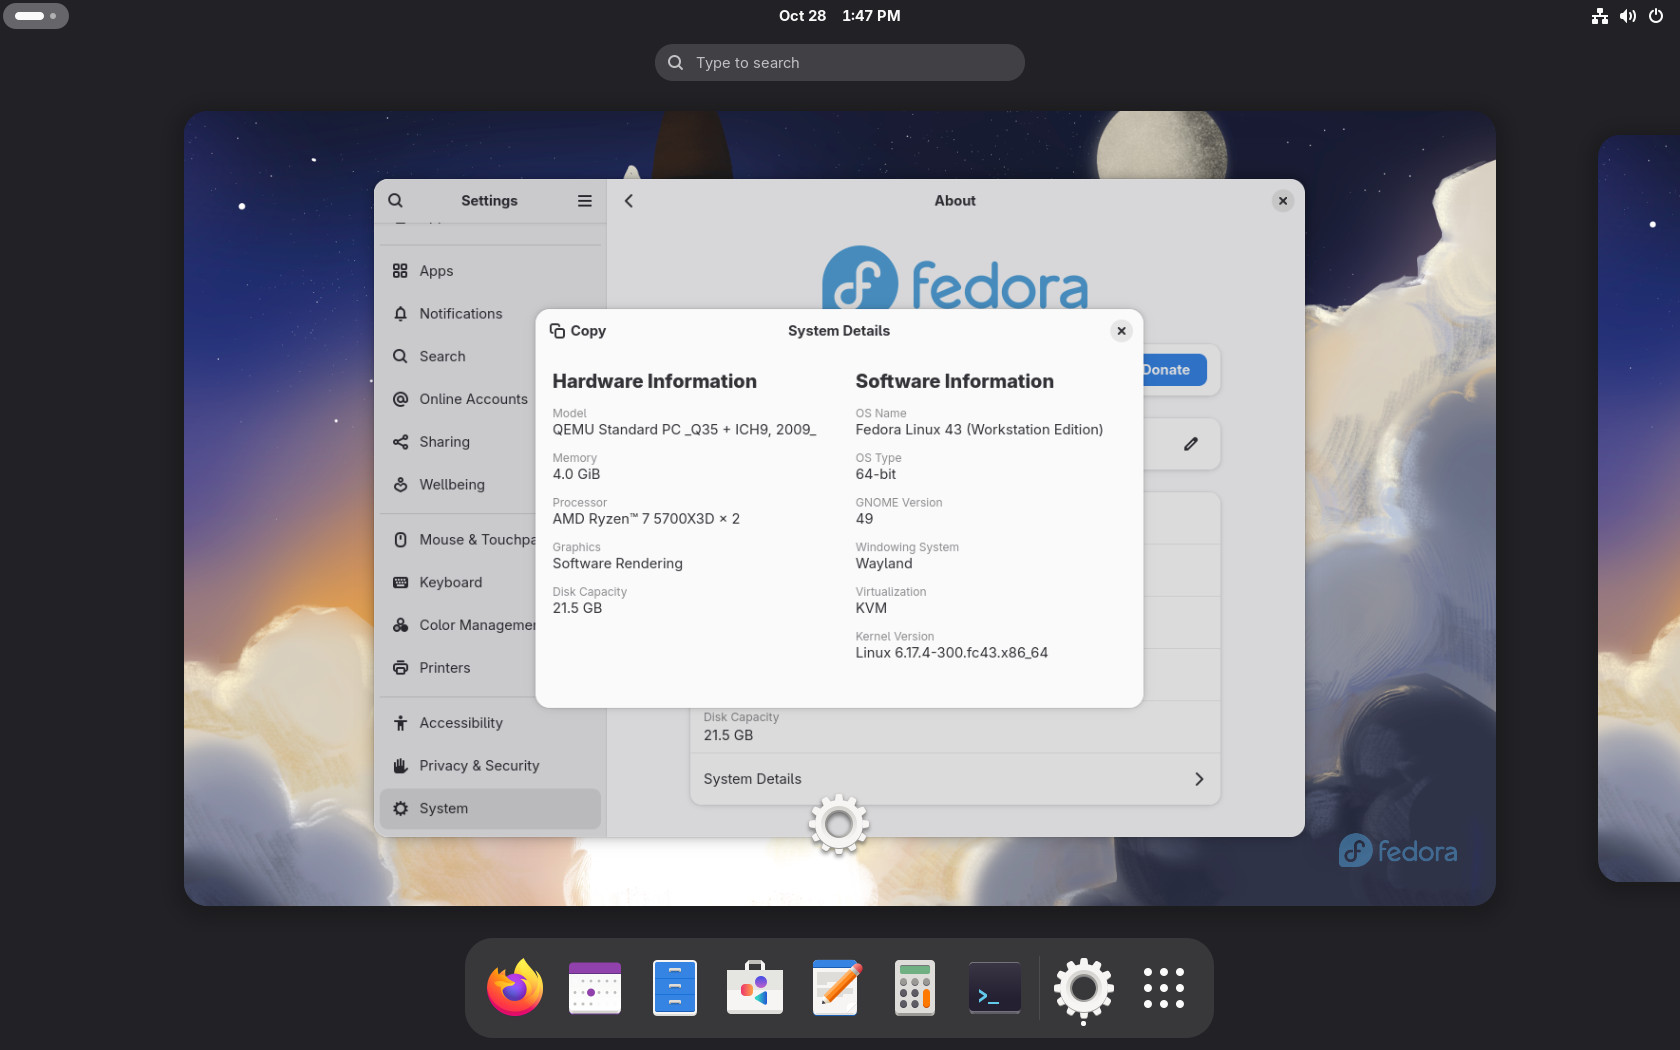
Once the upgrade is complete, your system will boot into Fedora 43.
Upgrade to Fedora 43 from Fedora 42 Using а Command Line
Step 1: Update Your Current System
Ensuring you have the latest packages for all currently installed software is vital. To do so, enter the following command in a terminal:
sudo dnf upgrade --refreshCode language: Bash (bash)
If you have any pending updates, install them and reboot the system if necessary.
Step 2: Install the DNF Upgrade Plugin
Next, you’ll need the DNF Upgrade plugin. It’s a tool that helps you manage your upgrade more effectively. You can install it (if it’s not already installed) by running:
sudo dnf install dnf-plugin-system-upgradeCode language: Bash (bash)Step 3: Download Fedora 43 Packages
Now, you’re set to start downloading the Fedora 43 packages. Run the following command:
sudo dnf system-upgrade download --releasever=43It tells DNF to download the necessary packages for Fedora 43. If the package manager finds any issues (such as conflicts or missing dependencies), it will let you know, and you might have to resolve them before proceeding.
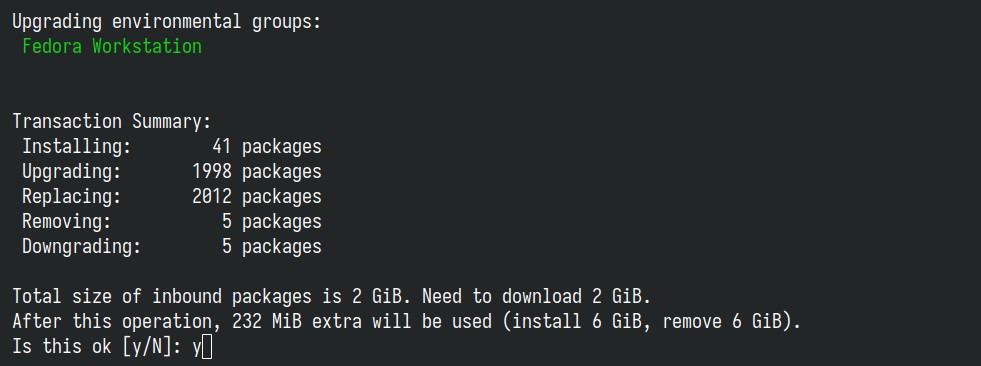
After downloading all the packages required to upgrade the system from Fedora 42 to 43 (which will take some time, so be patient), you will see the screen below. At the end, you must manually approve the proposed system’s modifications by typing “Y” and then confirming by pressing “Enter.”
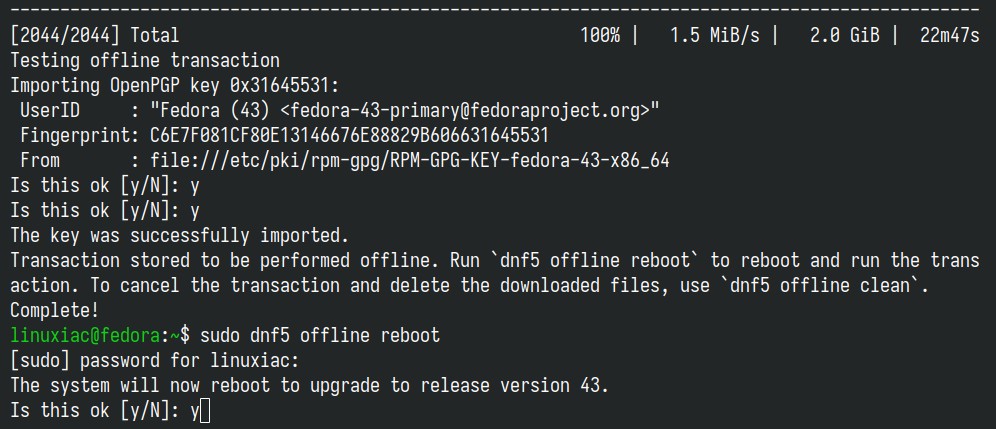
It’s important to understand that your current system has not yet been upgraded. To start the process, execute:
sudo dnf5 offline rebootCode language: Bash (bash)You will be prompted for confirmation that the system will reboot to begin the upgrade. Type “y” and hit “Enter.”
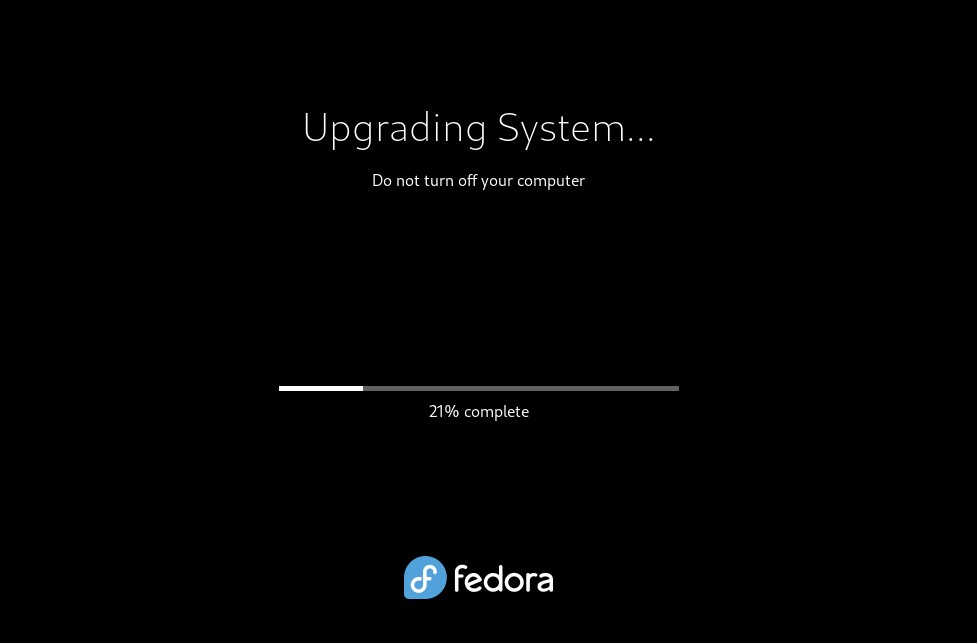
Step 4: Upgrading Fedora 42 to 43
Once the system reboots, the upgrade process will automatically start. It will take some time, so be patient and let it finish.
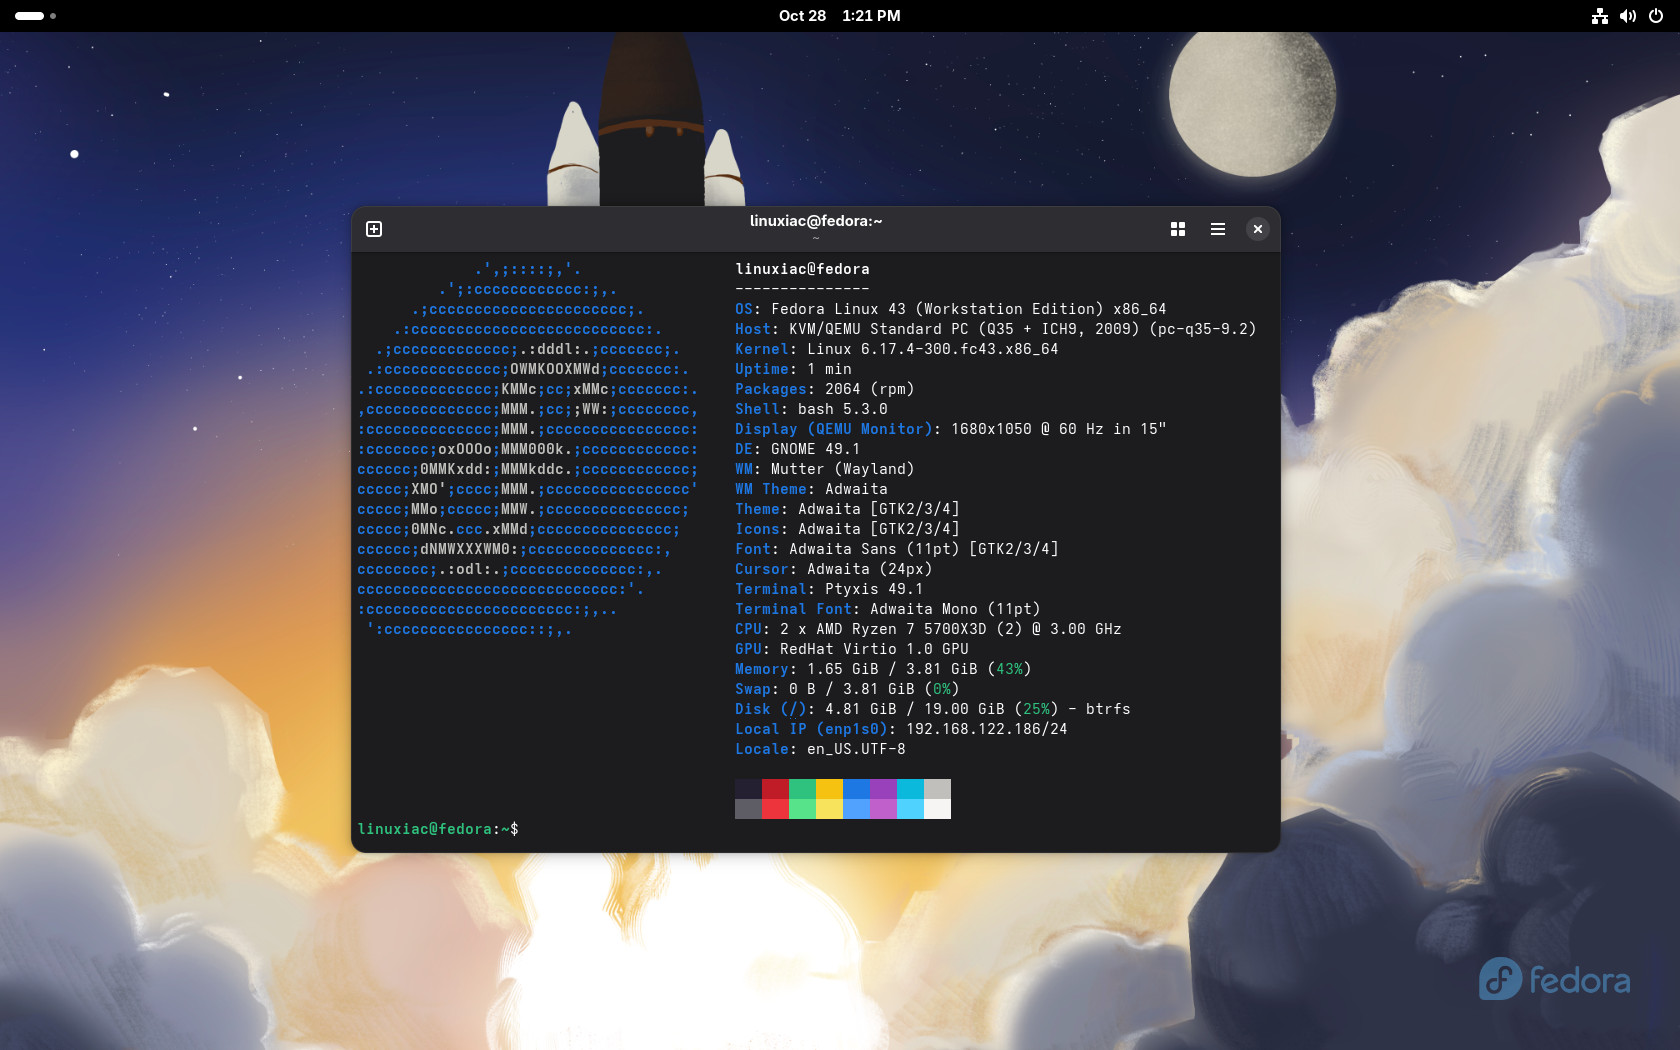
When everything is complete, your system will reboot, and you can log in and enjoy your new Fedora 43 system.
Step 5: Clean Up Post-Upgrade
After your system has successfully upgraded to Fedora 42, doing a little cleanup is a good idea. You can do this by running:
sudo dnf clean allCode language: Bash (bash)This command removes cached packages and metadata that are no longer needed.
Bottom Line
As you can see, with a little help, upgrading from Fedora 42 to 43 is straightforward with the right guidance. Follow the steps outlined in this guide to complete the process, and you’ll be all set to enjoy the latest features and improvements.
Additionally, I recommend thoroughly testing the system to ensure all applications and functionalities work as expected.
For additional help or useful information, check the official Fedora upgrade documentation.
Thanks for your time! I hope you find this guide helpful. Please let me know in the comments section below if you have any questions.


Typo in the first code line under Step 3: it should read “releasever=43”, not 42
Thanks for noticing. Fixed.
@Luigi:
probabilmente,
per dnf4:
dnf system-upgrade reboot
per dnf5:
dnf5 offline reboot
Why not using, sudo dnf system-upgrade reboot ?
Will the xfce spin be Wayland only?
Nope, xfce is still working on their Wayland support
Nice post. It’s amazing how easy Fedora makes it to upgrade between releases! Gotta love that!
Hi! Can I change the download location of the upgrade? I don’t have too much free space on the root folderThanks!
in your "sudo dnf system-upgrade download" command, add the paramater "–dest=<your download directory>" . Warning : DO NOT use your Home directory, as it will wipe everything that's in there. Create an empty directory on a separate partition for the upgrade.