
When it comes to application development, containers are now the standard approach. They are popular among software developers due to their flexibility and portability.
The LEMP stack is an open-source solution used to develop web applications. It is an acronym representing Linux, Nginx, MySQL/MariaDB, and PHP. In addition, it is widely popular and well-supported among the Open Source community.
However, installing and configuring all of these services takes time and skills. This is where Docker containers, specifically Docker Compose, come in. With its help, you can have your LEMP stack up and running in minutes and focus entirely on developing web apps without wasting time installing and configuring services.
But if you still prefer to take the traditional approach and install the LEMP stack from the native packages for the distro you are using, our tutorials for Ubuntu, Debian, Rocky Linux, and AlmaLinux will help you do it effortlessly.
This guide will show you how to quickly and easily integrate Nginx, MariaDB, and PHP using Docker Compose. In addition, we’ll add the popular web-based application phpMyAdmin to the LEMP stack to manage your MySQL/MariaDB database.
So without further ado, let’s get to work.
Prerequisites
Of course, having Docker and Docker Compose installed is required to deploy a containerized LEMP stack. So, if you don’t already have Docker installed, any of the following guides may be helpful:
- How to Install Docker on Ubuntu 22.04
- How to Install Docker on Debian 11 (Bullseye)
- How to Install Docker on AlmaLinux / Rocky Linux
- How to Install Docker on Fedora
- How to Install Docker on Raspberry Pi
The other essential component is Docker Compose. Remember, it is provided separately from Docker. Therefore, you must Install Docker before adding Docker Compose; otherwise, Compose will not function.
Fortunately, even if it is not already on your Linux system, installing it is pretty simple. Type the following commands:
sudo curl -L "https://github.com/docker/compose/releases/download/v2.10.2/docker-compose-linux-$(uname -m)" -o /usr/local/bin/docker-compose
sudo chmod +x /usr/local/bin/docker-composeCode language: Bash (bash)
Next, run the command below to ensure that Docker Compose is installed and functioning correctly. You should receive a response similar to the one shown.
docker-compose versionCode language: Bash (bash)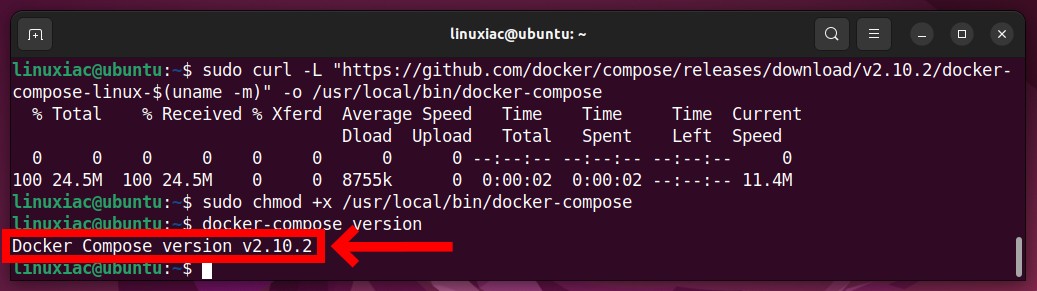
Everything seems fine, so let’s get to the actual part.
Set Up Nginx, MariaDB, and PHP with Docker Compose
Docker Compose allows you to build and run stacks of multiple containers. In other words, it is a tool for defining and running multi-container Docker applications.
To use it, you must first create a “docker-compose.yml” file that configures the containers for your application. Then, you can use a single command such as “docker-compose up” to start all the containers and link them together.
Let’s begin by creating the directory structure to house the files required to set up Nginx, MariaDB, and PHP with Docker Compose. The final version should look like the one shown below, and we’ll now explain what each file and directory represents.
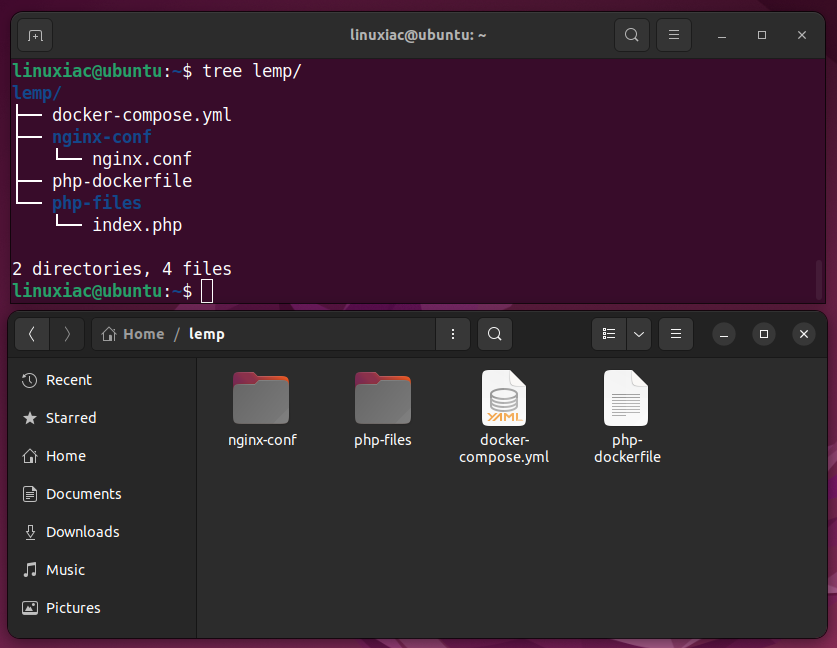
We use an arbitrary name for the main directory, such as “lemp.” It will store all the files required for the setup, so let’s create it.
mkdir lempCode language: Bash (bash)Then we make two subdirectories inside it: “nginx-conf” and “php-files.”
mkdir lemp/{nginx-conf,php-files}Code language: Bash (bash)The “nginx-conf” directory will hold our modified Nginx web server main configuration file, which we will create later. Finally, the “php-files,” as the name implies, are intended to store the PHP scripts that the application we are developing is expected to execute.
It is important to note that we chose all these directory names arbitrarily. But, of course, you are free to use different ones.
Let’s continue creating our master file describing all the services in our containerized LEMP stack. Create a file named “docker-compose.yml” inside the “lemp” directory with your preferred text editor:
cd lemp
vim docker-compose.ymlCode language: Bash (bash)
Add the following content to it:
version: '3.8'

# Services
services:

    # PHP Service
    php:
        build:
            dockerfile: php-dockerfile
        volumes:
            - './php-files:/var/www/html'
        depends_on:
            - mariadb

    # Nginx Service
    nginx:
        image: nginx:latest
        ports:
            - 80:80
        links:
            - 'php'
        volumes:
            - './php-files:/var/www/html'
            - './nginx-conf:/etc/nginx/conf.d'
        depends_on:
            - php

    # MariaDB Service
    mariadb:
        image: mariadb:10.9
        environment:
            MYSQL_ROOT_PASSWORD: your_password
        volumes:
            - mysqldata:/var/lib/mysql

    # phpMyAdmin Service
    phpmyadmin:
        image: phpmyadmin/phpmyadmin:latest
        ports:
            - 8080:80
        environment:
            PMA_HOST: mariadb
        depends_on:
            - mariadb

# Volumes
volumes:

  mysqldata:Code language: YAML (yaml)
Save and close the file. Don’t be worried if something in its contents is unclear to you. We’ll go through it in more detail below.
PHP Service
We’ll begin with PHP, the first service in our “docker-compose.yml” file. The key point here is the “build” directive, which states, “dockerfile: php-dockerfile.”
As you can see, there is no path to a Docker image here. This is because we will be building our own, the instructions for which can be found in the “php-dockerfile” file.
You may be asking why we need to build our own Docker image for PHP instead of using one already available on Docker Hub. The answer is simple: the official image includes a limited set of preinstalled PHP extensions. Unfortunately, they are, in most cases, insufficient for the applications we aim to develop.
Therefore, we will create a new Docker image based on the official PHP 8.1 one, but additionally, we will compile and include some of the most often-used PHP extensions, such as MySQL, GD, ZIP, and so on.
So, create a file named “php-dockerfile” in the “lemp” directory with your preferred text editor and add the following content to it:
vim php-dockerfileCode language: Bash (bash)FROM php:8.1-fpm
# Installing dependencies for the PHP modules
RUN apt-get update && \
apt-get install -y zip libzip-dev libpng-dev
# Installing additional PHP modules
RUN docker-php-ext-install mysqli pdo pdo_mysql gd zipCode language: Dockerfile (dockerfile)Save and close the file. Of course, as you guessed, if you need more PHP extensions, you can include them in the file.
The following directive, “volumes,” specifies where the app will store our PHP files. As you know, Docker containers are temporary, and any data are expected to be lost when the container is deleted. Fortunately, the Docker volumes provide a mechanism to persist data created inside a container.
So, our “php-files” directory points to “/var/www/html” in the PHP container, which is where PHP looks for executable PHP scripts.
We’ll create an “index.php” file into it, which will just be used for testing.
vim php-files/index.phpCode language: Bash (bash)Add the single line shown below, then save and exit the file.
<?php phpinfo(); ?>Code language: PHP (php)The “depends_on” directive instructs our PHP container to wait until MariaDB has been started. We do this because we expect PHP to try to connect to the database; thus, it must first be operational.
Nginx Service
Things are considerably more straightforward here. We utilize the most recent Docker image and expose the container’s port 80 to port 80 of our local Linux system. The “links” directive is a way to connect the Nginx container to the one on the PHP. In other words, it allows you to define extra aliases by which a service is reachable from another service.
Again, we specify the “php-files” directory, so the Nginx server knows where to look for the requested files. The interesting part is in the second volume, where we define “./nginx-conf:/etc/nginx/conf.d.” This is the Nginx web server’s main configuration file.
We do this since Nginx must learn to work with PHP files by default. Therefore, we must first add the necessary configuration to this capability.
Inside the “nginx-conf” directory, create a file named “nginx.conf” and paste the following content into it:
vim nginx-conf/nginx.confCode language: Bash (bash)server {
listen 80 default_server;
listen [::]:80 default_server;
server_name localhost;
root /var/www/html;
index index.php index.html;
location / {
try_files $uri $uri/ /index.php?$args;
}
location ~* \.php$ {
fastcgi_pass php:9000;
include fastcgi_params;
fastcgi_param SCRIPT_FILENAME $document_root$fastcgi_script_name;
fastcgi_param SCRIPT_NAME $fastcgi_script_name;
}
}Code language: Nginx (nginx)Finally, save and exit the file.
Again, we tell the Nginx container to wait for the PHP to start first because it is dependent on it.
Furthermore, if you want to become more familiar with Nginx’s server blocks, our handy guide, “How to Create Nginx Virtual Host (Server Block),” will be helpful too.
MariaDB Service
Our MariaDB server’s Docker Compose configuration is simple. All that needs to be done is replace the “MYSQL_ROOT_PASSWORD” directive, “your_password,” with the one you choose. As the name implies, this is the password for the MariaDB root account.
The “volumes” directive assures us that we will not lose the data in our database during container restarts. That’s all we need for our MariaDB container.
phpMyAdmin Service
The final container in our Docker Compose deployment is phpMyAdmin. Since it is not required for the LEMP stack to function, it greatly simplifies MariaDB administration, which is why we include it in our deployment.
We specify phpMyAdmin to be accessible on port 8080 because we have already exposed port 80 to the Nginx container on our local Linux system.
The “PMA_HOST: mariadb” directive tells the phpMyAdmin container which database to connect to, in this case, our MariaDB container.
Start and Run the LEMP Stack with Docker Compose
Finally, we are ready to run Nginx, MariaDB, PHP, and phpMyAdmin using Docker Compose. To do this, execute the below-given command from the “lemp” directory where our “docker-compose.yml” file is located.
Start and run the containers in the background:
docker-compose up -dCode language: Bash (bash)The images will start downloading, and during the process, the PHP Docker image will be recreated, including the additional modules.
The entire procedure will take a few minutes, depending on your internet connection speed. In the end, you should see a screen similar to the one below, informing you that all containers have been successfully started.
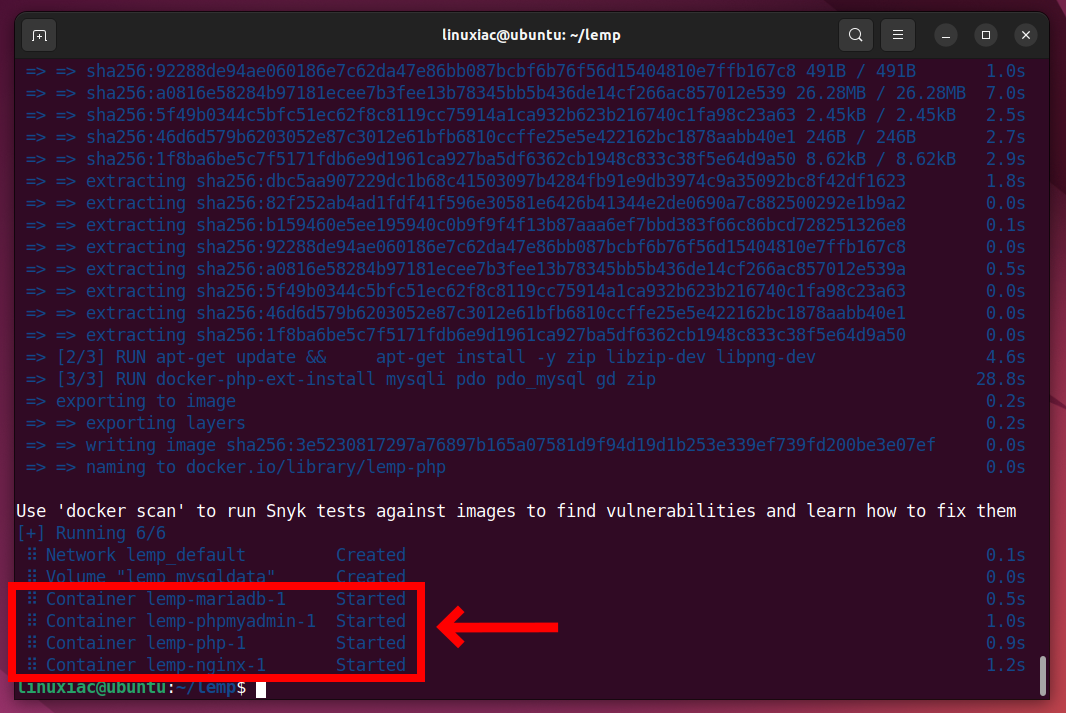
Of course, the delay before the actual start of the Nginx, MariaDB, PHP, and phpMyAdmin containers using Docker Compose will only be the first time because it is necessary to download the images from the Internet.
All subsequent runs will take seconds since the Docker images are available locally on your Linux system.
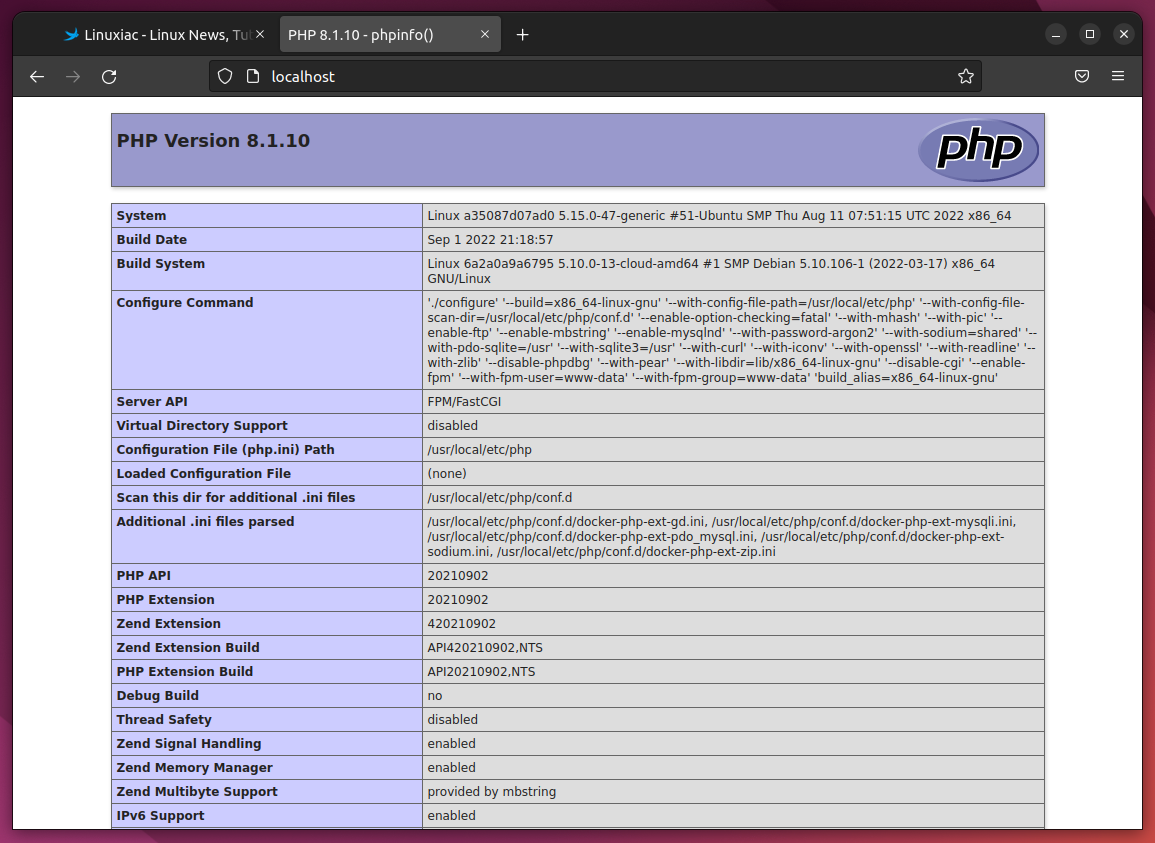
You can now open your browser and navigate to http://localhost. The “index.php” file we prepared in the “php-files” directory will greet you.
You can also reach your containerized phpMyAdmin instance at http://localhost:8080.
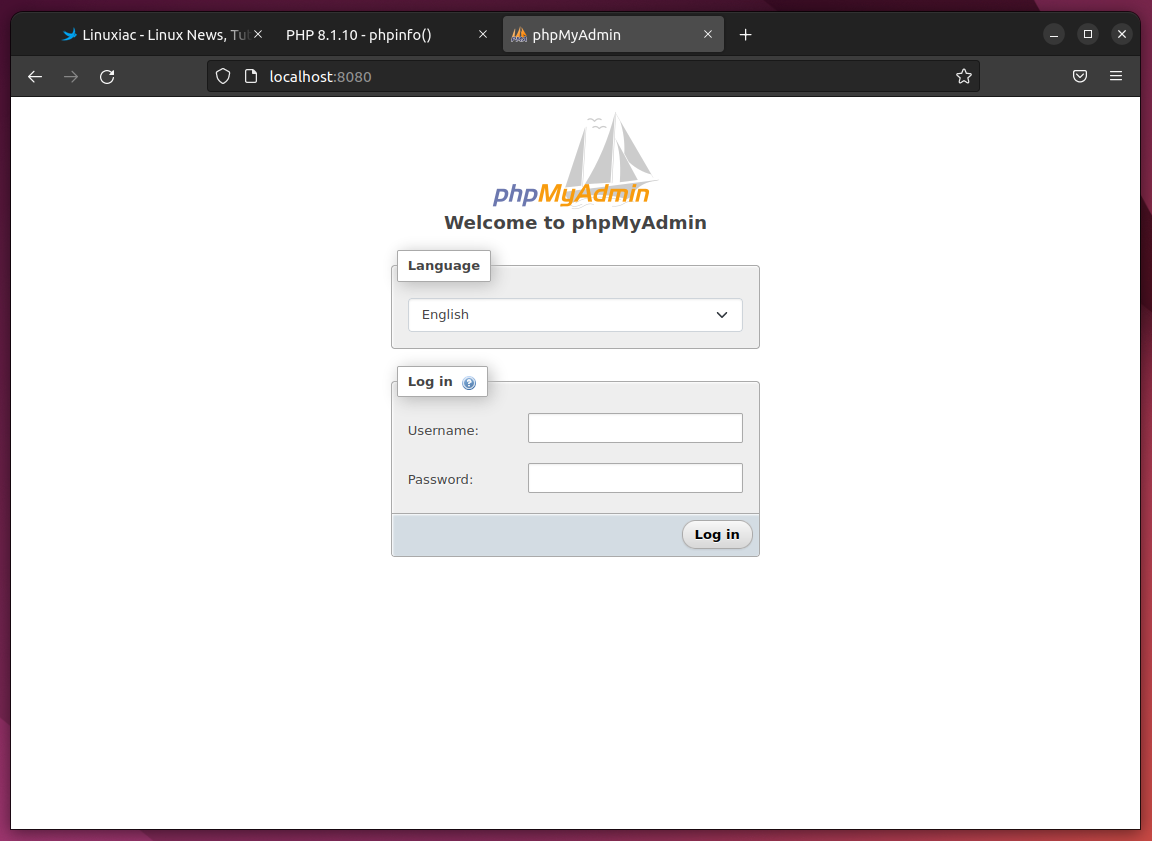
It is time to congratulate yourself on a well-done job!
Finally, let us walk you through the essential Docker Compose commands for managing your containerized LEMP stack.
Basic Docker Compose Commands
The basic Docker Compose commands you can use in practice are shown below with examples. Remember to execute them from the directory containing the “docker-compose.yml” file.
List All Docker Containers
To view a list of all the containers that are currently running in your LEMP deployment, type:
docker-compose psCode language: Bash (bash)
Stop All Docker Containers
To stop all docker containers that are running in the background, use the command as shown below:
docker-compose stopCode language: Bash (bash)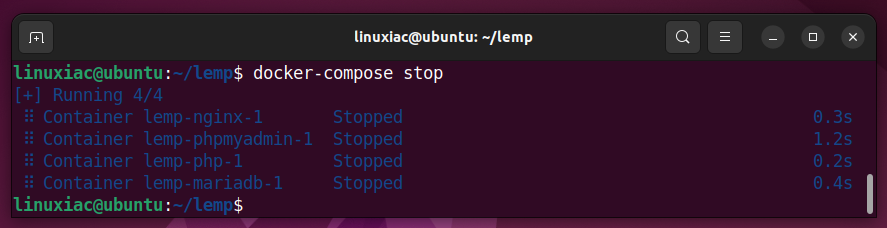
Of course, you can stop just one of the containers in your LEMP stack rather than all of them. Run “docker-compose stop” followed by the service name to do so. Notice not the container name but the service name.
For example, to stop the Nginx container, execute:
docker-compose stop nginxCode language: Bash (bash)
Similarly, you can rerun it again later by executing “docker-compose start nginx.”
Start All Docker Containers
From your project directory (“lemp”), start up your application by running the command as shown below:
docker-compose startCode language: Bash (bash)
View the Containers’ Logs
The docker-compose logs command displays log output from services. For example, run the command followed by the service name to view the Nginx container logs.
docker-compose logs nginxCode language: Bash (bash)Additionally, if you want to aggregate the logs of every container in your LEMP stack and track what’s happening in them in real-time, type:
docker-compose logs -fCode language: Bash (bash)Stop and Destroy Containers
The following command stops and removes containers and networks created by the “docker-compose up” command:
docker-compose downCode language: Bash (bash)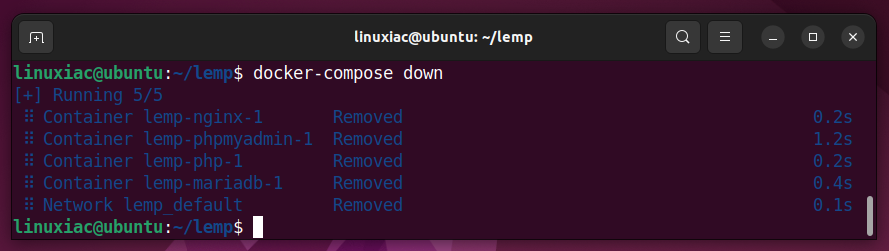
Additionally, if you want to stop and remove containers as well as their associated Docker images, use the following command:
docker-compose down --rmi allCode language: Bash (bash)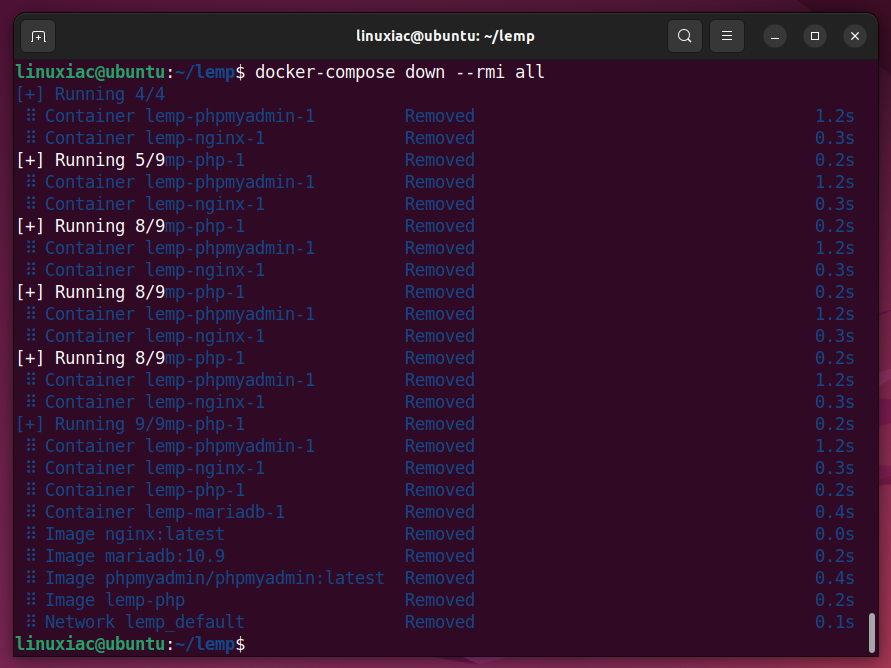
Accessing the Docker Container
The last scenario we’ll present isn’t directly related to Docker Compose, but it comes in handy when inspecting what’s happening inside the container.
For example, let’s say we want to enter inside the Nginx container. First, run the following command to list all running Docker containers and locate the container ID of the target container in the “CONTAINER ID” column.
docker psCode language: Bash (bash)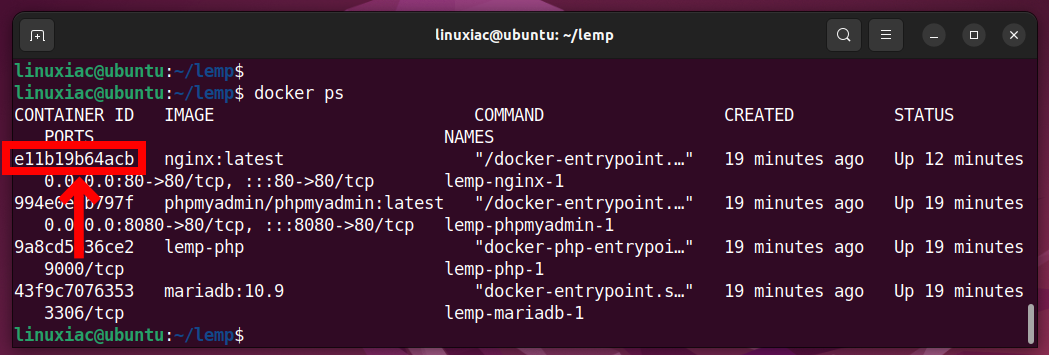
Now we know that the ID of the Nginx container is e11b19b64acb. You can now get into the container by accessing its shell as executing:
docker exec -it e11b19b64acb /bin/shCode language: Bash (bash)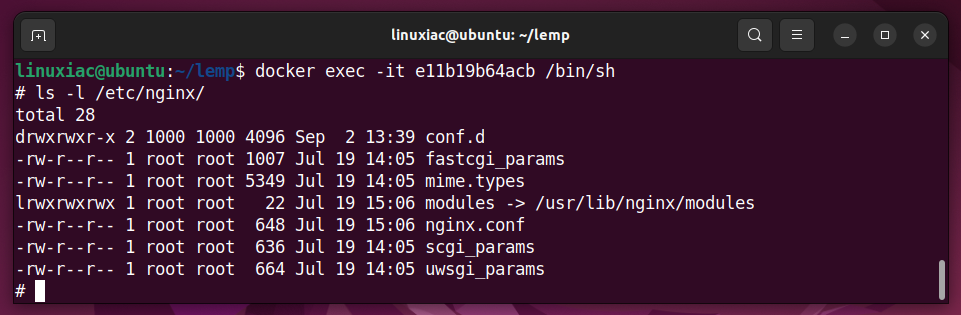
Conclusion
Setting up Nginx, MariaDB, and PHP (LEMP stack) with Docker Compose can significantly simplify deploying web applications. It provides a way to define and manage multiple Docker containers as a single application, making it easier to maintain and scale. Moreover, Docker Compose enables developers to manage the configuration of multiple services in one place, saving a lot of time and effort.
This guide walks you through all the steps needed to set up and dockerize Nginx, MariaDB, and PHP using Docker Compose, which gives you great flexibility when developing web applications.
Check out the project’s official documentation to learn more about Docker Compose.
We hope that we were helpful to you. Any comments or suggestions are welcome in the comments section below.


Bobby, thank you very much.For my two days experience with Docker and Docker Compose on Raspberry Pi 5 your tutorial came at the very right time (I would like to run a genealogic application in this container (its name is TNG)).Thank you also that you answerd to Peter Scargill!I have a problem at $ docker compose up:
Attaching to mariadb-1, nginx-1, php-1, phpmyadmin-1Gracefully stopping… (press Ctrl+C again to force)Error response from daemon: failed to set up container networking: driver failed programming external connectivity on endpoint lemp-nginx-1 (bb2d162e49f453d0c8644790bfe8099a881791623e62412d02d5472aaedf7c9d): Bind for 0.0.0.0:80 failed: port is already allocated
I made another test with a Docker container with Apache & PHP 8.3. In that file I have:services: apache: image: php:8.3-apache restart: always ports: – 80:80 volumes: – ./www:/var/www/html
Do you mean that this Apache container is the problem for “Bind for 0.0.0.0:80 failed: port is already allocated"?
Greetings and thank you for your hint!
Hi Marian,
Yes, most likely. The error message tells you that another application is already using port 80. In other words, you can't have two applications running on the same port on your host. If you have other containers running (like Apache, as you mentioned) that are already bound to port 80, just stop them first. You can check which ports are in use on your host by running
sudo netstat -tulnpIgnore me…
REmoving the “phpmyaadmin:” prefix on line 38 sorted the problem
Hey THANKS for that – it worked perfectly (almost). Brilliant explanation. At the very last minute of running “docker-compose up -d” I hit this (Raspberry Pi 5, Bookwork 64 bit).
! phpmyadmin The requested image’s platform (linux/amd64) does not match the detected host platform (linux/arm64/v8) and no specific platform was requested
All else started – port 80 has the php page….. can you possibly advise how to change this to accomodate linux/arm64/v8 ie Rpi 5 with 64 bit Bookworm???
Pete
Hey Peter,
In the “docker-compose.yaml” file, replace the line:
image: phpmyadmin/phpmyadmin:latestwith
image: arm64v8/phpmyadmin:latestI hope I’ve been helpful! 🙂
Best,
Bobby
Thank you so much for this guide it worked great.
I have been trying to diagnose connection issue
I put in the following php and I get connection refused
connect_error) {
die(“Connection failed: ” . $conn->connect_error);
}
echo “Connection success”;
?>
Great tutorial. Thank you for doing this.
For people who are getting the docker-compose error: “ERROR: The Compose file is invalid because:
Service php has neither an image nor a build context specified. At least one must be provided”, this can be fixed by adding
“context: .”
without the quotes right under “dockerfile: php-dockerfile” in the docker-compose.yml file.
Thank you so much ,It is very easy to run all this docker.LOL
Hello,
thank you for your tutorial. It has been a great help to deploy quickly a new app.
Afaik, the “links” parameter in docker-compose.yml is deprecated.
Thanks for the great tutorial.
For the php-dockerfile, how do you handle the apt calls requiring sudo?
Thanks!
So how would I add and use Composer in this setup?
Hi William,
I’m not sure I understand your question, but if you could be more specific about what you’re asking for, I’d be happy to help you.
Best,
Bobby
Hi Bobby,
Sorry for being vague. So I’ve followed this tutorial and now have a LEMP-stack running on Docker containers. So now I’m wondering how I get composer (the one for PHP package management, not Docker compose) working in this setup so I can use it to require packages.
Regards,
William
Hi William,
I understand you’re talking about that. Although it makes the whole thing a bit “tricky,” the thing that comes to my mind is when building the PHP Docker image, the Composer should be integrated into it. An approach similar to the one shown here.
For this, in the ‘PHP Service’ section of this guide, try adding the following at the end of the “php-dockerfile” file:
RUN curl -sS https://getcomposer.org/installer | php -- --install-dir=/usr/local/bin --filename=composerWhich should install the PHP Composer inside the PHP Docker image, then make it available for use accordingly.
Best,
Bobby
Thanks for this great tutorial. It was very helpful for a docker newbie such as myself.
I had a few hiccups, but they were spelling/syntax mistakes I made(to hopefully gain experience and learn from the process, I manually typed everything instead of copy-pasting. Honestly a very useful learning method!). Once I identified and corrected them everything functions correctly!
Hi Jasper,
Great! I’m glad things worked out! 🙂
Best,
Bobby
Thanks Bobby for that tutorial, I did most of it without problem.
Just at the moment of entering phpmyadmin, I could not get the credentials rights. I had to modify the docker-compose.yml putting
MYSQL_USERNAME: root
MYSQL_ROOT_PASSWORD: secret
both in mariadb/environment and in phpmyadmin/environment.
Hey Olivier,
First, thanks for reading Linuxiac!
Is it possible that you ran some tests and then deleted the containers, but you forgot to remove the docker volume that stored the MySQL data?
Because it is persistent and when you start the containers, MySQL has already set a root password, which it takes from the stored data in the volume. So regardless of changing the one available in the docker-compose file, the database continues to use the old one.
After deleting the containers, you may always use “docker volume ls” to check the available volumes and “docker volume rm volume_name” to delete a single one.
Of course, you can delete the containers along with their associated docker volumes using the “docker-compose down -v” command. But doing so results in losing all data previously stored in the database.
Best,
Bobby