
With the proliferation of cloud storage services and the growing need for remote work capabilities, file sync software has become increasingly popular in recent years. It allows users to automatically synchronize files between different devices and platforms, ensuring that all file versions are up-to-date and easily accessible from anywhere.
So, when it comes to file sync software, there are two main options: cloud-based services and self-hosted solutions. While cloud-based services have advantages, such as ease of use and accessibility, self-hosted file sync software offers several benefits, making it a more attractive option for some users.
For example, self-hosted file sync software allows users to manage their file synchronization needs on their hardware and infrastructure, providing greater control and customization options.
In other words, you will be assured that you are the only person who has access to this data and makes decisions about managing it. Last but not least, self-hosted solutions offer cost savings over cloud-based alternatives.
Syncthing, Nextcloud, and Seafile are among the best and most popular self-hosted file sync solutions. However, unlike the previous, it does not rely on a centralized server to host the files but has taken a different approach. So first, let’s see what Syncthing is and what it offers.
What is Syncthing?
Syncthing is a powerful, decentralized, open-source file synchronization software that allows users to easily and securely synchronize files between different devices and platforms, including Windows, Linux, macOS, and Android, making it a versatile solution for individuals and organizations. In addition, it uses a peer-to-peer architecture, meaning that files are synchronized directly between devices without relying on a central server, making it a more secure and private option for file syncing.
The Syncthing UI gives users a graphical interface to configure and manage Syncthing instances running on their devices. With it, users can view the status of their synced folders, add or remove devices from the synchronization network, set up advanced synchronization options, and monitor the transfer of files between devices.
The UI is designed to be user-friendly and intuitive, with a clean and easy-to-use interface that makes it easy for users to manage their synchronized files and folders. Furthermore, it is accessible via a web browser so that users can access it from any device with an internet connection. This guide shows you how to set up your Syncthing instances to sync files between them. So let’s get started!
Step 1: Install Syncthing on Linux
Syncthing is available in most Linux distributions’ repositories, making installation simple. Depending on the distro you’re using, here’s how to install it.
Ubuntu, Debian, Linux Mint, Pop!_OS, MX Linux
Ubuntu, Debian, and all other Linux distros based on them and using their software repositories need to run:
sudo apt install syncthingFedora
If you are using Fedora, run the following:
sudo dnf install syncthingRocky Linux, AlmaLinux
Rocky Lynux, Alma Linux, and other RHEL-based users must first add the EPEL repository to their systems (if not already done) before installing Syncthing, which is housed in it.
sudo dnf install epel-release
sudo dnf install syncthing
Arch Linux, Manjaro, EndeavourOS
Users of Arch and its derivatives can install Syncthing with the following Pacman command:
sudo pacman -S syncthingThis guide will synchronize files between two computers running Ubuntu and Fedora. So let’s start by installing Syncthing on both machines.
On the Ubuntu machine, we run the following:
sudo apt install syncthing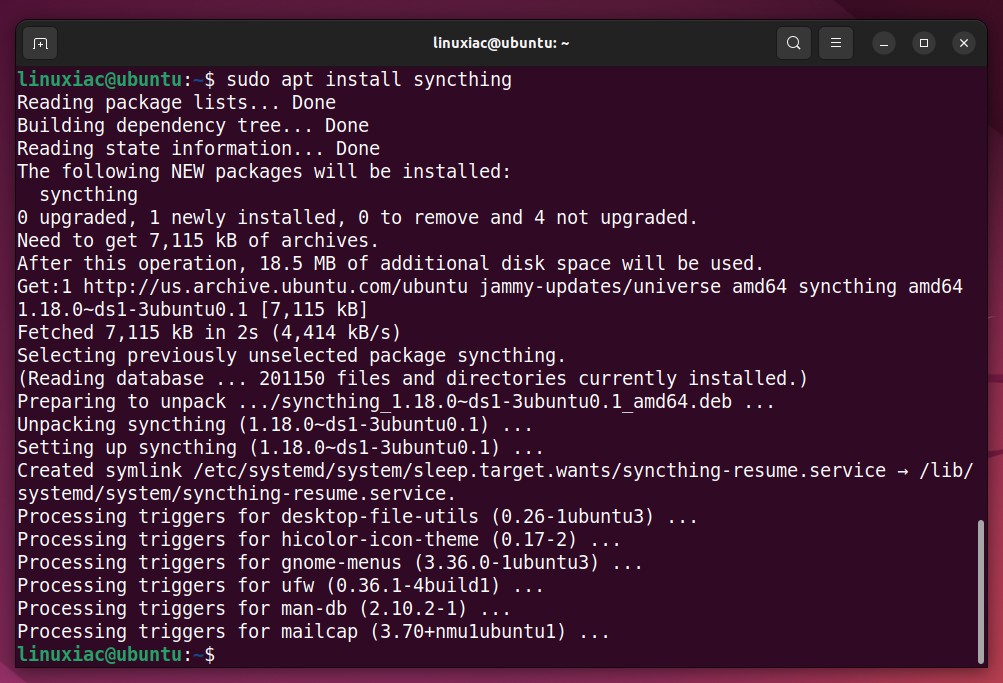
Accordingly, on the Fedora machine, we perform the following:
sudo dnf install syncthing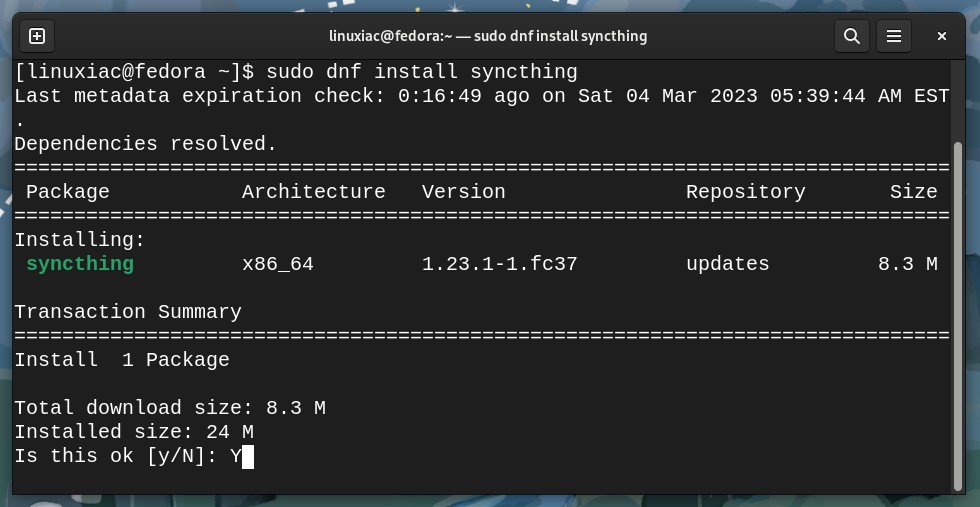
Once Syncthing is installed on our Linux systems, we’ll ensure the service starts automatically.
Step 2: Setting the Service to Start Automatically
We will set Syncthing to start automatically on every system boot. This gives us peace of mind that our files will always be in sync between systems without further intervention.
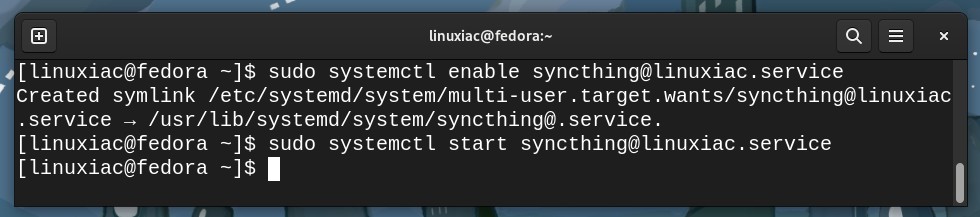
To do this, run the two commands listed below on each machine, remembering to replace the “myuser” part with your username on that system.
sudo systemctl enable syncthing@myuser.service
sudo systemctl start syncthing@myuser.serviceCode language: CSS (css)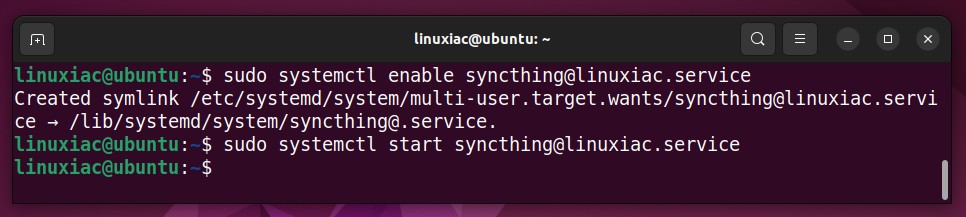
Then, you can run the command below to check the service status on each machine, and the output should look like this.
sudo systemctl status syncthing@myuser.serviceCode language: CSS (css)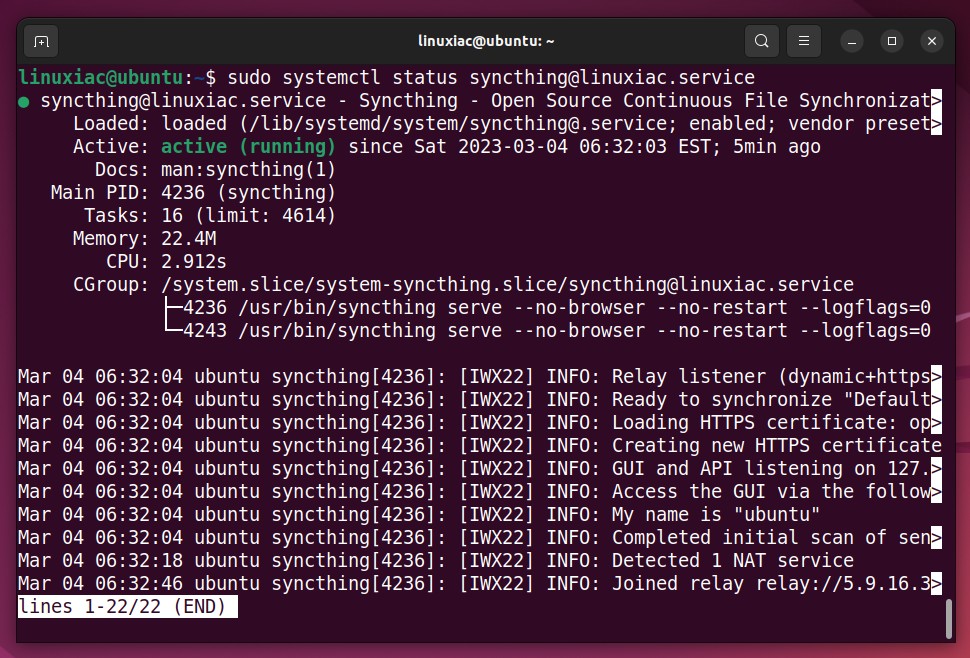
Of course, don’t forget to replace the “myuser” part again with the current username valid for your system.
Step 3: Syncthing Initial Configuration
Once we have ensured Syncthing is up and running on both Linux systems, we can configure it.
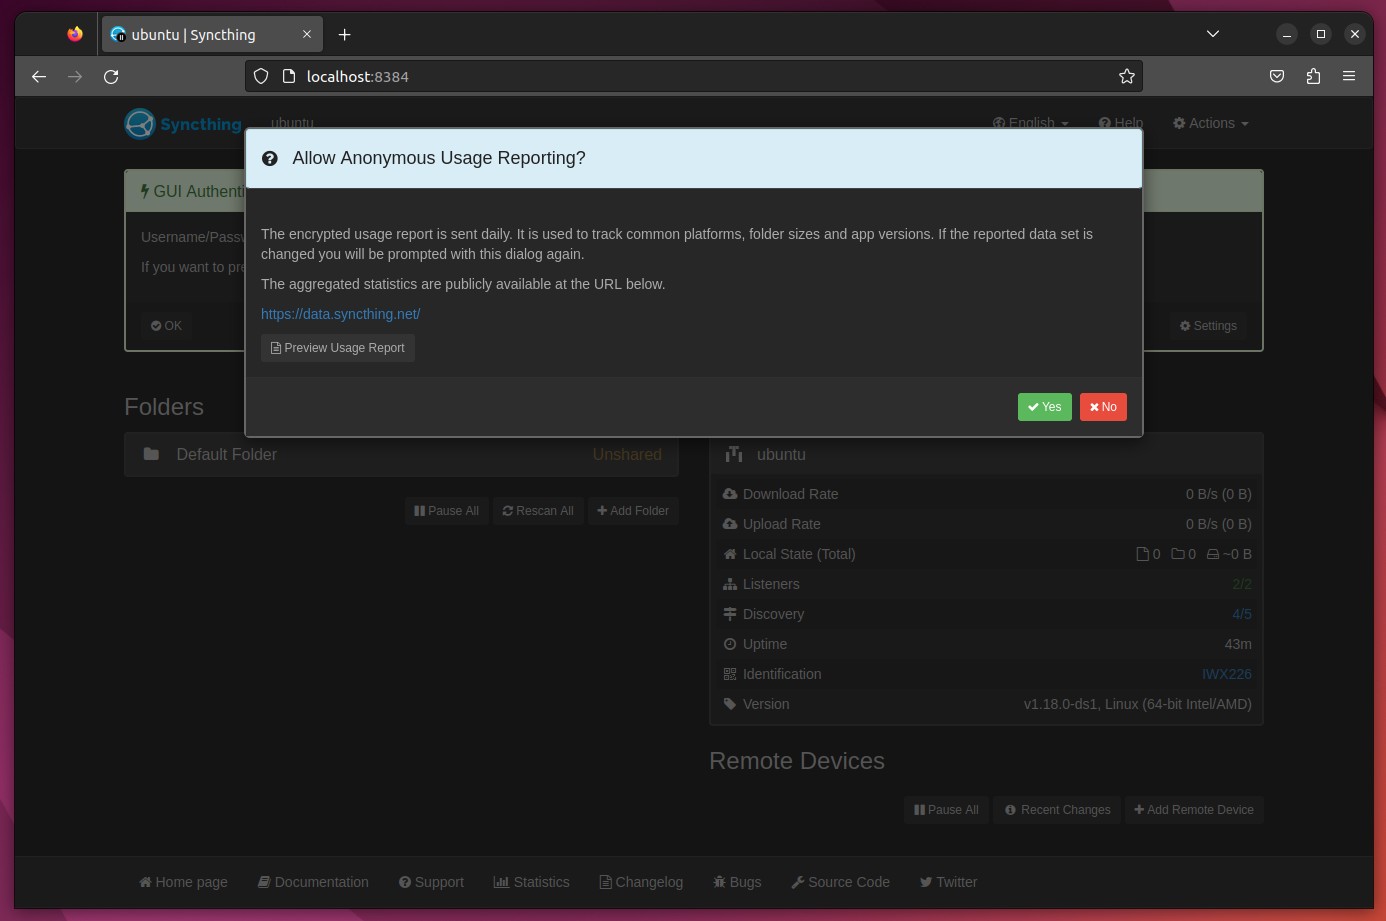
Syncthing provides an easy-to-use, user-friendly web interface to configure the service and synchronize files. It is accessible through a web browser on port 8384. So, on one of our two Linux systems, say Ubuntu, we point the browser to “http://localhost:8384“.
You will be greeted by the screen below, prompting you to choose whether you allow anonymous statistics to be sent. Make your choice to continue.
Here we will make a slight digression. If you have installed Syncthing on a headless Linux server, in other words, one that does not have a desktop environment, you may be wondering how you can configure the service. Don’t worry because the solution is straightforward. This is where SSH tunnels come to the rescue.
Open the terminal app you are using, and run the command below, where “XXXX” is the local port to which the remote “8384” port will be mapped. Also, replace “myuser” with the username valid for this system and the “remote-ip-address” part with the IP address of the Syncthing server.
ssh -L XXXX:localhost:8384 myuser@remote-ip-addressCode language: CSS (css)For example, the command would look like this:
ssh -L 8855:localhost:8384 linuxiac@192.168.122.26Code language: CSS (css)In the example above, we map the local “8855” port on our desktop system to the remote “8384” port on the server with IP address “192.168.122.26” (in that case, our Ubuntu Syncthing instance) where we have installed and run Syncthing.
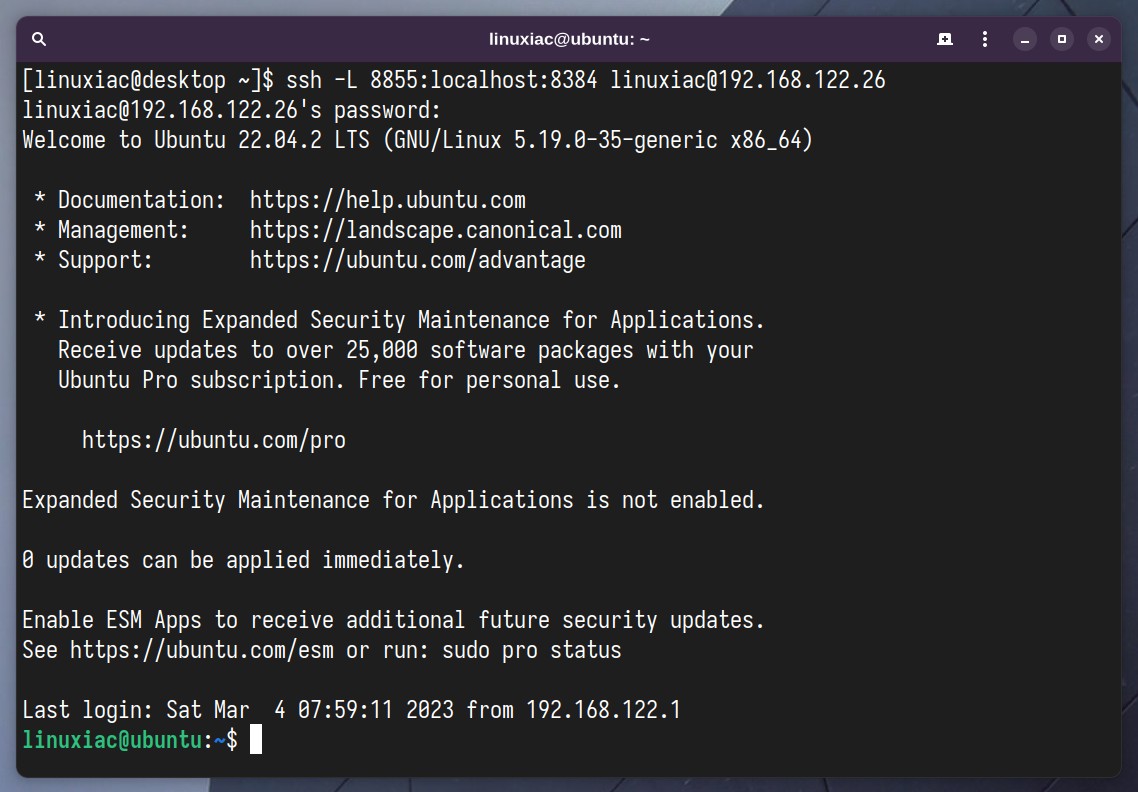
After successfully logging in, it is essential to remember that the terminal window from which you executed the SSH tunneling command must remain open for the tunnel to stay active.
You can then navigate to “http://localhost:8855” in the web browser on your desktop PC from which you ran the command. As a result, you will be taken to the remote machine’s Syncing admin interface.
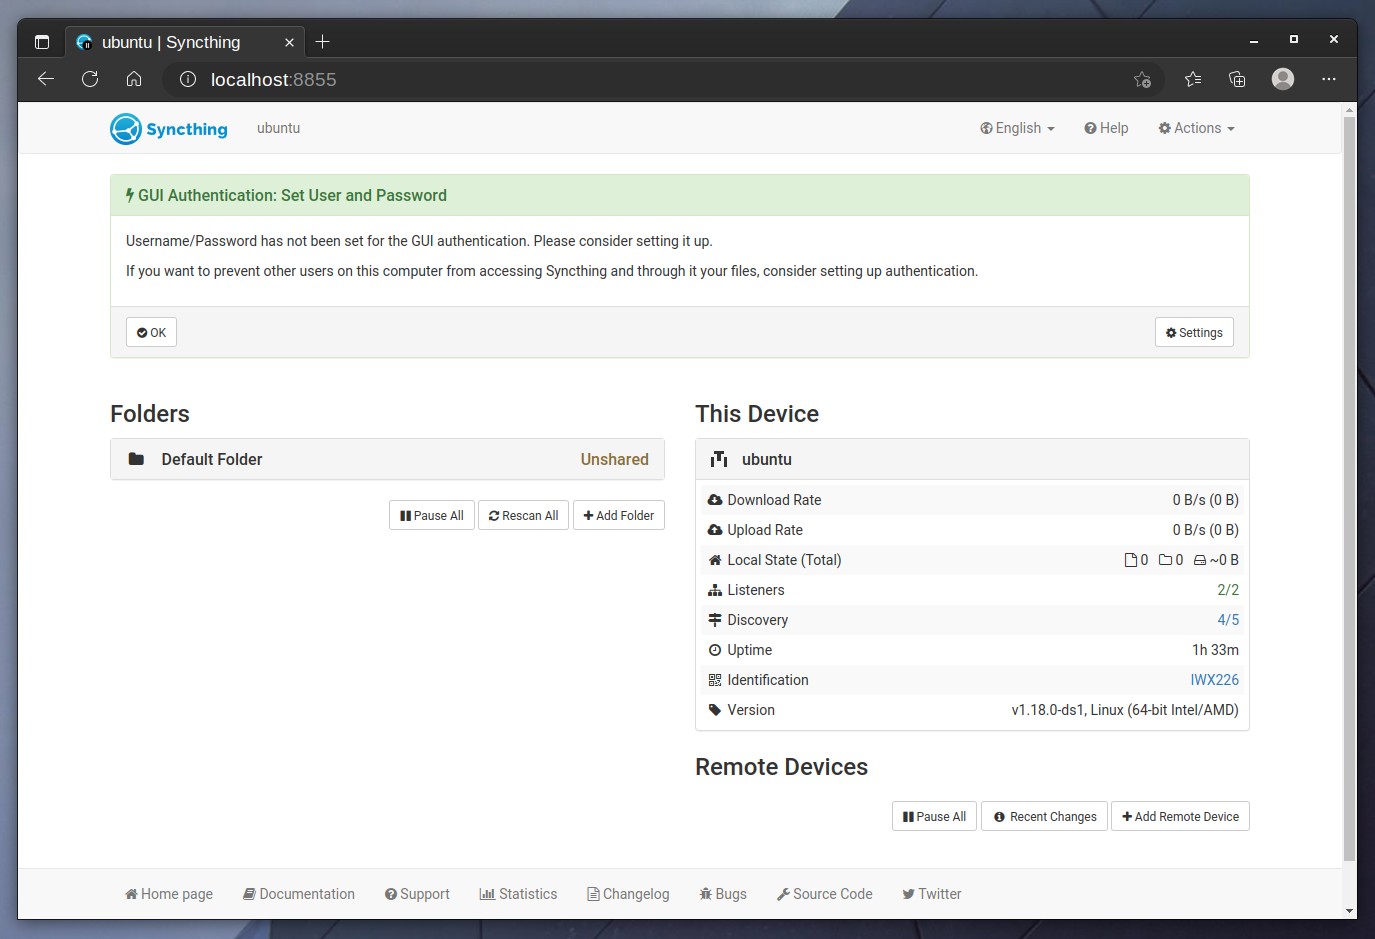
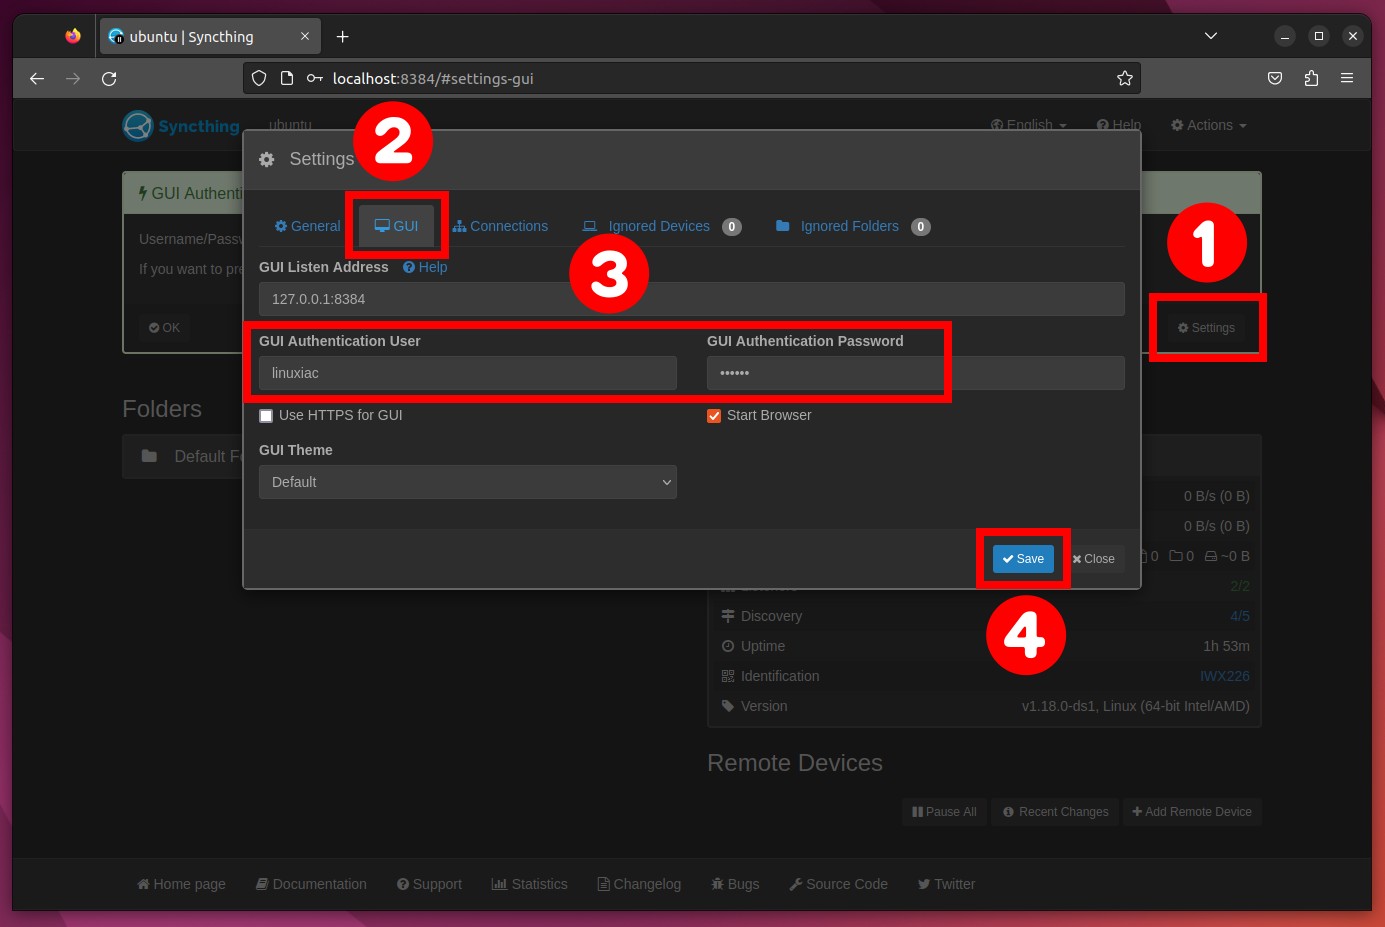
But now, back to our Ubuntu system. First, you’ll see a reminder message that no password has been set to access the Syncthing UI. So, following best practices, let’s set one.
Click on the “Settings” button. Next, choose the “GUI” tab in the pop-up window, then enter your preferred username and password in the “GUI Authentication User” and “GUI Authentication Password” fields, and finally, confirm with “Save.”
Repeat the same steps on the second Syncthing instance, our Fedora system.
Step 4: Connecting the Syncting Instances
Let’s now connect our two instances, Ubuntu and Fedora, to each other. Syncthing uses a specially generated ID for each instance to identify itself as a unique identifier. Therefore, we must know and provide this identifier to connect one instance to another.
To connect the Ubuntu and Fedora Syncthing instances, first get the unique ID of one of the two, say Ubuntu, then enter it into the Fedora Syncthing instance.
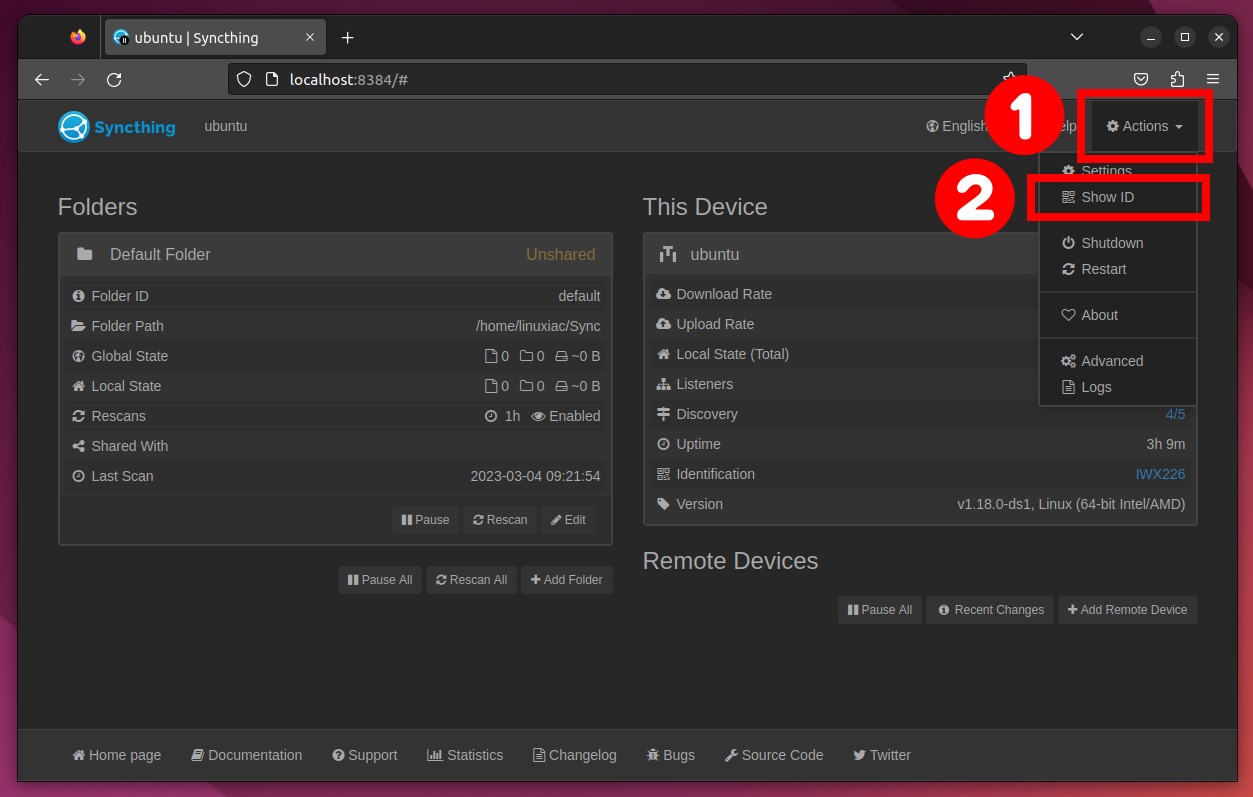
Press the “Actions” button at the top right, and from the menu, choose “Show ID.”
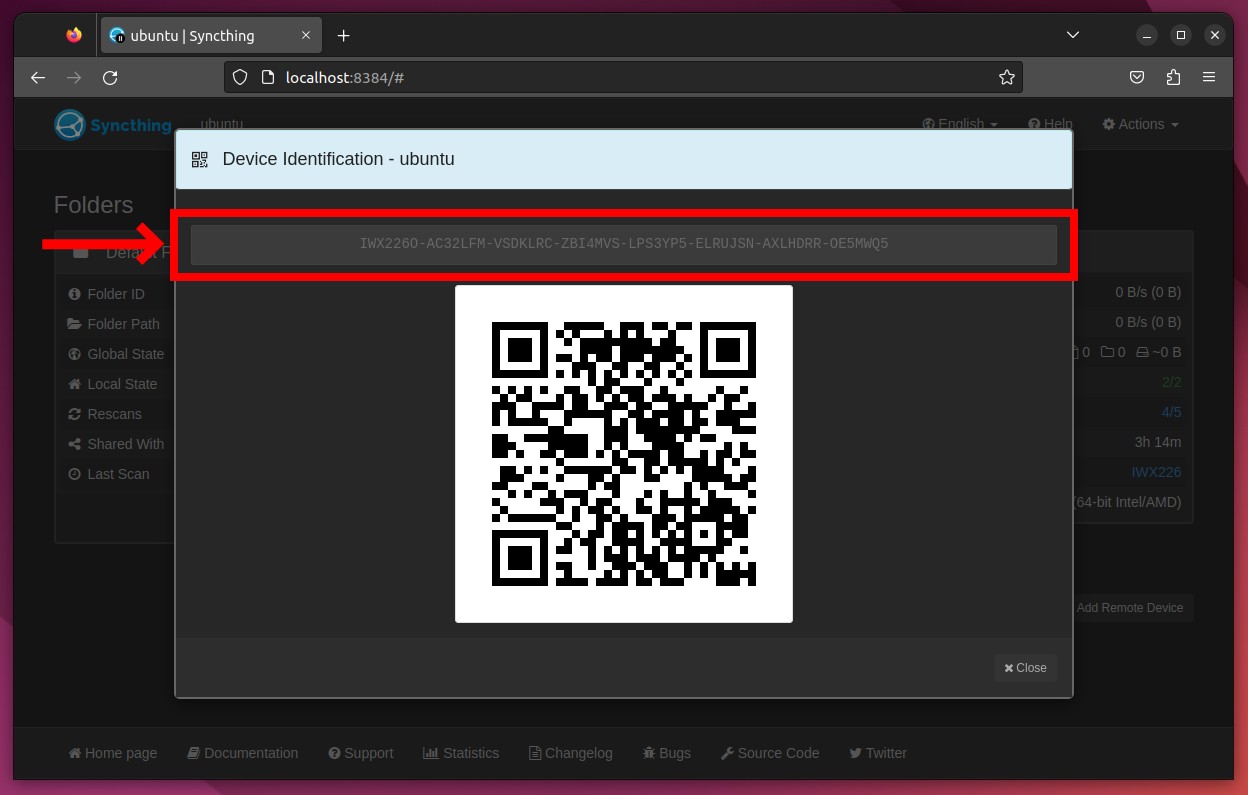
Copy the code shown from the pop-up window and switch to the other Syncthing instance, Fedora.
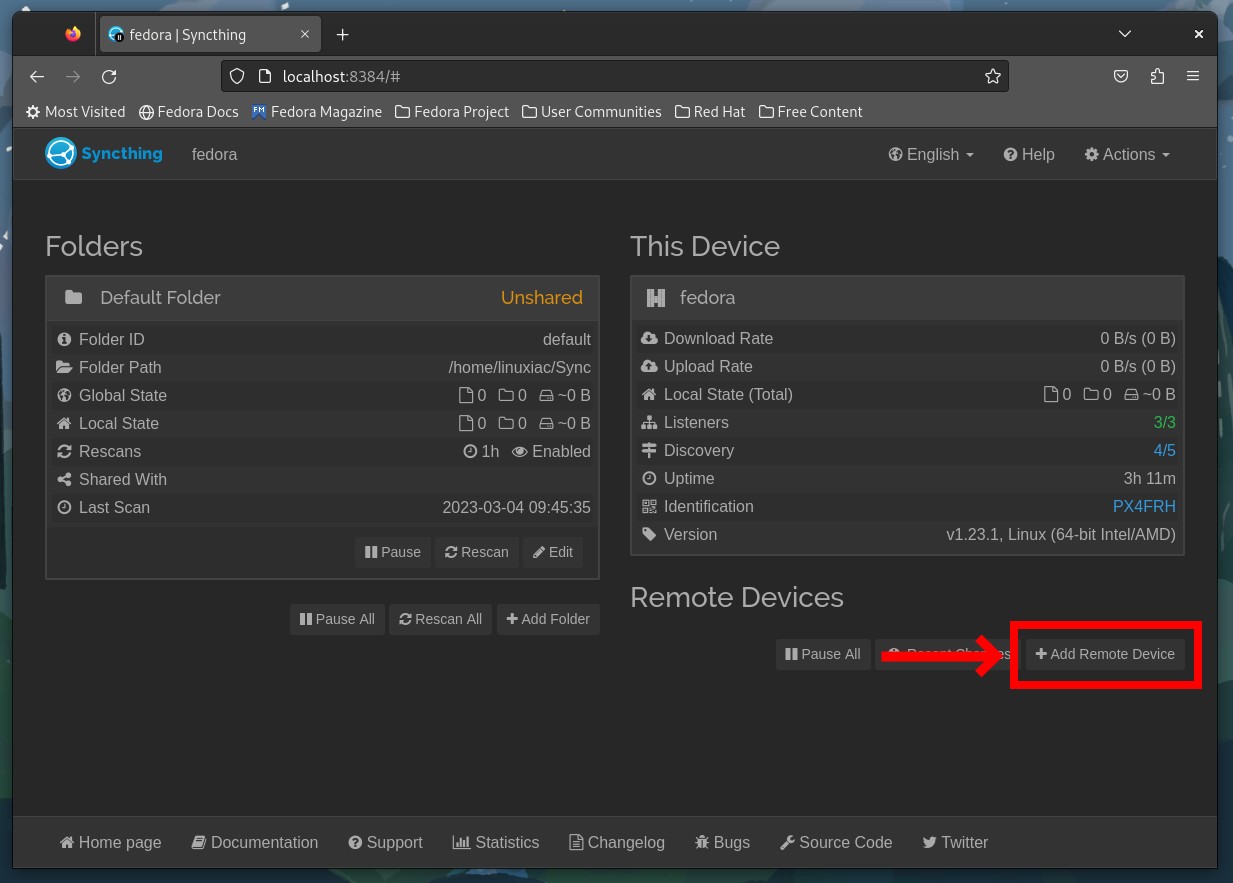
On the second instance, select the “Add Remote Device” button.
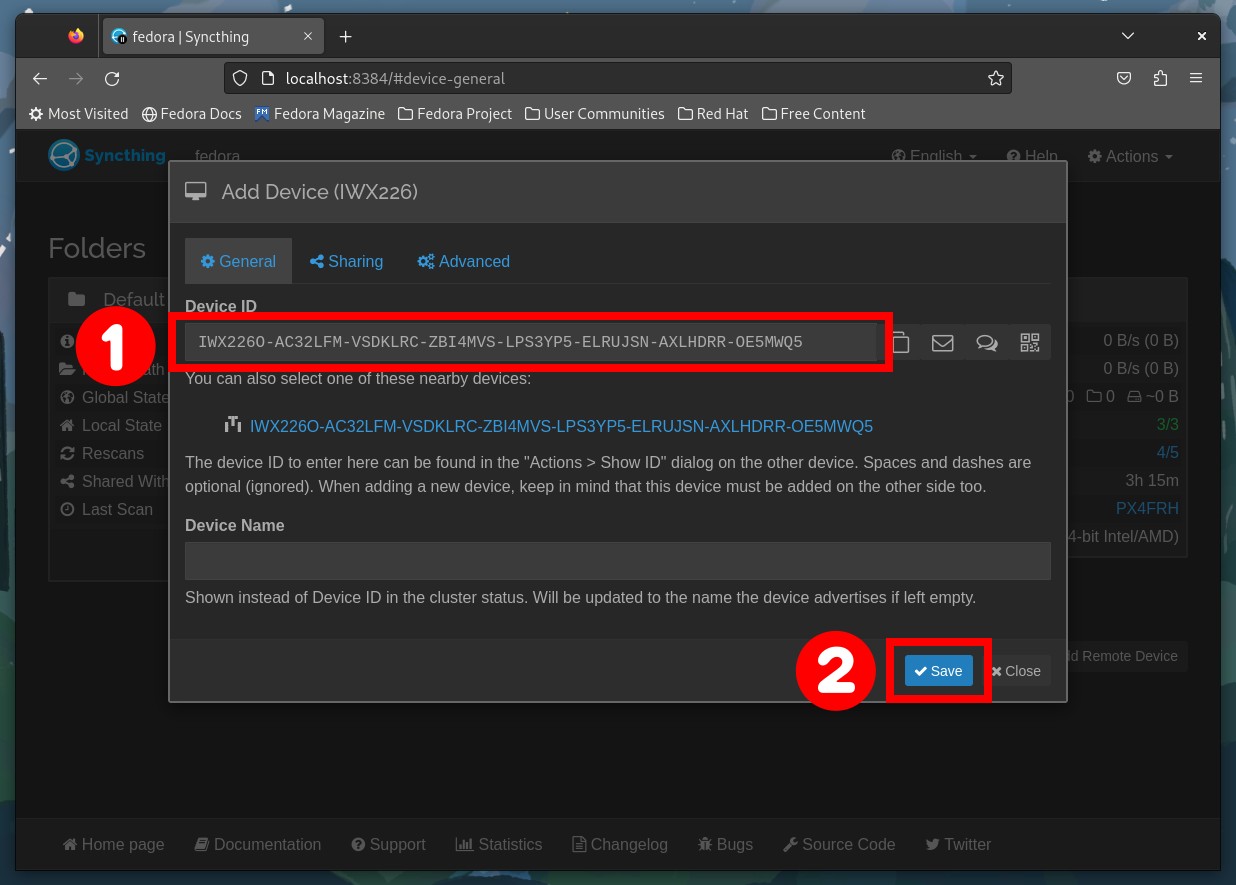
Paste the copied code from the Ubuntu Syncthing instance into the “Device ID” field and click “Save.”
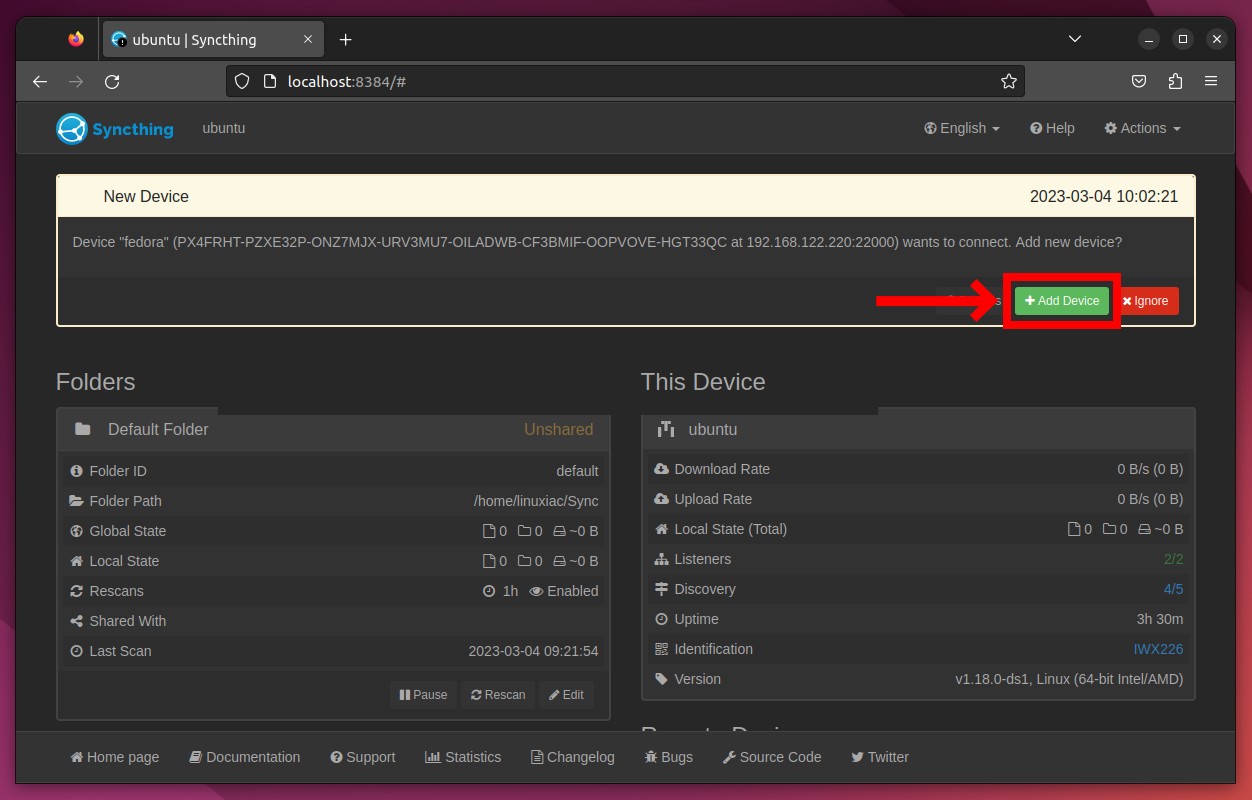
Now if you go back to the Ubuntu Syncthing instance, you’ll see that a message has appeared saying that the Fedora device wants to connect to it. Confirm by clicking on the “Add Device” button.
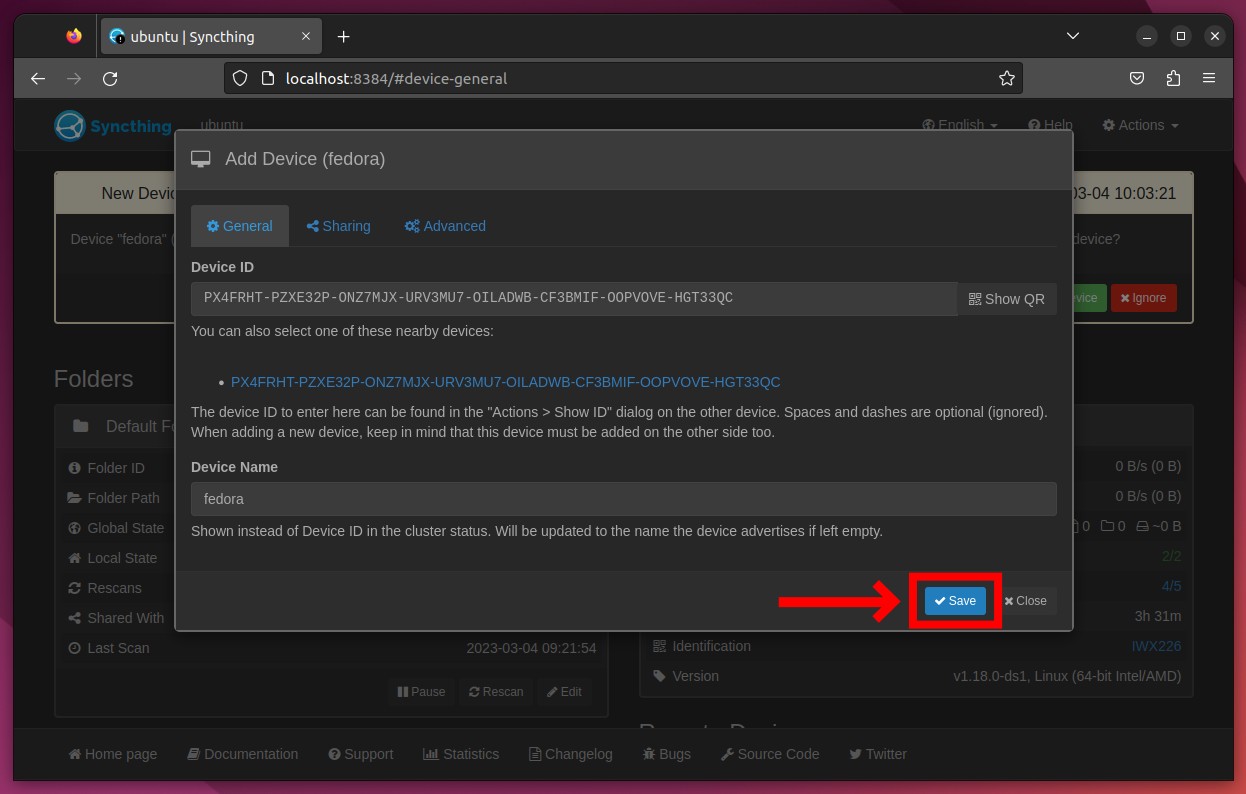
A new pop-up window will open where you can change the device name for your convenience. When you’re done, click the “Save” button to add it.
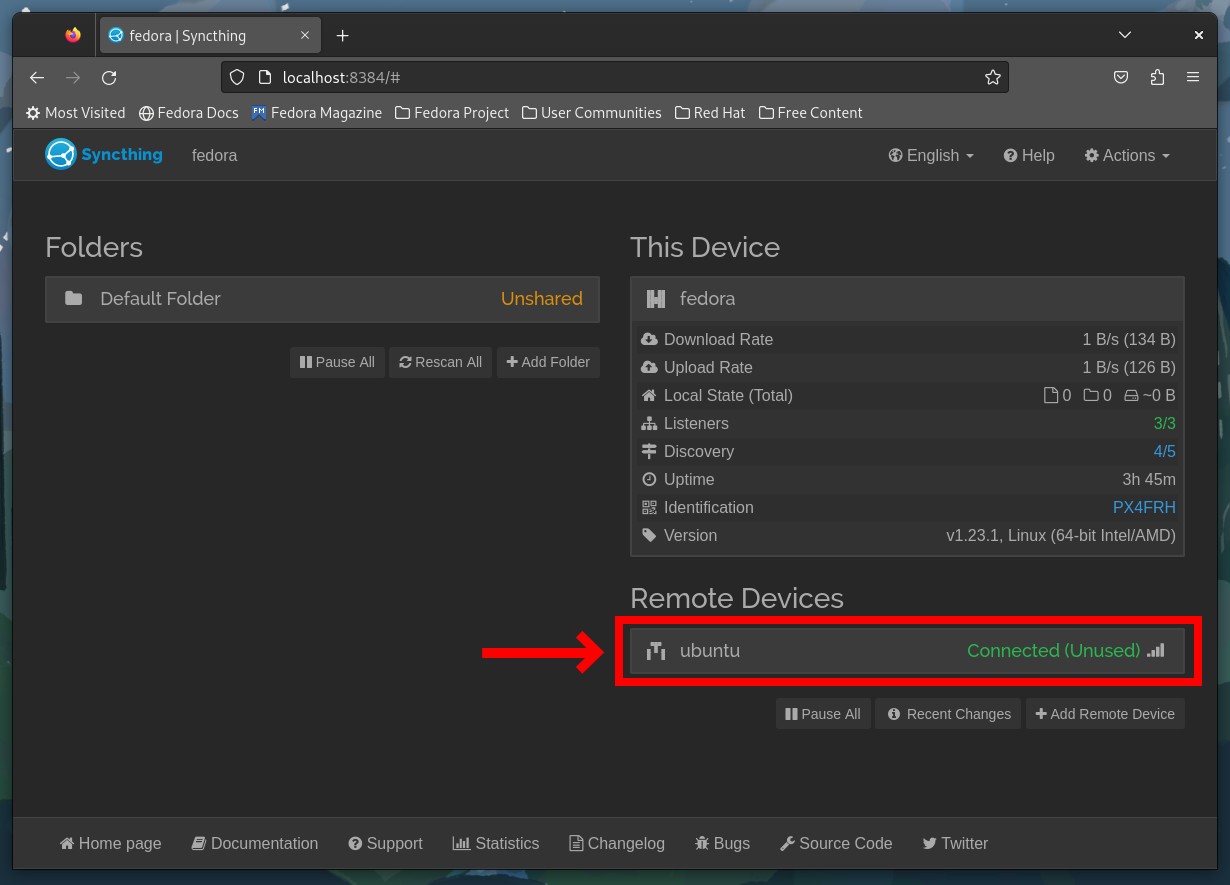
After a few seconds, the device status under the “Remote Devices” section should change to “Connected.”
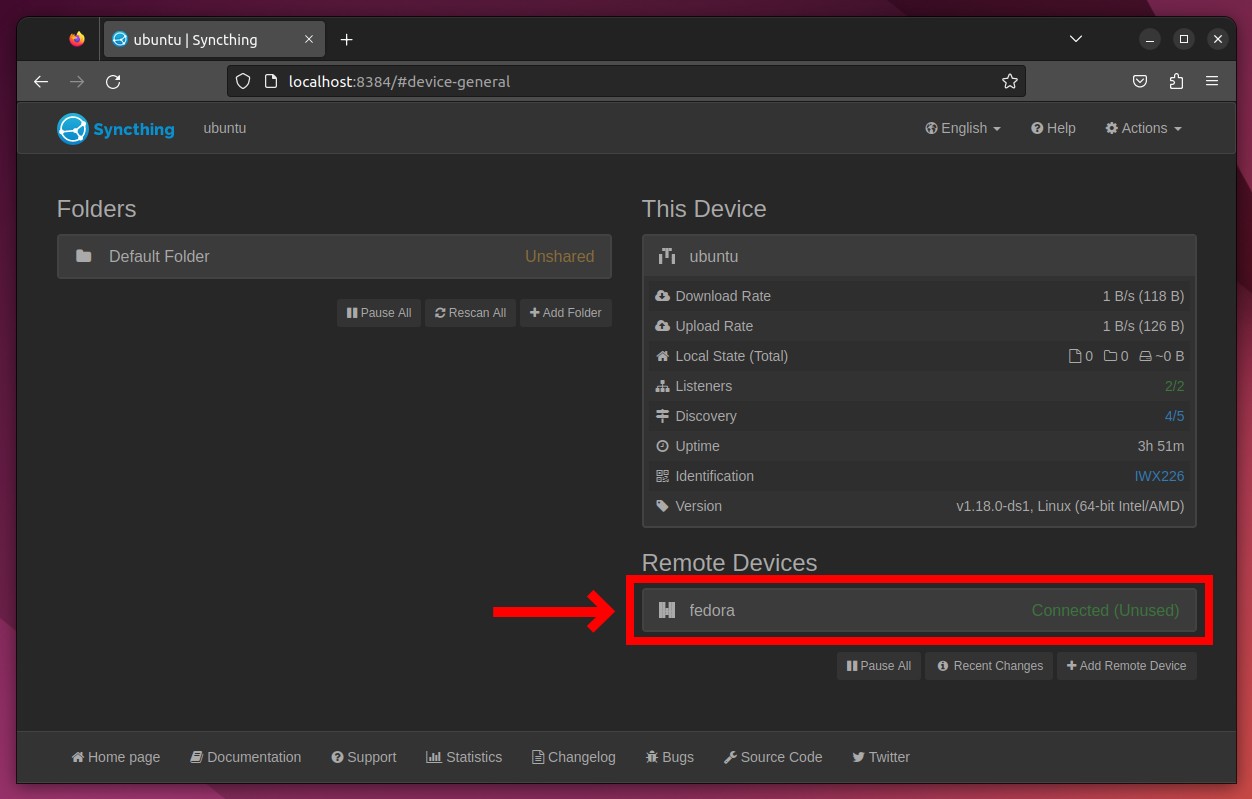
If you go to the Fedora system, you’ll see that the status there has also automatically changed to the same.
Congratulations! Your two remote Syncthing instances are now connected. Let’s move on to the final part, syncing files between them.
Step 5: Setting up Syncthing Shares
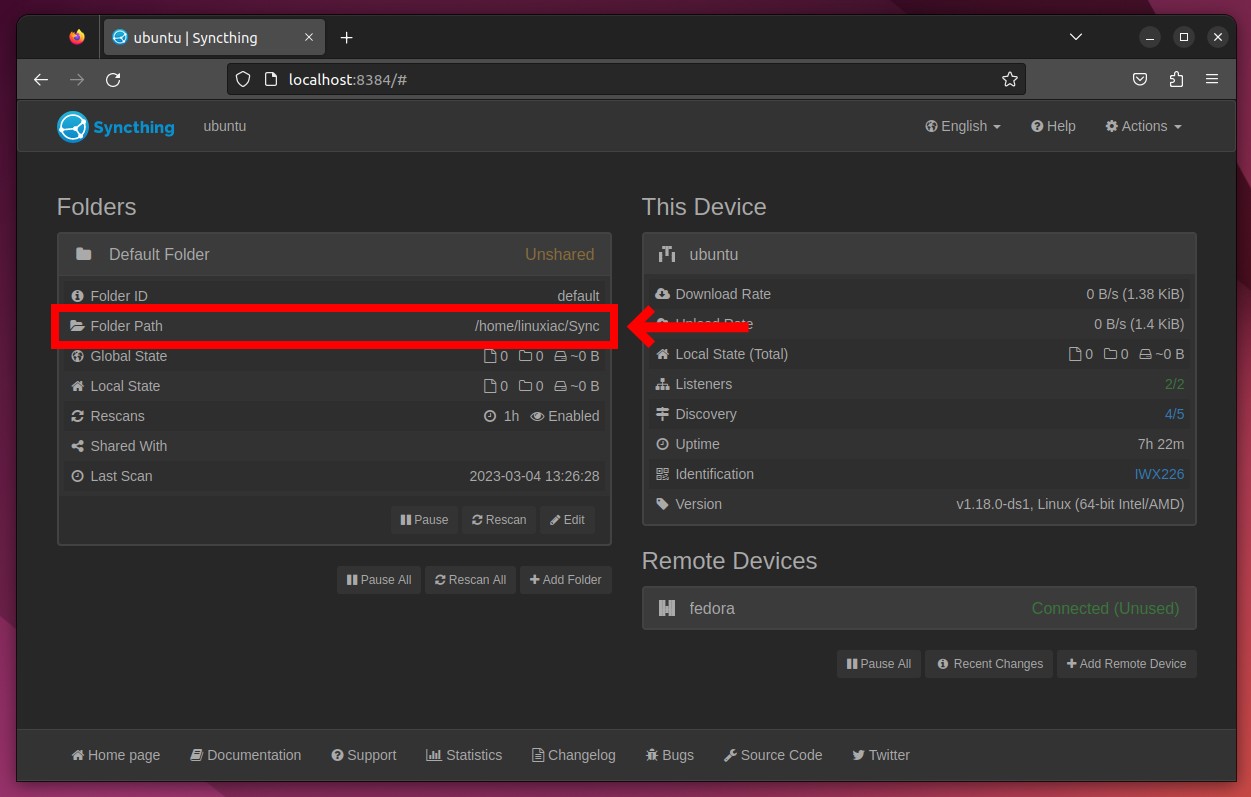
By default, Syncthing creates an empty folder named “Sync” in your home directory to store files that will be shared with other Syncthing instances. Of course, you can add as many additional folders as you want using the “Add Folder” button, but we will stick with the default “Sync” folder for this guide. The sharing and syncing mechanisms are the same for each additional folder added.
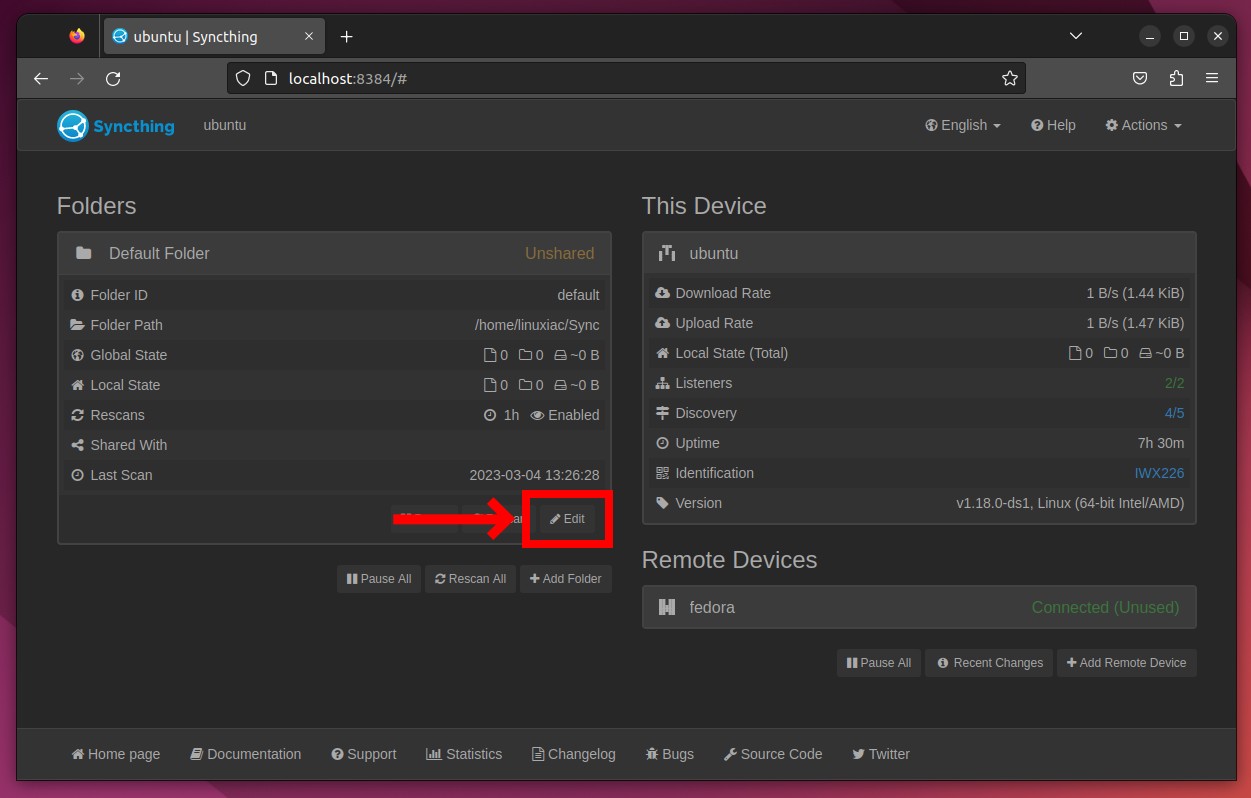
To set up a directory where you will share the files available in it with other Syncthing instances, click on “Edit.”
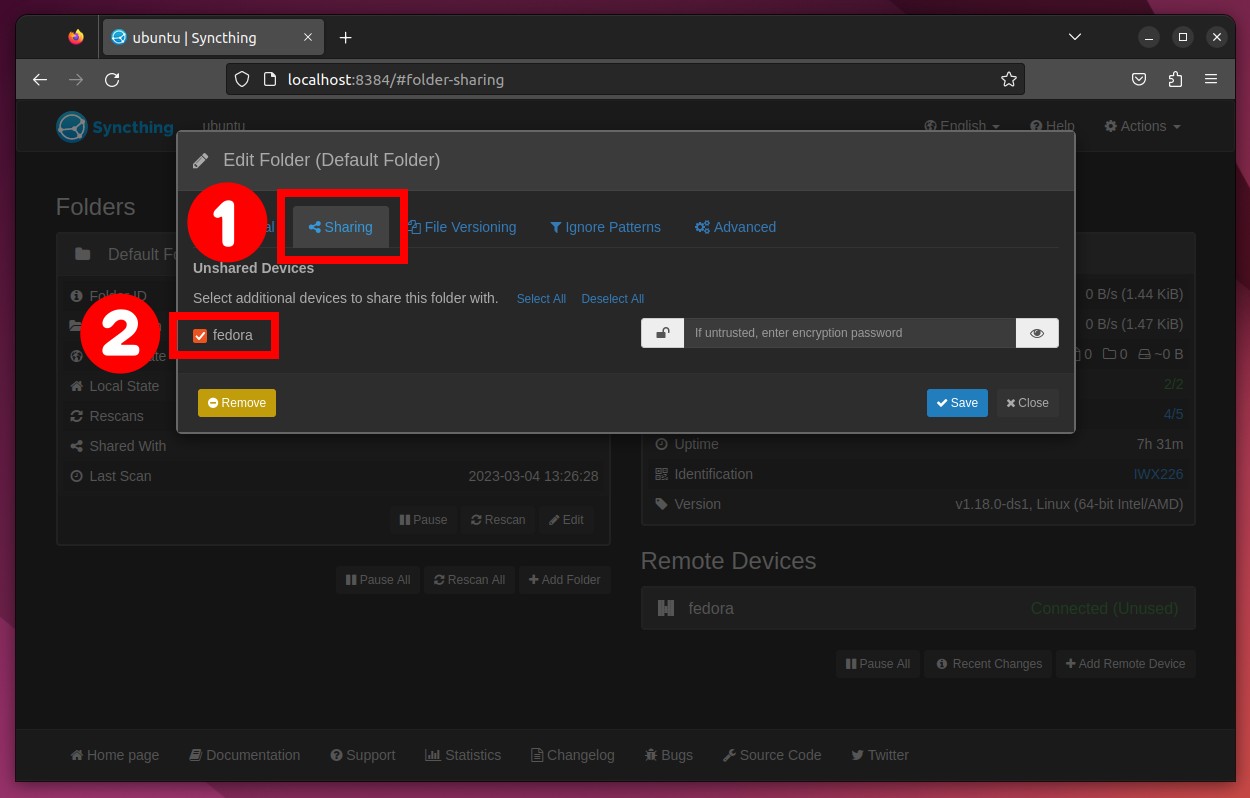
Select the “Sharing” tab from the open pop-up, then tick the box of the Syncthing instance with which you will be sharing/syncing files. In our case, this is the Fedora system we added a moment ago.
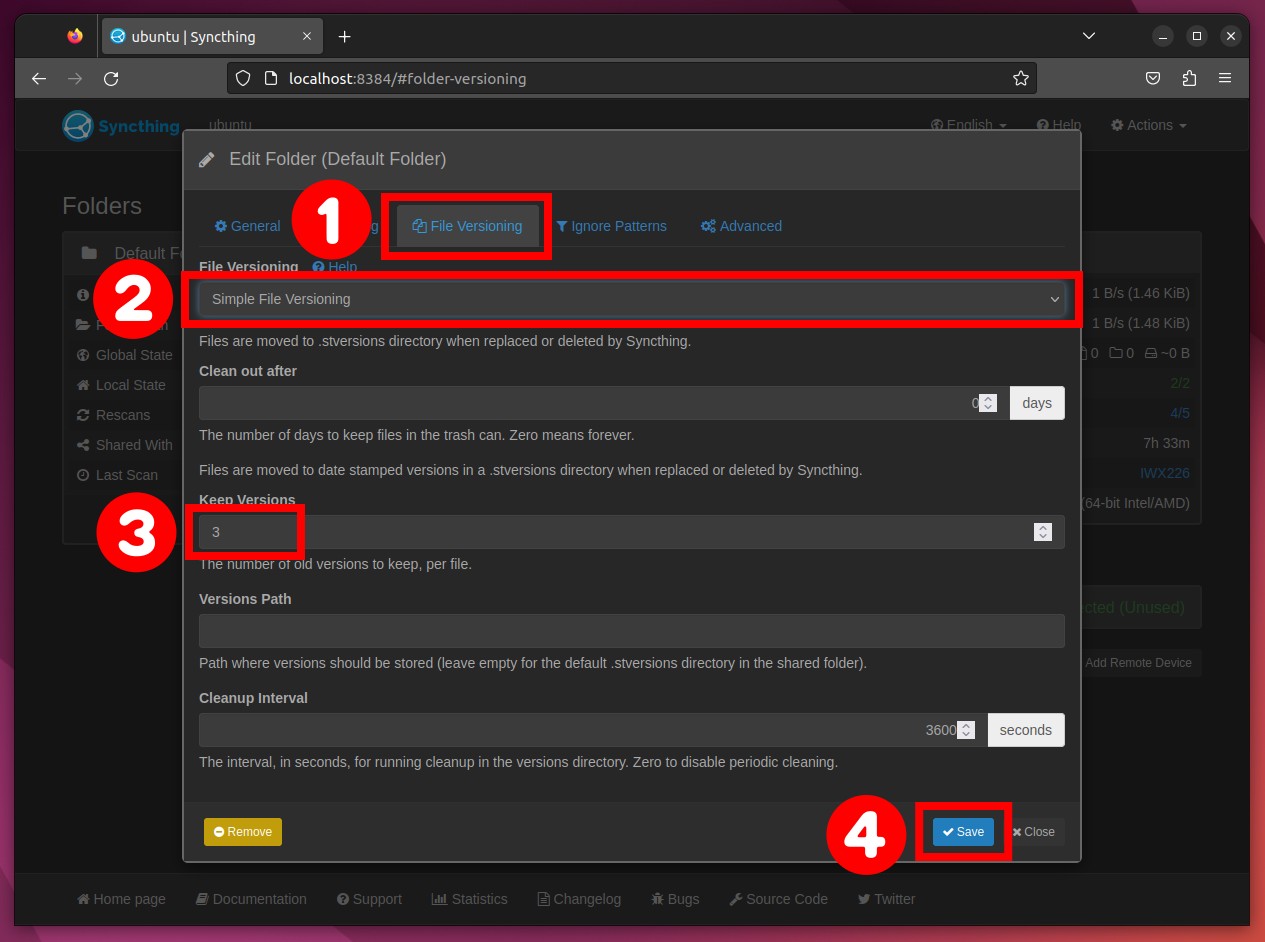
The following step is optional, but I strongly recommend it. It is all about file versions. Syncthing allows you to keep several versions of the same file. In some cases, this can be lifesaving, enabling you to restore a file that was accidentally overlapped with another or even deleted.
To take advantage of this unique feature, select the “File Versioning” tab, then choose “Simple File Versioning” from the drop-down menu, and for “Keep Versions,” I recommend setting “3.” When you’re done with the settings, confirm with the “Save” button, and the window will close.
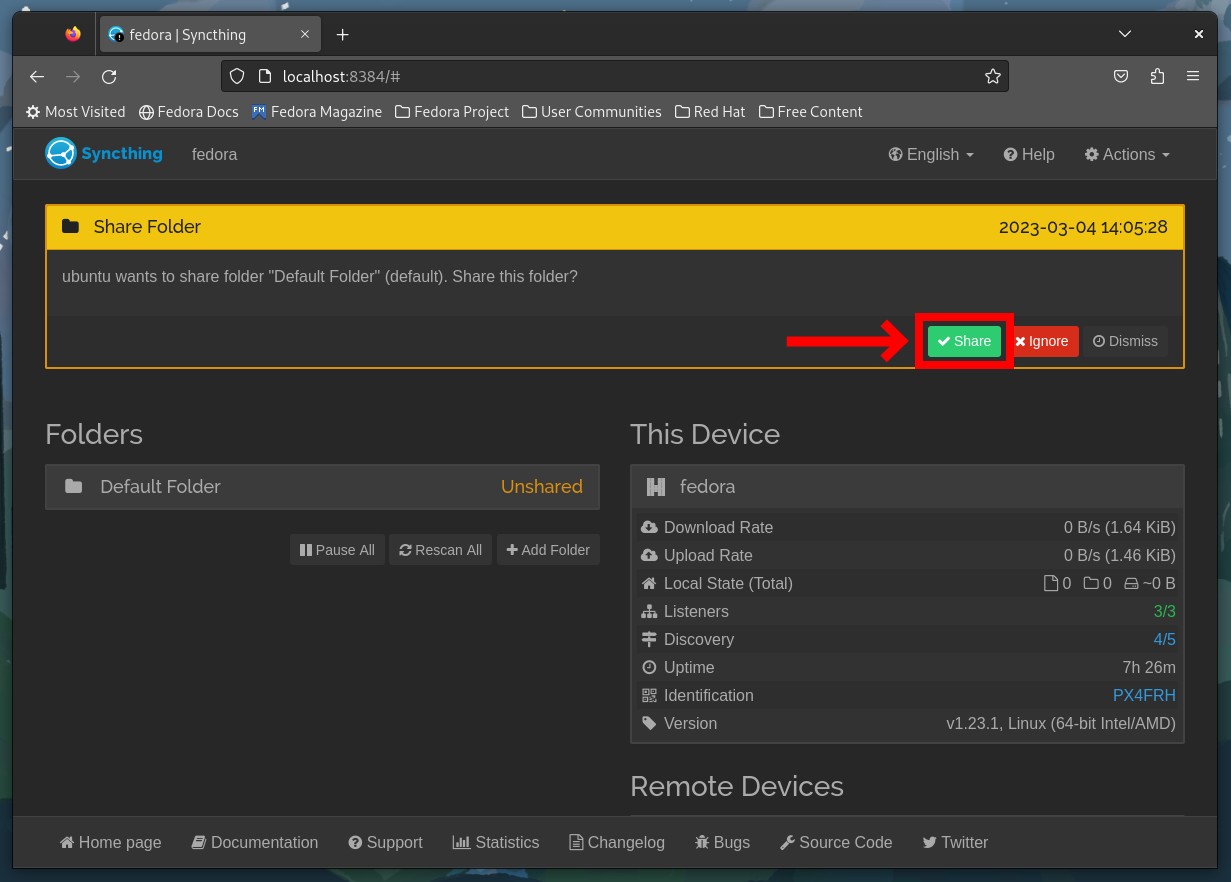
This action will automatically notify the other Synthing instance that we want to share a folder with it. So when you go to the Fedora machine, you’ll see a notice asking you to confirm the folder share. Just hit the “Share” button, and the folder will be shared and kept in sync between the two Syncthing instances.
Step 6: Testing File Sync
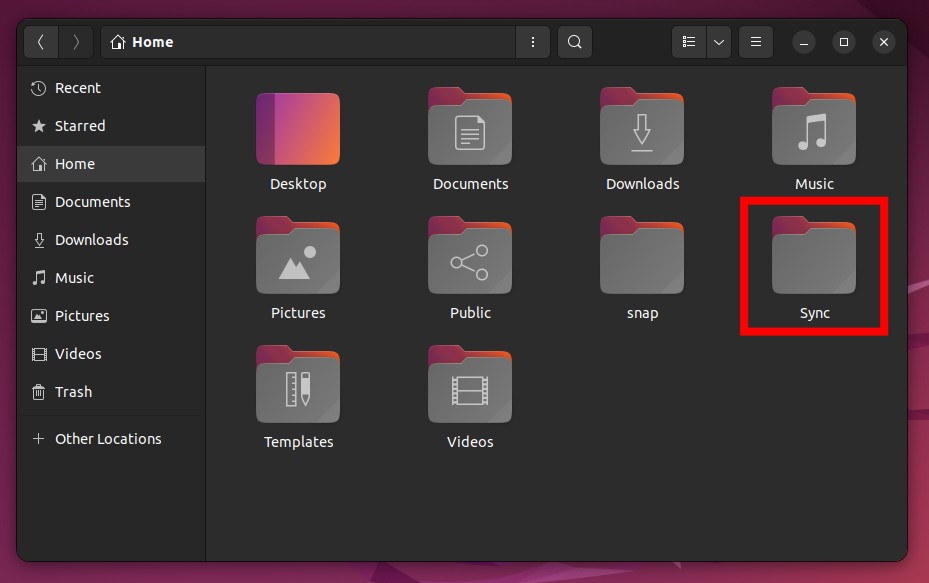
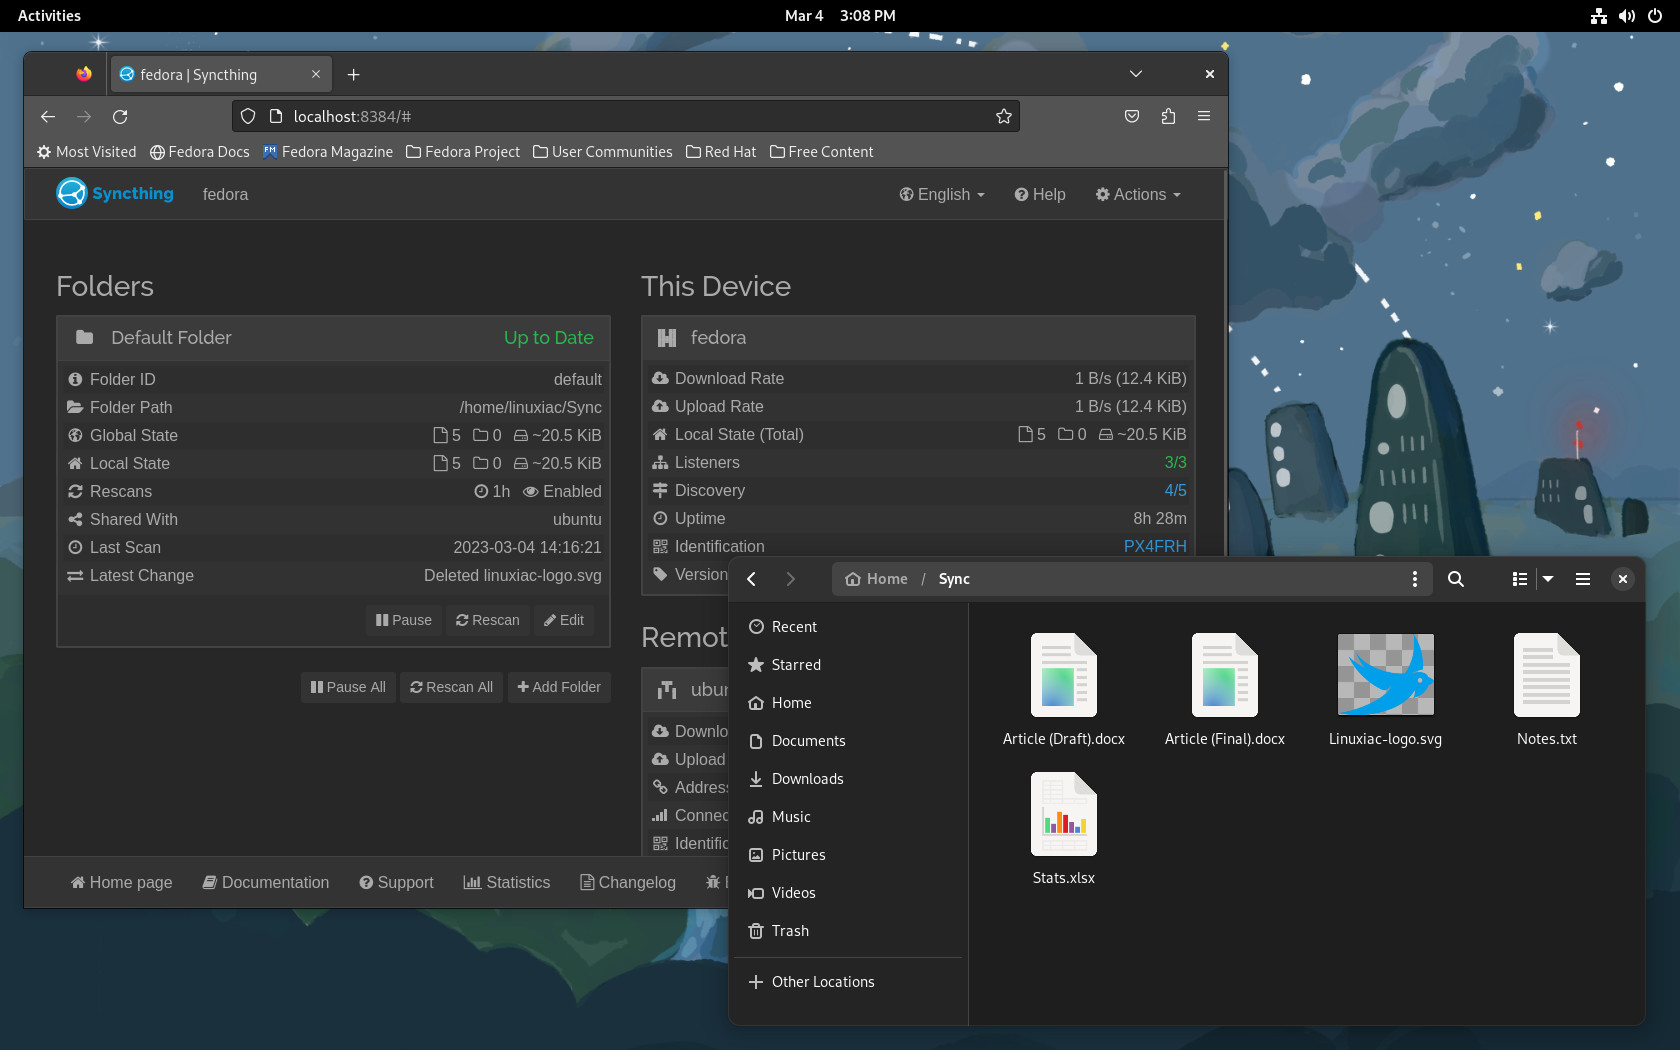
We’ve come to the most exciting moment, where we’ll see the fruits of our labor. Both Syncthing instances have an empty “Sync” folder. So let’s put some files in the Ubuntu machine’s “Sync” folder.
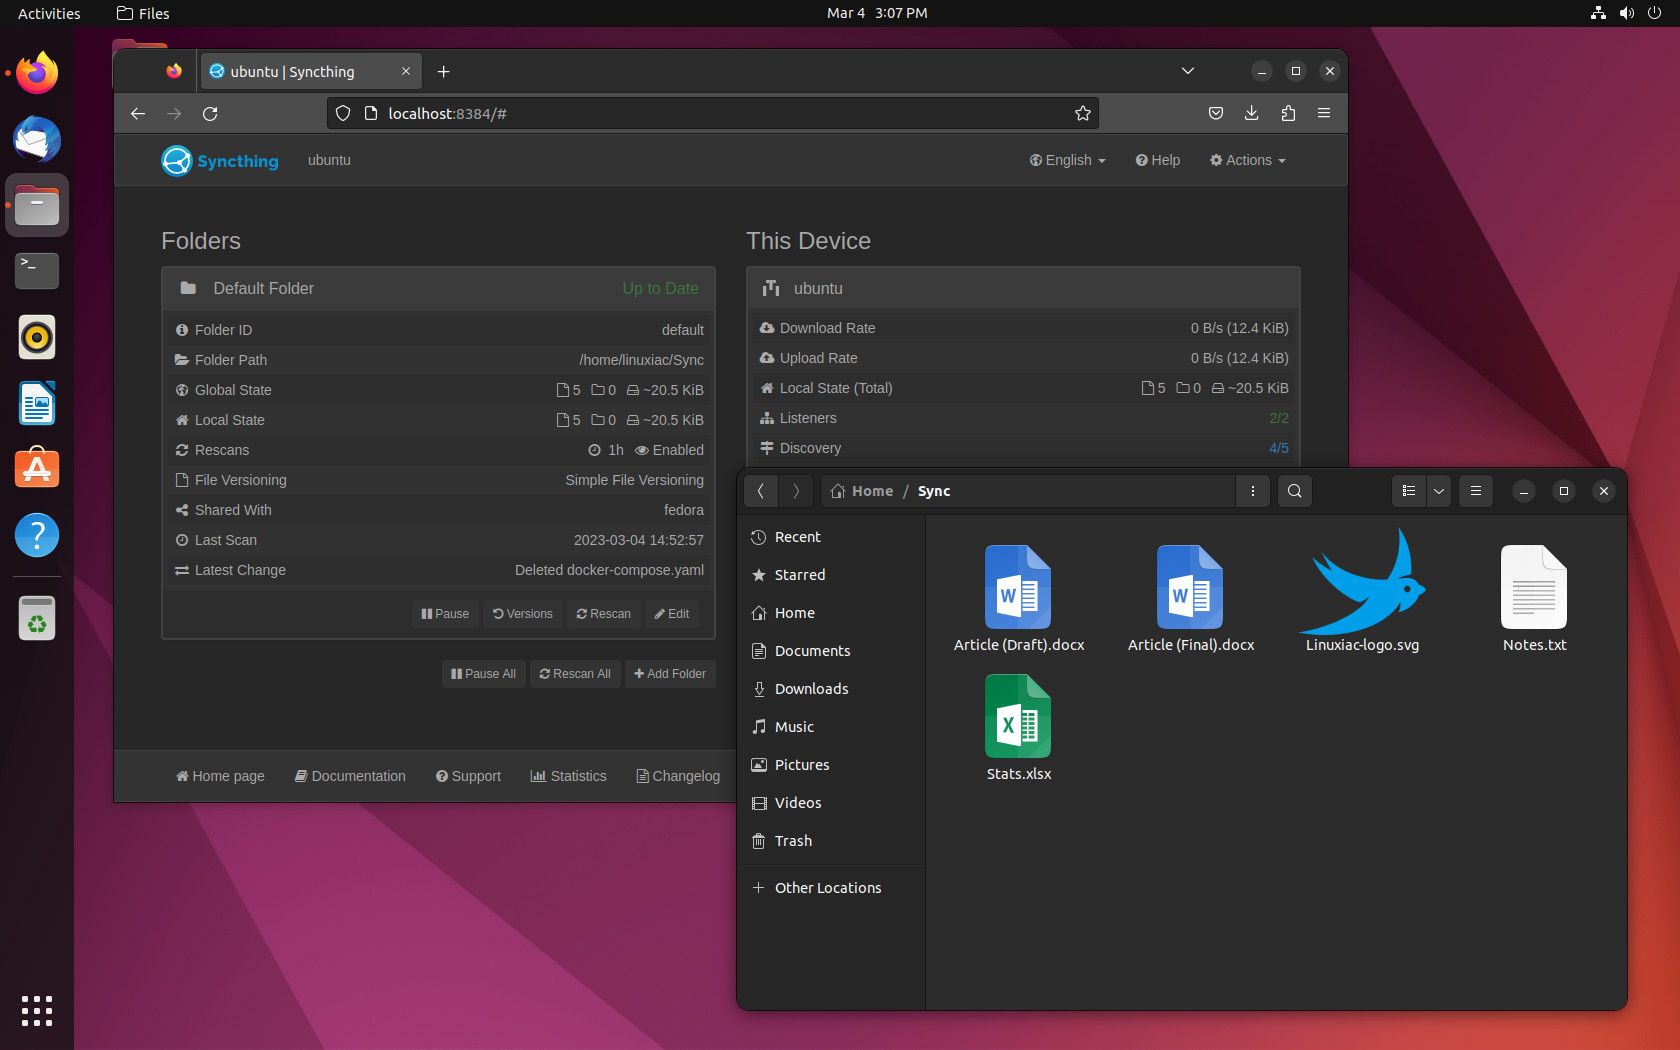
Now go to the other Syncthing instance; in our case, it is the Fedora machine, and the magic has happened! The files you added to the Ubuntu system are now available in the “Sync” folder on the Fedora system.
Of course, synchronization works both ways, so no matter which instance you add, change, or delete a file from, it will be automatically replicated on the other within seconds.
Conclusion
Syncthing is a powerful and reliable tool for synchronizing files across multiple devices. With its open-source nature and advanced features like versioning and selective synchronization, Syncthing is an excellent choice for anyone looking for a robust file synchronization solution.
The best part, however, is that Syncthing is not limited only to Linux. The software is also available for Windows, macOS, and Android devices. This gives you unlimited options always to have your files at your fingertips, regardless of your operating system.
Following the steps outlined in this guide, you can quickly set up and use Syncthing on your Linux machine to keep your files in sync across multiple devices. So, whether you’re a developer, a business owner, or a home user, Syncthing has something to offer everyone.
Of course, the software provides many other features beyond this guide’s scope. I highly recommend you visit the project’s website or consult its documentation for an in-depth look at them.
Thanks for your time! I hope you find this guide helpful. Your feedback and comments are most welcome.


In the iPhone app store I see Mobius which says it works with Syncthing.
Do you think it’s safe to use?
Hi Jay,
I haven’t used Mobius, but judging by the reviews, it does the job. However, do further research on the subject because iOS devices with apps running in the background can sometimes face issues due to the OS’s restricted policy toward such apps.
Best,
Bobby