
We will start with a metaphor. Imagine a fortress; while its tall walls and strong gates are built to keep out unwanted visitors, there will always be those who attempt to scale the walls or force the gates.
Similarly, our digital fortress, especially servers, faces persistent threats. One such gate to it is the Secure Shell (SSH), a protocol allowing secure remote access. So, just as gates require guards and monitoring systems, SSH requires protective measures against potential intruders.
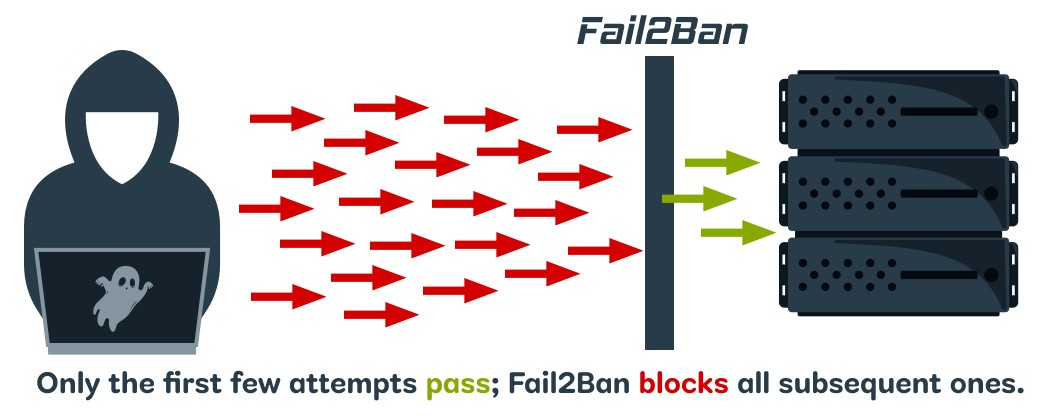
Enter Fail2Ban – a vigilant sentry for your servers. It is one of the most effective shields against unauthorized access attempts, especially brute force.
What is Fail2Ban?
Fail2Ban is an open-source software tool that protects against automated malicious activities like brute-force server attacks.
One of its most valuable things is it acts proactive. In other words, instead of waiting for an attack, Fail2Ban offers an approach by identifying and blocking potential threats in real time.
The beauty of Fail2Ban lies in its simplicity and adaptability. While it is frequently used to secure SSH, its functionality isn’t limited to this protocol. Fail2Ban can be configured to monitor any service’s log files, providing a versatile solution for services like FTP, SMTP, web servers, and more.
Moreover, it is light on resources, so it doesn’t burden your server’s performance – a critical consideration for servers handling high volumes of transactions or interactions.
How Fail2Ban Works
First, let us briefly explain what exactly is brute-forcing. It is a type of cyberattack in which an attacker attempts to gain unauthorized access to a system or service by systematically trying all possible combinations of passwords or encryption keys until the correct one is found.
In this regard, Fail2Ban monitors server logs for specific patterns indicative of such attacks – for example, repeated failed login attempts within a short time frame.
Based on predefined or custom rules, called “filters,” Fail2Ban identifies patterns that suggest an attack and automatically triggers some predefined action. The most common one is to temporarily ban the IP address of the attacker, enforce firewall rules, and prevent further malicious attempts.
A key feature of Fail2Ban is the concept of “jails” – specific monitoring policies for server services that combine a filter with actions. You can have different jails for different services (e.g., one for SSH, another for FTP, etc).
Each jail specifies which log file to monitor, what patterns to look for, and what actions to take when those patterns are detected.
After being banned for a set period, the IP address is automatically unbanned, allowing legitimate users who might have been temporarily blocked due to, for instance, forgetting their password to try again.
Installing Fail2Ban
Let’s now install Fail2Ban, which is quite simple, as you can see. Please use the command appropriate for the Linux distribution you are using.
Debian / Ubuntu
sudo apt install fail2banNo further action is needed here since the service is automatically activated after installation.
RHEL / Rocky Linux / Alma Linux / Fedora
Since Fail2Ban resides in the EPEL repository, you must first add it to your system if you have not already done so:
sudo dnf install epel-releaseThen install Fail2Ban and enable the service to start on boot:
sudo dnf install fail2ban
sudo systemctl enable fail2ban
openSUSE
sudo zypper in fail2banConfiguring Fail2Ban for SSH
Once installed, the main configuration file is “/etc/fail2ban/jail.conf.” However, best practices do not recommend modifying this directly. Instead, we will copy it by creating a new one with the extension “.local.” Why? It is simple – this avoids merging problems when upgrading. So, let’s do it.
sudo cp /etc/fail2ban/jail.conf /etc/fail2ban/jail.localWhen the Fail2Ban service is restarted, the “jail.conf” file is read first, then “jail.local,” with later settings overriding earlier ones.
Now, let’s get to the fun part – configuring Fail2Ban. Open the “jail.local” file with your preferred terminal text editor.
sudo nano /etc/fail2ban/jail.localScroll down until you find the “[sshd]” part, which looks similar to the one below.
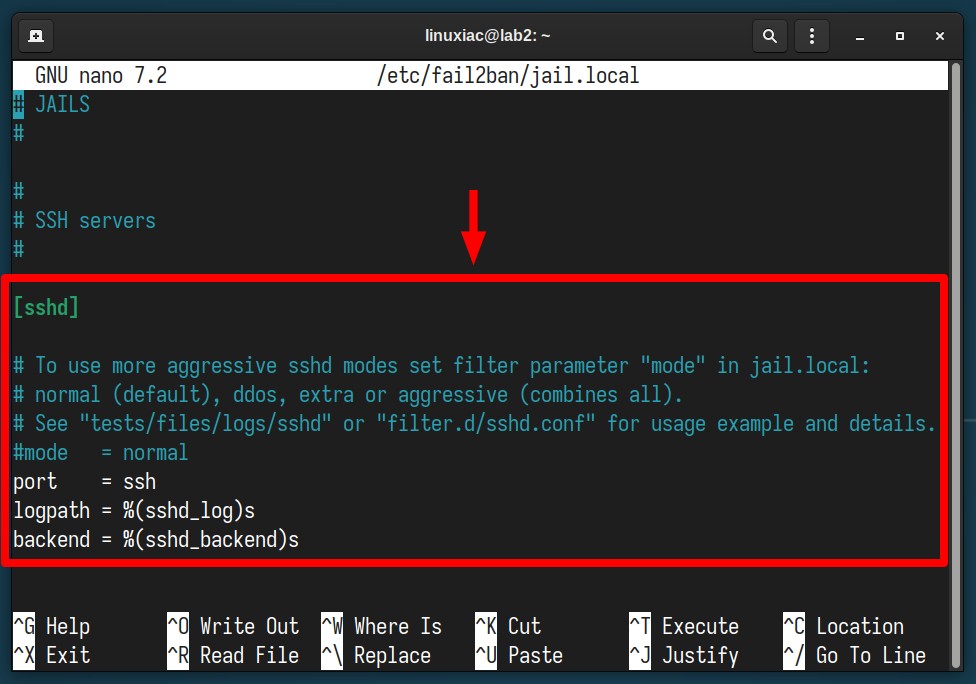
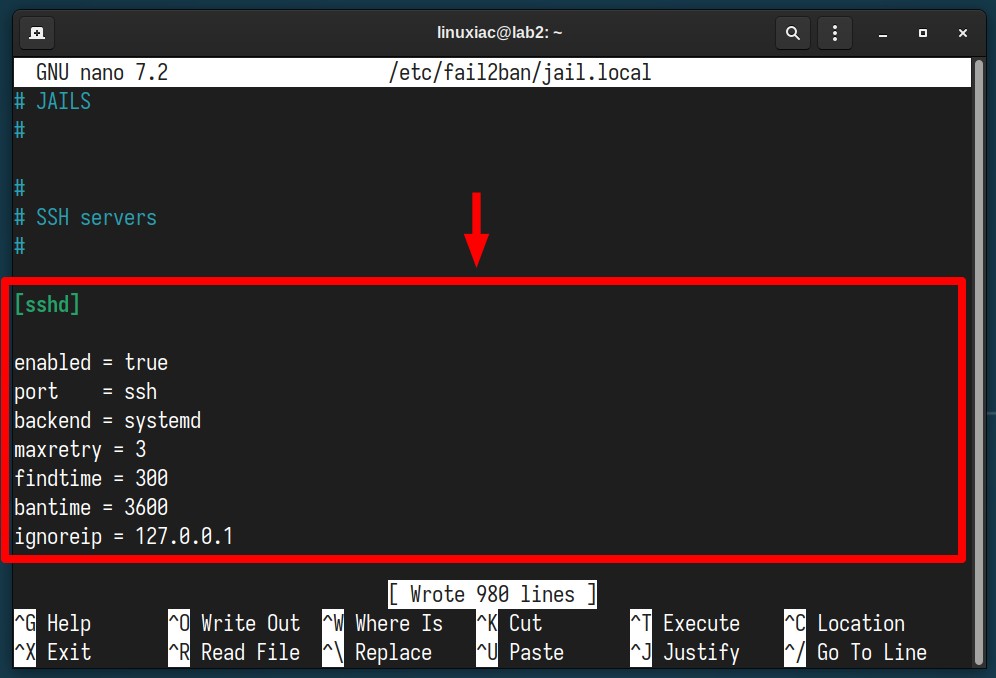
Replace the existing contents of the “[sshd]” part with this:
[sshd]

enabled = true
port    = ssh
backend = systemd
maxretry = 3
findtime = 300
bantime = 3600
ignoreip = 127.0.0.1Code language: JavaScript (javascript)
The final version should look like the one shown below. Need to know what these options mean? Fear not – we’ve explained each one in detail further down.
- enabled – Determines if the jail is active or not.
- port – Specifies the port(s) you want to monitor. Accepts any port number or service name, e.g., “ssh,” “22,” “2200,” etc.
- backend – Specifies the backend used to get file modification. Since all modern Linux systems rely on systemd’s logging service, we specify it as our backend.
- maxretry – The number of failed attempts from an IP before it is banned.
- findtime – The timeframe (in seconds) during which “maxretry” failed logins will lead to a ban. We have specified 300 seconds, i.e., 5 minutes.
- bantime – The duration (in seconds) an IP should stay banned. In our case, we have set 3600 seconds, which means that in the next hour, any subsequent requests (not just to the SSH port) from this IP address will be blocked.
- ignoreip – Allows you to whitelist IP addresses that should be ignored. This ensures that given IP addresses, even if they exceed the number of failed attempts specified in “maxretry,” will not be blocked.
That’s it. Save the file and exit, then restart the Fail2Ban service.
sudo systemctl restart fail2banThen, make sure everything is OK with the service.
sudo systemctl status fail2ban
Testing & Monitoring
Try logging in via SSH several times from another computer to the server on which you just installed and configured Fail2Ban. After the third failed attempt, your access should be blocked.
You’re already probably wondering how to monitor what’s happening inside. The good news is that Fail2Ban has excellent integrated tools for this purpose. To see IP addresses that are currently blocked, run the following command:
sudo fail2ban-client status sshd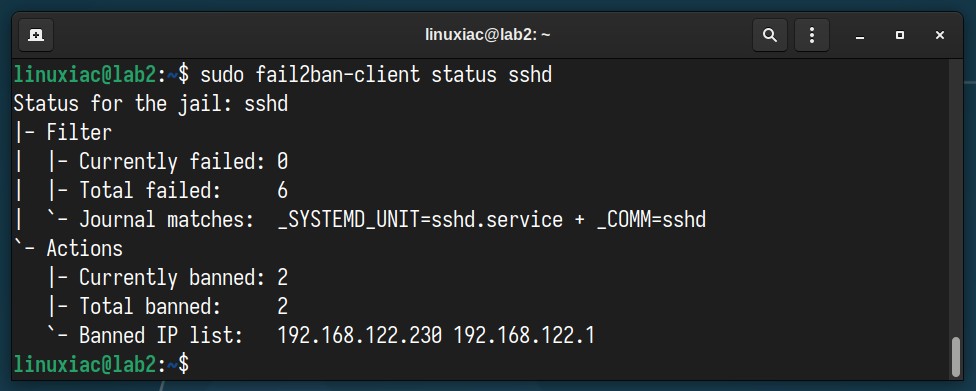
If we go even further and review the iptables rules, we will find that Fail2Ban has created a chain (“f2b-sshd “) in which it has inserted the IP addresses in question. They will be automatically removed from there after the timeout period given in the “bantime” option.
sudo iptables -L -n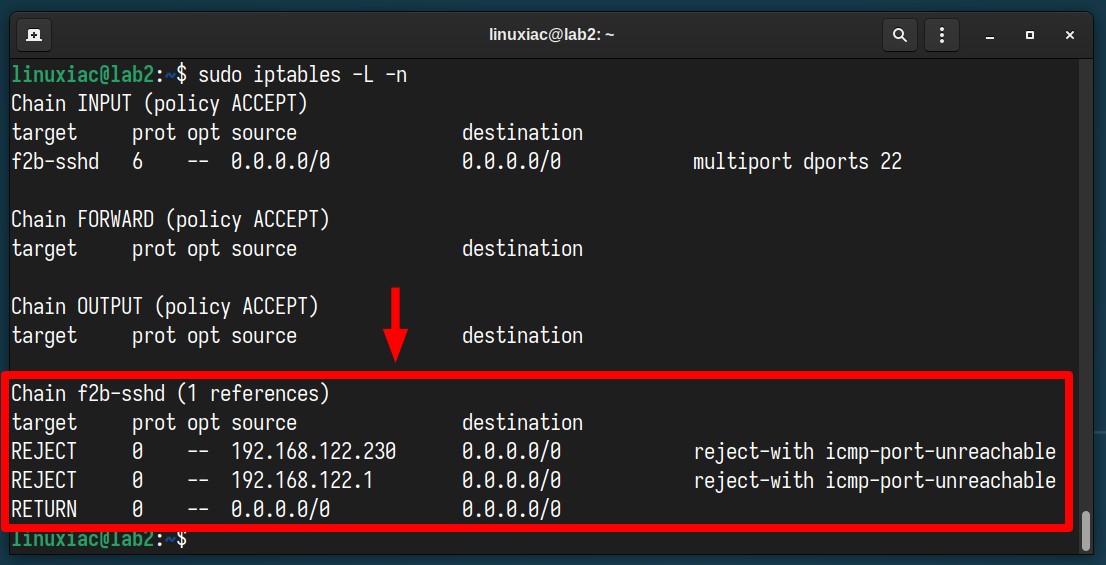
To manually unbans all IP addresses in all jails, execute the following:
sudo fail2ban-client unban --allFor a separate address only, your command should be:
sudo fail2ban-client unban <ip-address>Code language: HTML, XML (xml)Of course, the fail2ban-client command has many other options, giving you great possibilities and flexibility. If you are curious to see them in detail, look here.
Important to Keep In Mind
Although Fail2Ban is excellent software, it is not as beneficial when your SSH server is configured to only public key authentication, as it is impossible to log in with a password. More about that here.
Additionally, remember that it does not replace the security a VPN would give you to access your server. Thus, unless absolutely required, avoid exposing your services to the internet.
Conclusion
Securing your server should always be a top priority. With SSH being a common entry point for many attackers, it requires particular attention.
Through this guide, we’ve walked through the straightforward steps of installing and configuring Fail2Ban to monitor and protect SSH from repeated malicious login attempts.
By setting up this tool, you’re adding an essential layer of security that can prevent potential intrusions. So, stay safe, stay updated, and always be proactive in your server’s defense strategy.
Thanks for your time! Finally, we recommend you check the Fail2Ban GitHub page for additional help or valuable information.


Thank you for your guide! I have received several emails posted by my VPS service, which notified me that I encountered an SSH login attack. After deploying fail2ban, the effect is immediate, as several IPs are already being banned.