Do you end up here because you are curious about running virtual machines on your Linux Mint 22 system? There’s one thing I want to say: you’re in the right place.
Maybe you’re looking to test a new operating system, create a secure environment for experiments, or explore yet another Linux distro in a safe way for your host’s OS. Whatever your reason, VirtualBox 7.1 makes it easy.
In this step-by-step guide, I’ll walk you through installing VirtualBox on Linux Mint 22. No prior experience? No problem. By the end of this tutorial, you’ll have VirtualBox up and running, ready to create your first virtual machine.
But before we start, let me clear something up. VirtualBox is readily available in the Mint repositories and can be installed through the Software Manager with just a few clicks. So, why am I taking a different approach in this guide? Because of this.
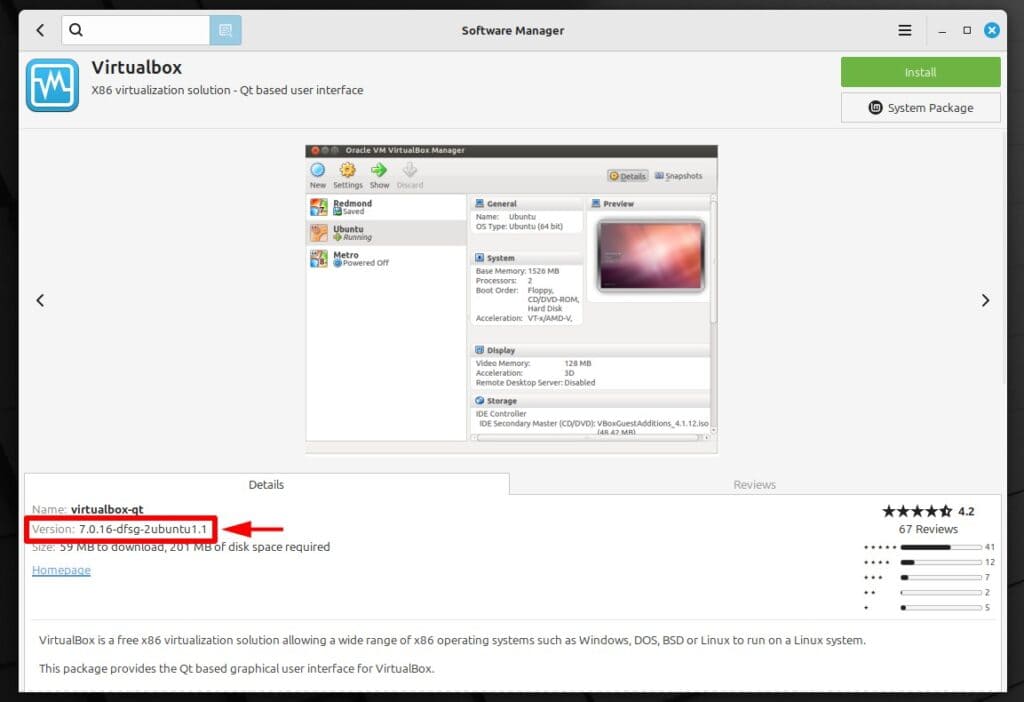
As you can see in the image above, the version available is relatively outdated—VirtualBox 7.0. Back in September 2024, VirtualBox released version 7.1, and as of the time of writing this guide, it has already seen four minor updates, the latest being 7.1.4.
That’s why I’ll show you how to install VirtualBox directly from the official VirtualBox repository on your Linux Mint 22 box. This ensures you always get the latest version with all the newest features and improvements.
The best part? Any future updates will integrate seamlessly with your Mint system’s regular updates. Pretty awesome, right? So let’s get started.
Step 1: Import VirtualBox’s Repo GPG Key
First, we’ll import the GPG key from the VirtualBox repository to ensure the authenticity of the software we install from it.
wget -O- https://www.virtualbox.org/download/oracle_vbox_2016.asc | sudo gpg --dearmor --yes --output /usr/share/keyrings/oracle-virtualbox-2016.gpgCode language: Bash (bash)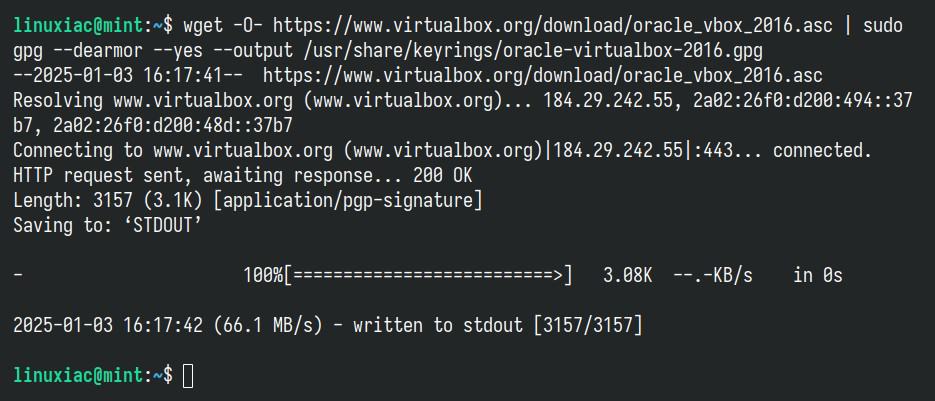
Step 2: Add VirtualBox Repository
Next, we’ll add the official VirtualBox repository to our Linux Mint 22 system. As mentioned above, if a new version is released, the update package will be made available with the rest of your system’s regular updates.
echo "deb [arch=amd64 signed-by=/usr/share/keyrings/oracle-virtualbox-2016.gpg] http://download.virtualbox.org/virtualbox/debian noble contrib" | sudo tee /etc/apt/sources.list.d/virtualbox.listCode language: Bash (bash)
Step 3: Run System Update
Before we proceed with VirtualBox installation on our Mint 22 system, we should refresh the list of available packages. Run the below command to update the APT repositories index.
sudo apt updateCode language: Bash (bash)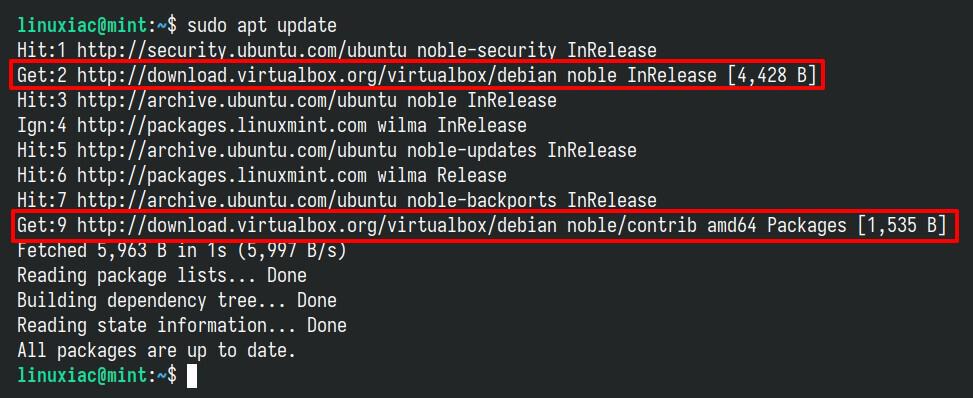
As you can see, our new VirtualBox repository is now available and ready to be used.
Step 4: Install VirtualBox 7.1 on Linux Mint 22
We’re all set to install the more up-to-date VirtualBox release on our Mint 22 system. Run the following commands:
sudo apt install virtualbox-7.1Code language: Bash (bash)Type “Y” to confirm and press “Enter.”
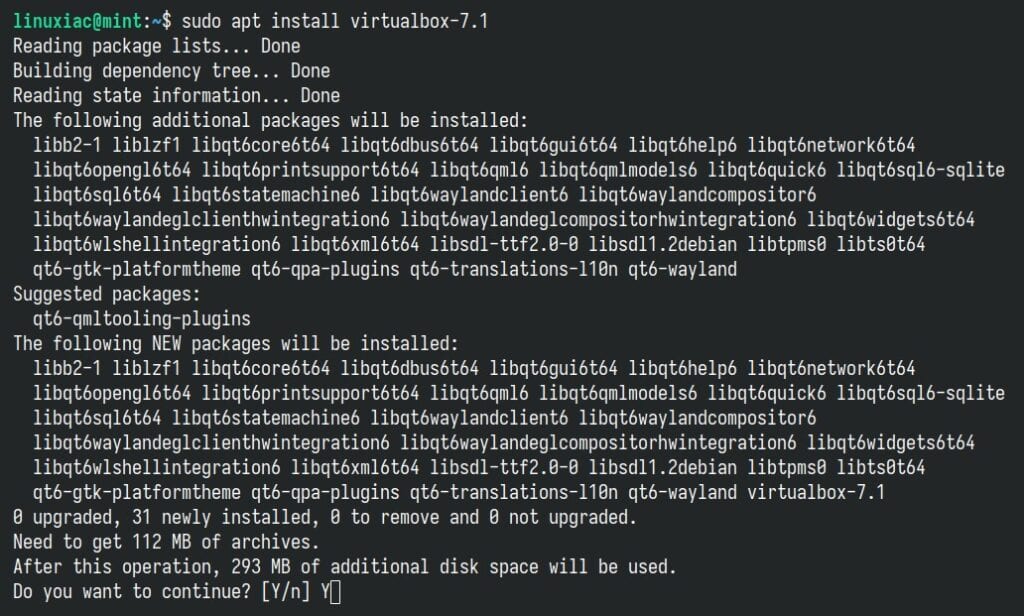
Wait for the installation to complete. Congratulations, we are done! But hold on before you run it—we have a few small but important things to take care of first.
Step 5: Install VirtualBox Extension Pack
This is an optional step, but I strongly encourage it because it will make working with VirtualBox on your Mint system easier and more convenient. VirtualBox Extension Pack unlocks many great features, such as:
- USB 2 and USB 3 support
- VirtualBox Remote Desktop Protocol (VRDP)
- Host webcam passthrough
- Disk image encryption with AES algorithm
- Intel PXE boot ROM
- Support for NVMe SSDs
Let’s highlight one peculiarity here. The Extension Pack’s version is strongly recommended to match the VirtualBox’s installed version. To verify the exact one of the just-installed VirtualBox, you can use a built-in vboxmanage command:
vboxmanage -v | cut -dr -f1Code language: Bash (bash)
As you can see, the installed version of VirtualBox is “7.1.4.” Therefore, you must then download the Extension Pack with the same version. So, use the below wget command to download the appropriate Extension Pack for VirtualBox.
However, if your installation’s version is different, replace both places containing “7.1.4” in the command below with the appropriate version. You can also visit the downloads page and look at the available releases.
wget https://download.virtualbox.org/virtualbox/7.1.4/Oracle_VirtualBox_Extension_Pack-7.1.4.vbox-extpackCode language: Bash (bash)Next, to install the VirtualBox Extension pack, run the vboxmanage command as follows:
sudo vboxmanage extpack install Oracle_VirtualBox_Extension_Pack-7.1.4.vbox-extpackCode language: Bash (bash)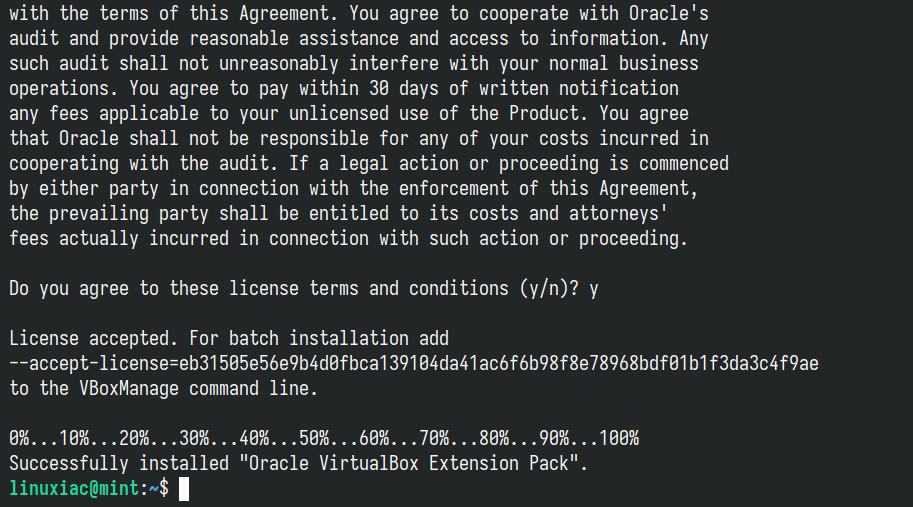
Additionally, you can verify installed VirtualBox’s extension pack version by running the following:
vboxmanage list extpacksCode language: Bash (bash)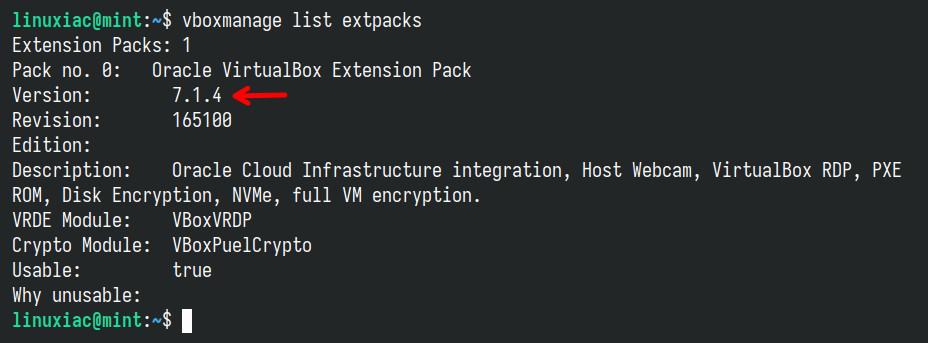
Step 6: Add User to vboxusers Group
And one final touch. Before using VirtualBox, add your user account to the “vboxusers” group. This is quick and simple to accomplish by running:
sudo usermod -aG vboxusers $USERCode language: Bash (bash)Now, perform a reboot. After login, check that you are in the “vboxusers” group with this command:
groups $USERCode language: Bash (bash)
Step 7: Running VirtualBox on Linux Mint 22
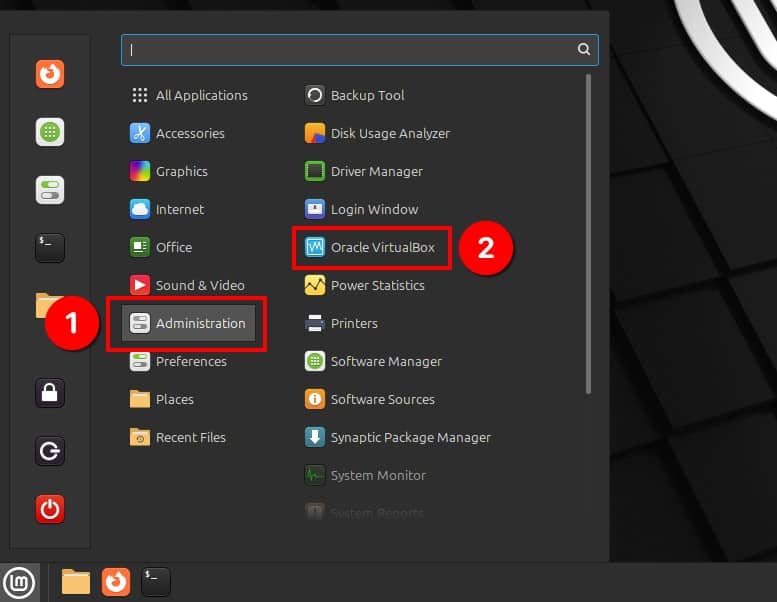
You can start using VirtualBox by launching it from the Mint’s start menu. The application is located in the “Administration” section. Navigate to it and click on the “Oracle VirtualBox” icon.
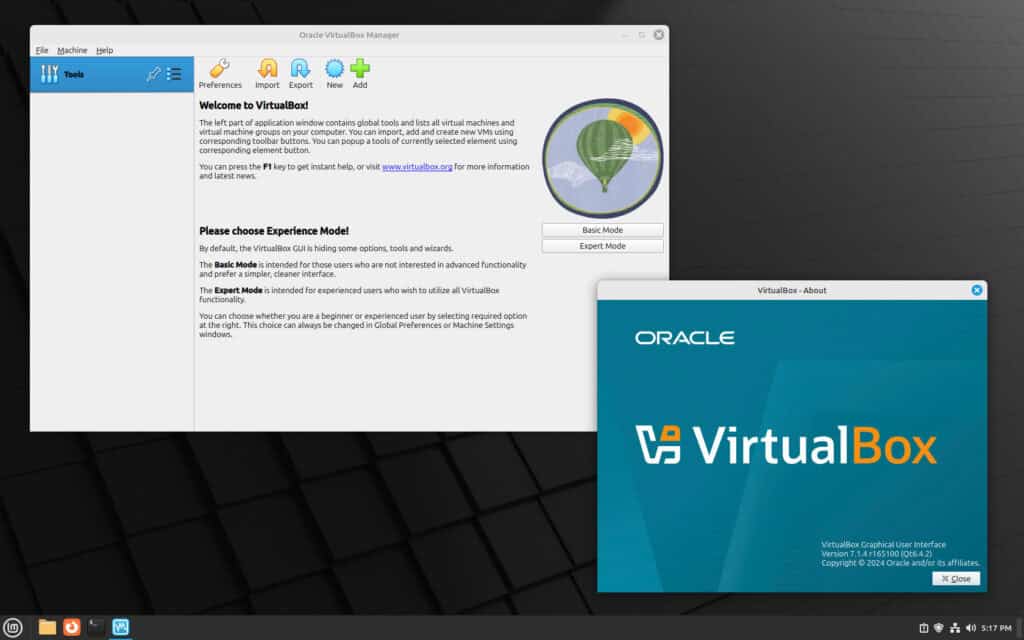
Hit the “New” button and start virtualizing your ideas!
Conclusion
That’s all friends! With VirtualBox 7.1 up and running on Linux Mint 22, you’re ready to go ahead and unleash your creativity—your virtual machine adventure starts now.
However, VirtualBox isn’t the only player in the virtualization game—VMware Workstation is another excellent and reliable option. If you’re considering giving it a try, we’ve got you covered with a step-by-step guide on setting it up in Linux Mint 22.
Finally, I recommend checking the official documentation for individuals who want to learn more about VirtualBox’s features and how to use them effectively.
If you found this guide helpful, feel free to share it with other Mint users who might enjoy the simplicity and power of VirtualBox. Thanks for your time! Your feedback and comments are most welcome. Happy virtualizing!
This is the way to do it…
Thanks Bobby!!
Thanks for the exemplary guidance 🙂
This is definately the best description I’ve seen so far, thank you !!! You could add a line informing people that is might be a good idea to take a snapshot using Timeshift before installaing anything 🙂
Nice description, but I run into trouble with a secure boot bios option enabled. Virtualbox need some components ‘trusted’ and doing this also fails. Does the admin need special privileges ticked on, in the checkbox ?
Thanks.
It worked right from the start.
The downside is that for every new minor (and major) version, you'd have to repeat this whole procedure. If you stay on the Ubuntu repo's version, you will get 7.1 (and 7.2 etc.) in due time, right?
No, you definitely don't need to repeat it. As the guide explains, you're adding a new repository (VirtualBox's official one) to your Mint 22 system. Once set up, any new versions will automatically be included in the system's updates, just like the rest of the regular Mint updates.
I guess you will want to repeat Step 5 for every new version of 7.1 that gets installed. And since you've installed virtualbox-7.1 explicitly in Step 4, you will not get any 7.2+ unless you do
sudo apt install virtualbox-7.1, isn't that the case?For minor updates to the 7.1.x series – no. For the Extension Pack, yes.As for version 7.2 (once it's available):
sudo apt install virtualbox-7.2