
For over two decades, phpMyAdmin has been the go-to solution for managing MySQL and MariaDB databases.
It’s a free and open-source tool written in PHP that allows users to handle various database activities, such as creating, modifying, and deleting databases; managing tables, fields, and indexes; executing SQL statements; and managing users and permissions via a convenient web-based interface.
To install it, however, you need PHP installed and php-fpm support configured with your web server, whether it’s NGINX, Apache, or another. Luckily, Docker simplifies this process, enabling you to set up phpMyAdmin quickly—within minutes. This lets you immediately focus on managing your MySQL/MariaDB databases without getting bogged down in initial setups.
This guide will walk you through setting up a phpMyAdmin container using Docker Compose and cover every scenario to ensure it connects properly with your MySQL/MariaDB database. So, let’s get started!
Prerequisites
Before proceeding with the installation, ensure you have Docker installed on your system. But if you don’t have it, fear not; any of the following guides will help you get it quickly. Pick the distribution you are using in one of the following links: Ubuntu 24.04, Debian 12, Arch, Alma/Rocky, Fedora, Linux Mint 22, Pop!_OS 22.04, or Raspberry Pi OS.
The other essential component is Docker Compose. Recent Docker versions now include Docker Compose by installing the “docker-compose-plugin” package. So, install it if it’s not already in your setup.
However, if you prefer, you can get it separately using both commands below. In that case, remember, when running the tool, type “docker-compose” instead of “docker compose.”
sudo curl -L "https://github.com/docker/compose/releases/latest/download/docker-compose-linux-$(uname -m)" -o /usr/local/bin/docker-compose
sudo chmod +x /usr/local/bin/docker-composeCode language: Bash (bash)
Run phpMyAdmin and MySQL Containers Together
This is the most common scenario when MySQL starts with an accompanying phpMyAdmin container to administer the database. To achieve this, the first step is to create the project directory in which our Docker Compose deployment file will be placed.
Then switch to it; from here on, you need to execute all commands further down in this guide from that location.
mkdir phpmyadmin
cd phpmyadmin
Create a file named “docker-compose.yml.” This file will define the services and volumes for our phpMyAdmin and MySQL instances, telling Docker what to do and how to set up the deployment.
Open your favorite text editor and paste the following content into it:
nano docker-compose.yamlCode language: Bash (bash)services:
phpmyadmin:
image: phpmyadmin:latest
container_name: phpmyadmin
ports:
- 8080:80
environment:
- PMA_ARBITRARY=0
- PMA_HOST=db
restart: unless-stopped
depends_on:
- db
db:
image: mysql:latest
container_name: mysql
ports:
- 3306:3306
environment:
MYSQL_ROOT_PASSWORD: mypassword
restart: unless-stopped
volumes:
- dbdata:/var/lib/mysql
volumes:
dbdata:Code language: YAML (yaml)As you can see, the deployment is straightforward. It involves running two containers: one for a MySQL server and another for the phpMyAdmin application itself. Let’s go over the key settings.
Setting “PMA_ARBITRARY” to 0 removes the option to enter a custom host on the phpMyAdmin login screen. This is because we use a specific predefined “db” for the phpMyAdmin container to connect to.
The most important one in the “phpmyadmin” service part is “PMA_HOST.” It specifies the hostname of the MySQL server to which phpMyAdmin should connect.
In our setup, however, since MySQL is running as another container within the same Docker deployment, we connect to it by referring to its service name, which we’ve set to “db.”
In the “db” server part that deploys the MySQL server, be sure to change the value of the “MYSQL_ROOT_PASSWORD” option to a secure one. Of course, we also ensure MySQL data’s persistence by creating a named Docker volume.
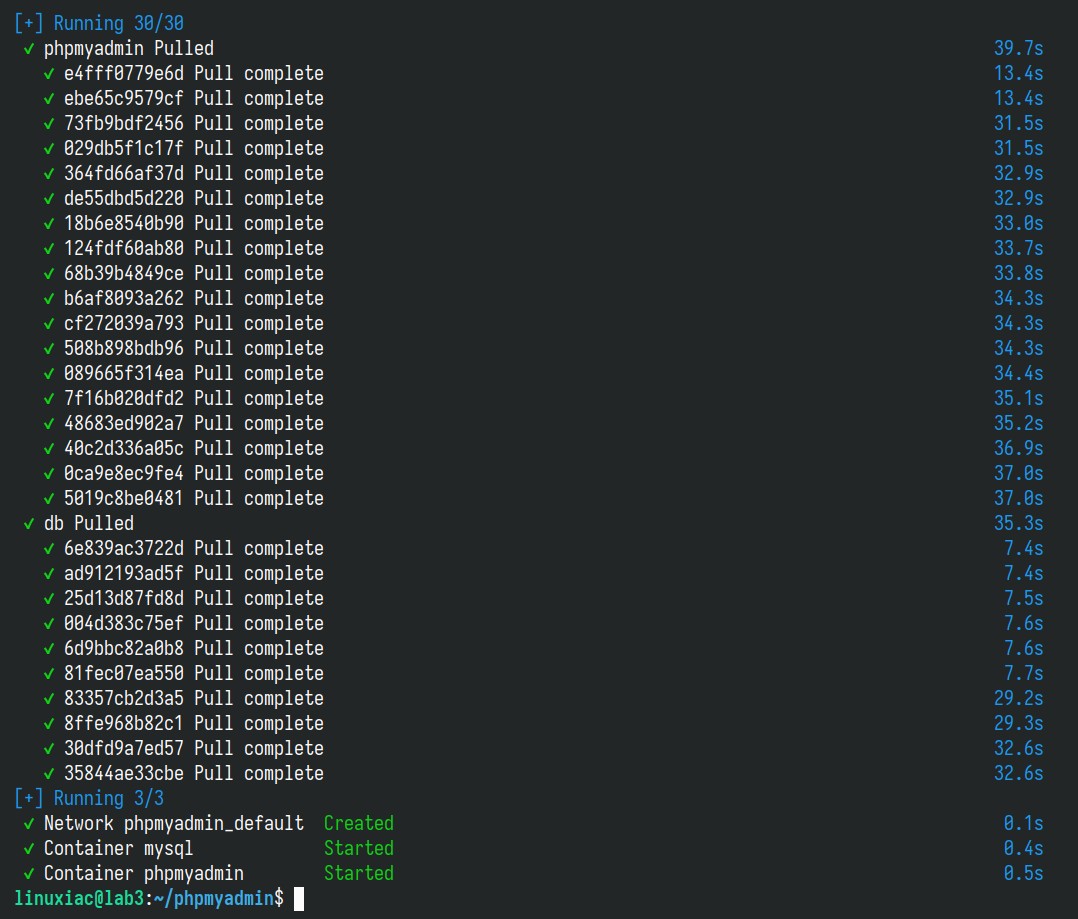
We are all set! Type the following command to start and run the container in the background:
docker compose up -dCode language: Bash (bash)The Docker images will start downloading. You should see a screen similar to the one below, informing you that your phpMyAdmin/MySQL installation has been successfully deployed, and the containers are up and running.
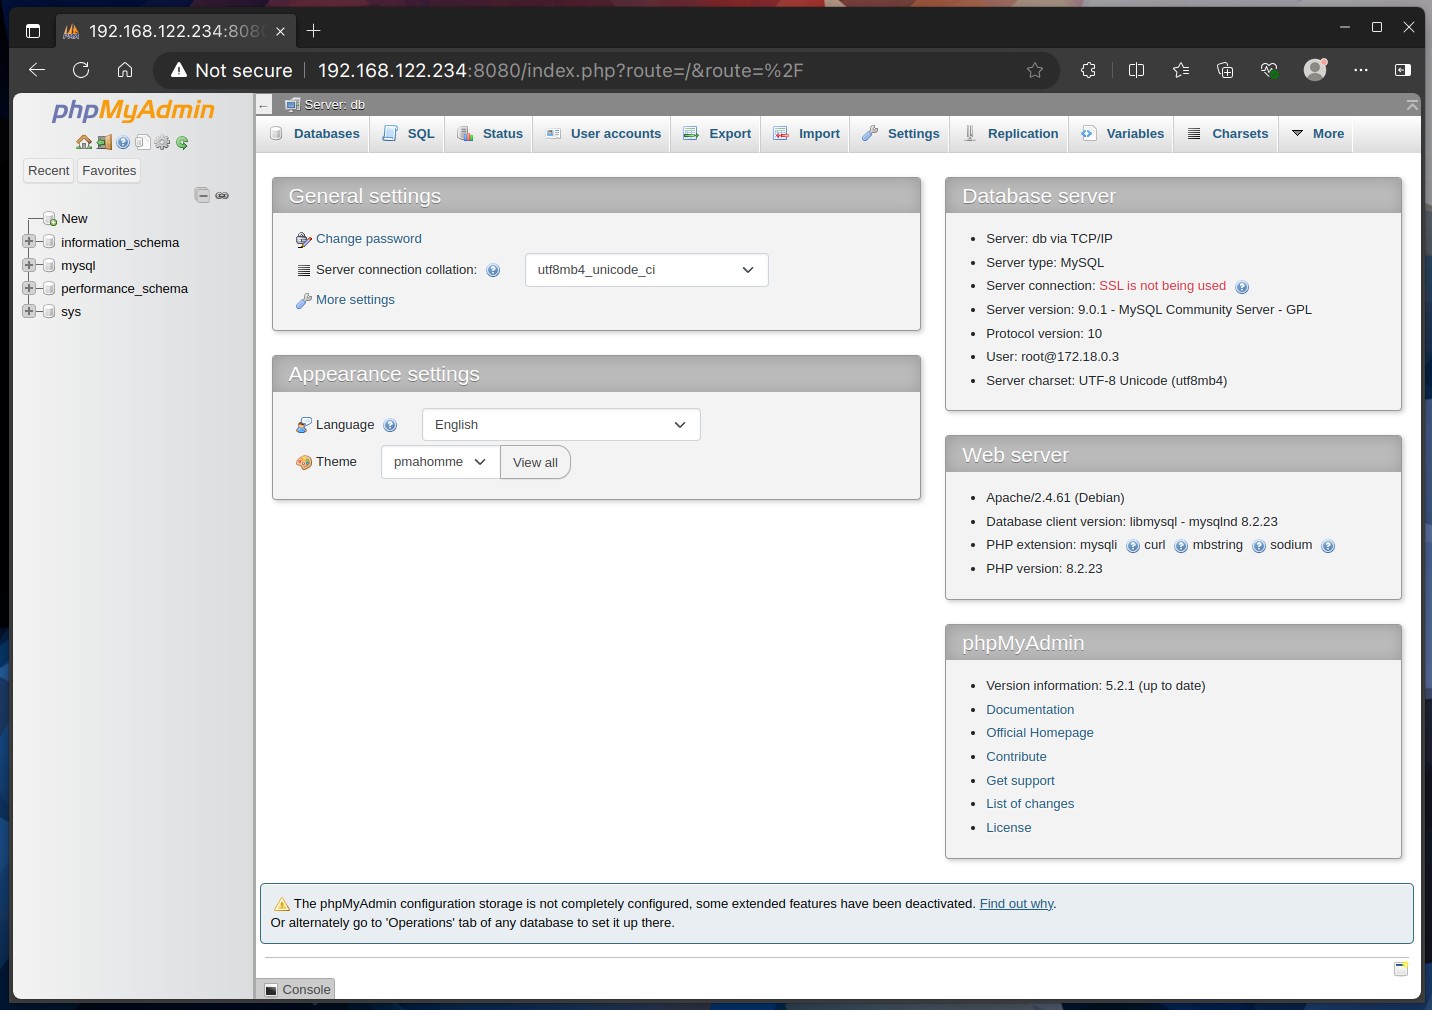
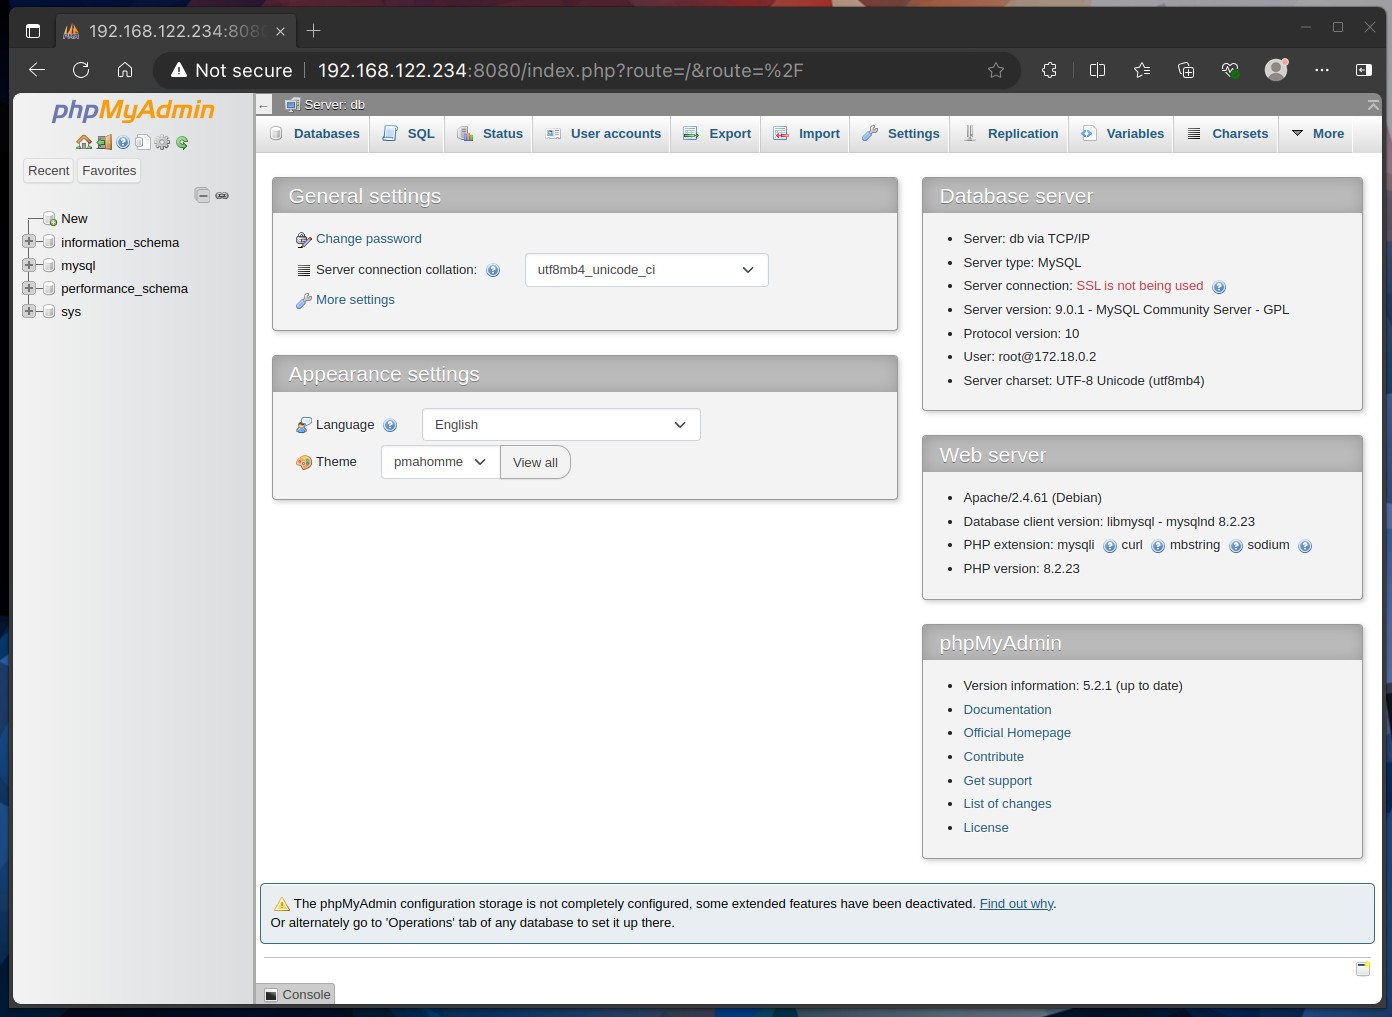
Now, open your browser and navigate to “http://localhost:8080” or “http://<your-server-ip>:8080.” You should see the phpMyAdmin login page.

To log in, use the username “root” and password defined in your Docker Compose file as the values of the “MYSQL_ROOT_PASSWORD” option. That’s it! phpMyAdmin will connect to the MySQL instance and be ready to serve you.
However, depending on your needs, let’s now look at some other phpMyAdmin use cases you may encounter.
Connect phpMyAdmin to MySQL Installed on the Host
But what if your MySQL/MariaDB server is installed directly on the host and not deployed as a Docker container? In that case, the phpMyAdmin container can’t directly see it because it’s on a separate Docker network, isolated from the host’s network.
Therefore, to connect phpMyAdmin to the locally installed MySQL, we need to make some additional configurations, both on the phpMyAdmin and MySQL side as well. The final phpMyAdmin’s “docker-compose.yml” file should look like this:
services:
  phpmyadmin:
    image: phpmyadmin:latest
    container_name: phpmyadmin
    ports:
      - 8080:80
    extra_hosts:
      - "host.docker.internal:host-gateway"
    environment:
      - PMA_ARBITRARY=0
      - PMA_HOST=host.docker.internal
    restart: unless-stoppedCode language: YAML (yaml)
The key part here is the “host.docker.internal:host-gateway” option. It’s a special DNS name recognized by Docker. It resolves to an IP address that routes to the host machine, making it particularly useful when you need a container to access services running on the host. More on that – here.
Additionally, for the “PMA_HOST” option, specify this Docker-specific DNS name, “host.docker.internal.”
On the MySQL side, ensure the “bind-address” option is set to “0.0.0.0” and not to “127.0.0.1” in the MySQL configuration file. This allows MySQL to accept connections from any IP address.

bind-address parameter from 127.0.0.1 to 0.0.0.0.Once you’ve made the changes, remember to restart the MySQL server to ensure they take effect. You can run the command below to verify everything is set up correctly. Check the output to see if the MySQL line reads “0.0.0.0.”
netstat -tulnpCode language: Bash (bash)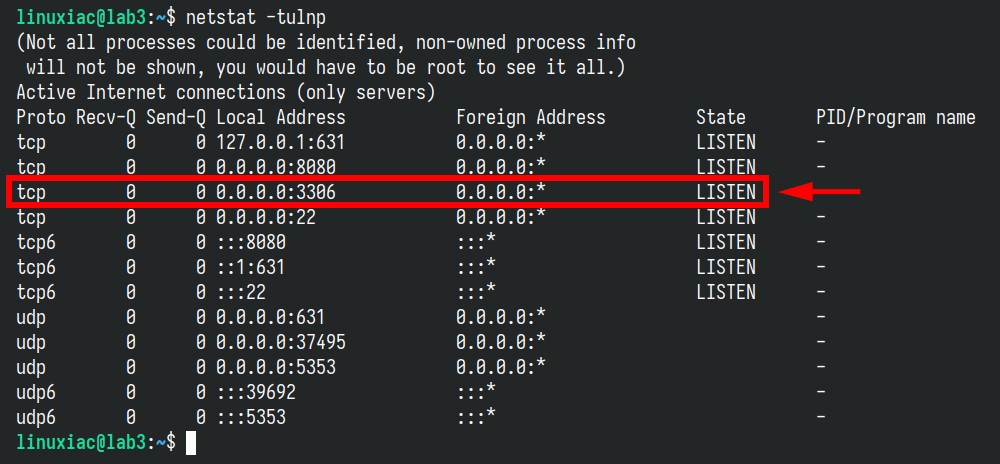
Now, start the phpMyAdmin container using the command “docker-compose up -d” and log in using the root account for your MySQL server.
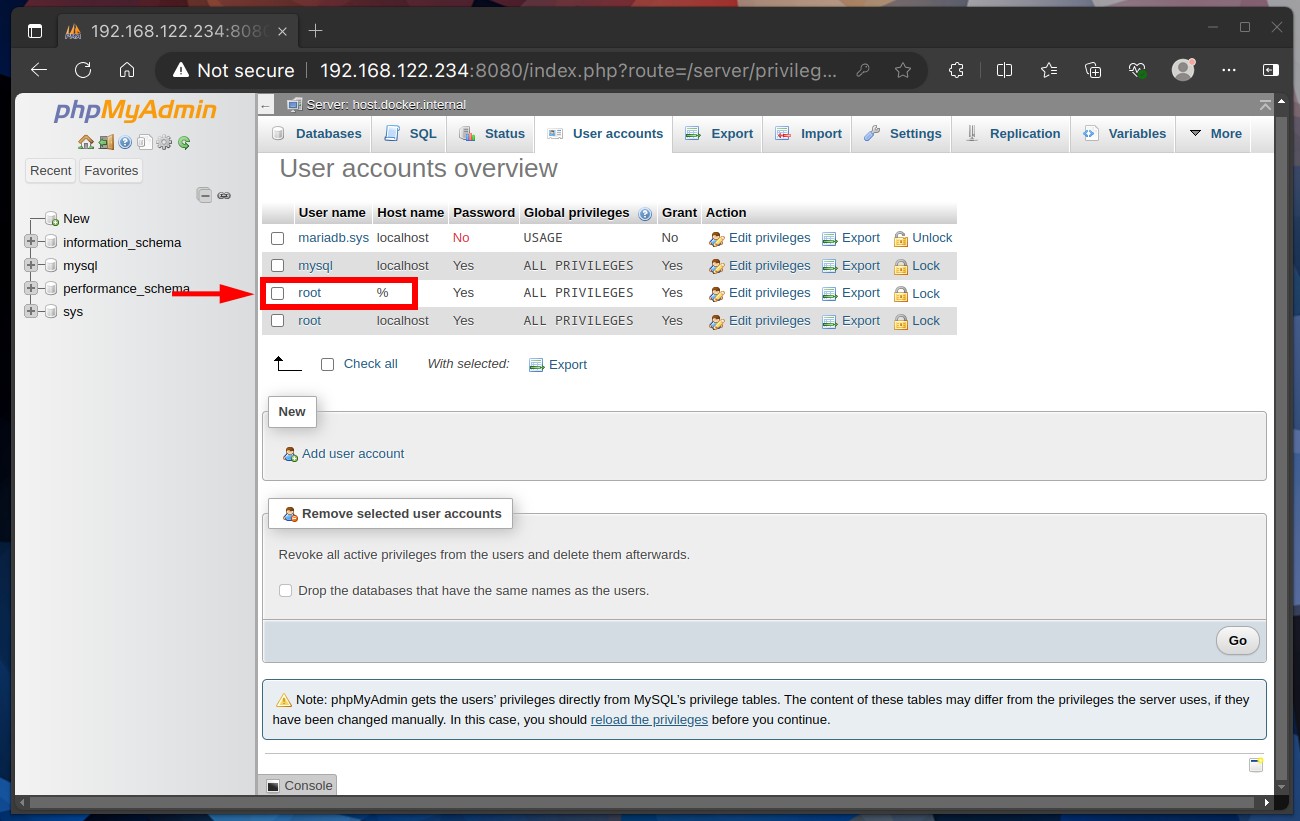
To successfully connect, ensure that the root user or any other user you’re using to connect to the MySQL server through phpMyAdmin has remote connection permissions enabled. For more details on how to manage MySQL users, check out our guide on the subject.
Important note: The settings mentioned above will make your MySQL server accessible from the internet or external networks. This is generally not safe and is a bad security practice.
To protect against unauthorized access attempts, it’s important to set up a firewall that only allows connections from specific networks, like your internal one, and blocks all others.
Connect phpMyAdmin to an Existing MySQL Container
The last scenario is when we already have a MySQL/MariaDB container deployed and want to add phpMyAdmin to administer our database through a convenient graphical interface. To achieve this, only one condition must be met—both containers must share the same Docker network (to be visible to each other).
So, first, we must create the Docker network the two containers will share. You can easily create one named, for example, “mysql_network” by executing the following command:
docker network create mysql_networkCode language: Bash (bash)To display a list of available Docker networks, run the following:
docker network lsCode language: Bash (bash)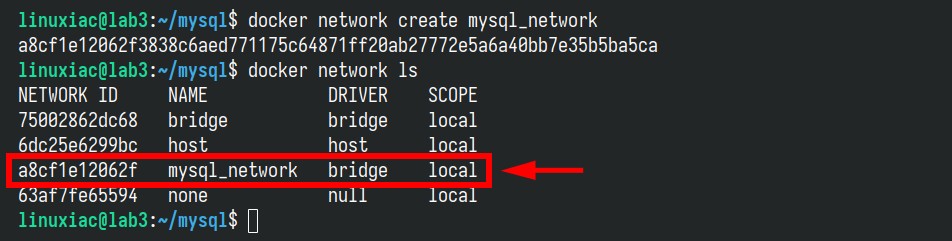
Now, stop the MySQL container and modify its deployment by adding in the service part:
networks:
  - mysql_networkCode language: YAML (yaml)
And define the network at the end of it. The final version should be similar to this:
services:
  db:
    image: mysql:latest
    container_name: mysql
    volumes:
      - dbdata:/var/lib/mysql
    environment:
      MYSQL_ROOT_PASSWORD: mypassword
    ports:
      - 3306:3306
    restart: unless-stopped
    networks:
      - mysql_network

volumes:
  dbdata:

networks:
  mysql_network:
    name: mysql_network
    external: trueCode language: YAML (yaml)
Do the same for the phpMyAdmin container, too, and, of course, ensure you correctly specify the MySQL service name in the “PMA_HOST” option:
services:
  phpmyadmin:
    image: phpmyadmin:latest
    container_name: phpmyadmin
    ports:
      - 8080:80
    environment:
      - PMA_ARBITRARY=0
      - PMA_HOST=db
    restart: unless-stopped
    networks:
      - mysql_network

networks:
  mysql_network:
    name: mysql_network
    external: trueCode language: YAML (yaml)
Now, both containers will share the same network, the “mysql_network” we created earlier. Therefore, they will have visibility to each other.
Finally, run the containers, and you should seamlessly log in to your MySQL instance through phpMyAdmin.
Conclusion
Integrating phpMyAdmin with Docker offers a streamlined and efficient approach to managing MySQL/MariaDB databases.
Whether you’re deploying phpMyAdmin alongside MySQL in Docker containers, connecting to a MySQL server on the host, or integrating with an existing MySQL container, our guide gives you all the answers you need to make it happen.
This saves valuable time and reduces the potential for configuration errors, allowing you to focus more on database management and less on setup complexities.
For more information on the options available when creating your deployment, check out the phpMyAdmin and MySQL documentation on Docker Hub.
Thanks for your time! If you have any questions, please leave them in the comments section below.


Thank you for your post, it helped me!