
Docker is a powerful tool for creating, deploying, and managing containers, making running applications in a consistent environment easier and time-saving. At the same time, Ubuntu is a great and reliable platform, suitable both for development and as a server you can trust for your Docker needs.
Whether you’re a developer eager to containerize your applications or just curious about Docker and its capabilities, you’ve come to the right place. We crafted this guide to help you smoothly install Docker on your Ubuntu 24.04 LTS system, ensuring you can start containerizing your applications quickly.
However, if you opt for Docker Desktop instead, an intuitive and powerful GUI application that makes it easier to create, manage, and deploy Docker containers on systems with desktop environments, we’ve got you covered.
Our detailed guide, “How to Install Docker Desktop on Ubuntu 24.04 LTS,” will help you set it up quickly.
Installing Docker on Ubuntu 24.04 LTS (Noble Numbat)
Follow the steps outlined below. We’ve thoroughly tested and proven each one to ensure they provide you with the best and most effective solution.
We’ll start with a clarification—several ways to install Docker on Ubuntu 24.04 exist. The most straightforward one is to install it from the Ubuntu repos with a single APT command. However, the main drawback to this approach is that the version available is not always the most recent.
For this reason, this guide will show you how to install Docker on Ubuntu 24.04 from its official repository, where you will always get the latest version.
The best part? It will automatically receive all future software updates as they become available, thus ensuring you always have the latest and greatest. So, let’s get started!
Step 1: Install Required Packages
First, run the two commands below to update the package index and install the prerequisite necessary for adding the new Docker repository, which we will do in a moment.
sudo apt update
sudo apt install apt-transport-https curlCode language: Bash (bash)
Step 2: Add Docker’s Official GPG Key
Next, import the Docker GPG repository key to your Ubuntu system. This security feature ensures that the software you’re installing is authentic.
curl -fsSL https://download.docker.com/linux/ubuntu/gpg | sudo gpg --dearmor -o /etc/apt/keyrings/docker.gpgCode language: Bash (bash)
Step 3: Set Up Docker’s Stable Repository
After importing the GPG keys, we’ll add the official Docker repository to our Ubuntu 24.04 LTS system. This implies that the update package will be made available with the rest of your system’s regular updates if a new version is released.
echo "deb [arch=$(dpkg --print-architecture) signed-by=/etc/apt/keyrings/docker.gpg] https://download.docker.com/linux/ubuntu $(. /etc/os-release && echo "$VERSION_CODENAME") stable" | sudo tee /etc/apt/sources.list.d/docker.list > /dev/nullCode language: Bash (bash)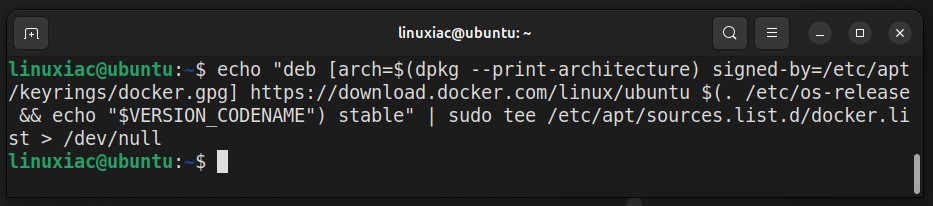
As with the previous command, its execution produces no output. Next, refresh the package list.
sudo apt updateCode language: Bash (bash)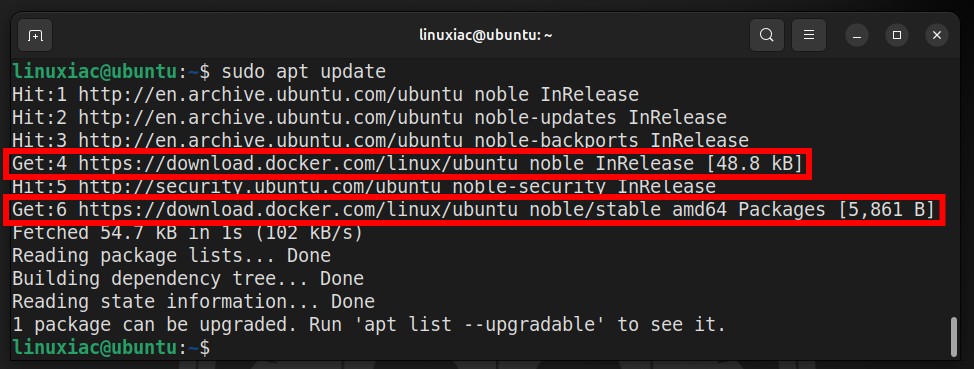
As you can see, our new Docker repository is now available and ready to be used.
Step 4: Install Docker Engine on Ubuntu 24.04 LTS
Run the below command to install the latest up-to-date Docker release on Ubuntu.
sudo apt install docker-ce docker-ce-cli containerd.io docker-buildx-plugin docker-compose-pluginCode language: Bash (bash)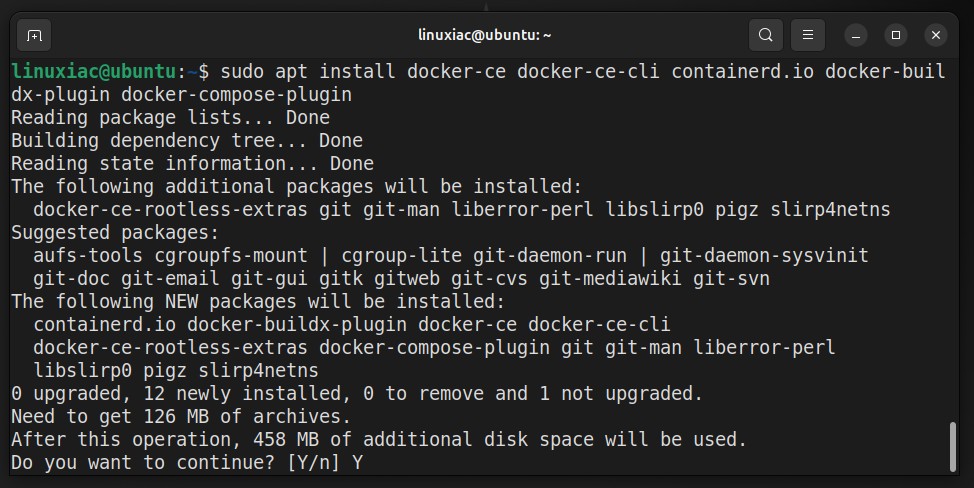
This installs the following Docker components:
- docker-ce: The Docker engine itself.
- docker-ce-cli: A command line tool that lets you talk to the Docker daemon.
- containerd.io: A container runtime that manages the container’s lifecycle.
- docker-buildx-plugin: This extension for Docker enhances the capabilities of building images, mainly focusing on multi-platform builds.
- docker-compose-plugin: A configuration management plugin that helps manage multi-container Docker applications using a single YAML file.
That’s all! Docker should now be installed, service enabled, and set to start automatically on boot. In addition, check its status using the command below to confirm that everything is as expected:
sudo systemctl is-active dockerCode language: Bash (bash)
Step 5: Verify Installation
The moment of truth. Let’s check if our new Docker installation works correctly by running a simple containerized application called “hello-world.”
sudo docker run hello-worldCode language: Bash (bash)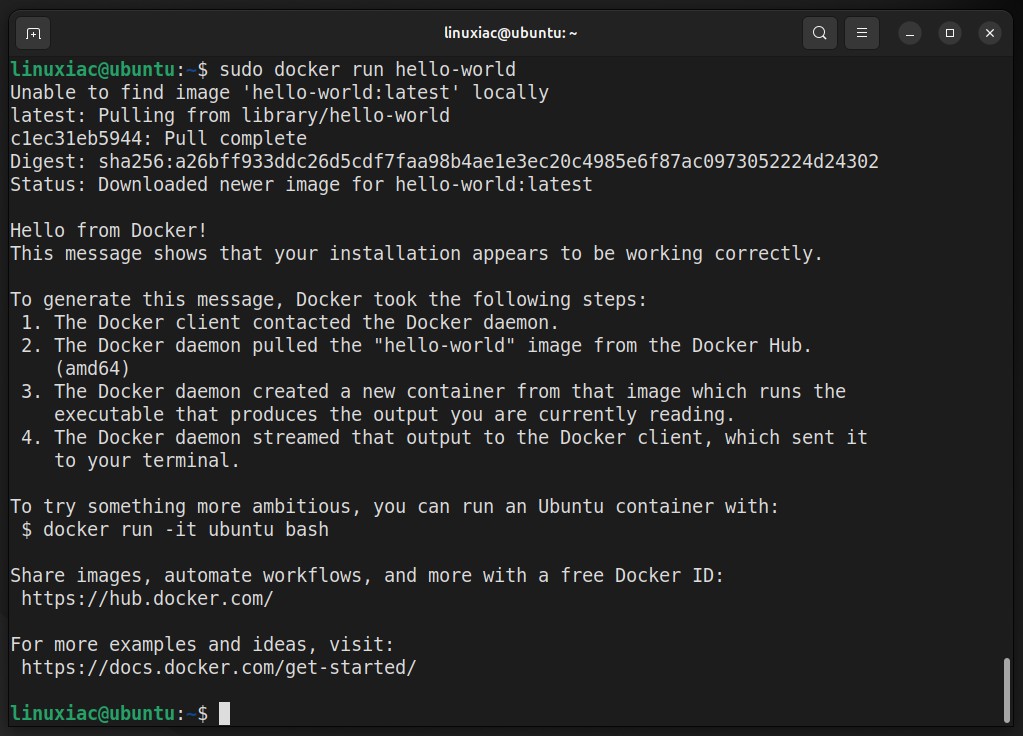
Congratulations! As we can see, everything works properly.
Enabling Non-root Users to Run Docker Commands
So far, you have successfully installed Docker on your Ubuntu 22.04 LTS system. However, only root and users with sudo privileges can execute Docker commands by default.
That means if you attempt to run the docker command without prefixing it with sudo, you’ll get an error message like this:
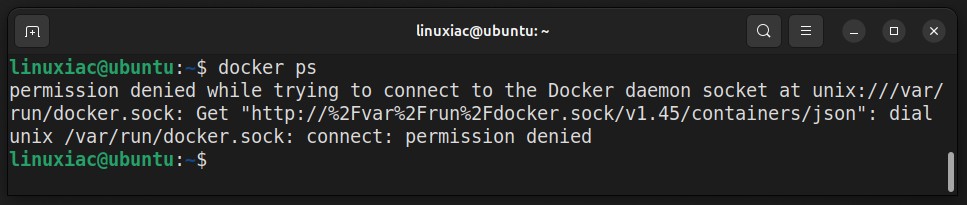
But there is no room for worry. To run Docker commands as a non-root user, add your user to the “docker” group. To do that, type in the following:
sudo usermod -aG docker ${USER}In the above command, “${USER}” is an environment variable that contains your username. To apply for the new group membership, reboot your Ubuntu system. You can then execute docker commands without prefixing them with sudo.

Uninstall Docker Engine
If, for some reason, you decide to remove Docker from your Ubuntu 24.04 system, run the following command first:
sudo apt purge docker-ce docker-ce-cli containerd.io docker-buildx-plugin docker-compose-plugin docker-ce-rootless-extrasCode language: Bash (bash)Then, manually remove the following two directories:
sudo rm -rf /var/lib/docker
sudo rm -rf /var/lib/containerdCode language: Bash (bash)
Conclusion
Following our guide’s steps, you now have Docker successfully installed on your Ubuntu 24.04 LTS system. You’re all set and well-equipped to get on with your Docker projects.
To learn more about Docker, I highly recommend checking out its official documentation.
As always, if you encounter any issues or have questions, let me know in the comments section below. Thank you for following this tutorial, and happy Dockerizing!


Thank you!
Worked like a charm
Isnt this pretty much the same as running the following as root:
curl -sSL https://get.docker.com | sh
then add user to docker group:
sudo usermod -aG docker $USER
then logout and log back in to refresh permissions.
regards 😀
Clear and precise. Thanks.
Great write-up. I would just like to note that you don't need to reboot the system after adding your user to the docker group. You simply need to log out of the system and then back in to refresh the permissions.
Greate. work perfectly
It worked without problem. Thank you
ty <3
superb instruction.
Awesome write up!! One question on installation options – Do you have any suggestions on how to use a separate hard disk to store containers and docker images. I have as SSD that is mounted as /u. Is there a way to do this when you install docker vs later?
Great question, Walter, and thanks for asking! Absolutely, it's possible. In fact, you gave me an idea for writing a guide on the subject. 🙂 It's now available: "How to Change Docker's Default Data Directory." Enjoy!
greate. work perfectly
Just awesome
thanks