
Debian is one of the most well-known and respected names in the Linux world, which doesn’t need much of an introduction. As a general-purpose distribution, it’s built a rock-solid reputation for stability and reliability, making it a go-to choice for millions of people—from regular home users to large enterprises.
With all these strengths, you can’t go wrong choosing it for your containerization needs. And if you’re here, it probably means you’ve already made that choice and are ready to get Docker set up. Well, you’re in the right place.
This guide—tested and proven in our lab—will walk you step-by-step through installing Docker on Debian 13 (Trixie). Follow along, and in just a few minutes, you’ll have everything up and running, ready to launch your containers. So, let’s get started.
Install Docker on Debian 13 (Trixie)
Step 1: Refresh the Package Base
First, refresh the packages on your Debian 13 system to ensure you’re using the latest software versions available in the distro’s repos. If there are pending updates, apply them.
sudo apt updateCode language: Bash (bash)
If you’re unsure about using Debian’s APT package manager, I highly recommend checking out our “Linux APT Command in Examples.” Now, back to the topic.
Step 2: Install Prerequisites
First, run the two commands below to update the package index and install the prerequisites necessary to add and use a new HTTPS repository.
sudo apt install apt-transport-https ca-certificates curl gpgCode language: Bash (bash)Step 3: Add Docker’s GPG Repo Key
Before we go any further, I want to clear something up. Docker is available for installation straight from the official Debian repositories. However, one disadvantage of this approach is that the version available is not always the most recent.
That’s why, below, I will approach it a little differently, as I’ll show you how to install Docker on Debian 13 from the official Docker repository. The main advantage is that this way you always get the latest up-to-date version, plus it will automatically receive all future software updates as they become available as part of the regular system updates.
So, let’s now import the Docker GPG repository key. The command below downloads and stores it in a format that the APT package manager can use to verify Docker packages. This security feature ensures that the software you’re installing is authentic.
curl -fsSL https://download.docker.com/linux/debian/gpg | sudo gpg --dearmor -o /usr/share/keyrings/docker.gpgCode language: Bash (bash)
Notice that the command produces no output.
Step 4: Add Docker Repository
With the GPG key imported, it’s time to add the official Docker repository to our Trixie system so you can install and update Docker directly from upstream’s maintained DEB packages.
echo "deb [arch=$(dpkg --print-architecture) signed-by=/usr/share/keyrings/docker.gpg] https://download.docker.com/linux/debian trixie stable" | sudo tee /etc/apt/sources.list.d/docker.list > /dev/nullCode language: Bash (bash)
As with the previous command, its execution produces no output. Then refresh your package list so the package manager knows about the new repository.
sudo apt updateCode language: Bash (bash)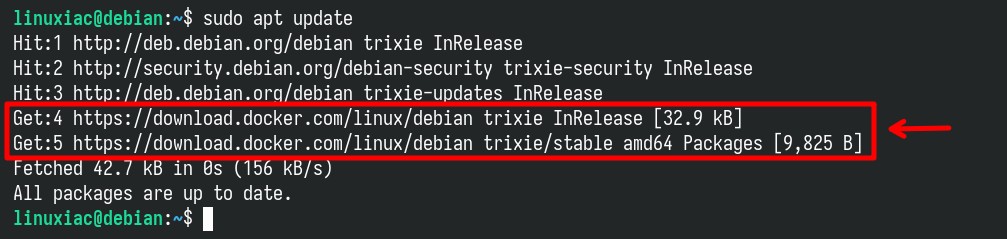
Great. As you can see from the command’s output, the newly added Docker repo is now available, so our Debian 13 system can use it to install packages from it. Additionally, you can also use the command below to verify that the Docker repo was properly added.
apt-cache policyCode language: Bash (bash)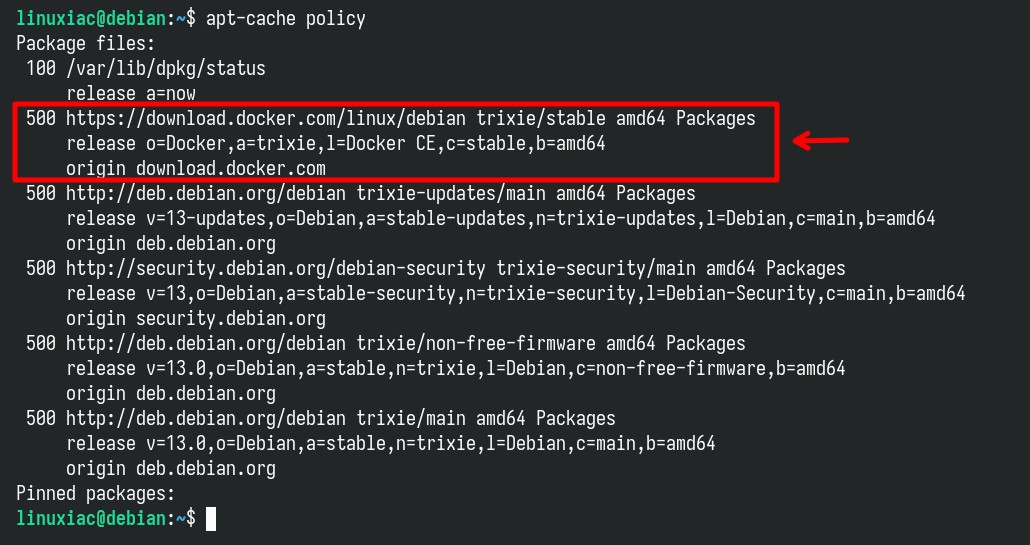
Step 5: Install Docker on Debian 13 (Trixie)
Finally, run the following command to install the latest up-to-date Docker release on Debian 13.
sudo apt install docker-ce docker-ce-cli containerd.io docker-buildx-plugin docker-compose-pluginCode language: Bash (bash)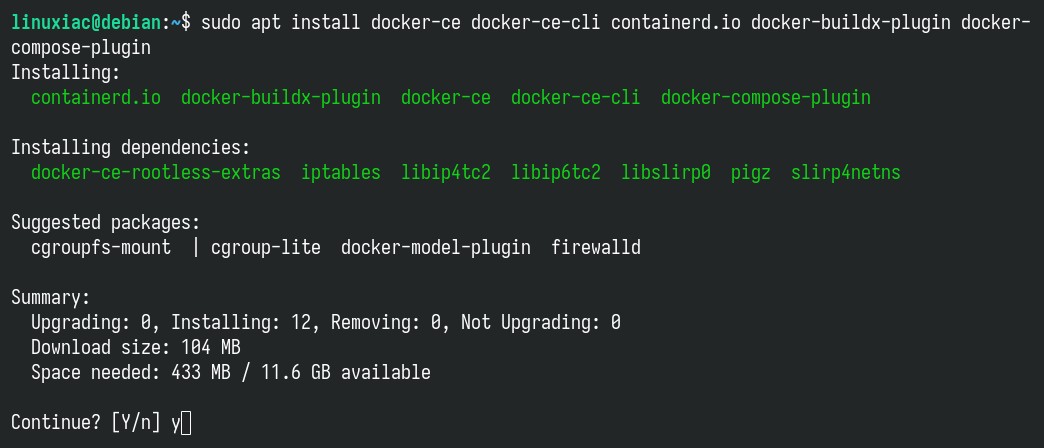
This installs the following Docker components:
- docker-ce: The Docker engine itself.
- docker-ce-cli: A command-line tool that lets you talk to the Docker daemon.
- containerd.io: A container runtime that manages the container’s lifecycle.
- docker-buildx-plugin: This extension for Docker enhances the capabilities of building images, with a focus on multi-platform builds.
- docker-compose-plugin: A configuration management plugin that helps manage multi-container Docker applications using a single YAML file.
Confirm with “Y.” Wait for the installation to finish—it should take no more than 30 seconds.
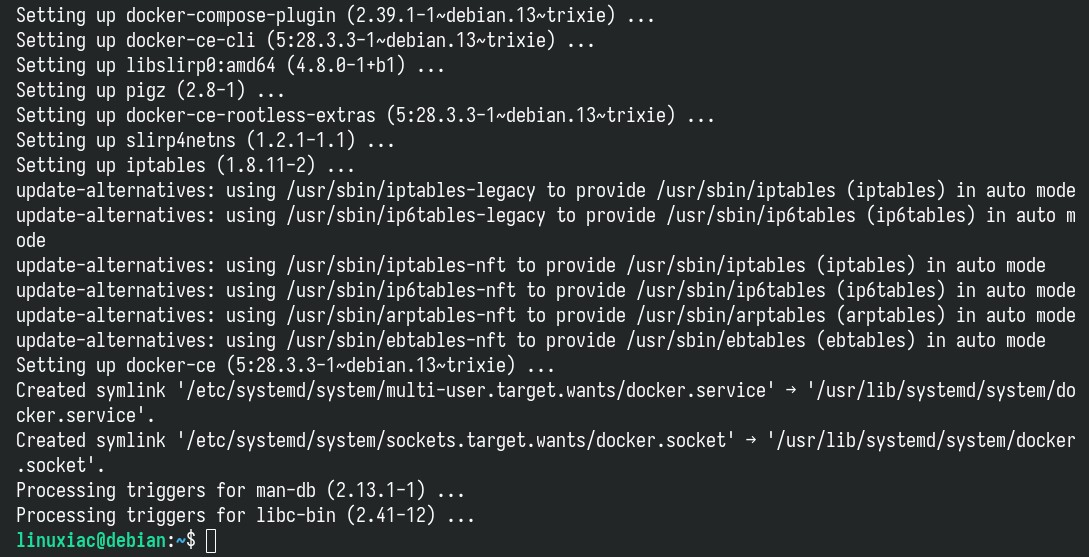
That’s all. Docker should now be installed; the service should be started and enabled to run automatically on boot by default. Let’s verify.
sudo systemctl is-active dockerCode language: Bash (bash)
Step 6: Verify the Docker Installation
We come to the most exciting part. Let’s test if our new Docker installation works correctly by running a simple containerized application called “hello-world.”
sudo docker run hello-worldCode language: Bash (bash)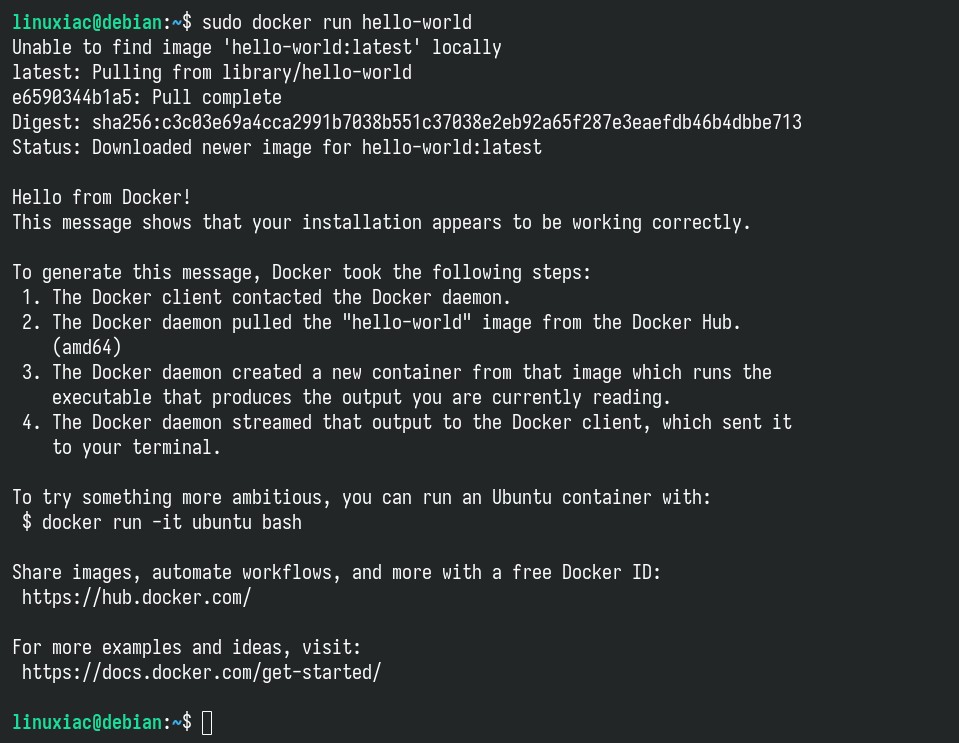
Well done! As we can see, everything works properly.
Enabling Non-root Users to Run Docker Commands
So far, we have successfully installed Docker on Debian 13. However, as you may have noticed, only root and users with sudo privileges can execute docker commands by default.
In other words, if you attempt to run some docker command without prefixing it with sudo, you’ll get an error message like this:

But there is no room for worries. We’ll make things more convenient right away. To run docker commands as a non-root user, you must first add your user to the “docker” group. It is a simple task. To do that, type in the following:
sudo usermod -aG docker ${USER}Code language: Bash (bash)In the above command, “${USER}” is a system environment variable that contains your username. Then, run the following command to activate the changes to the group:
newgrp dockerCode language: Bash (bash)You can then execute docker commands without prefixing them with sudo.

Remember that this is a temporary solution. It will work only for your current terminal session. In other words, if you close the terminal, you will either have to execute the newgrp command above again or prefix docker commands with sudo. To make this change system-wide and to last permanently, reboot your Debian system.
Conclusion
As you can see from this guide, installing Docker on Debian 13 (Trixie) is a simple task and can be completed in minutes with the right guidance. Now, you have a reliable foundation perfectly suited for managing containerized workloads.
To learn more about Docker, check out its official documentation. Additionally, I recommend our detailed guide to expanding your Docker skills and learning how to run and manage multi-container applications using Docker Compose.
Thanks for your time! I hope you find this guide helpful. As always, your feedback and comments are most welcome.


Hi,
I try to install Docker, but I get the following error:
Error: Failed to fetch https://download.docker.com/linux/debian/dists/trixie/pool/stable/amd64/containerd.io_2.2.1-1%7edebian.13%7etrixie_amd64.deb 404 Not Found [IP: 13.227.219.51 443]
This is a clean Debian install. Tried to search on the internet, but can’t find a solution. Anyone any idea?
Regards,
Kay
From a noob to docker and containerisation, this is the simplest tutorial I have found for Debian 13. Thank you 🙂
Dear Bobby,
great article so far. But please keep in mind (i quote https://wiki.debian.org/Docker):
“Docker has no equivalent to sudo’s password check, so an arbitrary-code-execution exploit against a user in the docker group effectively grants the attacker root access. Therefore, the safer choice is to never add a user account — even your own — to the docker group, so that Docker commands can only be used via sudo.”
Cheers, Kai
Great tutorial, thanks. A comment on the last section, talking about the newgrp command : it is quite wrong. The newgrp command allows to join the group immediately, but you sure don’t need to reboot the computer to make it permanent. Just exit your terminal and launch a new one and voila…
Thanks, it seemed to work well, while the regular procedures I tried did not work and got stuck.
At least it said succesfull in the end, and I was able to run hello world example.
One remark though:
During one of the steps I got a text “popup” (installation type of text message in a full screen colored background) indicating that it expected another kernel than that was running, and this would not be automatically handled/installed. so I needed to reboot the system, which I did but nothing seemed to have changed or installed.
Merci, cela fonctionne à merveille.
Salutations
Thanks for this article, it made it easier for me.
I just had problems with the sources file.
Maybe you should use `apt modernize-sources`to use the new format.
I get this message ‘sudo: gpg: command not found’ when running curl -fsSL https://download.docker.com/linux/debian/gpg | sudo gpg –dearmor -o /usr/share/keyrings/docker.gpg
Yeah, I forgot to include the gpg package in Step 2 as a prerequisite. The guide’s been updated now.
sudo apt install gpg
I followed this procedure on Debian minimal CLI installation in a KVM virtual machine configured to get its local own IP (bridge mode). It looks like Docker messed up this networking setup, as the VM stopped getting its IP from my DHCP server and couldn’t connect to internet anymore. Any hints why this might be? Never had this problem on Debian 12 VMs.