Caddy is a free, security-focused, HTTP/2-enabled web server written in Go, designed to be simple, efficient, and portable. It offers modern capabilities such as virtual host support, reverses proxy functionality, and so on. Furthermore, Caddy is the first web server to automatically obtain and renew SSL/TLS certificates using Let’s Encrypt.
Yes, Nginx has reigned supreme as the preferred choice for web servers in recent years due to its lightning-fast performance and many features. However, despite being a relatively new project, Caddy’s popularity has skyrocketed due to characteristics like ease of use, speed, and native SSL support. So, it is quickly becoming the web server of choice for many developers and system administrators.
If you’re new to Caddy setup and management, this process can seem daunting, but don’t worry – we’ve made it easy for you. By following the steps in this guide, you’ll be able to quickly and easily get your Caddy server up and running with PHP 8.1 support on Ubuntu 22.04 LTS to make setting up your website a breeze. So, let’s get to work.
Step 1: Install Caddy Web Server on Ubuntu 22.04
To begin, you must add Caddy’s official external repository to your system, as the web server is not included by default in Ubuntu repositories. But first, you’ll need to install some package dependencies.
sudo apt install -y debian-keyring debian-archive-keyring apt-transport-httpsThen, run the following two cURL commands to add the Caddy repository:
curl -1sLf 'https://dl.cloudsmith.io/public/caddy/stable/gpg.key' | sudo gpg --dearmor -o /usr/share/keyrings/caddy-stable-archive-keyring.gpg
curl -1sLf 'https://dl.cloudsmith.io/public/caddy/stable/debian.deb.txt' | sudo tee /etc/apt/sources.list.d/caddy-stable.listCode language: PHP (php)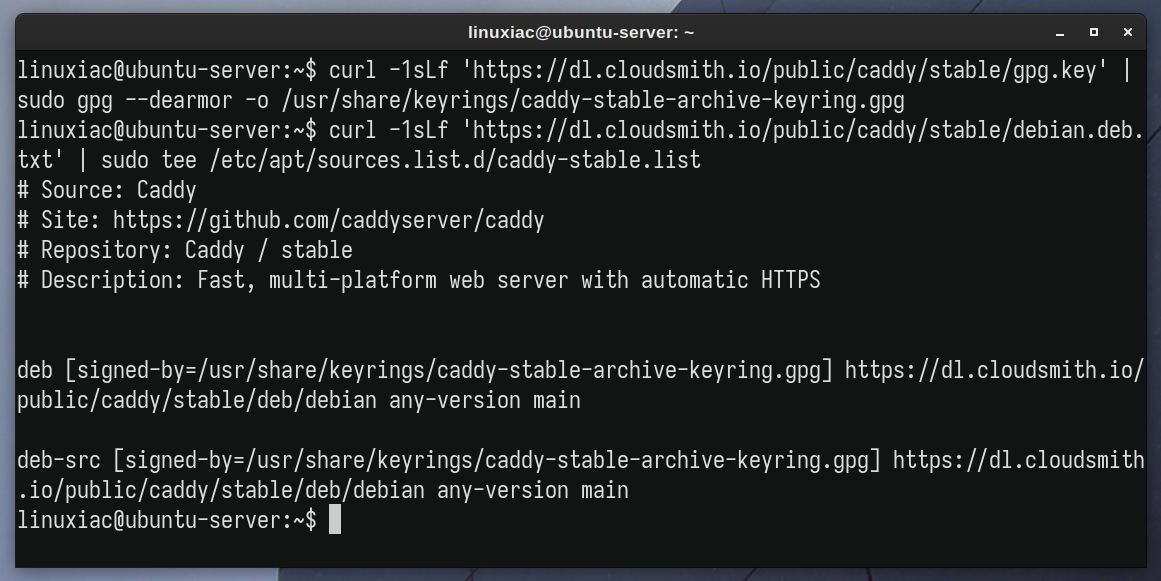
Finally, refresh the package list and install the Caddy web server on your Ubuntu 22.04 system.
sudo apt update
sudo apt install caddy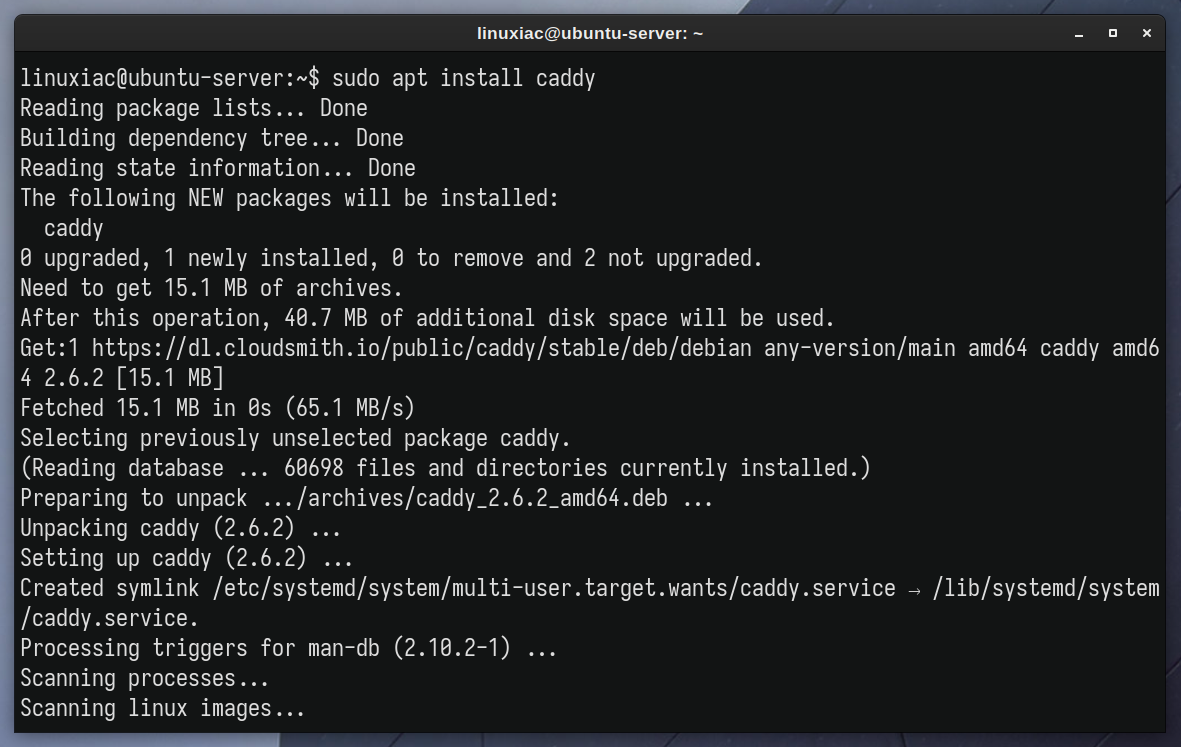
You can now use the command below to check the status of the Caddy service; it should confirm that Caddy is up and running.
sudo systemctl status caddy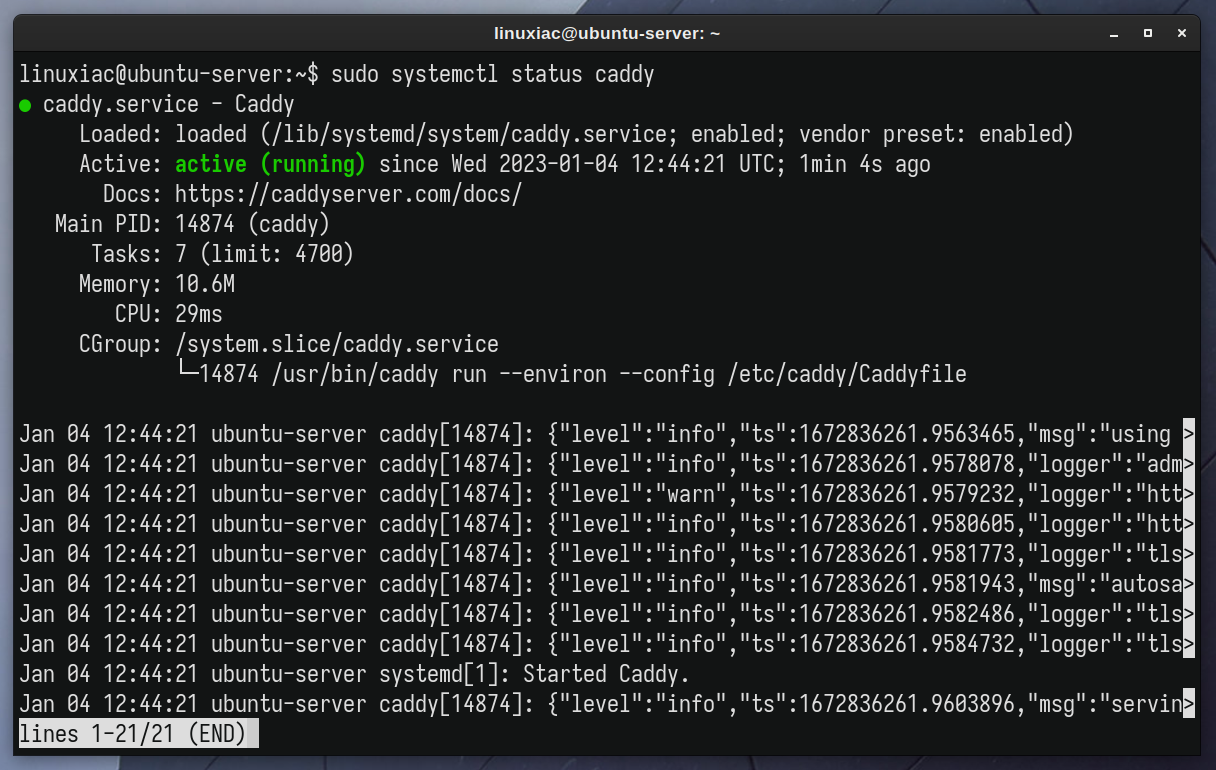
Step 2: Enable HTTP(S) Firewall Ports
The next step is to ensure that the firewall is not blocking access to the web server and, if it is, to add the necessary rules to enable traffic on ports 80 (HTTP) and 443 (HTTPS).
First, check the firewall’s current status. You can skip the next if the result is “inactive,” as shown below.
sudo ufw status verbose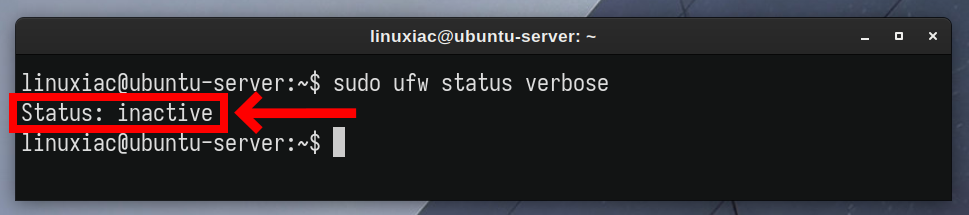
However, if the result is different, the firewall is active, and you must add the following rule to allow connections on ports 80 and 443 to the Caddy web server.
sudo ufw allow proto tcp from any to any port 80,443Code language: JavaScript (javascript)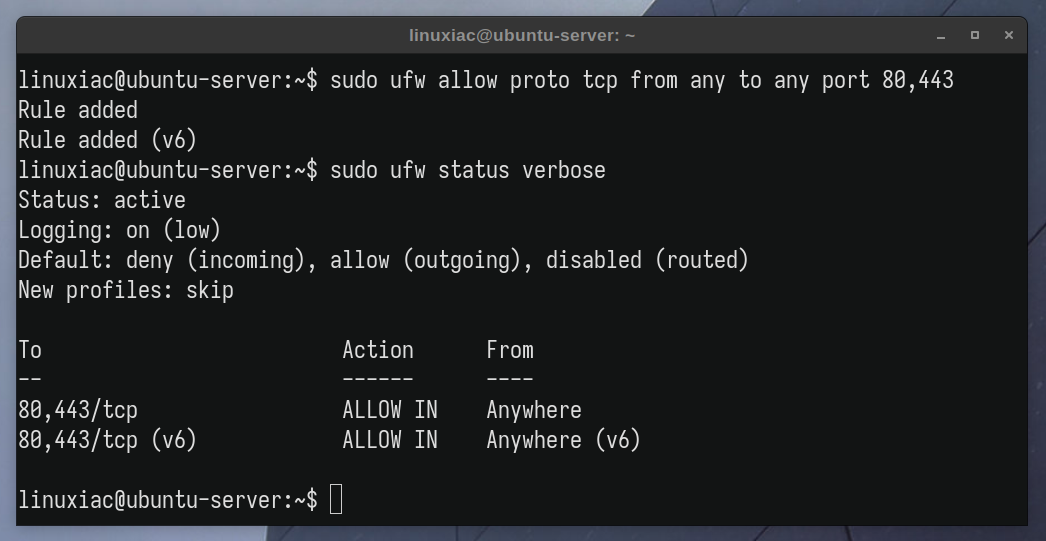
Now, point your browser to the domain Caddy will serve, and Caddy’s default web page will welcome you. We’ll use the temporarily created subdomain “caddy.tmplinux.com” for this guide. Of course, replace it with the one for your case.
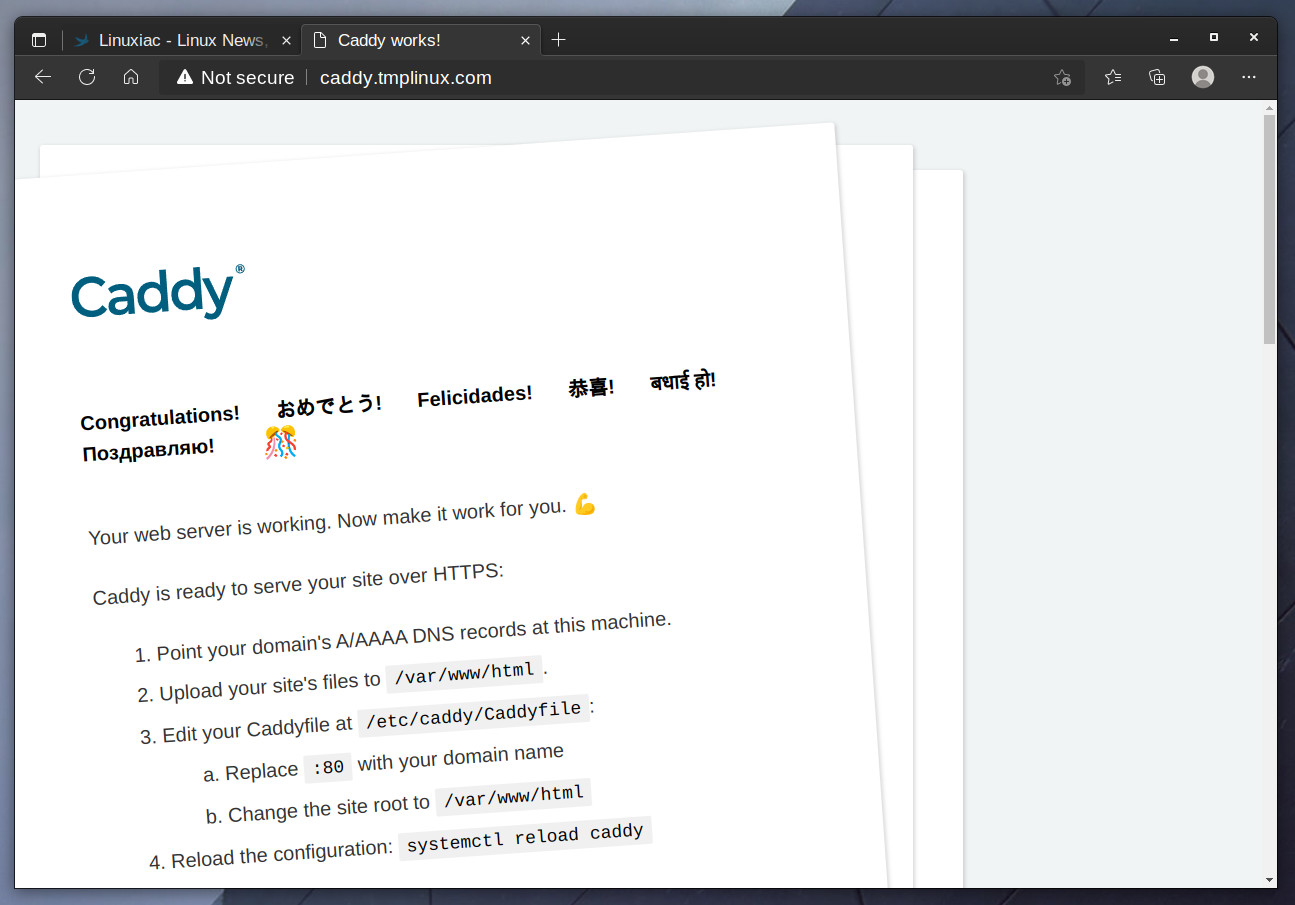
As you can see, Caddy is up and running and working as expected. In the following steps, we will add PHP support, create a virtual host for our domain, and automatically obtain a free SSL Let’s Encrypt certificate.
Step 3: Install PHP on Ubuntu 22.04
To enable PHP support in Caddy, you should first install PHP-FPM on your Ubuntu 22.04 system, which Caddy will use to execute PHP files. In addition, you need to install some of the most commonly used PHP modules to have complete and full-featured PHP functionality.
sudo apt install php-fpm php-mysql php-gd php-cli php-curl php-mbstring php-zip php-opcache php-xml php-xmlrpc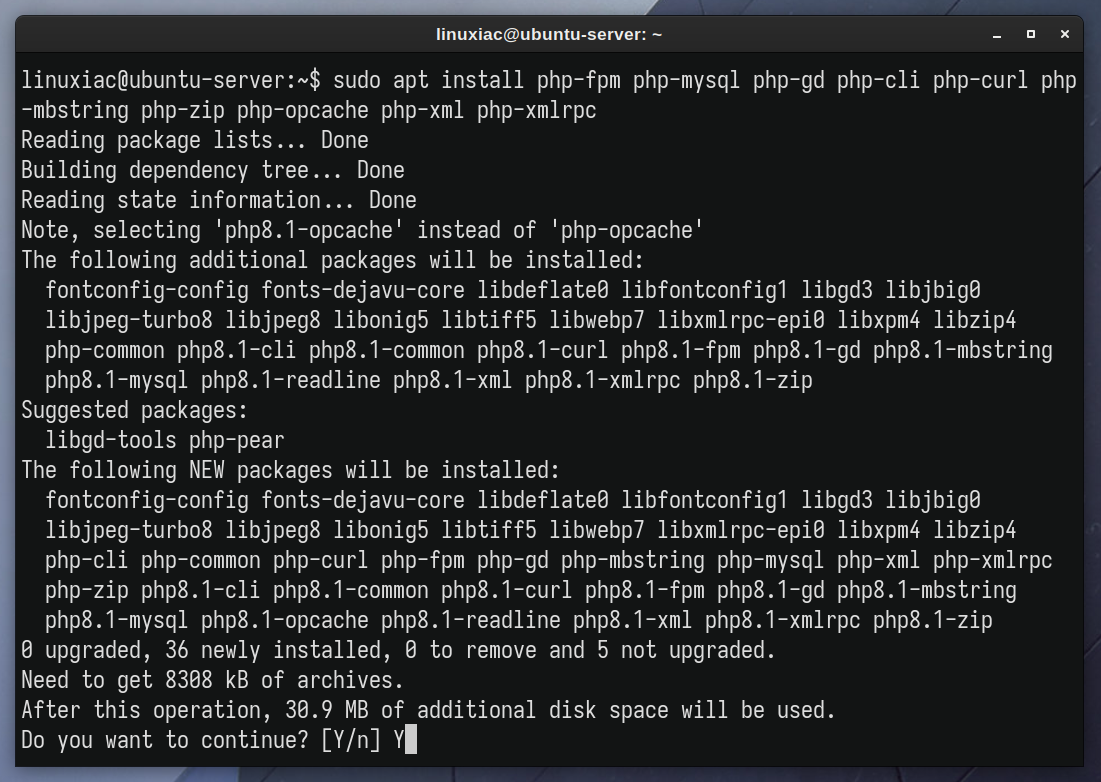
Step 4: Configure Caddy to Use PHP and SSL
Before proceeding, create the directory in which your website files will be housed. In other words, the one you’ll point Caddy to for your website’s root directory. For example, “/srv/www/caddy.”
sudo mkdir -p /srv/www/caddyWe’ve reached the most enjoyable portion of the process, where the Caddy web server shines in all its glory – the configuration. System administrators who are used to the complexities of Apache or Nginx configurations will be fascinated. In addition, the ease with which you can set up Caddy with PHP support and automatic SSL certificate issuance on your Ubuntu 22.04 system is remarkable.
Open the Caddy configuration file, “Caddyfile,” using your preferred text editor, remove all lines and add the following ones. Don’t be worried if you need help understanding what they’re for. I’ll explain in more detail below.
sudo vim /etc/caddy/Caddyfilecaddy.tmplinux.com {
root * /srv/www/caddy
tls bobby@linuxiac.com
encode gzip zstd
php_fastcgi unix//run/php/php8.1-fpm.sock
}Code language: JavaScript (javascript)The final result should look like this:
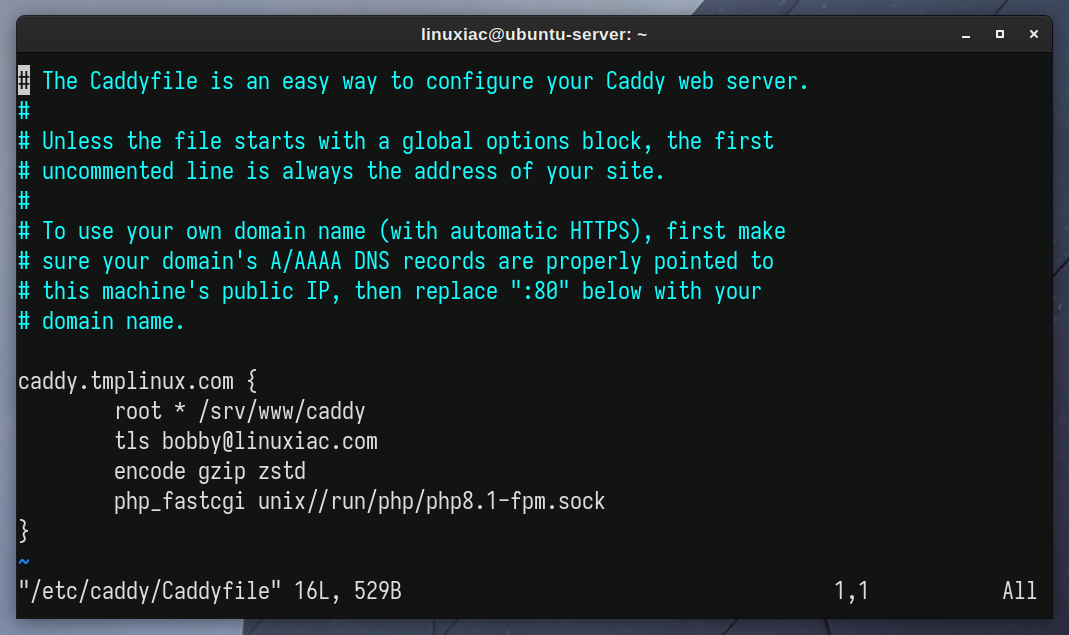
caddy.tmplinux.com: The domain name that the Caddy web server will serve.root * /srv/www/caddy: The full path to the root directory containing your website files.tls bobby@linuxiac.com: Instructs Caddy to automatically issue a free Let’s Encrypt SSL certificate, and the e-mail address to which notifications intended for the owner will be sent is specified.encode gzip zstd: Specifies the use of compression for fast performance.php_fastcgi unix//run/php/php8.1-fpm.sock: The path to the socket file where the PHP-FPM service listens.
Everything is ready. Save the file and exit. All that is left is to restart the Caddy service to apply the new configuration settings.
sudo systemctl restart caddyStep 5: Verify Caddy PHP and SSL Support
You have completed the installation of Caddy with PHP and SSL support on Ubuntu 22.04. So, let’s create a test PHP file to verify that PHP-FPM works and is successfully integrated with Caddy.
echo "<?php phpinfo(); ?>" | sudo tee /srv/www/caddy/index.phpCode language: HTML, XML (xml)Finally, you got to the most fun part of the process: enjoying the results of your effort. So, let’s load the domain address into a browser, in our case, “caddy.tmplinux.com.”
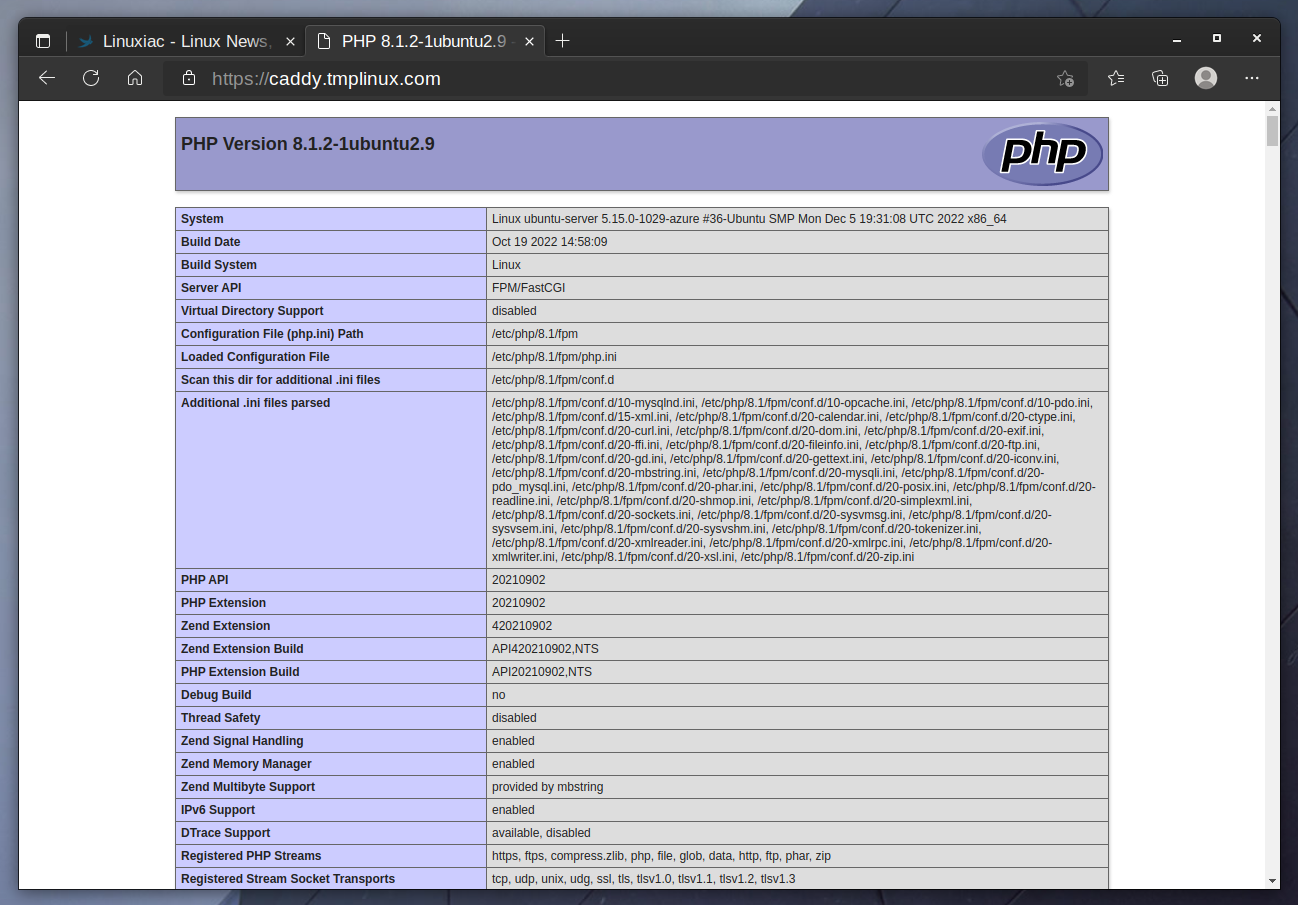
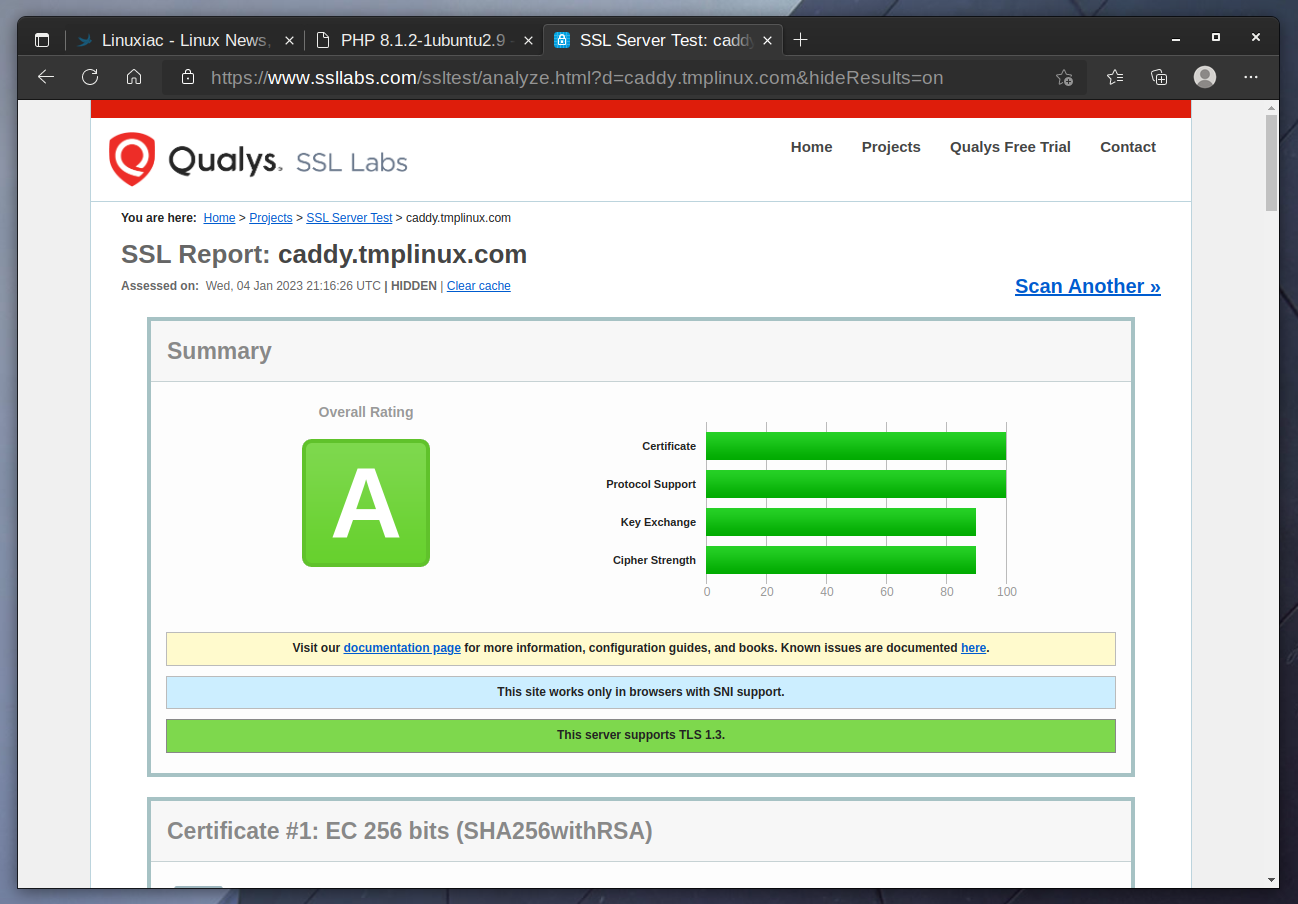
Good job! As you can see, a web page with complete information about PHP installation appears. Caddy has also automatically issued an SSL certificate for the domain, making communication to the website secure. But how safe is the combination of Caddy and the Let’s Encrypt certificate? Let’s check it at Qualys SSL Labs. Yes, the maximum possible score!
Finally, I’d want to make a necessary clarification. Caddy cannot issue an SSL certificate if your server is behind a proxy service provided by Cloudflare, DigitalOcean, or similar services due to the specifics of how the traffic is proxied.
In other words, Caddy must be precompiled with some additional modules to use this feature. The procedure is simple, but because it is outside the scope of this article, it will be detailed in a separate one.
Conclusion
This guide showed you how to install the Caddy web server with PHP 8.1 and SSL support on Ubuntu 22.04 LTS, so PHP-based web apps can run on your server. The certbot tool is another option for obtaining a free Let’s Encrypt SSL certificate. Our how-to guide will show you how.
Caddy comes with strong SSL support embedded directly into its core. In addition, it automatically issues SSL certificates and securely configures the SSL setup. So, please check the project’s website and documentation for additional in-depth information about Caddy.
Overall, Caddy is a reliable Nginx alternative. Installing it with PHP 8.1 support on Ubuntu 22.04 and obtaining a Let’s Encrypt SSL certificate is simple and efficient, making it an excellent choice for those looking to set up a fast, secure, and reliable web server on their Ubuntu system.