
AlmaLinux has become popular for those seeking a stable and secure Linux distribution, especially in light of the CentOS 7 End-of-Life (EOL).
Many users and businesses are now looking for reliable alternatives that offer long-term support and compatibility with the Enterprise Linux ecosystem, where AlmaLinux plays a key role.
If you’ve already migrated your CentOS 7 system to AlmaLinux 8, you’re probably looking for a guide to walk you through the steps to jump from version 8 to the latest up-to-date AlmaLinux 9. Well, you’ve come to the right place!
This guide will cover everything from preliminary checks and backup strategies to the actual upgrade process. So, let’s get started.
Step 1: Take System Backup
First, let’s ensure all your important data is safe. Before doing anything else, we strongly recommend making a full system backup so that if something goes wrong, you can restore your system with all the vital data to its previous state.
However, if you do not feel like taking the above approach, you can instead use a command like the one shown below, which will archive all of the more critical directories and their contents in a tar.gz archive.
sudo tar czf /alma8-data.tar.gz \
     --exclude=/alma8-data.tar.gz \
     --exclude=/dev \
     --exclude=/mnt \
     --exclude=/proc \
     --exclude=/sys \
     --exclude=/tmp \
     --exclude=/media \
     --exclude=/lost+found \
     /Code language: Bash (bash)
Feel free to add more “–exclude=” parameters if needed. Finally, the command creates a backup of all files in the “alma8-data.tar.gz” file located on the root partition (/), which you should ideally transfer to another computer or drive, for example, using the SCP command.
Step 2: Update All Software
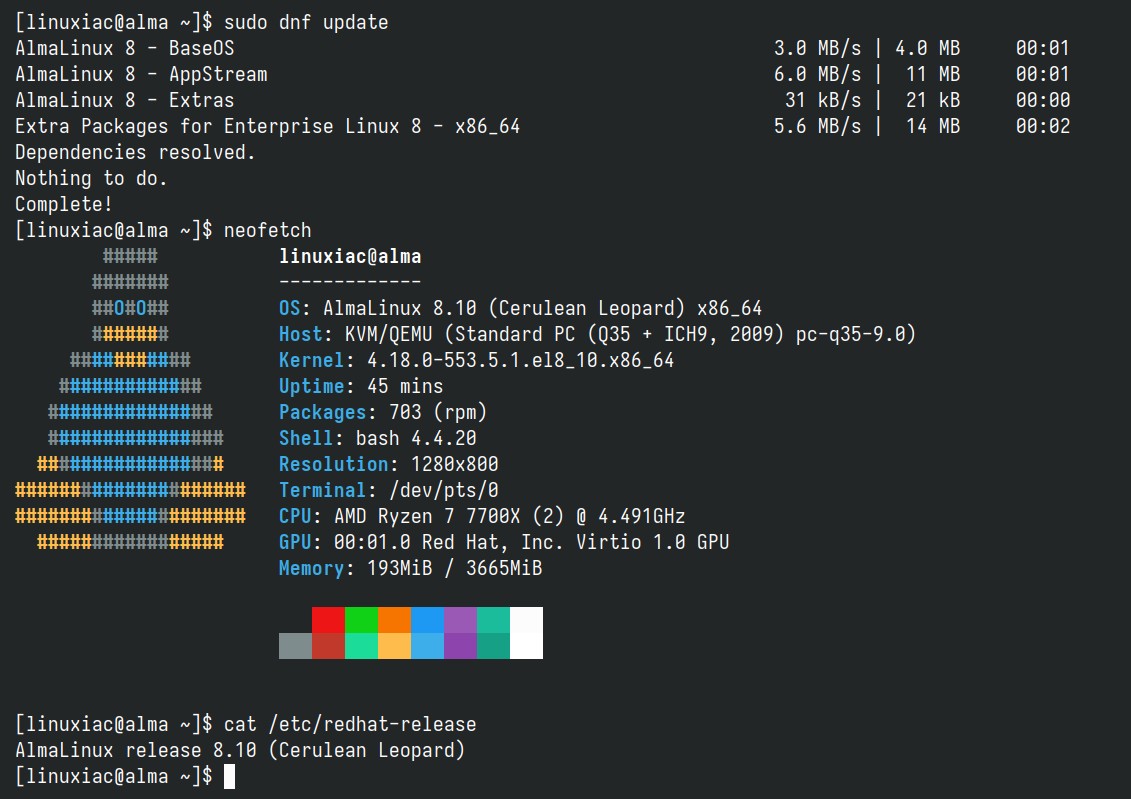
Ensure you have a fully updated Alma 8 system. Open the terminal app and type the following command:
sudo dnf updateCode language: Bash (bash)If there are any pending updates, install them. The result should be a fully up-to-date system with no packages waiting to be updated. Here is our AlmaLinux 8 system before starting the migration process to AlmaLinux 9.
Step 3: Migrate AlmaLinux 8 to AlmaLinux 9
Before we start, let’s say a few words about the fantastic tool that will help us with the migration: ELevate. Developed by AlmaLinux, it supports migrations between major versions of Red Hat Enterprise Linux forks (Alma, Rocky, Oracle), allowing users to migrate from CentOS 7.x to 8.x versions of the RHEL derivative or upgrade from 8.x to 9.x within the same. For more information, visit the project’s page.
Step 3.1: Install the ELevate Tool
The first step in the upgrade process is installing the “elevate-release” package on your current Alma 8 system.
sudo yum install -y http://repo.almalinux.org/elevate/elevate-release-latest-el$(rpm --eval %rhel).noarch.rpmCode language: Bash (bash)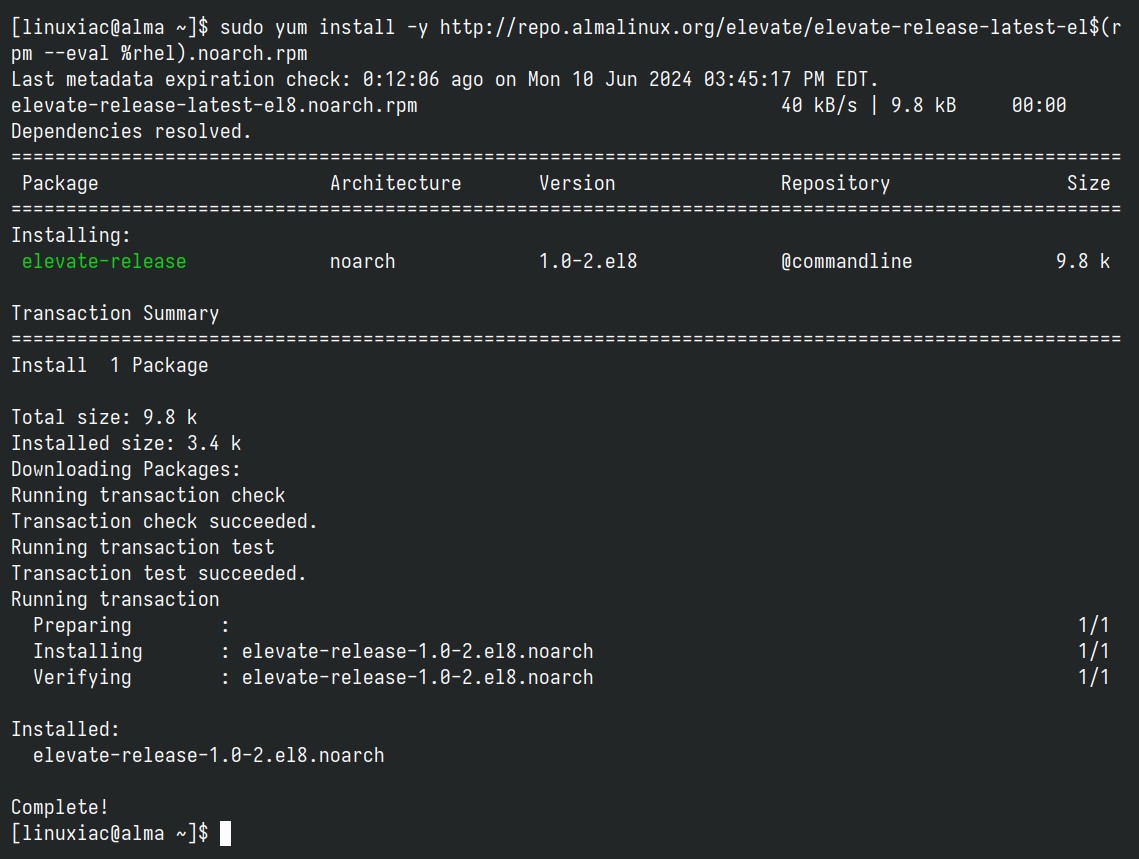
Step 3.2: Install Leapp and Migration Data
The migration process is based on a combination of Red Hat’s Leapp, a tool designed to facilitate in-place upgrades of RHEL systems from one major version to another, and a community-created library containing the migration metadata set. So, let’s install them:
sudo yum install -y leapp-upgrade leapp-data-almalinuxCode language: Bash (bash)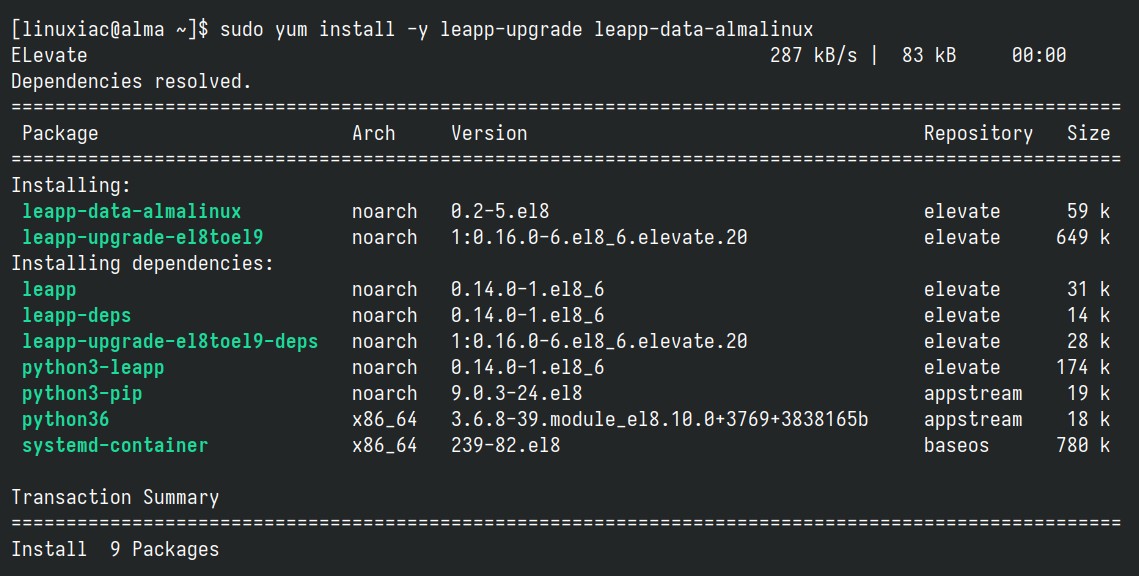
Step 3.3: Make Some Adjustment
However, issues can sometimes arise with SELinux and Firewalld settings during an upgrade. To proactively prevent yourself from such problems, we’ll take several steps.
Open the “/etc/sysconfig/selinux” file, set the “SELINUX” option to “disabled” as shown below, then save the file and exit.
sudo vim /etc/sysconfig/selinuxCode language: Bash (bash)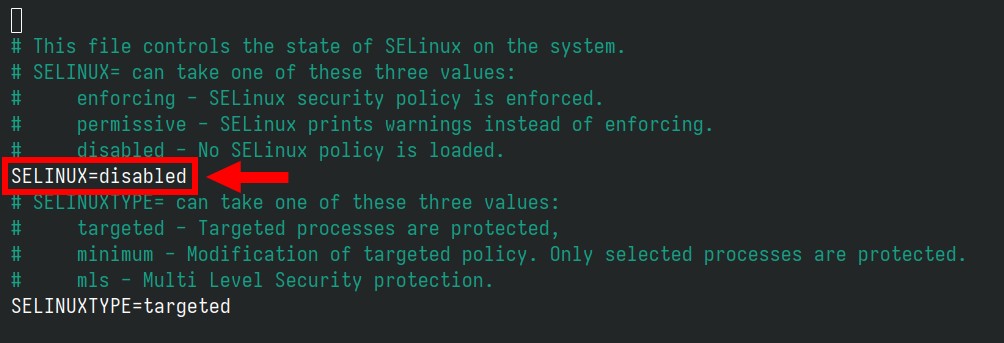
Then, open “/etc/firewalld/firewalld.conf” and set the “AllowZoneDrifting” option to “no.”
sudo vim /etc/firewalld/firewalld.confCode language: Bash (bash)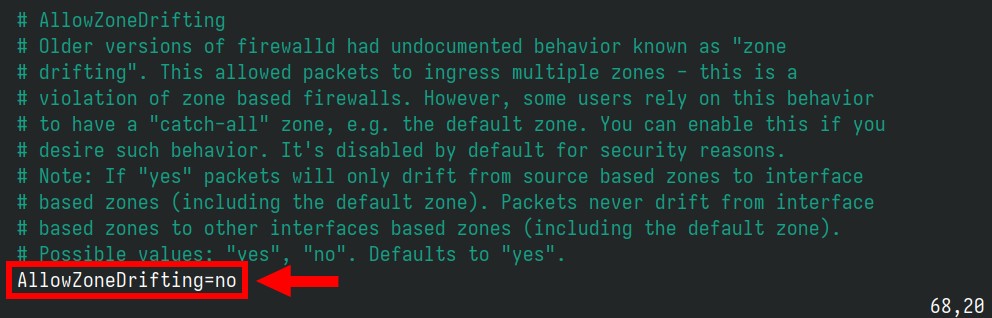
Finally, save the file, exit, and reboot your AlmaLinux 8 system for the changes to take effect.
sudo rebootCode language: Bash (bash)Step 3.4: Start Pre-Upgrade Checks
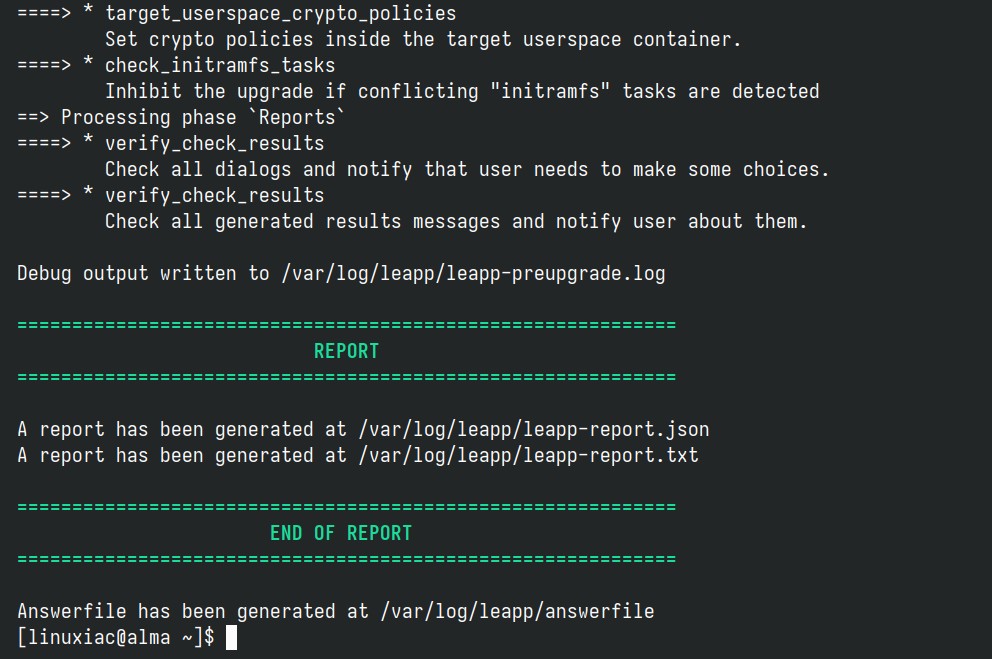
The next step is to start a pre-upgrade check. The command below verifies server compatibility without making any actual changes and creates a “/var/log/leapp/leapp-report.txt” file that contains possible problems and recommended solutions:
sudo leapp preupgradeCode language: Bash (bash)Once the command is complete, the output should look like the one below, i.e., everything should be green.
However, if for some reason the check fails and you get red error messages, according to the official documentation, depending on the case, the three commands below solve the issue in most cases. Execute them, then rerun sudo leapp preupgrade.
sudo rmmod pata_acpi
echo PermitRootLogin yes | sudo tee -a /etc/ssh/sshd_config
sudo leapp answer --section remove_pam_pkcs11_module_check.confirm=TrueCode language: Bash (bash)
Step 3.5: Start the Actual Migration from AlmaLinux 8 to 9
Run the following command to migrate your AlmaLinux 8 system to AlmaLinux 9.
sudo leapp upgradeCode language: Bash (bash)The command downloads and stores the necessary packages needed for the upgrade in a temporary folder, but the upgrade hasn’t been started yet. That will happen in the next step.
Moreover, now is the perfect time to grab a coffee and settle in because the upgrade process will take some time, depending on your internet connection speed.
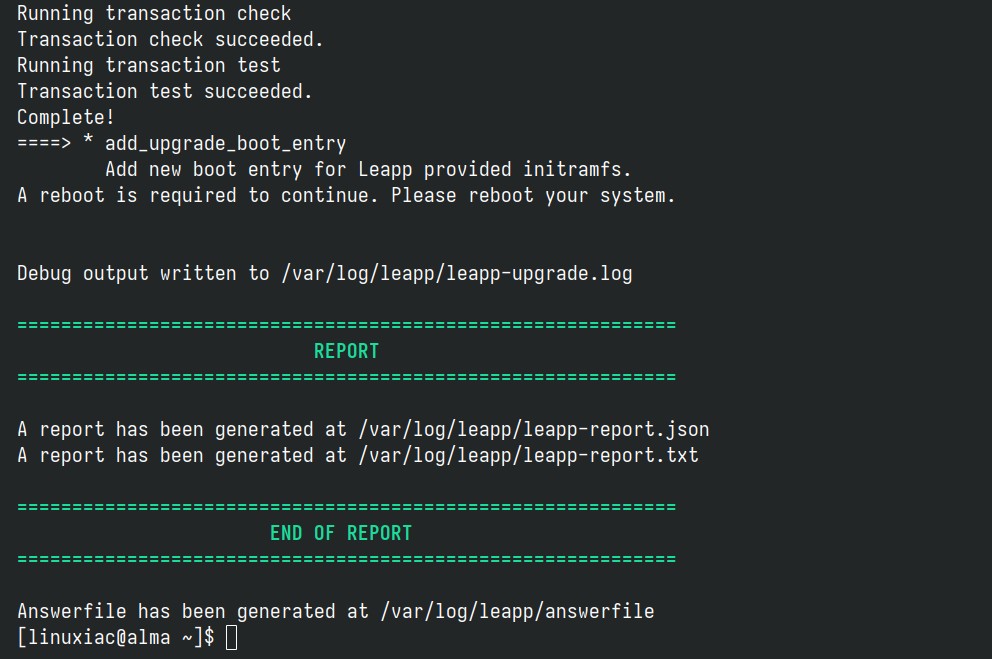
Once the process is completed, you’ll be offered to reboot the system. Okay, the moment of truth!
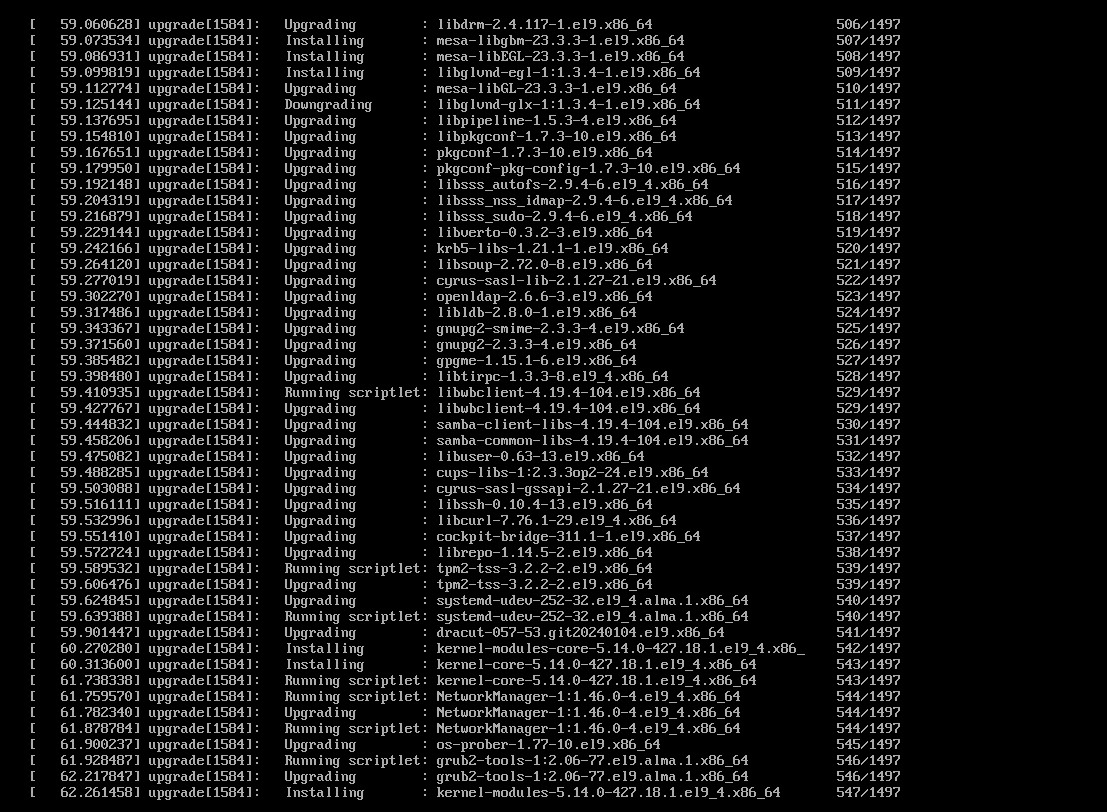
sudo rebootCode language: Bash (bash)Since the package upgrades involve a lot of background activity, the process might take a while. Please be patient if you cannot access the terminal to track these changes.
Depending on your hardware’s capabilities and the number of updated packages, it could take anywhere from a few minutes to half an hour.
In the final loop, the system will automatically reboot again, and the GRUB bootloader will greet you. The list should now include the Linux kernel 5.14 used by AlmaLinux 9 (Seafom Ocelot).
At this point, it’s time to give yourself a big pat on the back because, just like that, you’ve successfully transitioned your system from AlmaLinux 8 to 9. I’m sending you a big congrats, too!
Step 4: Check the OS Version (Optional)
To ensure everything went according to plan, why not take a quick peek at the OS version?
cat /etc/redhat-releaseCode language: Bash (bash)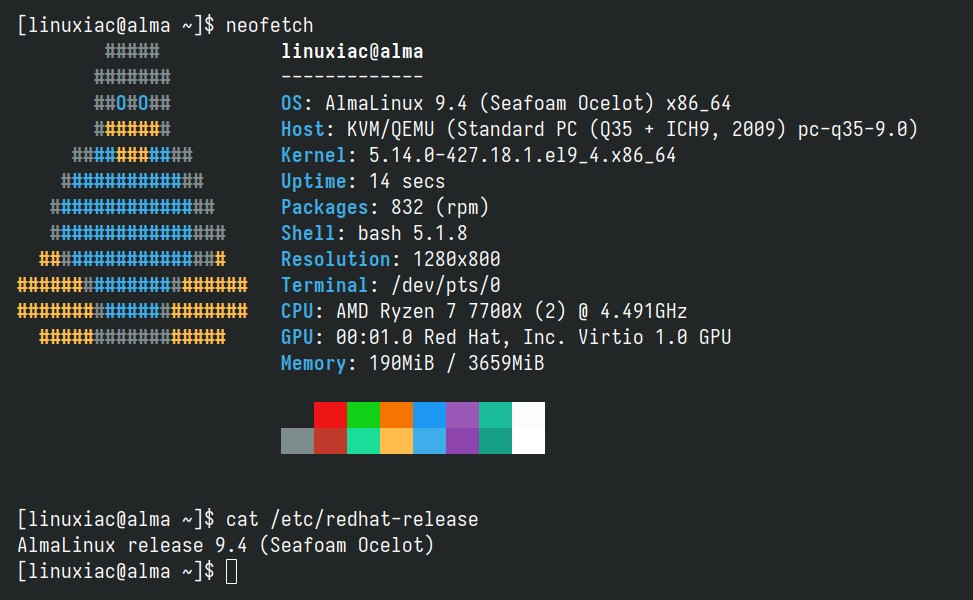
As you can see, everything went very smoothly, and our system has been upgraded to AlmaLinux 9.4, the most current version available at the time of this writing.
Conclusion
Upgrading from AlmaLinux 8 to 9 is straightforward, and by following our detailed guide, you can ensure a smooth transition. So, congratulations! Your system is now more robust and secure, ready to meet current and future demands.
I try to make this guide as simple as possible. Thanks for using it! Please share your thoughts in the comments box below. For more information, visit the Alma’s documentation.


Thanks, works. 1/1/2025
I did all the steps. got no errors yet it doesn't upgrade the OS.
Thank you for taking the time to put together this excellent concise article. Been a Unix/Linux software engineer for over 40 years but still picked up on the usefulness of leapp. The worse thing that ever happened to Red Hat and its variants is when they introduced Selinux. It is often the first thing to get disabled and replaced with other security measures.
Disabling SELinux is never good advice, not temporarily and especially not when you don't tell users to re-enable it post-upgrade. It's there for a reason, and tools designed to handle any issues with it have improved massively in recent years, there is no excuse for switching off one of your system's primary security defences.
Please do not propagate bad advice like this, if you're a Senior Sysadmin/Dev-Ops professional as claimed you should know better.
Thanks for this awesome how-to. It worked like a charm!