If you’re venturing into the world of containerization and looking for an efficient way to deploy applications, Docker is the tool you need. But what’s better than harnessing the power of containerization on a distro that keeps you on the cutting edge?
Arch’s rolling release nature ensures that you always work with the latest software, a significant advantage for developers who want to stay ahead of the curve.
In this guide, we’ll go through a detailed, step-by-step process to install Docker on Arch Linux, enabling you to leverage container technology for your projects effortlessly.
Prerequisites
Before we start, ensure that you have:
- A running Arch Linux system.
- A user account with
sudoprivileges.
Step 1: Update Your System
First, it’s a good practice to update your system to ensure all existing packages are up to date. This minimizes compatibility issues. Open your terminal and run the following Pacman command:
sudo pacman -SyuCode language: Bash (bash)This command will fetch the latest package databases and upgrade all the installed packages to their latest versions.
Step 2: Install Docker on Arch Linux
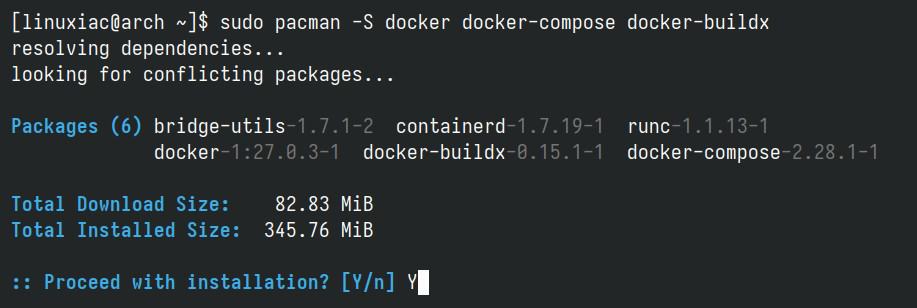
Installing Docker on Arch is straightforward, thanks to the availability of Docker in the official Arch repository. Execute the following command:
sudo pacman -S docker docker-compose docker-buildxCode language: Bash (bash)
As you’ve noticed, in addition to the Docker itself, we’re installing a few additional helpful components, specifically:
- docker: The Docker engine itself.
- docker-compose: A configuration management tool to orchestrate the creation and management of Docker multi-container deployments using compose files.
- docker-buildx: A CLI tool that extends the native Docker build with many new features, allowing you to build container images for multiple platforms.
That’s all! Docker should now be installed; however, there are a few minor things to do before using it.
Step 3: Start and Enable Docker Service
To ensure Docker starts automatically at boot, enable and start the service:
sudo systemctl enable --now docker.serviceCode language: Bash (bash)
Let’s check its status.
sudo systemctl is-active docker.serviceCode language: Bash (bash)
Step 4: Verify Installation
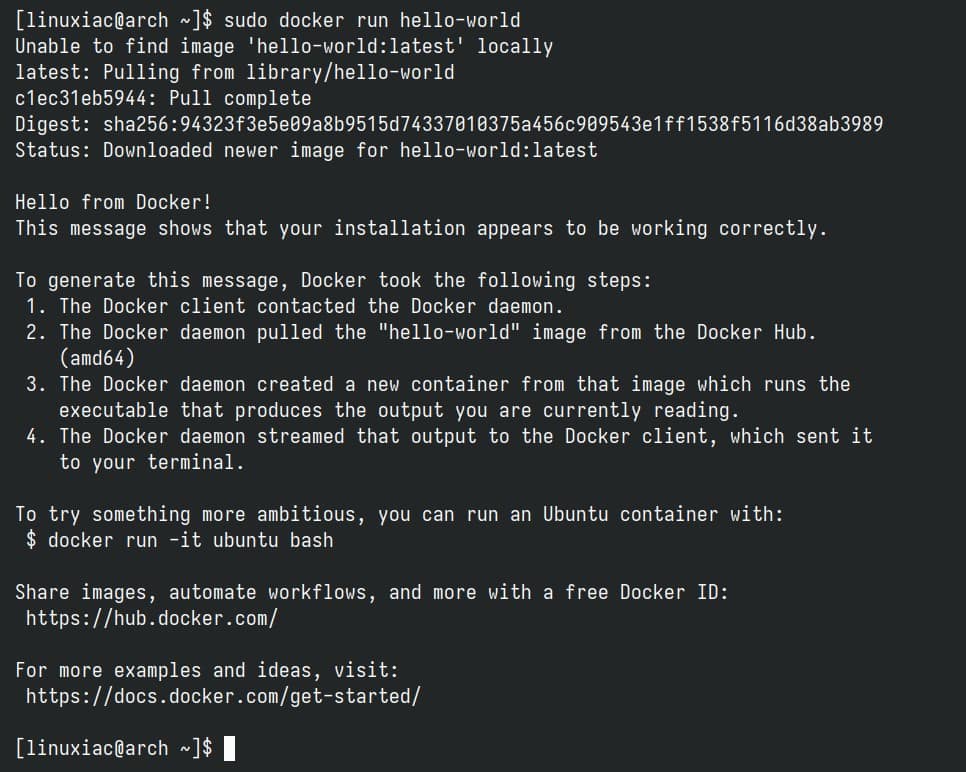
Now, let’s check if everything works properly. For this purpose, we will run a simple Docker application called “hello-world.”
sudo docker run hello-world
Congratulations! As we can see, everything works as expected!
Enabling Non-root Users to Run Docker Commands
So far, we have successfully installed Docker on the Arch system. However, by default, only root and users with sudo privileges can execute Docker commands.
In other words, if you attempt to run the docker command without prefixing it with sudo, you’ll get an error message like this:

But there is no room for worries. To run Docker commands as a non-root user, you must first add your user to the “docker” group. It is a simple task. To do that, type in the following:
sudo usermod -aG docker ${USER}Code language: Bash (bash)In the above command, “${USER}” is a system environment variable that contains your username. Then, run the following command to activate the changes to the group:
newgrp dockerYou can then execute docker commands without prefixing them with sudo.

Remember that this solution will work only for your current terminal session. In other words, if you close the terminal, you will either have to execute the newgrp command above again or prefix docker commands with sudo. To make this change last permanently, just reboot your Arch system.
Conclusion
Installing Docker on Arch Linux is straightforward and allows you to benefit from the latest features and improvements in Docker technology. You’re now ready to containerize applications and fully take advantage of Docker’s efficiencies and portability.
To learn more about Docker, check out its official documentation. Additionally, we recommend our detailed guide to expanding your skills with Docker and learning how to run and manage multi-container applications using Docker Compose.
As always, if you encounter any issues or have questions, let me know in the comments section below. Thank you for following this tutorial, and happy Dockerizing!

Thanks for the guide, works fine in CachyOS