
If you use Ubuntu or some of its spins, you probably know that Snap packages play a big role in how some applications are delivered. Canonical—the company behind Ubuntu—relies heavily on this packaging format.
Of course, the Snap format is not limited to Ubuntu; it can be installed on virtually any other Linux distribution. Still, for some reasons beyond this guide’s scope, it is used exclusively, mainly on Ubuntu and its spins.
It’s important to note that the distro offers excellent graphical tools for managing software, so users rarely need to use the command line to deal with Snaps. Still, a lot of power and flexibility is hidden there. Learning to use it is important to get a feel for full control over your system. This guide provides exactly that.
By the end, you’ll feel confident managing software using Snap, keeping your system efficient and up to date. However, before we move on to the practical part, I will introduce you to some explanations needed to fully understand the Snap packet format. So, keep reading.
What Is Snap and Snapd in Linux?
Snap is a universal, distro-agnostic package format developed by Canonical, the maker of Ubuntu, to simplify software distribution.
Linux distros typically rely on their own package managers and formats, such as APT for the Debian ecosystem, DNF for Fedora/RHEL-based distros, Pacman for Arch and its derivatives, etc.
But let’s face it—we’ve all (sometimes) encountered compatibility issues with these package managers at some point or found ourselves needing a newer version of software that wasn’t available in the distribution’s repositories. Here’s when Snap steps in.
Similarly to Flatpak’s concept, Snap resolves these inconveniences by bundling the application and all its dependencies into a single, self-contained package. Here’s a breakdown of its key features:
- Universal Compatibility: Snaps works on a wide range of Linux distributions, eliminating the need for developers to create separate packages for each distro.
- Isolation and Security: Each Snap runs in a confined environment that operates independently of other applications on your system. This enhances security by reducing the risk of conflicts or interference between applications.
- Automatic Updates: Snap apps can automatically update in the background, ensuring you always have the latest version without manual intervention.
- Dependency Management: Since Snaps bundle all their dependencies, you don’t have to worry about installing extra libraries or tools. Everything needed to run the app is included in the package.
- Easy Rollback: Snap allows for easy rollback to previous software versions if an update causes issues.
Additionally, besides Snap, there is another component that de facto does all the work: snapd. It is the background service that enables Snap functionality on your system and manages the installation, updates, and removal of Snap packages.
Essentially, snapd is the engine that powers Snap on your Linux machine, handling all the heavy lifting behind the scenes. It works to ensure your Snap applications are securely delivered, properly updated, and seamlessly integrated with your system.
To make things even clearer, here’s how Snap and snapd are related:
- Snap refers to the actual application packages themselves. A Snap is a containerized application bundled with all its dependencies into an installable package format, ensuring it can run on any Linux distribution that supports Snap.
- snapd is the service or daemon that handles Snap packages on your system. It manages Snaps’ installation, updates, and removal and ensures that they run in isolation from the rest of your system, preventing conflicts with other software.
Now that we’ve clarified things on a conceptual level, it’s time to move on to the practical part—how to use Snap to manage the software on your Ubuntu system.
Basic Snap Commands
Searching for a Package
To search for a Snap package, you can use the snap find command. It allows you to search for available Snap packages based on a keyword or package name in the Snap store.
For example, to search for a package related to “gimp,” you can use the following command:
snap find gimpCode language: Bash (bash)This will display a list of packages related to GIMP, along with their name, version, publisher, and a brief description.

You can now choose the appropriate installation package based on the results list.
Viewing Package Details
The snap info command is very useful – it gives detailed information about the Snap package, including its version, description, publisher, and available channels. Let’s say you want to view details about the “gimp” package.
snap info gimpCode language: Bash (bash)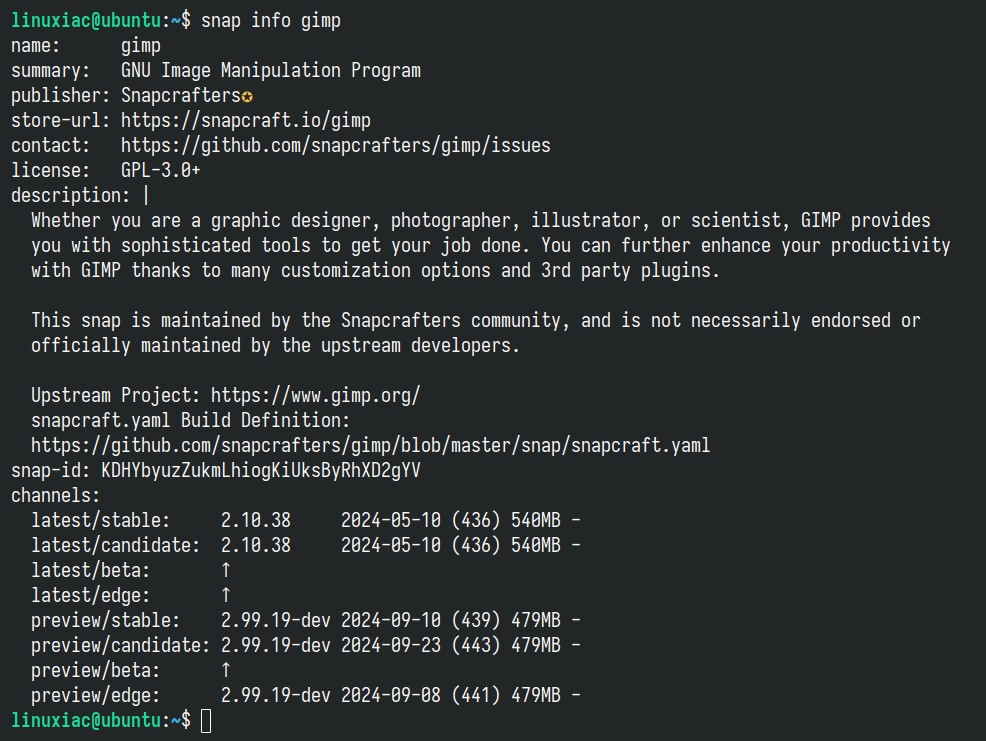
In the command’s output, you’ll get detailed information about the package, including:
- Name: The official name of the package.
- Publisher: The individual or organization responsible for publishing the Snap.
- Channels: Snap packages are often available in different channels like:
- Stable: The most reliable and tested version.
- Candidate: Almost stable, with some testing.
- Beta: Less stable, newer features but may have bugs.
- Edge: Bleeding-edge development version, usually the least stable.
The snap info command is useful for understanding more about a package before installing or when troubleshooting any versioning or update-related issues.
Installing a Snap Package
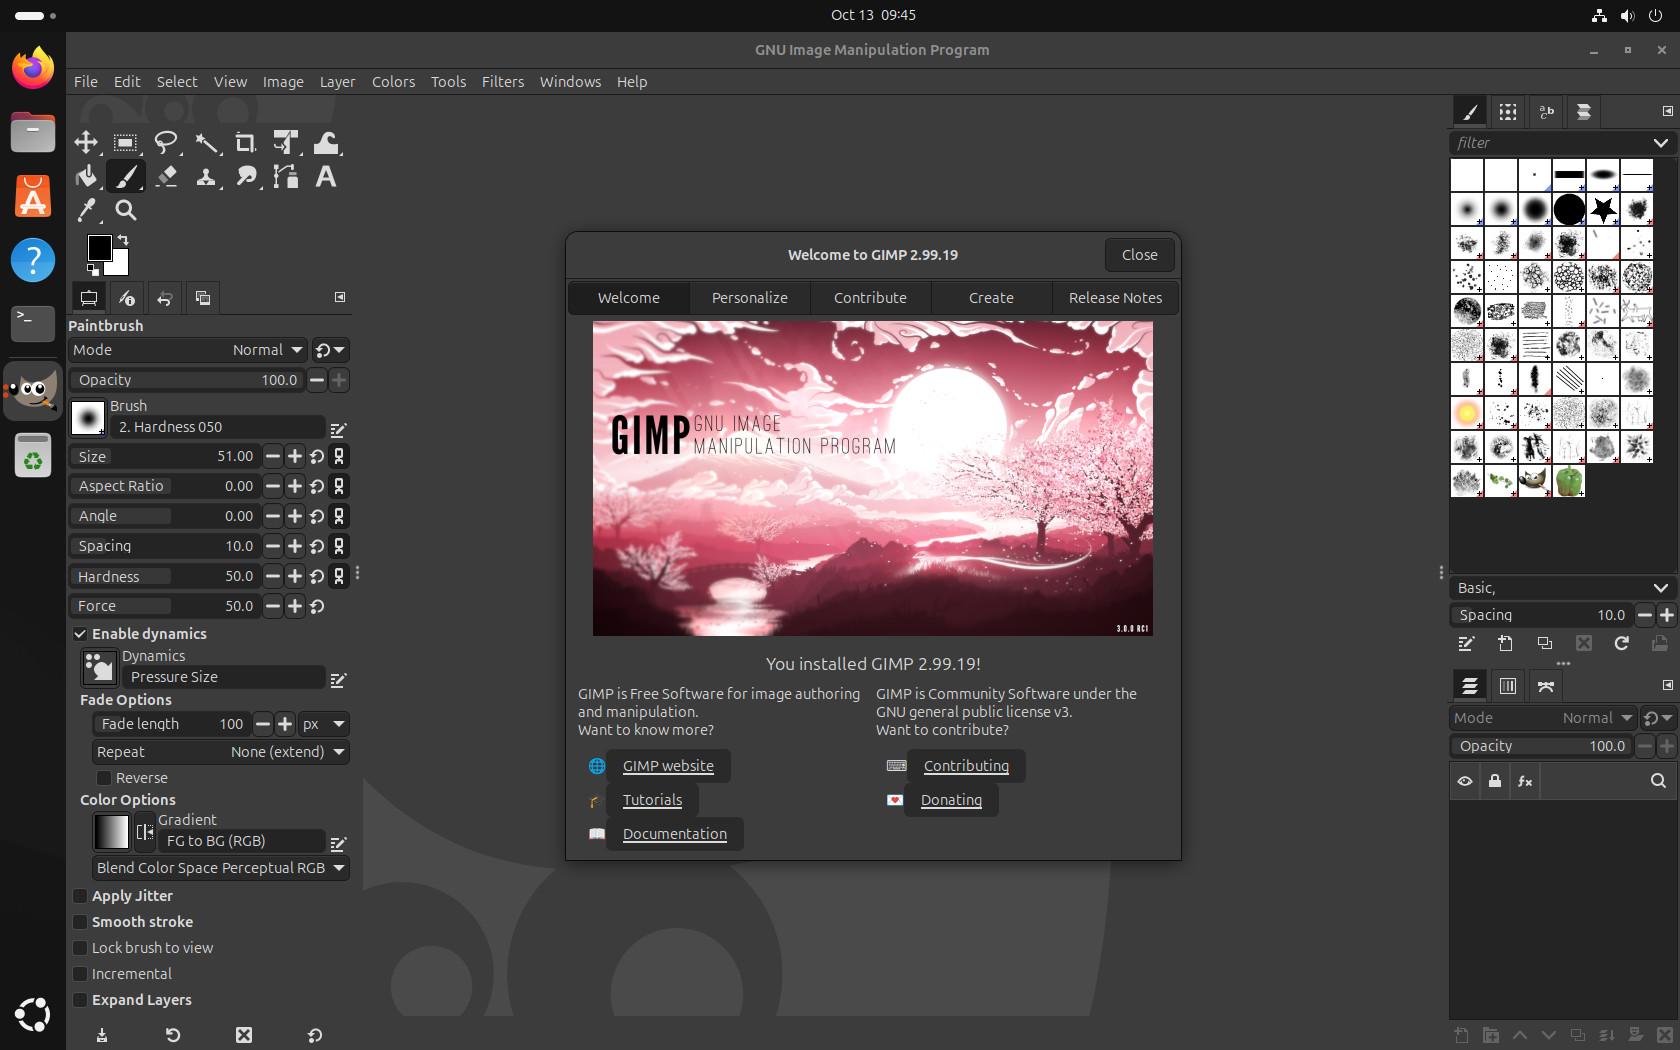
Installing a Snap package on a Linux system is straightforward. Once you’ve found the package, you can install it using the snap install command. For instance, to install GIMP, use:
sudo snap install gimpCode language: Bash (bash)
Once installed, you can start the app from the system’s application menu. However, if you want to install a package from a specific channel, you must append --channel=<channel> to the installation command. For example, to install GIMP from a “preview/candidate” channel, type to following:
sudo snap install gimp --channel=preview/candidate
Lastly, if you’ve already installed a Snap package from one channel and want to switch to a different one, you can use the “–channel” flag during an update.
For example, to switch to the stable GIMP version from the “latest/stable” channel, our Snap command would look like this:
sudo snap refresh gimp --channel=latest/stableCode language: Bash (bash)
Uninstalling a Snap Package
Uninstalling a Snap package is very simple. Just type sudo snap remove followed by the name of the package you want to remove. For example, if you want to uninstall GIMP, the command would be:
sudo snap remove gimpCode language: Bash (bash)
Remove Multiple Packages at Once
Additionally, you can uninstall multiple Snap packages using a single command. Just list there’s names one after another:
sudo snap remove gimp vlc braveCode language: Bash (bash)Purge Configuration Files
While the snap remove command typically deletes all the associated files, sometimes it may leave behind user data or configuration files. If you also wish to remove these, you can use the “–purge” option.
For example, to remove the GIMP along with its accompanying data, execute the following:
sudo snap remove gimp --purgeCode language: Bash (bash)If you are unsure of the exact name of the Snap package that you want to remove, check the next section.
Managing Installed Snap Packages
Listing Installed Snap Packages
To list installed Snap packages on your Linux system, you can use the following command:
snap listCode language: Bash (bash)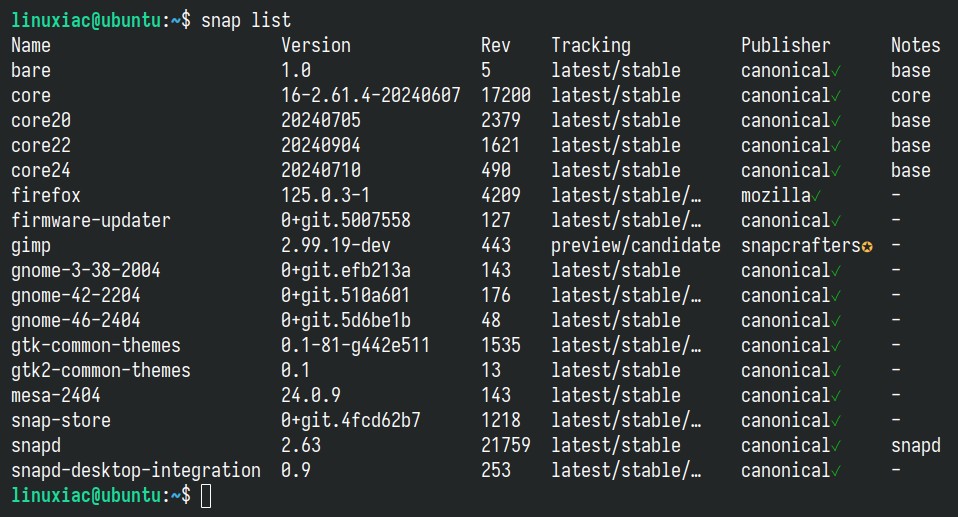
The command’s output list of all the Snap packages installed on your system, along with important details such as the package name, version, revision number, tracking channel (e.g., stable, candidate, beta), and publisher.
Refresh (update) Snap Packages
Snap packages are updated automatically by default, but you can manually trigger an update by executing a refresh command. It checks for available updates and refreshes all installed snaps to the latest version.
sudo snap refreshCode language: Bash (bash)Moreover, if you want to update only a specific package, you can specify the package name after the command. For example, to update the GIMP Snap package:
sudo snap refresh gimpCode language: Bash (bash)Check for Available Updates Without Installing
You can also check if there are any updates available for your installed Snap packages without applying the updates by using the following command:
sudo snap refresh --listCode language: Bash (bash)
Rolling Back to a Previous Version
Rolling back a Snap package to a previous version is a useful feature, especially if the latest version of the application causes issues or doesn’t work as expected. In light of this, Snap packages keep previous versions on hand, so you can easily revert to it.
To do it, use the snap revert command followed by the package name to roll back the package to its previous revision:
sudo snap revert gimpCode language: Bash (bash)
After that, you can use the snap list command to confirm that the package has been reverted to the earlier version.
Advanced Snap Usage
Setting Auto-Refresh Timing
By default, Snap automatically updates packages four times a day. You can customize the auto-refresh schedule by setting the refresh timer. For example, to schedule updates to only happen during the night:
sudo snap set system refresh.timer=2:00-4:00Code language: Bash (bash)Snap Aliases
Aliases in Snap allow you to create shortcuts or alternative names for installed Snap applications, making it easier to run specific commands. This is particularly useful when a snap command name conflicts with a system command or if you’d like to simplify the usage of a longer command.
For example, suppose you have installed the “microk8s” snap, which provides the microk8s.kubectl command. To create an alias so you can simply use kubectl, run:
sudo snap alias microk8s.kubectl kubectlCode language: Bash (bash)
Now, when you type kubectl in the terminal, it will execute microk8s.kubectl.
To remove an existing alias, use the snap unalias command followed by the alias name. So, to remove the kubectl alias you created earlier, execute:
sudo snap unalias kubectlCode language: Bash (bash)
Identifying Issues with Snap Logs
Snap logs are a useful tool for diagnosing issues with Snap applications and services on a Linux system. The Snap log system captures both application-specific logs and the Snap daemon (snapd) logs, helping you understand what might be going wrong when an application fails to run or when Snap behaves unexpectedly.
If you’re having trouble with a specific Snap application, you can view its logs using the snap logs command, followed by the Snap package name, which retrieves the application’s logs. For example, to view the logs from the “microk8s” package, run the following:
sudo snap logs microk8sCode language: Bash (bash)This will show you the output and error logs generated by the Snap application in real time. It helps identify runtime issues such as crashes, missing dependencies, or misconfiguration.
Furthermore, you can add a “-f” option that works similarly to the “tail -f” command in Linux, where it continuously monitors and streams the logs in real time.
Switching Between Channels
The snap switch command is used to change the tracking channel of a Snap package. The main use case is when you want to test new features on the beta or edge version but revert to the stable version if you experience bugs.
As we already mentioned, a “channel” refers to the different versions or branches available for the package, such as “stable,” “candidate,” “beta,” and “edge.” Using snap switch, you can move between these channels.
For example, to switch GIMP back to the “stable” channel, execute the following:
sudo snap switch --channel=latest/stable gimpCode language: Bash (bash)
Once you’ve switched channels, you need to refresh the package to apply the changes:
sudo snap refresh gimpCode language: Bash (bash)Tracking and Managing Snap Changes
The snap changes command allows you to view and manage changes made by Snap on your Linux system, such as installations, updates, removals, or rollbacks. To list all Snap changes, run:
snap changesCode language: Bash (bash)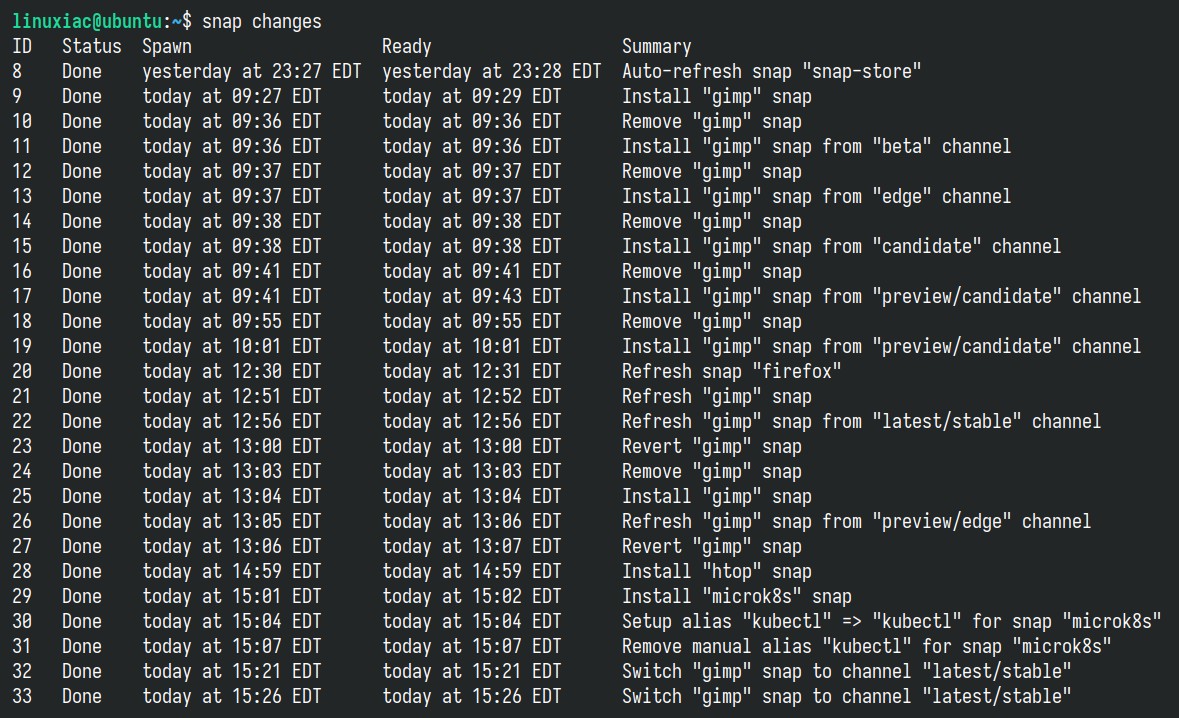
This will display a list of changes with their IDs, status, and timestamps. Now, to see detailed information about a specific change, use the change ID from the previous command:
snap change 30Code language: Bash (bash)
Lastly, if a change is stuck or you want to stop it, you can abort it with the snap abort command followed by the change ID:
sudo snap abort 30Code language: Bash (bash)Disabling/Enabling a Snap Package
The snap disable and snap enable commands allow you to temporarily stop (disable) or reactivate (enable) Snap packages on your system without uninstalling them. For example:
sudo snap disable gimpCode language: Bash (bash)
Conversely, the snap enable command reactivates a previously disabled Snap package, allowing it to run again.
sudo snap enable gimpCode language: Bash (bash)
The main use case is if you occasionally use certain Snap services. You can disable them and enable them only when necessary. Additionally, these commands are particularly useful for managing system resources or troubleshooting specific applications without removing and reinstalling them completely.
Bottom Line
Snap is a powerful tool that greatly simplifies software management on Linux, especially for Ubuntu users, where this technology is very much present.
By practicing the examples in this guide, you should now be comfortable using Snap to handle a wide range of software tasks on your system straight from your command line.
For more information, visit the official Snap documentation. Thanks for your time! As always, any suggestions and comments are highly welcome in the section below.


What about backing up a snap and it's user data, and restoring a snap from backup.