Docker Desktop is a powerful platform that simplifies the process of building, sharing, and running containerized applications via a convenient GUI. At the same time, Ubuntu, known for its stability and reliability, is a favorite among developers.
Pairing both is perfect for building, testing, and deploying containerized applications in a consistent and isolated environment, simplifying collaboration and increasing efficiency.
Our practical, tried-and-tested guide will walk you through every step of installing Docker Desktop on Ubuntu 24.04 LTS, making it easy to start and deploy your containerized projects without wasting time in complicated setups.
System Requirements
To install Docker Desktop successfully on your Ubuntu 24.04 LTS system, it must match the following requirements:
- 64-bit kernel and CPU support for virtualization.
- At least 4 GB of RAM.
- KVM virtualization support.
- QEMU must be version 5.2 or newer.
- A desktop environment with system tray support.
Additionally, it is important to understand that Docker Desktop runs a Virtual Machine that creates its own Docker context.
In other words, containers deployed on your Linux host before installing Docker Desktop will not be available in the app, so you’ll have to redeploy them through it to be able to manage them through Docker Desktop.
Step 1: Add Official Docker Repository
I’ll clarify immediately – to install Docker Desktop on Ubuntu 24.04, you essentially need to install a single DEB package. However, if you quickly download and try to install it without first adding a Docker repository to your system, you’ll face an error due to missing dependencies.
Specifically, the message states, “docker-desktop : Depends: docker-ce-cli but it is not installable.”
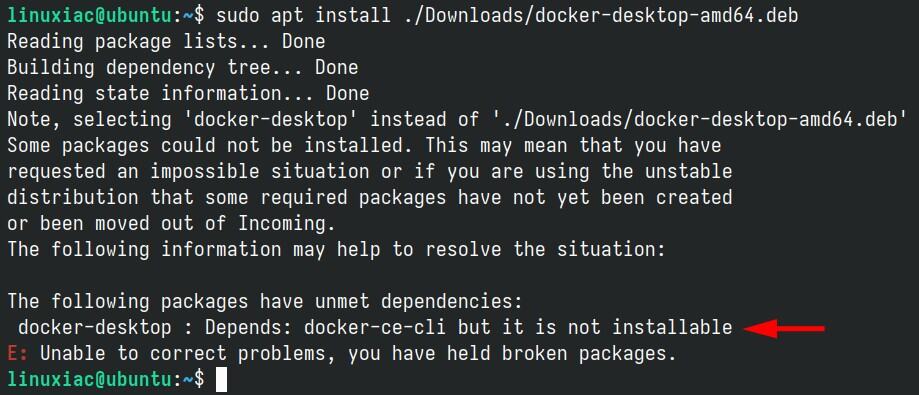
In other words, Docker Desktop needs the “docker-ce-cli” package installed on your Ubuntu 24.04 or available in its repositories. So, we’ll first add the official Docker repositories to your system, where the package is available. This way, when we install Docker Desktop, all the necessary dependencies will be met.
Run the commands in the order shown below to add the Docker repository to your Noble Numbat system.
sudo apt install apt-transport-https ca-certificates curl gnupg
curl -fsSL https://download.docker.com/linux/debian/gpg | sudo gpg --dearmor -o /usr/share/keyrings/docker.gpg
echo "deb [arch=$(dpkg --print-architecture) signed-by=/usr/share/keyrings/docker.gpg] https://download.docker.com/linux/ubuntu noble stable" | sudo tee /etc/apt/sources.list.d/docker.list > /dev/nullCode language: Bash (bash)
Then, refresh the repository index. The command output will show that the Docker repo is ready for use. So when you install Docker Desktop in the next step, the required package dependencies will be downloaded from it, thus ensuring a seamless installation.
sudo apt updateCode language: Bash (bash)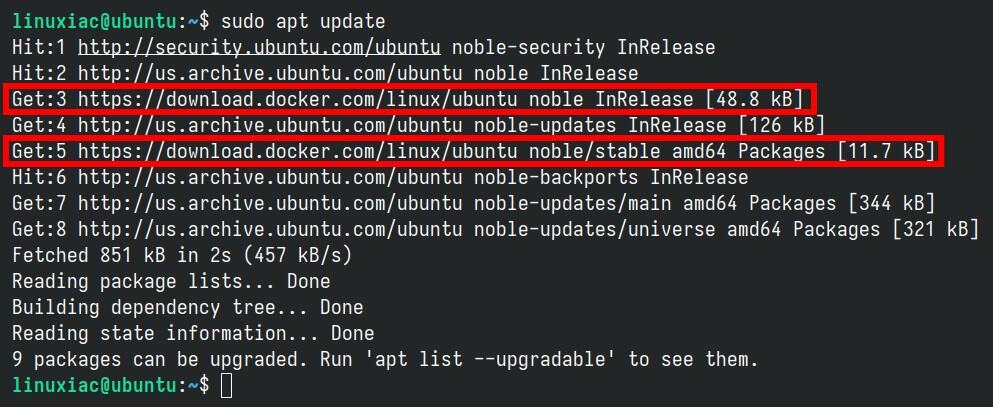
Step 2: Download Docker Desktop
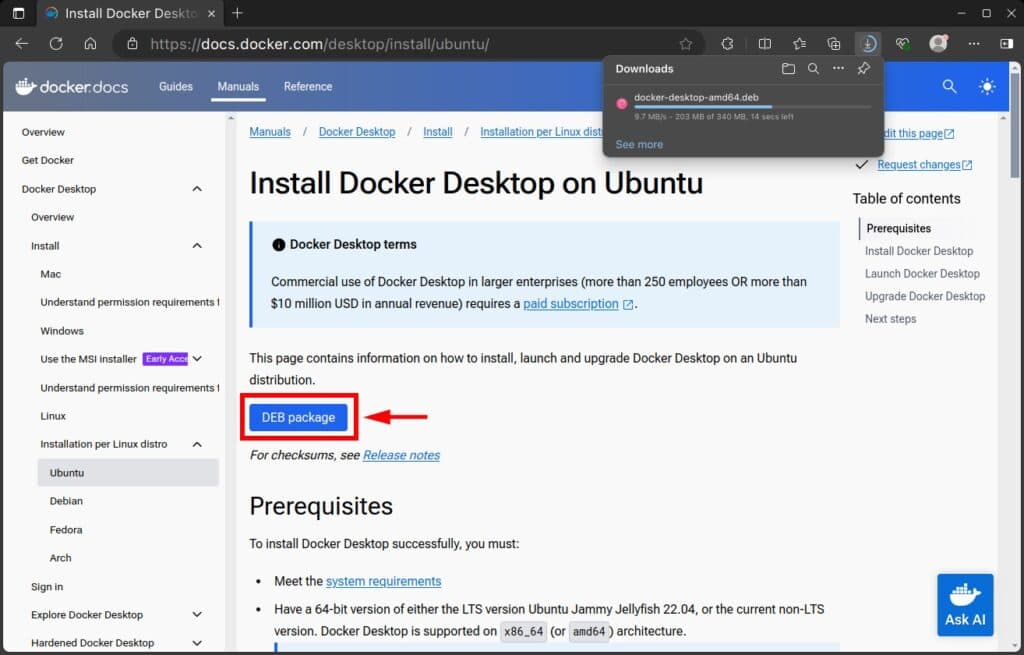
Now point your browser to this address and click the “DEB package” button to download Ubuntu’s Docker Desktop installation package.
Step 3: Install Docker Desktop on Ubuntu 24.04 LTS
So, everything is ready. The last step is to install the DEB file we downloaded. To do this, use the command below, but remember to change the file path if you downloaded it to a different folder on your Ubuntu 24.04 system.
sudo apt install ./Downloads/docker-desktop-amd64.debCode language: Bash (bash)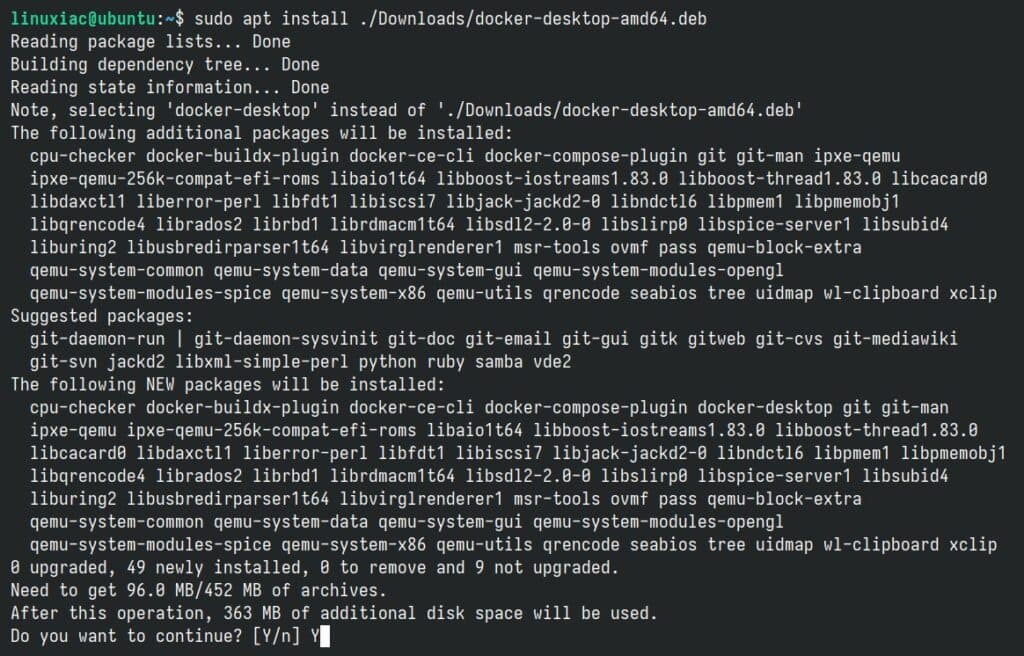
Wait for the necessary packages to be downloaded and installed; the process will not take more than a minute.
Step 4: Run Docker Desktop
The installation is complete, but do not rush to run the application. If you do, you will be unpleasantly surprised by the following error message.
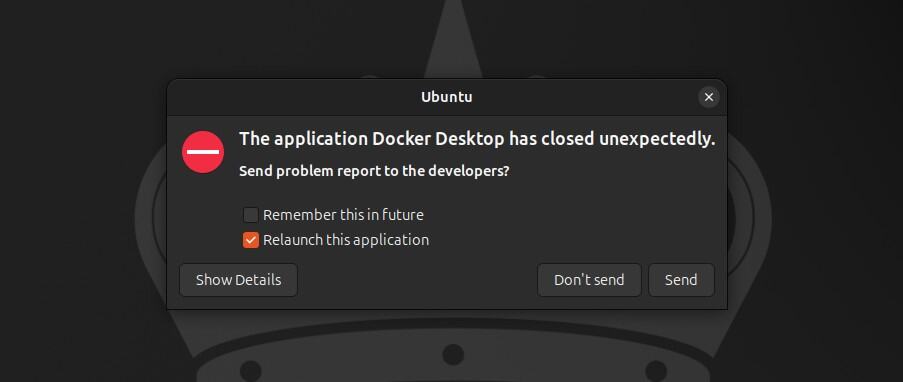
It occurs because of a change in how Ubuntu 24.04 LTS restricts unprivileged namespaces (more on that here). But there’s no room for worry because we give you a solution for that right away.
To solve the issue temporarily, you can run the following:
sudo sysctl -w kernel.apparmor_restrict_unprivileged_userns=0Code language: Bash (bash)The downside of this approach is that you need to execute it each time before you start Docker Desktop. So, we highly recommend opting for, as a permanent solution, to simply run the command below, then reboot your Ubuntu system.
echo 'kernel.apparmor_restrict_unprivileged_userns = 0' | sudo tee /etc/sysctl.d/20-apparmor-donotrestrict.confCode language: Bash (bash)Now, use the application launcher and search for “docker.” When the Docker Desktop icon appears, click to run it.

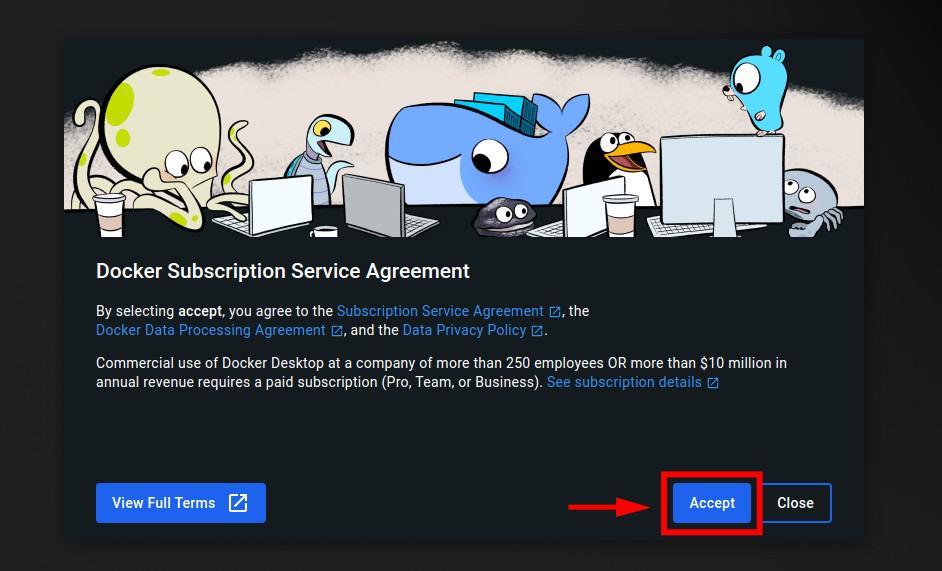
You will be greeted by the “Docker Subscription Service Agreement.” Click the “Accept” button.
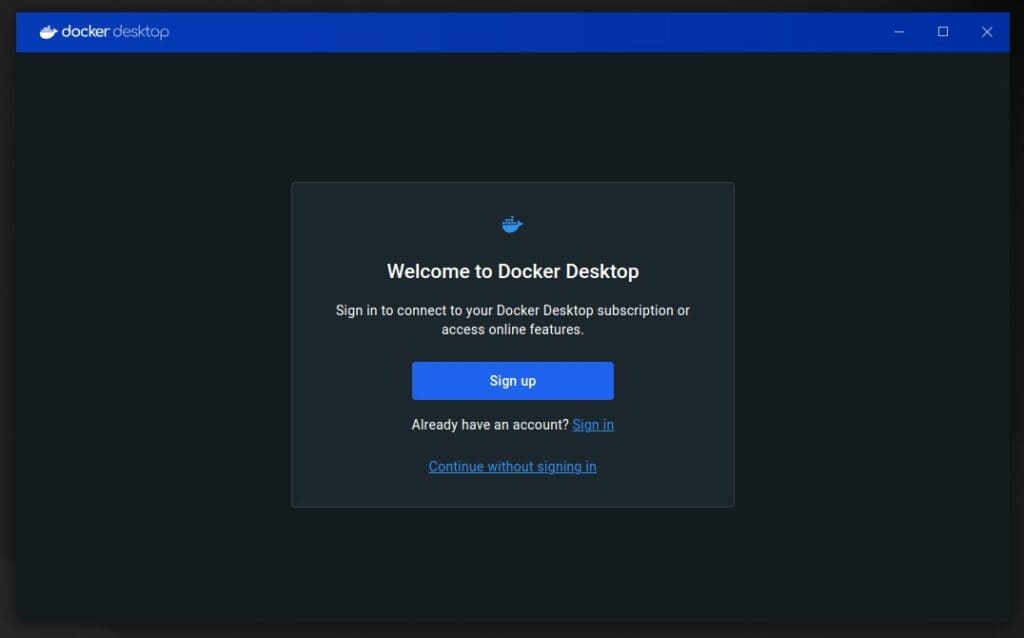
If you have Docker Desktop subscriptions, you can log in on the next screen. If not, just click the “Continue without signing in” link.
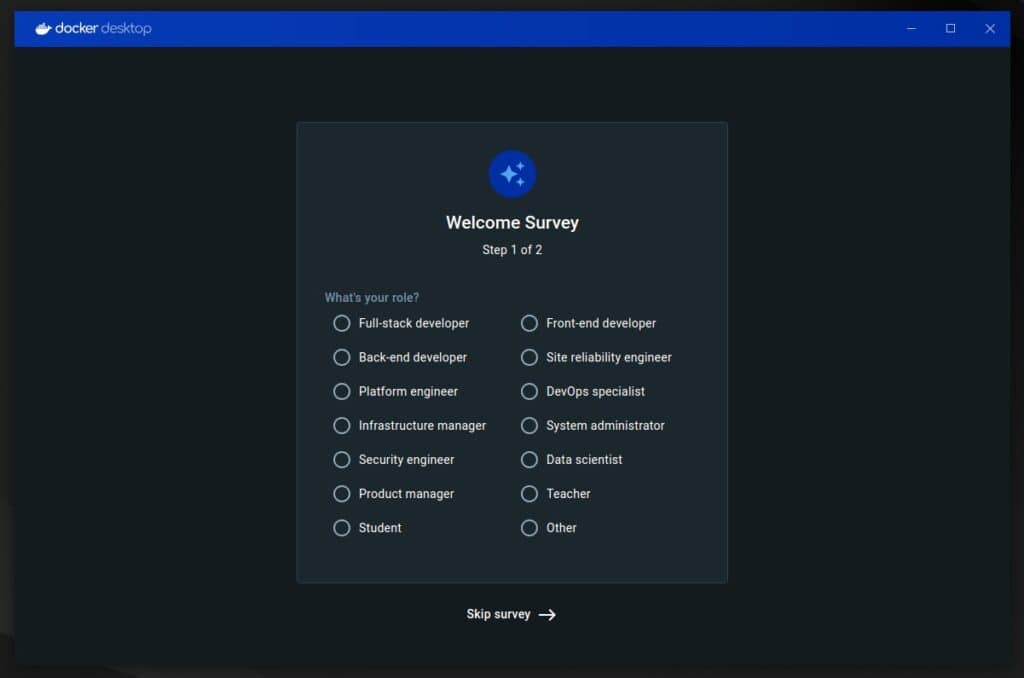
We’re almost set. Docker has a quick survey to learn more about its users. You can participate by answering it briefly or clicking the “Skip survey” button.
And that’s all! You’ve successfully installed Docker Desktop on your Ubuntu 24.04 LTS (Noble Numbat) system, which rises before you in all its glory. Congratulations! Additionally, you can manage the application through the system tray icon.
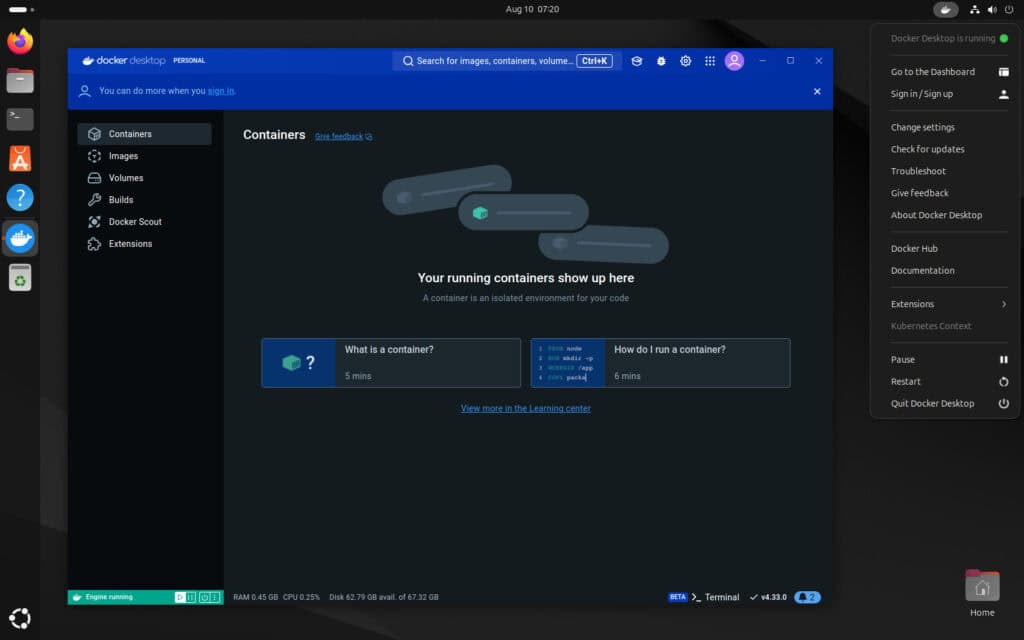
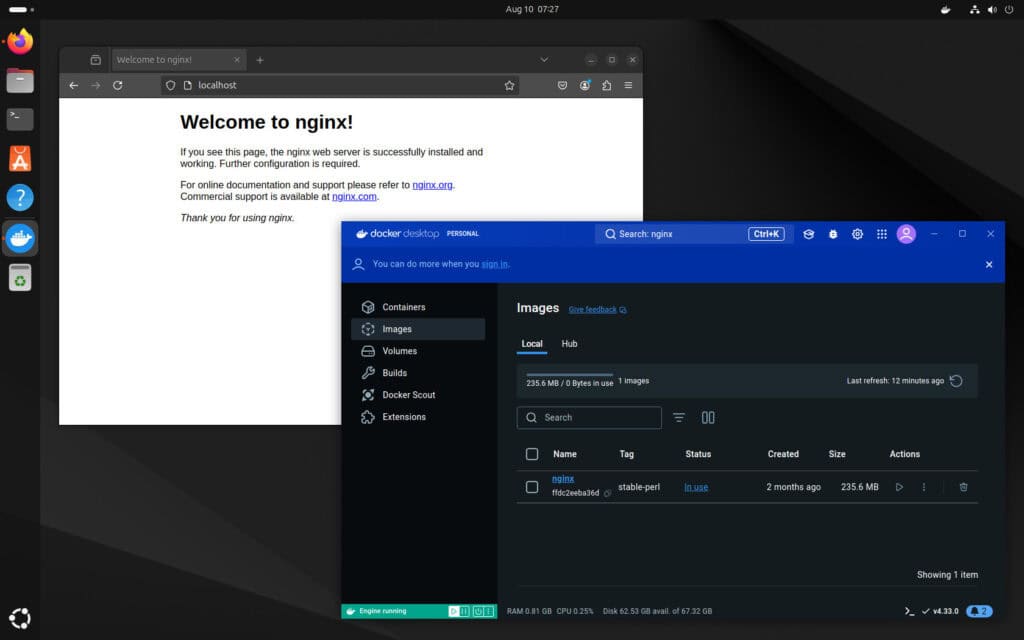
So, what are you waiting for? With Docker Desktop’s convenient graphical interface, you’re all set up and ready to start containerizing your ideas quickly and easily.
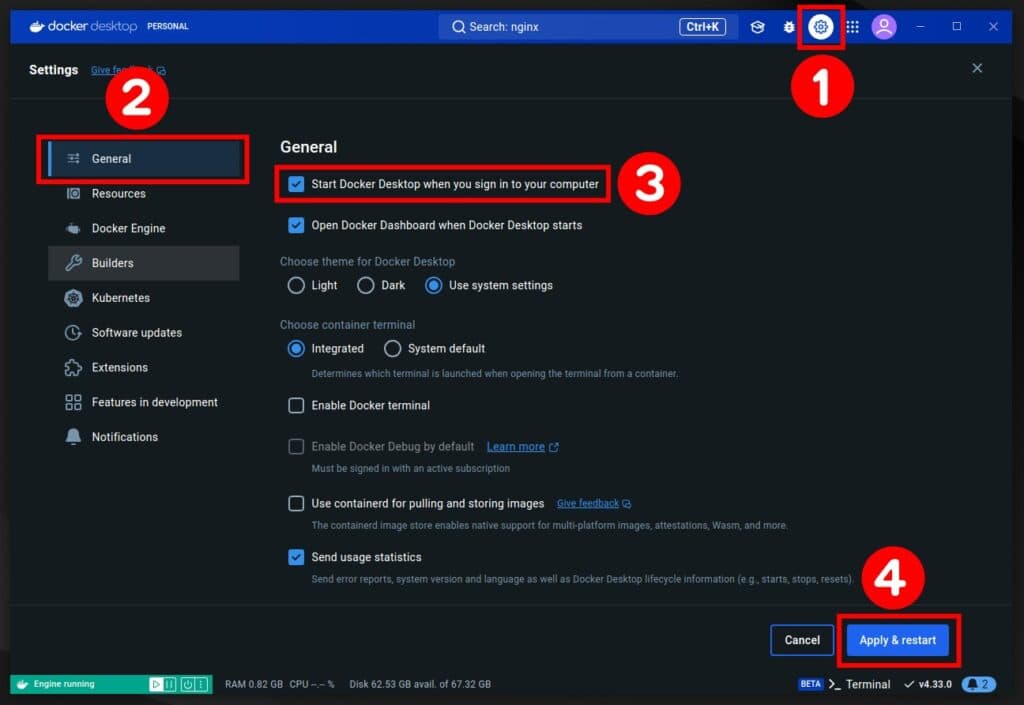
Lastly, to have Docker Desktop automatically start when you log in, go to the Docker Desktop “Settings” -> “General” and mark the “Start Docker Desktop when you log in to your computer” checkbox. Then, confirm by pressing the “Apply & restart” button.
Bottom Line
As you can see, with the proper instructions, installing Docker Desktop on Ubuntu 24.04 LTS is relatively straightforward. Whether setting up a development environment, running containers for testing, or deploying applications, you’re all set with a robust platform tailored for these tasks.
For more in-depth knowledge about using Docker, visit its documentation or navigate to the official Docker Desktop manuals.
Additionally, if you want to go with the full command-line approach, our guide on installing Docker on Ubuntu 24.04 LTS will greatly help you get started.
Thanks for using our guide! Feel free to share your thoughts in the comments section below.

Unfortunately, after I've impacted with issue: https://github.com/docker/desktop-linux/issues/258 after I tried to install composer dependencies in container.