Remote Desktop is a service that allows you to take over and use another computer remotely. In Ubuntu, it can be enabled on a graphical client machine to control a host machine.
This feature is beneficial for users using a GUI interface or unfamiliar with a command line.
In this tutorial, we walk you through setting this up and then connecting to that Ubuntu remote desktop via the Remmina remote desktop client.
Enabling Remote Desktop Sharing on Ubuntu
The actual process of sharing the desktop is relatively straightforward.
Boot the Ubuntu desktop and navigate to the down-arrow in the upper-right corner. Next, click on the “Settings” link.
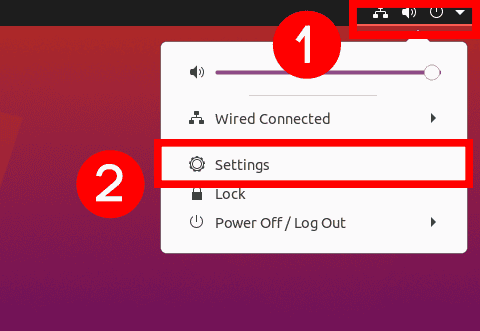
The Settings window opens.
- Navigate to the “Sharing” tab in the left-hand menu in the system settings.
- By default, screen sharing is turned off on Ubuntu. You can turn it on by clicking the toggle at the window’s top right corner.
- Click on the “Screen Sharing” button to configure the screen sharing options.
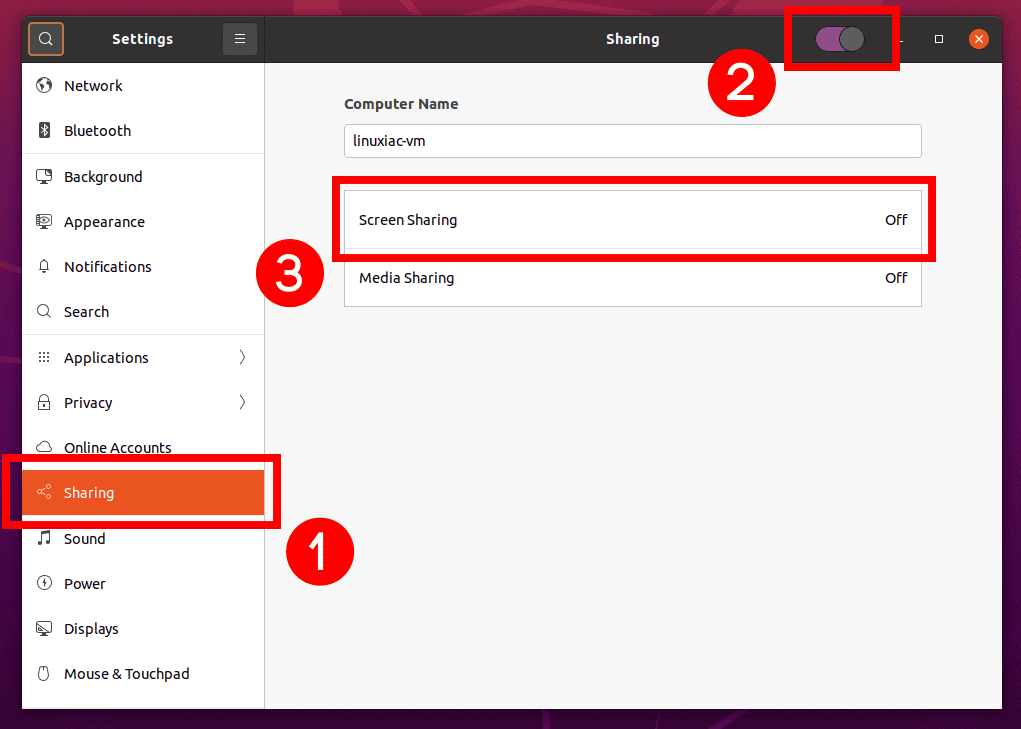
A new dialog box will open.
- Turn the “Screen Sharing” on by clicking the On/Off toggle.
- Check the “Allow connections to control the screen” checkbox.
- Check the “Require a password” checkbox and enter a password.
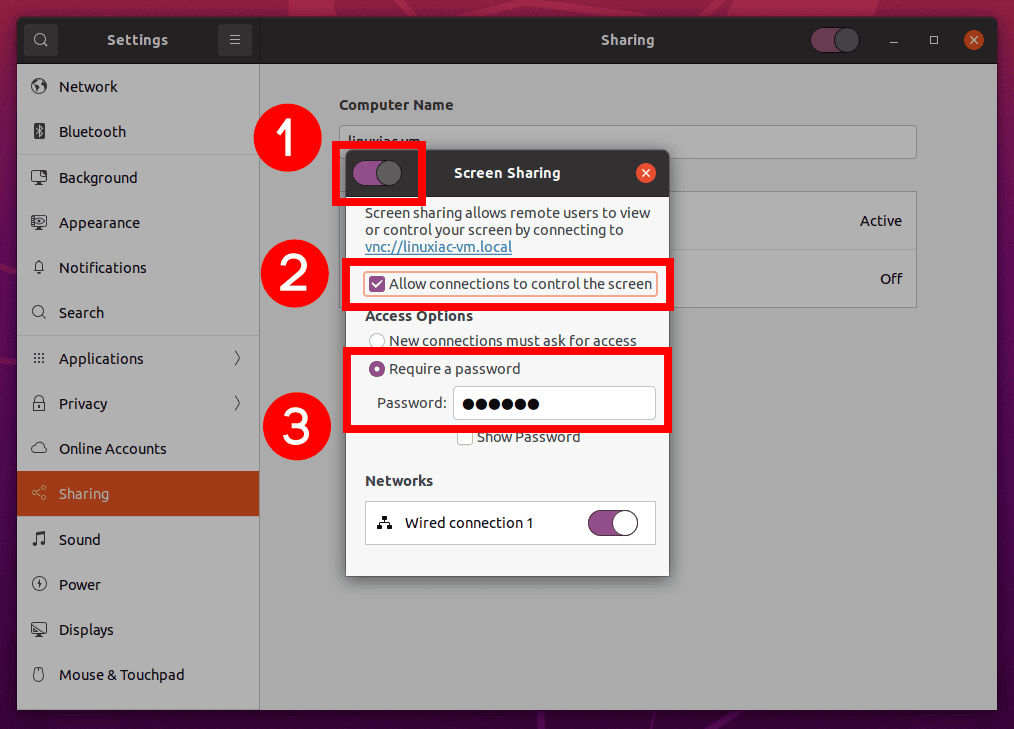
That’s all. You are good to close all dialog boxes. Now you can connect to this Ubuntu PC from whatever Linux distro you’re using.
Connect to the Ubuntu Remote Desktop
Controlling an Ubuntu over a remote desktop connection from another device is a straightforward process. You can connect to your Ubuntu PC from another Linux PC by using Remmina.
It is a free and open-source remote desktop client for Linux with support for RDP, VNC, NX, XDMCP, SPICE, and SSH protocols.
Related: Remote Desktop with Linux: 5 Apps Which You Can Use
The Remmina package should be installed by default on most Linux distros, but install it from the terminal if you cannot find it on the system.
Ubuntu / Debian / Linux Mint
sudo apt install remminaFedora / AlmaLinux (EPEL Repo) / Rocky Linux (EPEL Repo)
sudo dnf install remminaArch Linux / Manjaro
sudo pacman -S remminaPress the super (Windows) key to start a search, then type “remmina” and launch the software by clicking on its icon.

Before you can connect to your Ubuntu desktop using another computer, you need to find out the IP address.
In the drop-down menu, select VNC. Then enter the IP address of the remote desktop. Finally, hit “Enter” to make the connection.
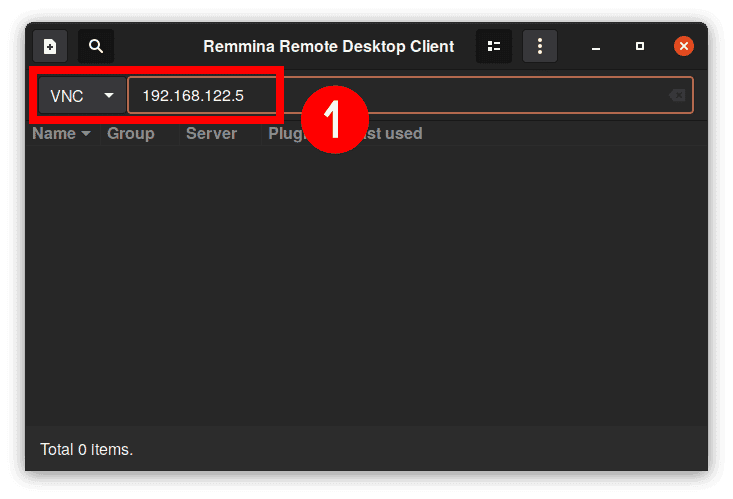
At this point, you’ll be prompted for a password on your Ubuntu remote desktop. Enter the password and click on the “OK” button.
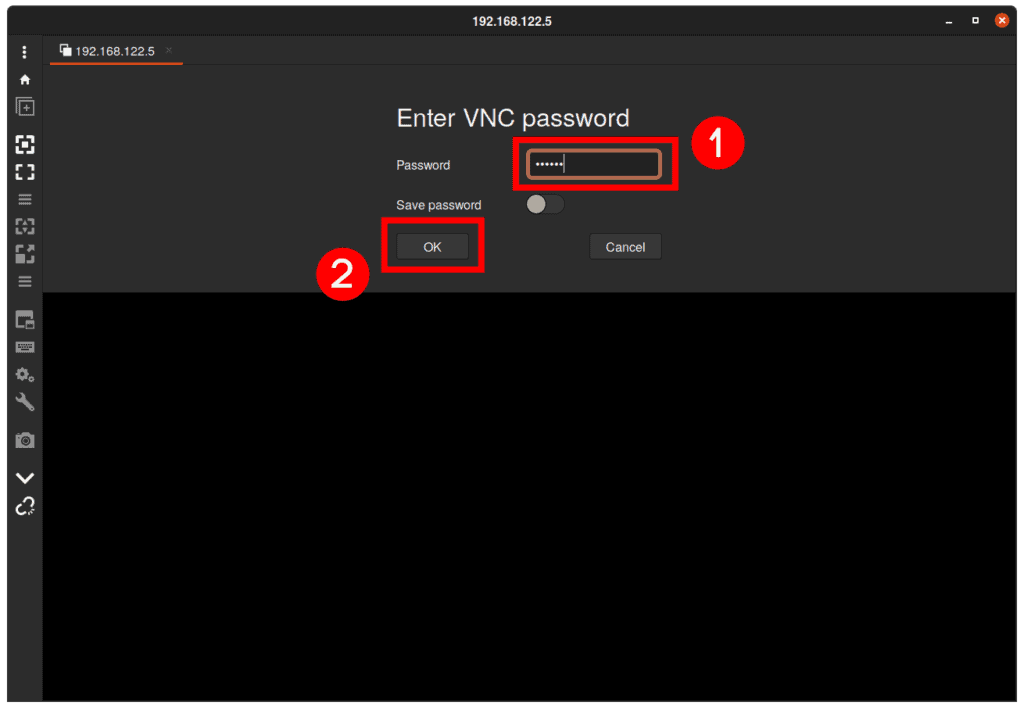
Remmina shows you the remote desktop in a window on your computer.
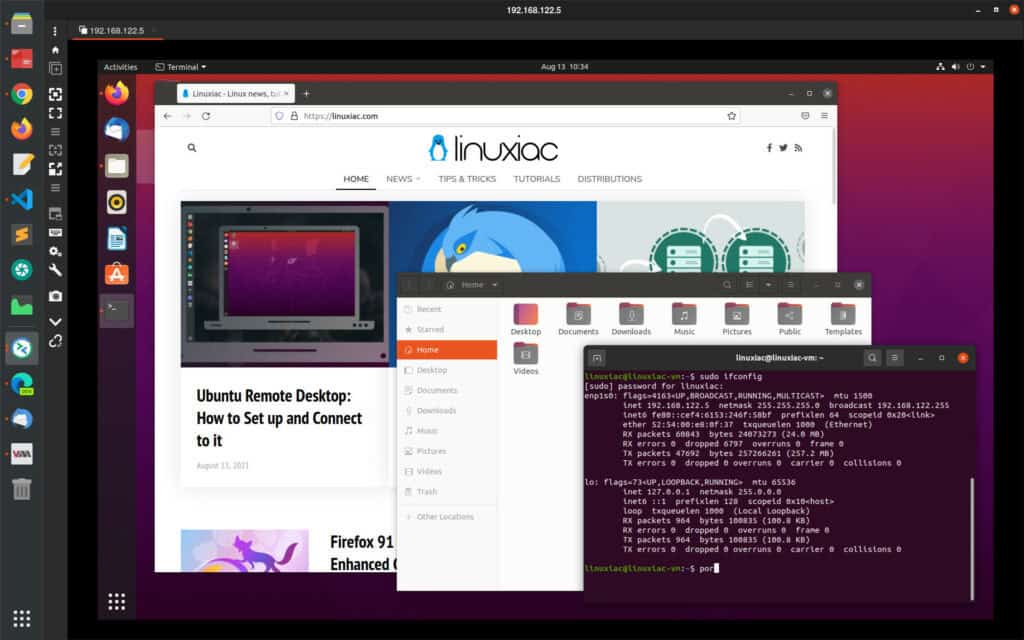
Now, you can begin working on the remote desktop.
How to Connect to Ubuntu Desktop from Windows
To connect from the Windows system, you need a piece of software called a VNC Client. Microsoft Remote Desktop Connections won’t work. RealVNC is a good option.
You can download RealVNC Viewer here.
In addition, if you plan to connect remotely to the Ubuntu desktop from the Windows system with RealVNC, then you might have to disable encryption for the connection by typing the following command:
gsettings set org.gnome.Vino require-encryption falseCode language: CSS (css)Otherwise, you will get an error in the RealVNC client about an incompatible encryption mechanism.
Conclusion
When you use remote desktop software, all of your operations take place on the remote desktop and utilize its resources.
By following this tutorial, you should now be capable of setting up your Ubuntu system for a remote desktop connection. You’ll be able to remotely control one Ubuntu computer from another or a Windows desktop.

what if i run xfce or mate as desktop is gsettings set org.gnome.Vino require-encryption false going to help vnc into computer os from windows ?