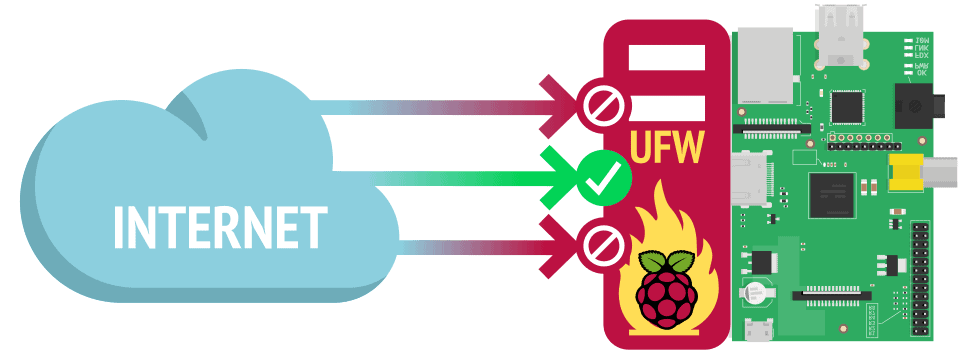
The level of security you need for your Raspberry Pi will strongly depend on how you plan to use it. For example, when your Raspberry Pi is connected to the internet, you should take the minimum security step to ensure that only the ports you require to be open are open!
A firewall is a software that monitors incoming and outcoming network traffic. It can then allow, reject or drop traffic.
Your Raspberry Pi is functional and connected without a firewall, but it can be made more secure with a firewall that only allows the types of traffic you permit

Installing a Firewall on the Raspberry Pi
UFW, or Uncomplicated Firewall, is a frontend for managing firewall rules in Linux. It is a firewall configuration tool that runs on top of iptables. Since iptables has a relatively complex syntax, using UFW to perform its configuration is a helpful alternative without skimping on security.
Before you begin, it’s a good idea to update and upgrade all the existing packages of the Raspberry Pi OS:
sudo apt update
sudo apt full-upgrade
Installation of the firewall package can be done in two ways.
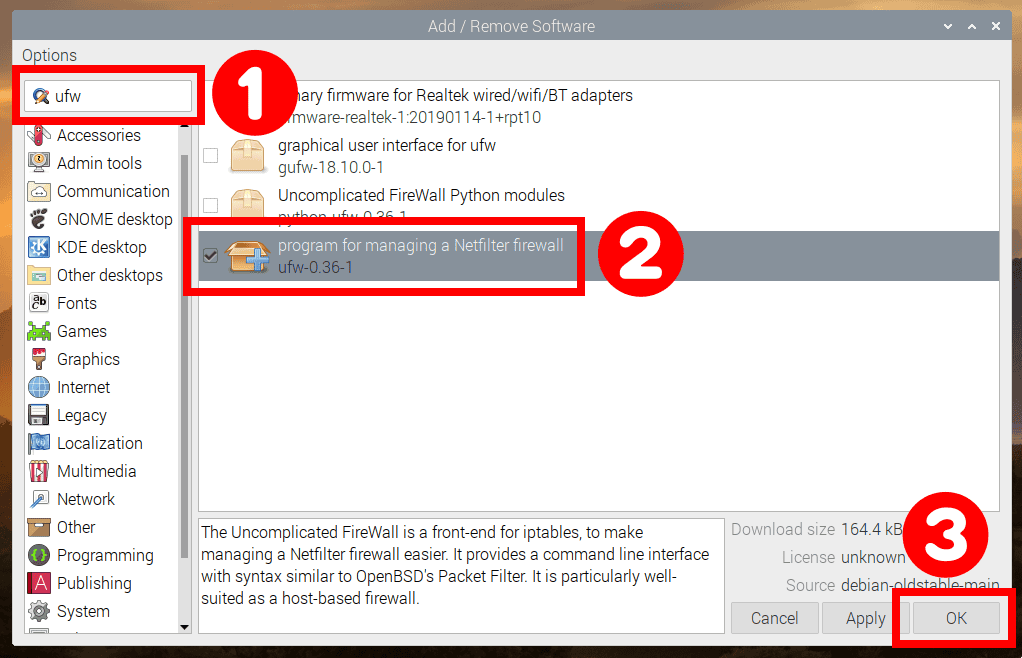
First, you can use the graphical package manager that comes by default with Raspberry Pi OS. Open it by navigating to Menu -> Preferences – Add / Remove Software.
Then search for ufw, highlight the installation package and confirm its installation with the OK button.

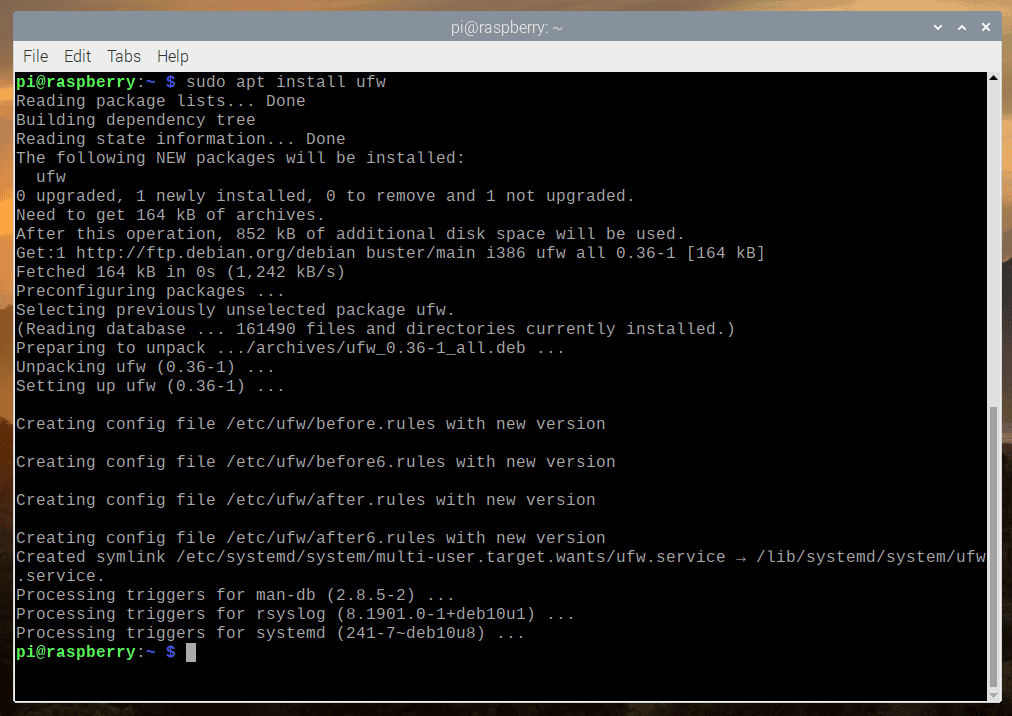
Alternatively, you can install the ufw package easily and quickly via the command line using the APT package manager:
sudo apt install ufw
Manage the Raspberry Pi Firewall with UFW
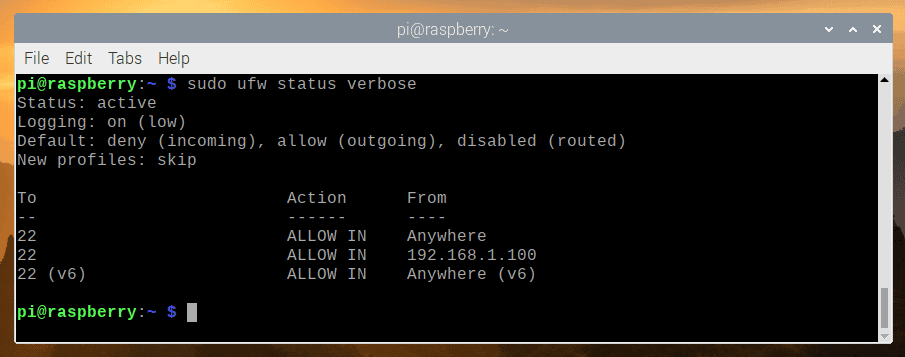
Now UFW is installed, but it is not turned on. To check if ufw is enabled, run:
sudo ufw status verbose
Allow Connections
Suppose you’re connecting to your Raspberry Pi from a remote location before enabling the UFW firewall. Then, it would be best if you explicitly allowed incoming SSH connections on port 22, the default SSH port.
If you don’t do this first, you will get locked out and need to physically connect a monitor and keyboard to get terminal access to your Raspberry Pi.
To configure your UFW firewall to allow incoming SSH connections, type the following command:
sudo ufw allow 22
To allow incoming connections from a specific IP address, you’ll need to include a from directive to define the source of the connection.
For example, to allow access to port 22 from your work machine with an IP address of 192.168.1.100, use to any port followed by the port number:
sudo ufw allow from 192.168.1.100 to any port 22Code language: CSS (css)
Turning on the Raspberry Pi Firewall
Now that the firewall is configured to allow incoming SSH connections, you can enable it by typing:
sudo ufw enable
You will be warned that enabling the firewall may disrupt existing ssh connections, type y and hit Enter.
Checking Status and Rules of Raspberry Pi Firewall
The ufw enable command will turn on UFW and applies rules. You can verify that UFW is running by issuing this command:
sudo ufw status verbose
In addition, the command will show you all currently active firewall rules.
Deny Connections
Just as it is vital to allow ports, it is also essential to deny ports. The default policy for all incoming connections is set to deny, and if you haven’t changed it, UFW will block all incoming connections unless you specifically open the connection.
For example, you opened port 22, but your Raspberry Pi server is under attack. To deny all connections to port 22, you can use the following command:
sudo ufw deny 22
Deleting Existing Rules
To do this, you first need to know its rule number. To get this list run:
sudo ufw status numbered
This command shows the list of rules created for your Raspberry Pi firewall, each identified by a unique number.
For example, to delete the rule for SSH communication (number 1), the command to be executed would be the following:
sudo ufw delete 1Code language: JavaScript (javascript)
You will be requested for confirmation before it is deleted. If sure, type y and then Enter.
This operation will cancel the SSH communication for IPv4 but not the one for IPv6. To delete the rule for IPv6, consult the list of existing rules again since its identification code will be changed.
Disable the Firewall
If you have a connection problem, it’s good to disable the Raspberry Pi firewall and then retest to see if you can connect.
To disable the UFW firewall, use the following command:
sudo ufw disable
This command will fully disable the UFW firewall service on your Raspberry Pi.
Conclusion
UFW is a powerful tool that can significantly improve the security of your Raspberry Pi when properly configured.
By enabling the UFW firewall, all communications to and from your Raspberry Pi pass-through this tool, protecting you from unwanted attacks and connection attempts from unauthorized users.
Let us know in the comments below anything you would add to this guide or any other helpful command you may know that may help others.

I configured Raspberry pi with UFW, and a have two network ports on the pi but it is not passing the traffic to my network even when the firewall is disabled. Any idea why?
Great lay out and instruction. I don’t code, but not afraid to take the plunge with setting up this “net appliance” since I am not using my PI and in need of securing my network.
With the 4B, the RJ45 of course is available. However, I am working from home with a business speed connection share with my home service. I am concerned using the cable and WiFi hand off, I might lose throughput (just under 500mbps).
What is your experience? Is there a riser/HAT adapter that can add an “out” for RJ45 to the network?
Thank you!
Hi folks!
Old guy trying to stay relative in a fast changing world. Used your guidance to cmd line install ufw firewall.
Thank you!!!
tom
Hi Tom,
We thank you for reading Linuxiac! We are glad to have been of help.
Best,
Bobby