If you’re looking to run multiple operating systems side-by-side on your Ubuntu 24.04 LTS (Noble Numbat) machine, you’ve landed in the right place.
VMware Workstation is a powerful virtualization tool that makes it a snap to set up and manage different environments without juggling separate computers.
Whether you’re an absolute beginner or a seasoned Linux user who just wants a refresher, in this guide, I will walk you through every step of the installation process—from downloading the right packages to handling those occasional curveballs that might pop up along the way.
By the end of this tutorial, you’ll have a smoothly running VMware Workstation instance that is perfectly set up to handle all your virtualization needs.
But before we dive in, let’s briefly explore system requirements and set up some dependencies.
Prerequisites
VMware Workstation runs on standard x86-based hardware with 64-bit Intel or AMD processors. The system requirements are:
- A compatible 64-bit x86/AMD64 CPU (AMD CPU with AMD-V support / Intel CPU with VT-x support)
- 2 GB RAM minimum (4GB RAM or more recommended)
- Windows or Linux host operating system
Before moving on to the steps below, our first thing to do is install some mandatory software dependencies so our Ubuntu 24.04 LTS system can build the needed VMware kernel modules.
It’s simple – open the terminal app and run the following command:
sudo apt install build-essential linux-headers-$(uname -r)Code language: Bash (bash)Step 1: Register a New Broadcom Account
VMware Workstation is free to download, install, and use for personal purposes (more on that here). However, you must first have a valid Broadcom Support Portal account to access the download.
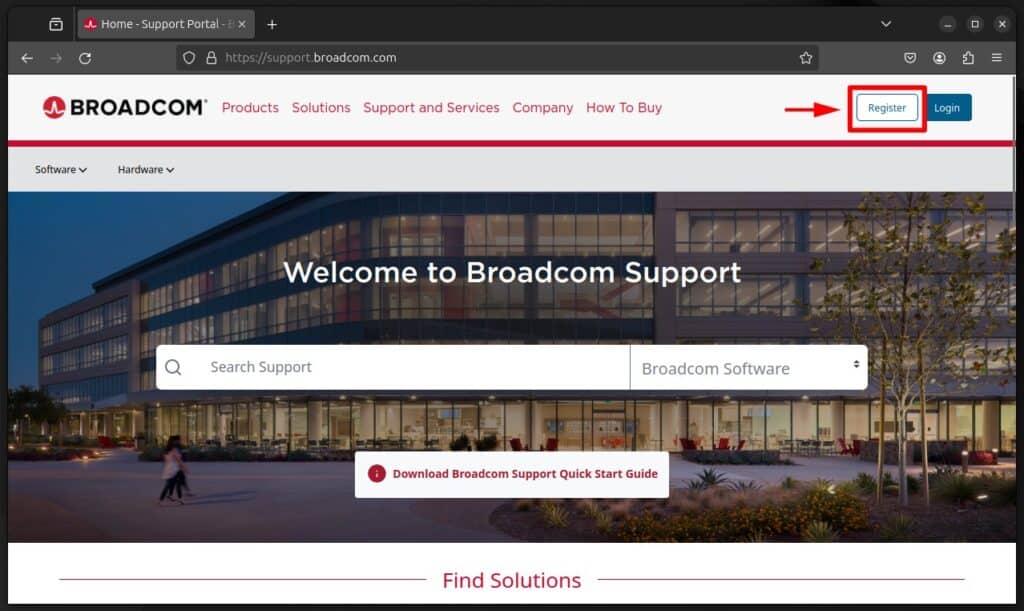
So, to get started, open your browser, go to support.broadcom.com, click the “Register” button, and complete the account registration procedure.
Step 2: Download VMware Workstation
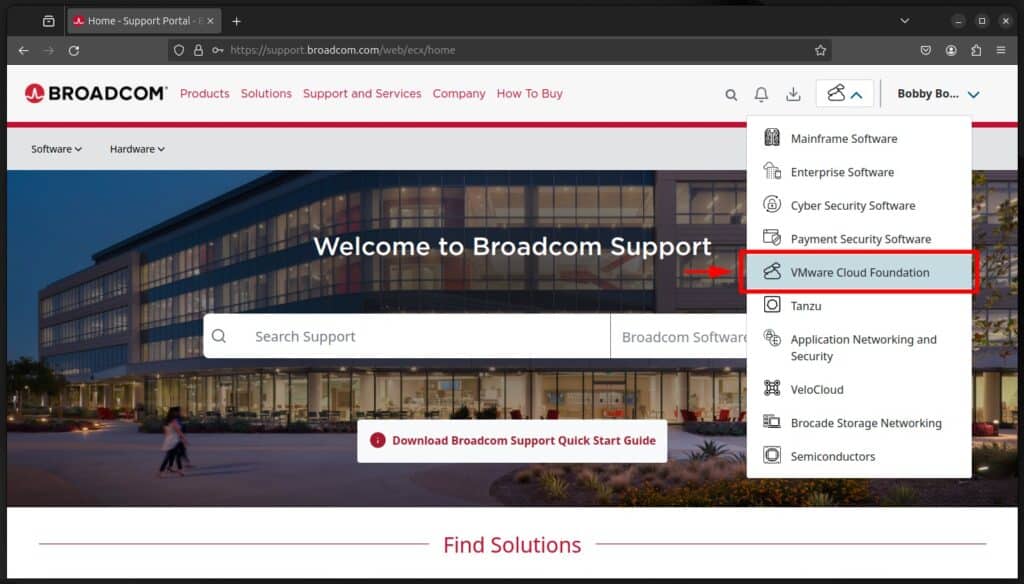
After completing your registration, you’ll be logged into the Broadcom support portal. From there, use the dropdown menu at the top right corner (as shown in the screenshot below) and select “VMware Cloud Foundation.”
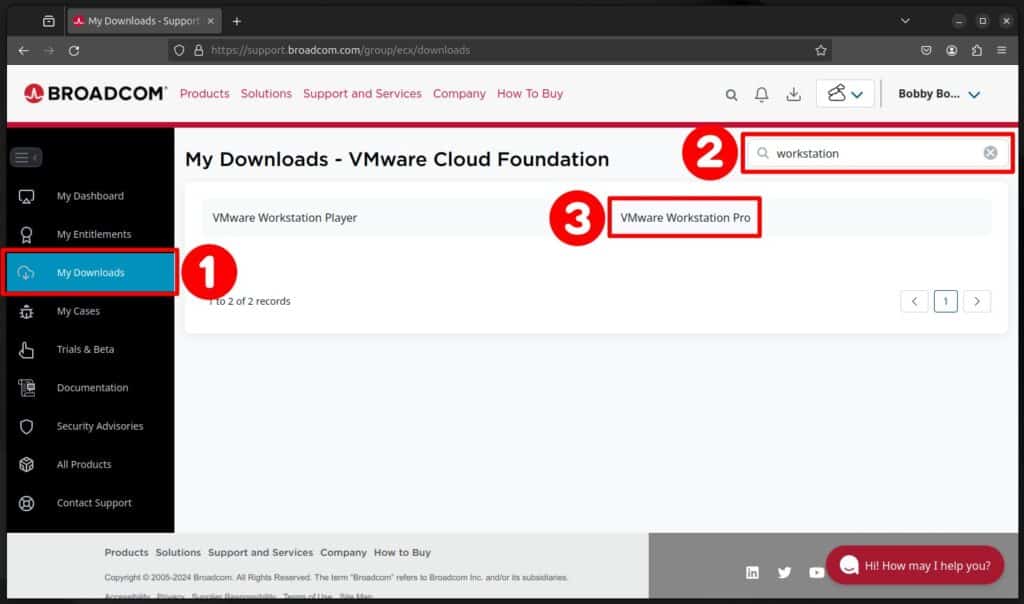
From the page you will be redirected to, click on “My Downloads” from the menu on the left. In the search box, type “workstation,” and the results will be filtered automatically. From there, choose “VMware Workstation Pro.”
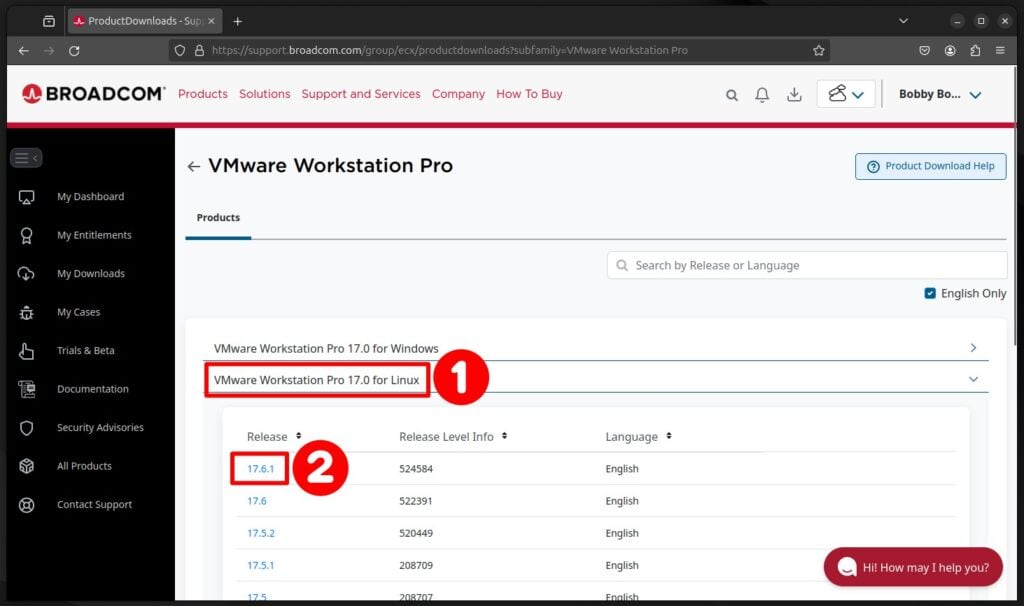
On the next page, look for “VMware Workstation Pro XX.X for Linux” and pick the latest major version—currently, it is 17. From there, you’ll see a list of minor versions. Choose the most recent one and click on it.
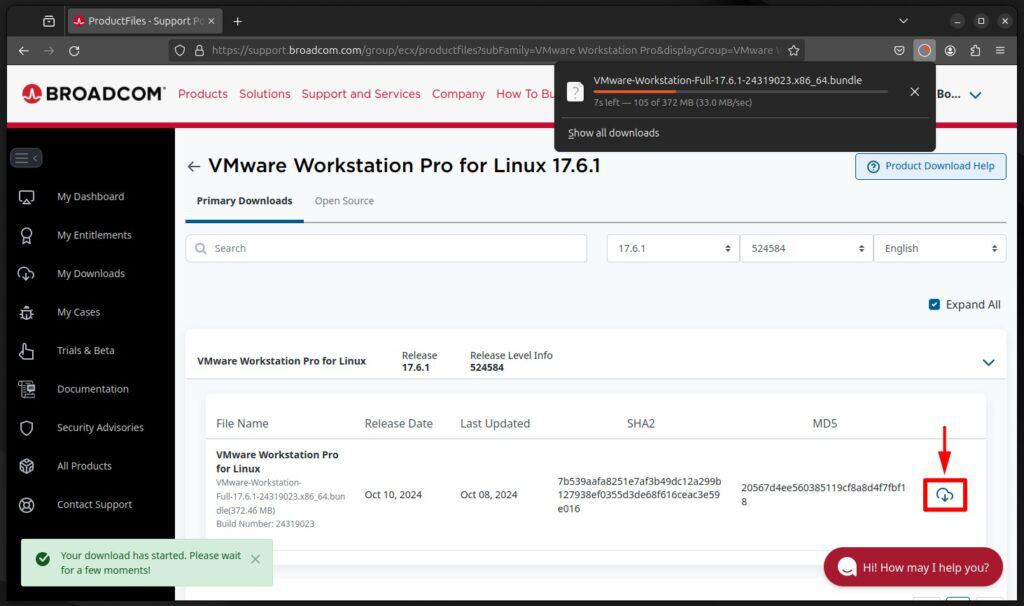
Alright, we’re nearly there. Just one final step. On the next page, click the download icon and let the VMware Workstation Pro for Linux file finish downloading.
Step 3: Make the File Executable
The VMware Workstation Pro file you downloaded has a “.bundle” extension—that’s completely normal. But before we can install it, we must make this file executable.
To do this, navigate to the folder where it is and run the following command, making sure to replace the name below with the actual one of the file you downloaded:
chmod +x VMware-Workstation-Full-17.6.1-24319023.x86_64.bundleCode language: Bash (bash)Step 4: Install VMware Workstation on Ubuntu 24.04 LTS
We’re all set. Run the VMware Workstation installer with administrative privileges by simply prefixing the filename (which has already been made executable) with sudo.
sudo ./VMware-Workstation-Full-17.6.1-24319023.x86_64.bundleCode language: Bash (bash)The progress of the VMware Workstation installation on your Ubuntu 24.04 system will be shown in the terminal. So, wait for the operation to complete, which takes around a minute or less.

Step 5: Make Initial VMware Workstation Initialization
Start VMware Workstation from your application launcher by searching for “workstation” and then click to run the same when its icon appears.

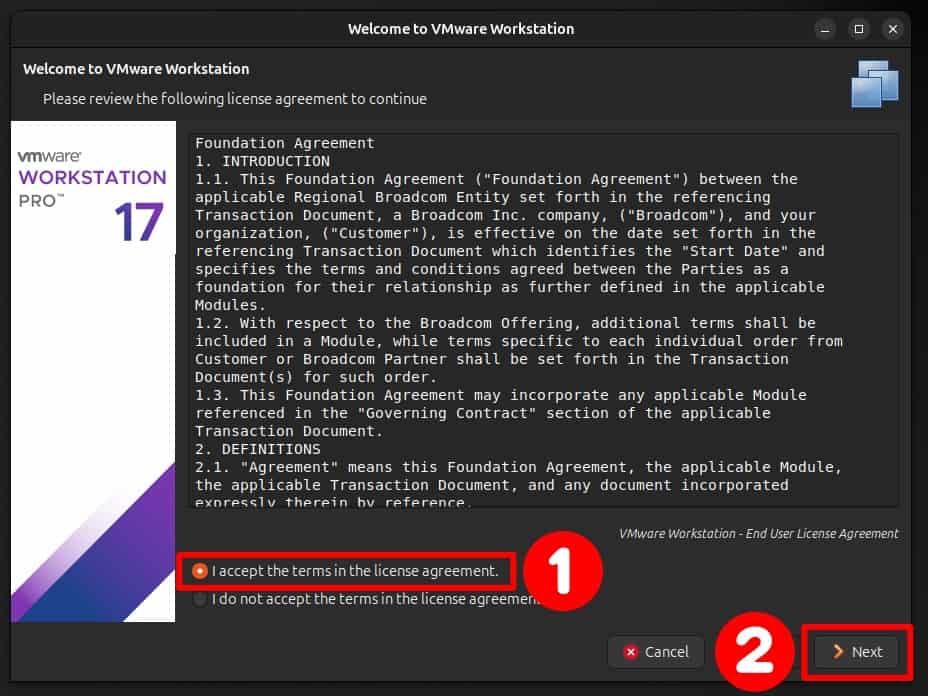
The app will start. All that is left is to complete the initial setup, but don’t worry – it happens quite quickly on a next-next-finish basis. First, accept the End User License Agreement and hit “Next.”
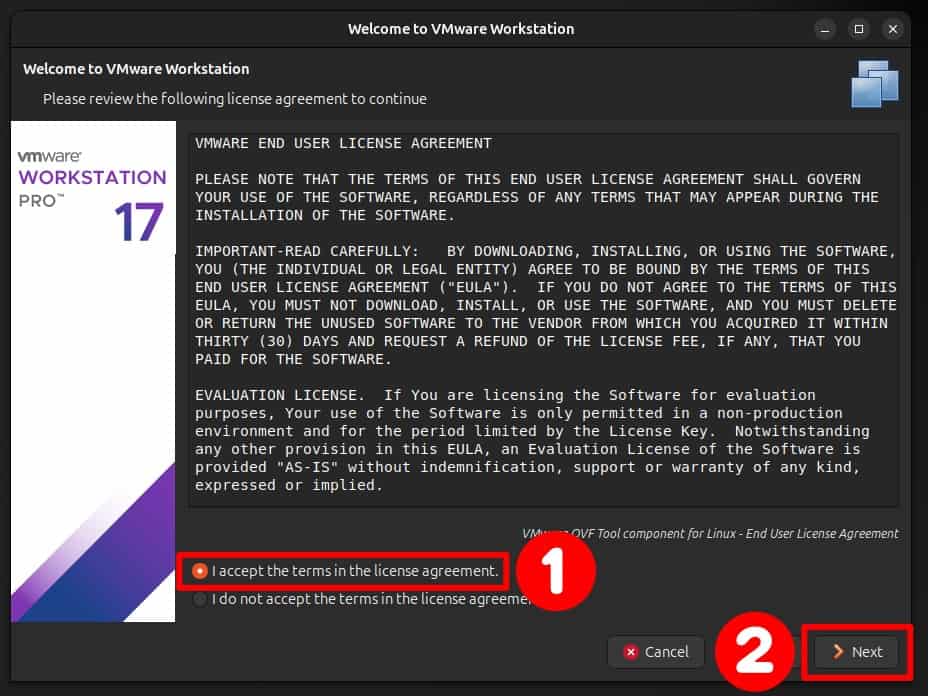
Another End User License Agreement will greet you. Accept it and confirm with the “Next” button.
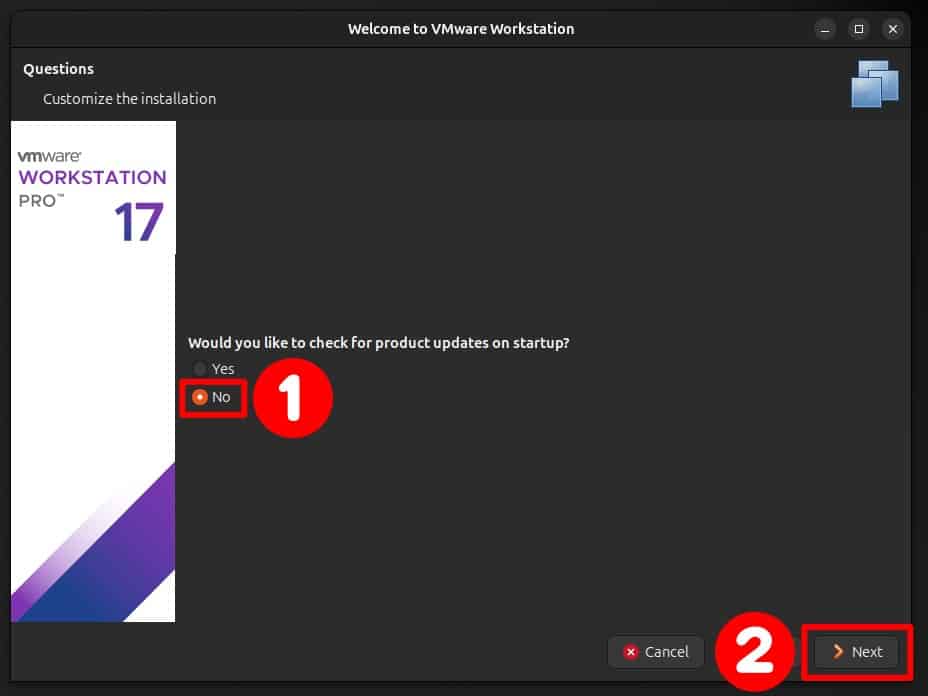
On the following screen, you will be asked if you want the application to check for available updates automatically when you start it. Make your choice and then press the “Next” button.
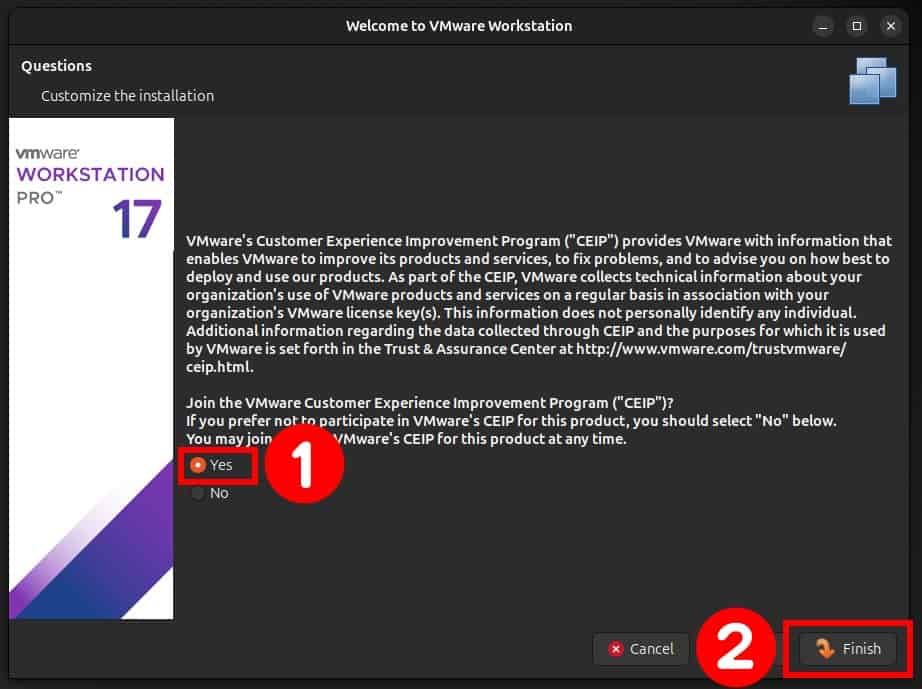
Choose whether to participate in the VMware Customer Experience Program (CEIP) and click “Finish.”
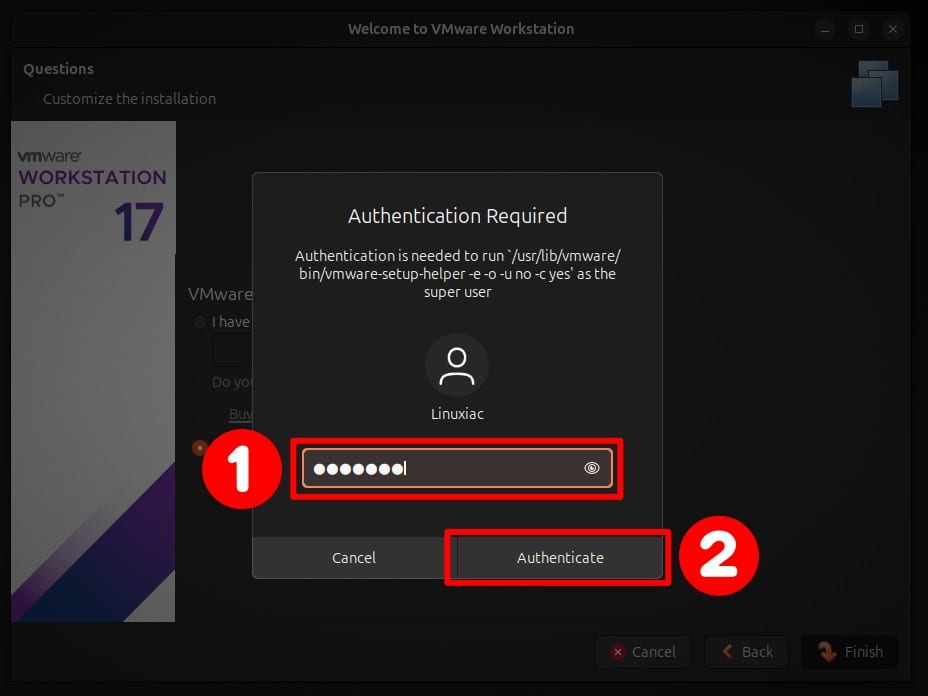
You will be prompted to enter your user password to apply the settings. Enter it and click the “Authenticate” button to confirm.
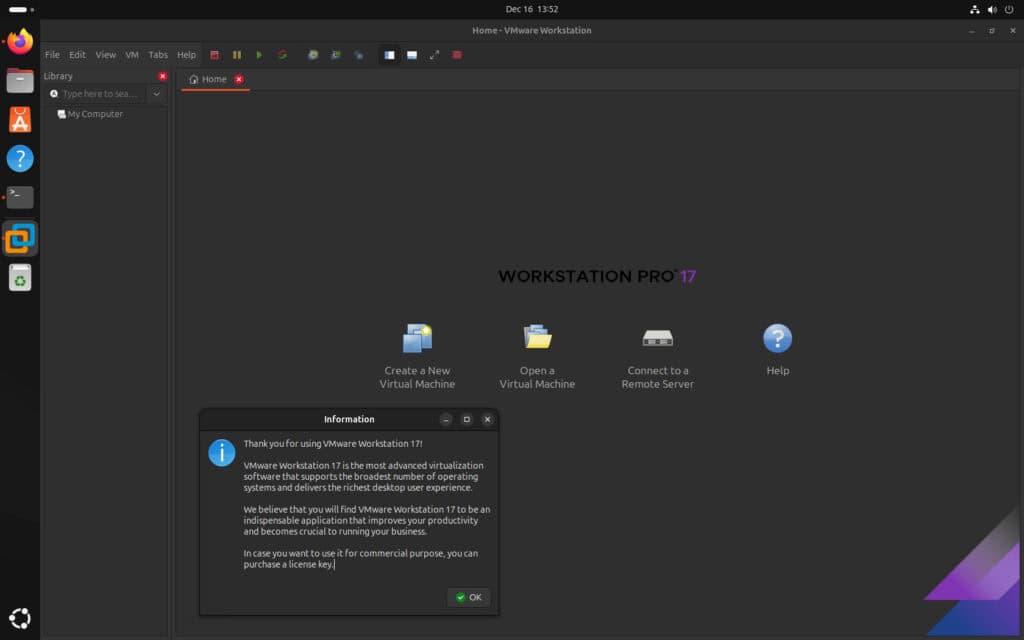
That’s all! You can start creating new VMs with VMware Workstation by hitting the “Create a New Virtual Machine” button and exploring the virtualization world’s possibilities.
Install Open VM Tools
Finally, here’s something that will make using VMware Workstation guest operating systems much more enjoyable.
After installing each Linux guest, don’t forget to install Open VM Tools inside it. These are a set of open-source virtualization utilities designed to enhance the performance and functionality of virtual machines running on VMware platforms.
Open VM Tools provide a range of features, such as better graphics performance, improved network connectivity, file transfer between a host and guest, improved memory management, enhanced support for virtualized hardware devices, etc.
They are available for various operating systems and are designed to work seamlessly with VMware Workstation.
For Debian-based (Ubuntu, Linux Mint, etc.) guest VMs, the command will be:
sudo apt install open-vm-toolsCode language: Bash (bash)For RPM-based Linux guest VMs such as Fedora, Red Hat, AlamLinux, Rocky Linux, Oracle Linux, etc.:
sudo dnf install open-vm-toolsCode language: Bash (bash)The Arch-based guest VMs, such as Manjaro, EndeavourOS, Garuda Linux, etc., need to run the following:
sudo pacman -S open-vm-toolsCode language: Bash (bash)openSUSE users need to run the following:
sudo zypper install open-vm-toolsCode language: Bash (bash)After the installation, reboot your guest virtual machine so the system can apply the changes made by installing the Open VM Tools into its kernel.
How to Uninstall VMWare Workstation
If, for some reason, you decide to uninstall VMware Workstation from your Ubuntu 24.04 LTS system, you can do it easily by running the command below. Ensure all virtual machines are first stopped, and the application is not running.
sudo vmware-installer -u vmware-workstationCode language: Bash (bash)
Conclusion
All in all, you’ve now successfully installed the VMware Workstation, running smoothly on your Ubuntu 24.04 LTS system. It gives you a powerful way to run multiple operating systems side-by-side without the hassle of constantly rebooting or juggling multiple physical devices.
However, VMware Workstation isn’t the only player in the virtualization game—VirtualBox is another excellent and reliable option. If you’re thinking about giving it a try, we’ve got you covered with a step-by-step guide on setting it up in Ubuntu 24.04LTS.
Finally, users can visit VMware Workstation’s official documentation for more information.
I hope this guide has made the process smooth and approachable. As always, if you have any questions or just want to share an opinion about the steps outlined above, leave a comment below. Happy virtualizing!
Worked. Great!
This will not work out of the box when you are running a kernel greater than 6.8I think your article should reflect this which it don’t
You don't need a stupid Broadcom account!https://softwareupdate.vmware.com/cds/vmw-desktop/ws/For instance:https://softwareupdate.vmware.com/cds/vmw-desktop/ws/17.6.2/24409262/linux/core/VMware-Workstation-17.6.2-24409262.x86_64.bundle.tar
Yeah but no. You do need a broadcom account! Your link is a joke.
You’re an impolite arse. At the time of writing, that URL was browsable and perfectly valid. In the meantime, Broadcom has closed that “loophole”. A workaround still exists: go here and click on “Workstation Linux“ https://www.techspot.com/downloads/189-vmware-workstation-for-windows.html