On June 10, 2023, the Debian Project released a stable version of Debian 12, introducing many new features. Hence, users are eager to experience the latest innovations, security enhancements, and software updates it brings.
The Bookworm release will receive security updates from the Debian Security team until June 10, 2026, when it will enter its LTS phase, extending its support beyond 2026 by at least two more years, i.e., until June 2028.
Given the release’s intended five years of support, upgrading to Bookworm will provide users with peace of mind for their servers and desktop PCs for years to come.
So, in this step-by-step guide, we will walk you easily through the process of upgrading to Debian 12 “Bookworm” from Debian 11 “Bullseye,” covering key points and essential steps to successfully navigate this major version transition.
Step 1: Perform a System Backup
Backing up your essential files and configurations is highly recommended. In this light, we recommend making a full system backup so that if something goes wrong, you can restore your system with all the vital data to its previous state.
In addition, you can always use a command like the one shown below, which will archive all of the more critical directories and their contents in a tar.gz archive.
sudo tar czf /bullseye.tar.gz \
     --exclude=/bullseye.tar.gz \
     --exclude=/dev \
     --exclude=/mnt \
     --exclude=/proc \
     --exclude=/sys \
     --exclude=/tmp \
     --exclude=/media \
     --exclude=/lost+found \
     /Code language: JavaScript (javascript)
Feel free to add more “–exclude=” parameters if needed. Finally, the command creates a backup of all files in “bullseye.tar.gz” located on the root partition (/), which you should ideally transfer to another computer or drive, for example, using the SCP command.
Step 2: Update All Currently Installed Packages
Before upgrading to Debian 12 from Debian 11, it is essential to ensure your currently installed Debian 11 system is up to date. Run the following APT commands in the terminal.
sudo apt update
sudo apt upgrade
sudo apt full-upgrade
If any updates are available, install them, then clean any leftover packages.
sudo apt --purge autoremoveFinally, reboot the system.
sudo rebootAfter the system boot, log in. Below is our current fully-updated Debian 11 “Bullseye” system before we upgrade to Debian 12 “Bookworm.”
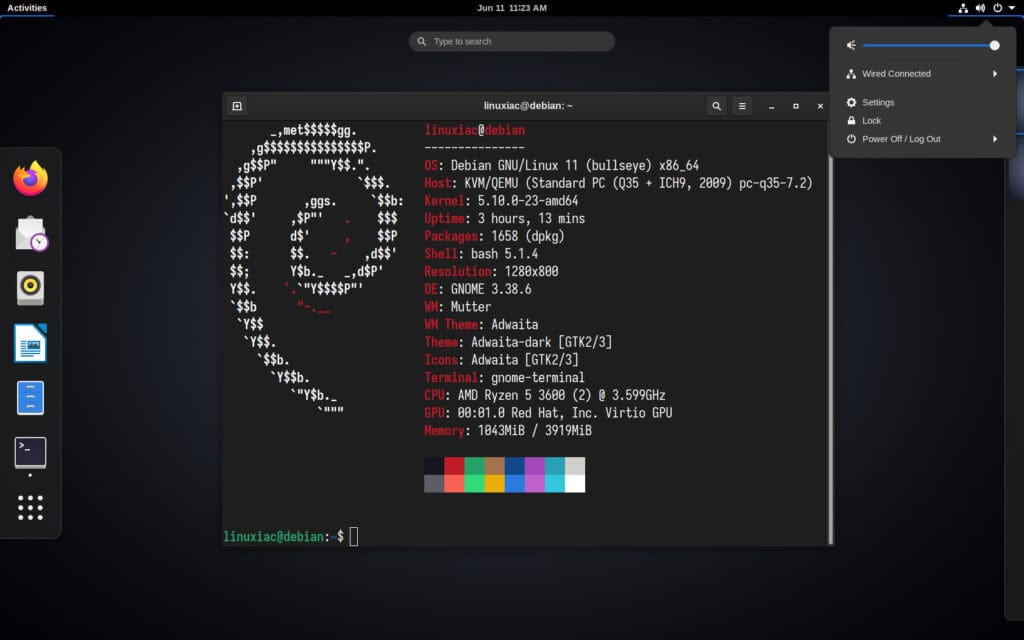
Step 3: Check for Installed Non-Debian Packages
Before proceeding with the upgrade to Bookworm, following best practices, we will check if any additional packages currently installed on our system are from somewhere other than the official Debian 11 repositories.
We do this because it is possible that when we have used our Debian 11 system, we have installed additional server or client software not from the Debian repositories, for example, Google Chrome, VirtualBox, etc.
However, this may cause complications when upgrading to Debian 12, as these external repositories may not yet be set up to work with the Bookworm release.
sudo apt list '?narrow(?installed, ?not(?origin(Debian)))'Code language: PHP (php)
As we can see, our check showed that, in this case, we have a Docker and Google Chrome installation that is from non-Debian repositories. So what do we do in such a situation?
Our best and recommended advice is, if the installed software is not critical to your needs, to uninstall it and reinstall it after successfully upgrading to Debian 12 to avoid issues during the upgrade.
However, in this case, with Docker and Google Chrome, since the software is from proven companies that immediately made their software compatible with Debian 12, we will continue upgrading to Bookworm without removing it.
But we’ll repeat it – do the necessary compatibility checks first.
In addition, check for packages that, for some reason, you have specified not to be updated. You can do this by running:
sudo apt-mark showholdIf the command doesn’t return anything, it is okay to move on. However, if you get a list of package names, you must allow them to be updated, as for each manually executed:
sudo apt-mark unhold package_nameStep 4: Update Software Sources Files
The Debian software repositories are defined in the “/etc/apt/sources.list” file and the “/etc/apt/sources.list.d/” directory. Before upgrading, you must reconfigure them to point to the Debian 12 “Bookworm” repositories.
It is a good practice before updating the software repositories’ configuration files to back up the current ones first.
mkdir ~/apt
cp /etc/apt/sources.list ~/apt
cp -r /etc/apt/sources.list.d/ ~/aptCode language: PHP (php)
Now you can update the current Debian 11 “Bullseye” repositories to those of Debian 12 “Bookworm.”
sudo sed -i 's/bullseye/bookworm/g' /etc/apt/sources.list
sudo sed -i 's/bullseye/bookworm/g' /etc/apt/sources.list.d/*Code language: PHP (php)
The above commands will replace the “bullseye” keyword with “bookworm” in software repository files.
Additionally, open the “/etc/apt/sources.list” file and add after each repository the new Debian 12’s “non-free-firmware” one.
After the changes, the final version of your “sources.list” file should contain the following lines:
deb http://deb.debian.org/debian/ bookworm main contrib non-free non-free-firmware
deb-src http://deb.debian.org/debian/ bookworm main contrib non-free non-free-firmware

deb http://security.debian.org/debian-security bookworm-security main contrib non-free non-free-firmware
deb-src http://security.debian.org/debian-security bookworm-security main contrib non-free non-free-firmware

deb http://deb.debian.org/debian/ bookworm-updates main contrib non-free non-free-firmware
deb-src http://deb.debian.org/debian/ bookworm-updates main contrib non-free non-free-firmwareCode language: JavaScript (javascript)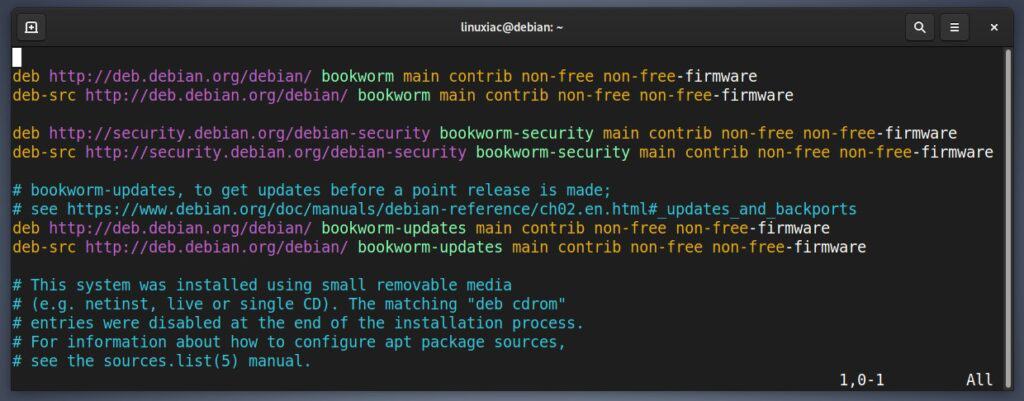
Step 5: Perform an Initial Minimal Upgrade
At this point, your Debian 11 system is ready to be upgraded to Debian 12. The first step is to update the repository to let the system recognize the newly added repo URLs.
sudo apt update
You’ll be informed that plenty of packages are waiting to be upgraded. That’s fine, and we can move on.
The Debian developers recommend a two-part upgrade process as a best practice, so we’ll proceed that way.
- Part 1: Minimal system upgrade
- Part 2: Full system upgrade
In the minimal upgrade, you will update and upgrade all the available packages without installing or removing any other packages. Run the command shown below.
sudo apt upgrade --without-new-pkgsCode language: JavaScript (javascript)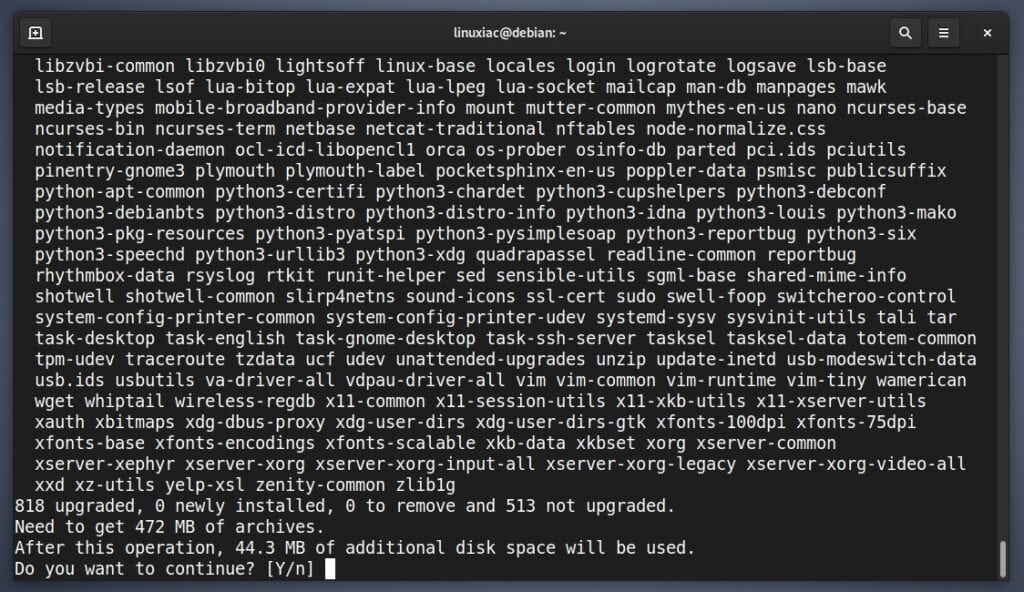
Keep an eye on the screen – it will show you important information about some upgraded packages. Press “q” after reading to exit the pager and continue the upgrade.
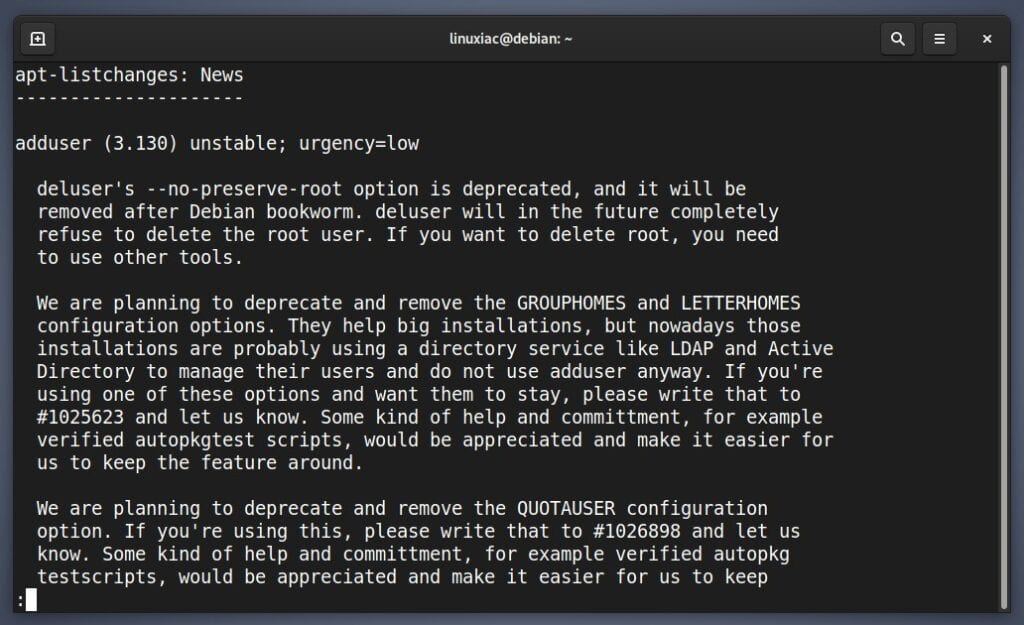
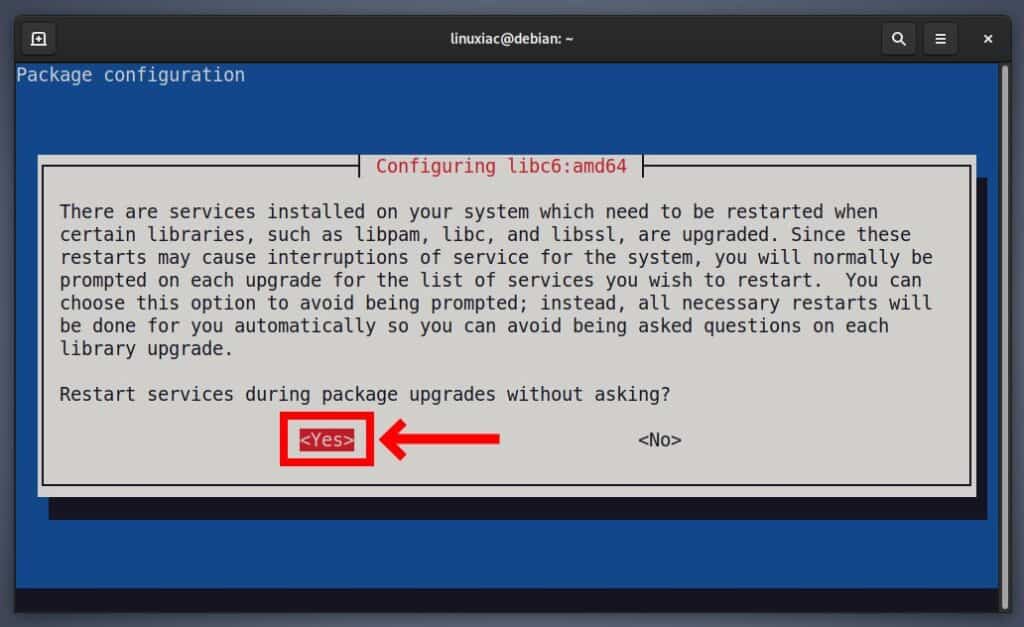
In addition, the upgrade process will prompt for permission to restart services without asking. Choose “Yes” and hit “Enter.”
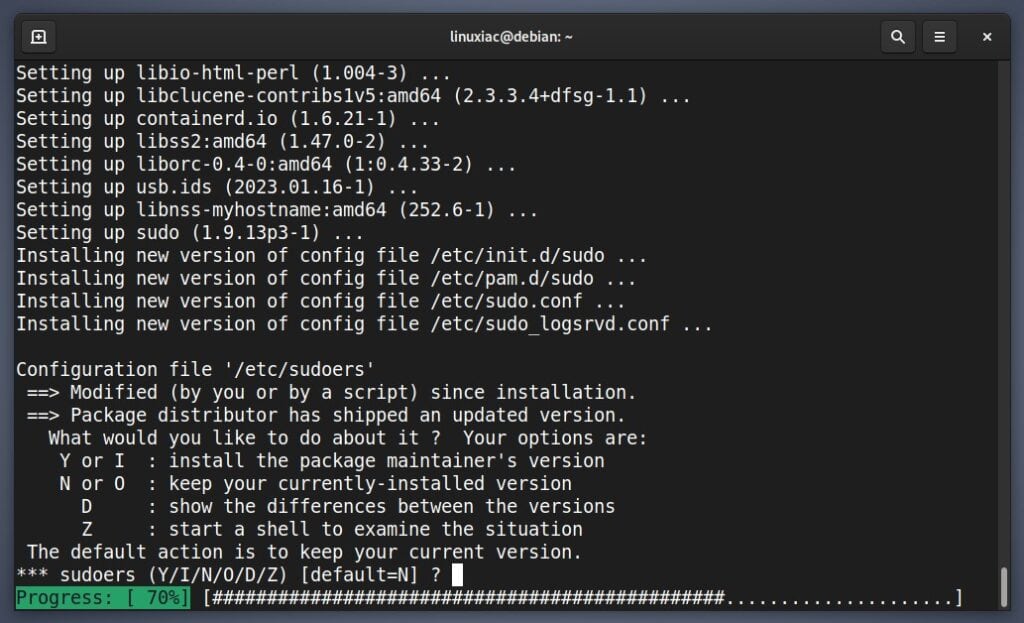
At the same time, you may also be asked what you want to do with a specific configuration file. If you’re unsure what to do, go with defaults by pressing the “Enter” key to continue with the upgrade.
Step 6: Upgrade to Debian 12 “Bookworm” from Debian 11″Bullseye”
Once the minimal system upgrade completes, run the following command to begin the full upgrade.
sudo apt full-upgradeAgain, keep an eye on the screen, read the notifications, and perform the necessary actions required for the upgrading process to proceed.
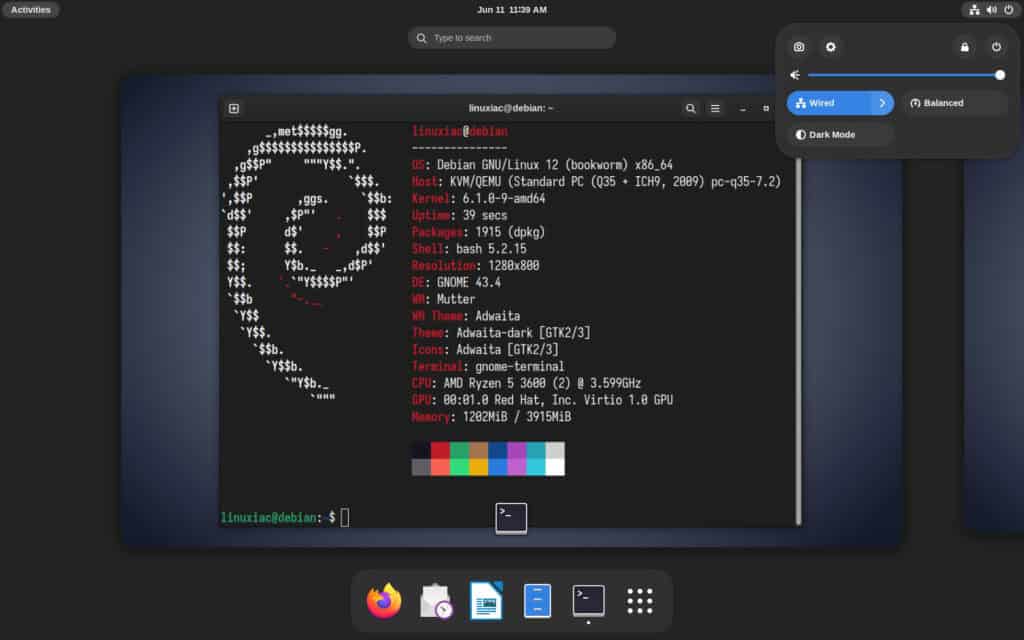
Once everything is complete, reboot the system.
sudo rebootLog in and enjoy your newly upgraded Debian 12 “Bookworm” system when the system boots.
Step 7: Cleaning up Obsolete Packages
Finally, clean your newly upgraded Debian 12 system by removing obsolete packages that are now leftover from your successful upgrade and are not needed anymore.
sudo apt --purge autoremoveConclusion
Upgrading to Debian 12 “Bookworm” from Debian 11 “Bullseye” is an easy and seamless process with the proper knowledge and careful execution. This step-by-step guide provides a comprehensive overview of the necessary procedures to ensure a successful upgrade.
By following these steps, users can take advantage of the latest features and improvements offered by Debian 12 while maintaining system stability and security.
For additional help or useful information, we recommend you check the official Debian upgrade documentation.
Finally, thank you for trusting our step-by-step instructions and relying on our expertise. I hope you have found our guide helpful.

A really great guide, thank you very much!
Works fantastic. 20 year pure Debian/Gnu/Linux user
Worked like a charm! Thank you
Nice step-by-step. I follow it and worked very well on a Debian 11 installed on a VMware 17. Thanks!
Thank you for the very clear and spot-on instructions
Worked like a charm! Upgraded an Acer netbook to Bookworm (32 bit) and other than taking hours to crawl through the process it’s up and running. Thanks for the instructions!
Worked like a charm! Upgraded an Acer netbook to Bullseye (32 bit) and other than taking hours to crawl through the process it’s up and running. Thanks for the instructions!
Thanks, it’s working very well
Worked perfectly, lots of bug warnings on bookworm but it looked like the bugs only affected certain users, cross-fingers and it worked.
All good…BUT: I have Debian xfce 4.18 (Greek language) installed. Opening thunar, and selecting Waste , it resizes the window and partially hides the left column. I have tested the whole system in English and it works correctly. So this problem is in the Greek language and I don’t know how it can be solved? I assume this is because of the displayed options under ‘Restore Selected Items’ – ‘Empty Trash’ which in Greek are much longer explanations and thus ‘break’ the size of the window…
Thank You. That worked nice.
🙂
Rather a banal question, but what is the CLI system details command showing after both cases of the command sudo reboot, please?
I’ve seen it before but cannot recall where, or how to obtain it.
Thanks in advance.
It’s called neofetch.
Dear sir,
You wrote:
deb http://deb.debian.org/debian/ bookworm main contrib non-free non-free-firmware
deb.debian.org: using a national/country mirror will often
be faster and will reduce the load on the central Debian servers.
https://www.debian.org/mirror/list.en.html
“contrib”, “non-free” and “non-free-firmware” are only required if
your system really requires them. These are not absolutely needed.
I am sure you are well aware of all this.
Gérard
Thanks, that worked nicely 🙂