Microsoft’s Visual Studio Code (VS Code) is one of the top choices among developers regarding code editors. It’s known for its versatility, support for many programming languages, and ability to be extended with many useful tools that make the developer’s life much easier and more productive.
Here, we’ll use two approaches to walk you through installing Visual Studio Code on Ubuntu 24.04 LTS (Noble Numbat).
- Using the Official Microsoft Repository (Recommended): This method is preferred because it allows you to install the latest updates directly from Microsoft, ensuring better speed and reliability than other approaches.
- Installing as a Snap Package: This method uses Ubuntu’s software distribution system, Snap. While Ubuntu promotes it, users generally don’t favor it.
The choice of which of the two to follow is entirely up to you, depending on your preferences.
Install Visual Studio Code on Ubuntu 24.04 LTS
This guide will use the sudo command, assuming you have sudo privileges.
Step 1: Install Prerequisites
Before we begin the installation, we must install some packages that will be required to be available on our Ubuntu 24.04 system for the next steps.
To accomplish this, type the following APT commands to update the package base and install prerequisites:
sudo apt update
sudo apt install wget gpg apt-transport-httpsCode language: Bash (bash)
Step 2: Import Microsoft’s GPG Key
To ensure that the packages we receive to install the Visual Studio Code are genuine, we should download and import the Microsoft signed GPG keys on our Ubuntu 24.04 system.
wget -qO- https://packages.microsoft.com/keys/microsoft.asc | gpg --dearmor > packages.microsoft.gpg
sudo install -D -o root -g root -m 644 packages.microsoft.gpg /etc/apt/keyrings/packages.microsoft.gpgCode language: Bash (bash)
Notice that none of the commands generate output.
Step 3: Add Microsoft’s Visual Studio Code Repository
After importing Microsoft’s GPG keys, we’ll add the official Visual Studio Code repository to our Ubuntu 24.04 system. If a new version is released, the update package will be made available with the rest of your system’s regular updates.
echo "deb [arch=amd64,arm64,armhf signed-by=/etc/apt/keyrings/packages.microsoft.gpg] https://packages.microsoft.com/repos/code stable main" | sudo tee /etc/apt/sources.list.d/vscode.list > /dev/nullCode language: Bash (bash)Then, you can safely delete the downloaded GPG key, which has already been imported into your system.
rm packages.microsoft.gpgCode language: Bash (bash)
Step 4: Run System Update
Before we proceed with VS Code installation on our Ubuntu 24.04 system, we should update the list of available packages. So, run the below command to refresh Ubuntu’s software repositories index.
sudo apt updateCode language: Bash (bash)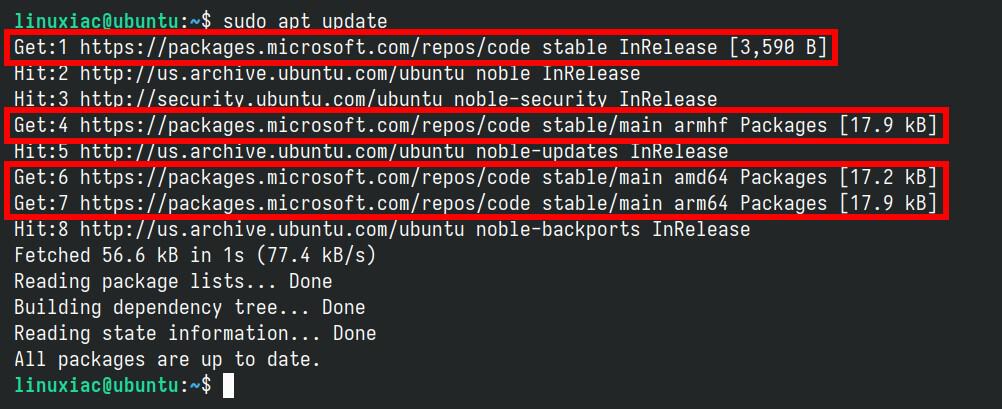
As you can see from the output above, the Microsoft repository is now available on your system and ready to be used.
Step 5: Install VS Code on Ubuntu 24.04 LTS
Everything is already prepared for the actual installation. To install VS Code on your Ubuntu 24.04 LTS (Noble Numbat) system, run the following command and wait for the installation to complete.
sudo apt install codeCode language: Bash (bash)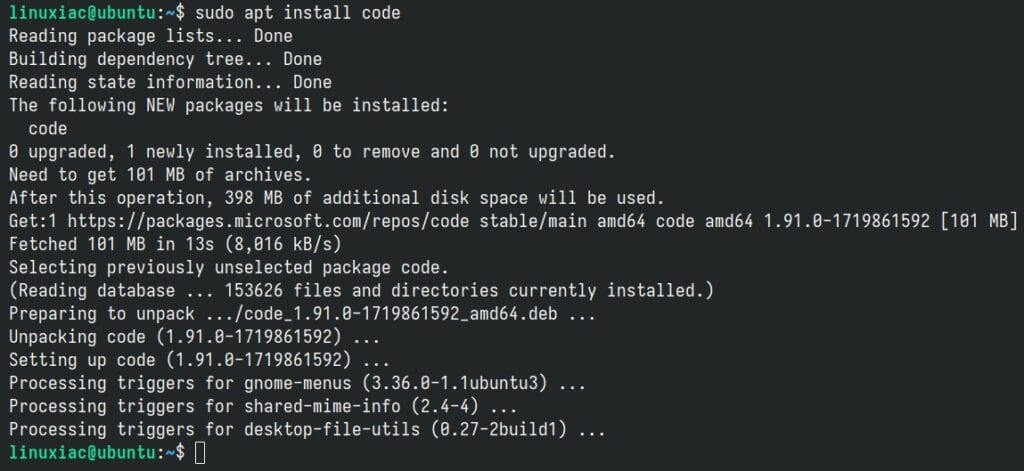
Step 6: Run Visual Studio Code on Ubuntu 24.04
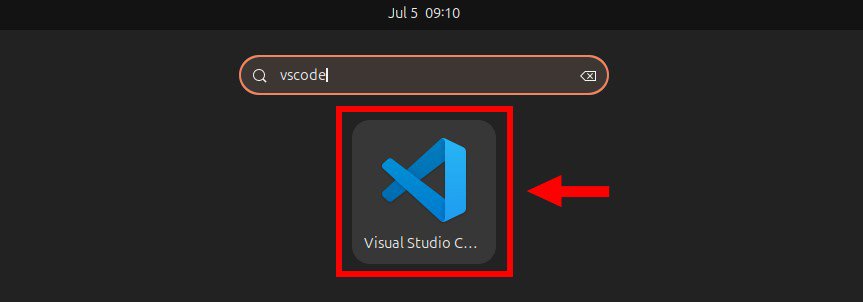
You can start using VS Code by launching it from the desktop application menu. Search for “vscode,” and click to run the same when its icon appears.
When you start VS Code for the first time, a window like the following should appear:
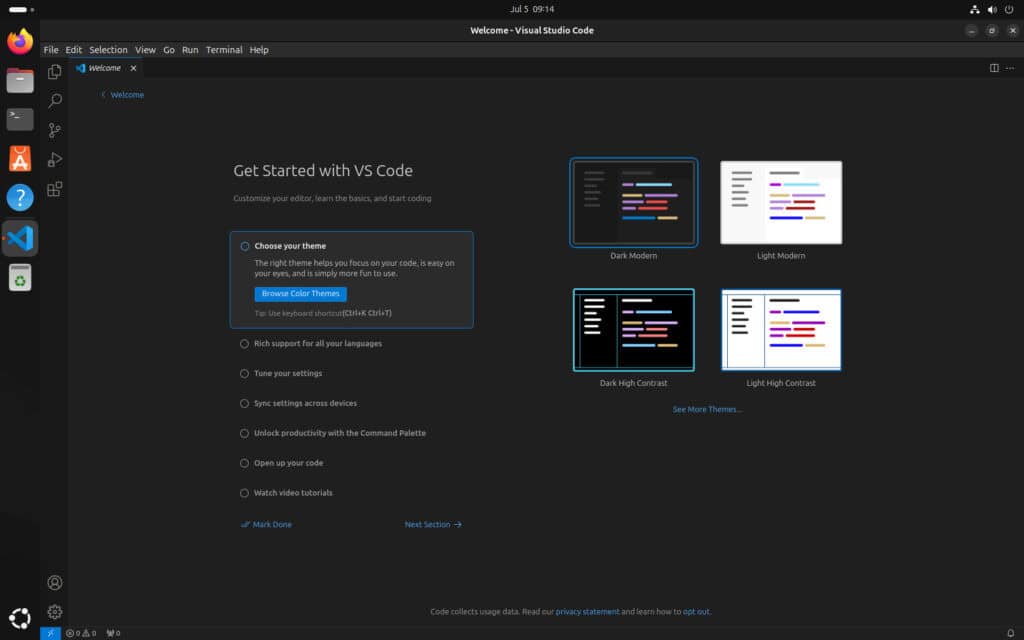
When setting up your interface, you will be asked to choose a theme and have the ability to personalize your IDE to match your preferences.
For example, you can modify font size, color scheme, and layout settings. Furthermore, you can install extensions that expand the IDE’s capabilities and features.
Doing so will allow you to customize your development environment according to your requirements, making your coding experience more efficient and enjoyable.
Uninstall VS Code
If you uninstall Visual Studio Code from your Ubuntu system for any reason, you can do it easily by running the provided command below:
sudo apt remove codeCode language: Basic (basic)Install Visual Studio Code as Snap
Snap is an approach to distributing software encapsulated in a package that offers compatibility with various Linux distributions. Since Canonical developed the technology, it’s not surprising that Ubuntu offers some of its software as Snap packages.
However, Snap packages have some drawbacks, one being speed compared to applications installed natively as DEB files. Anyway. If that’s your choice, installing Visual Studio Code as a Snap package on Ubuntu 24.04 involves executing a single command.
sudo snap install --classic code
That’s all. The application can then be run as outlined in the previous section.
However, if you feel uncomfortable with the command line, you can achieve the same result by installing VS Code as a Snap package through Ubuntu’s graphical applications manager.
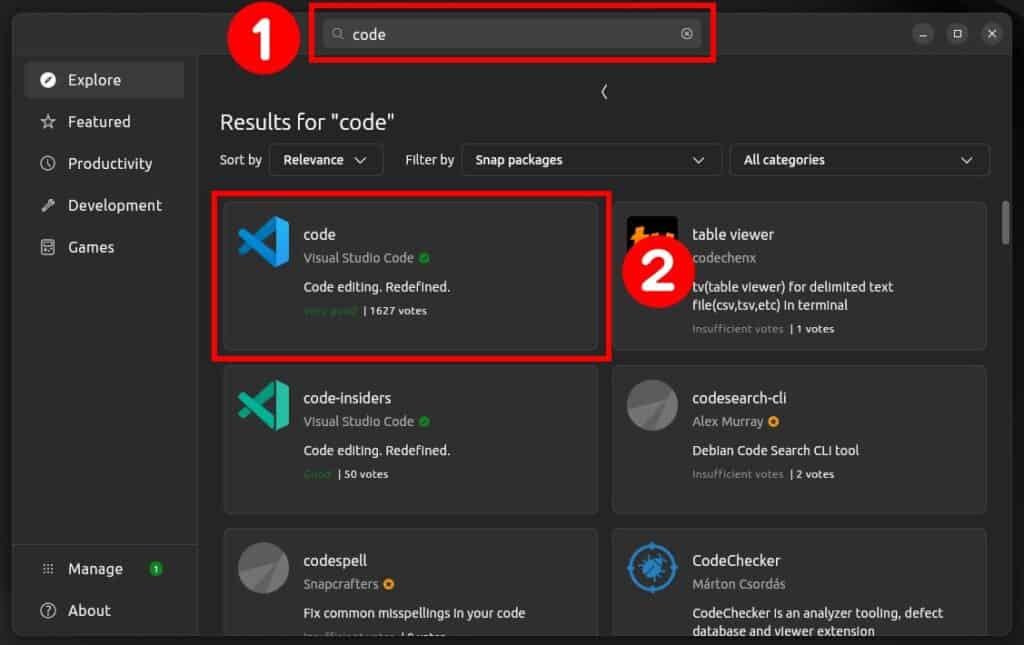
Run the App Center and search for “code,” then select it from the results list.
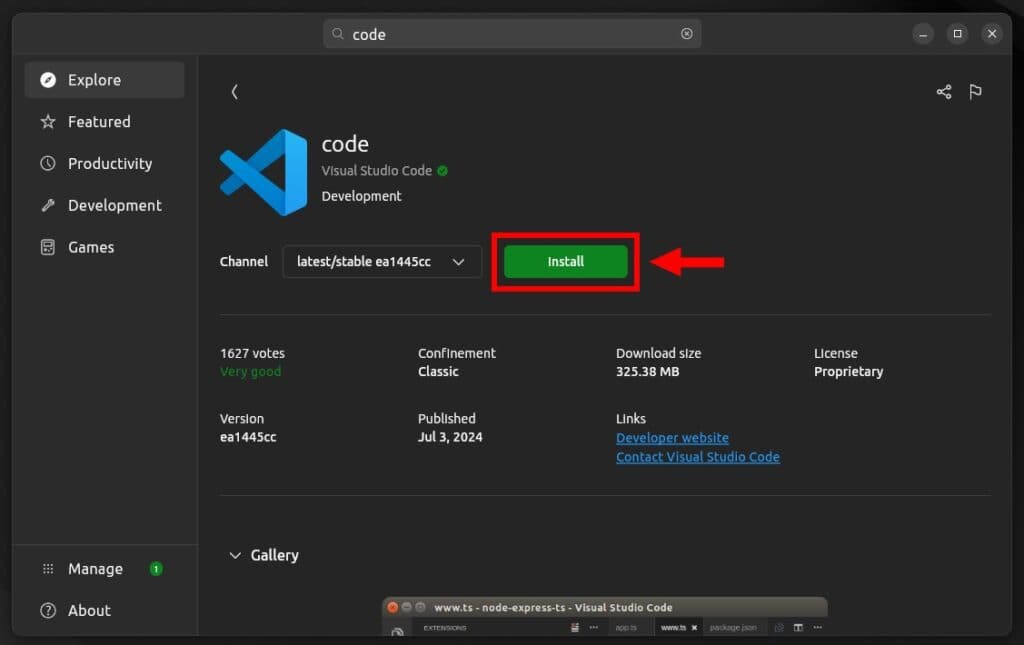
Next, click the “Install” button to install Visual Studio Code as a Snap package.
Conclusion
This guide showed how to install Visual Studio Code on Ubuntu 24.04 LTS using two techniques: as a native DEB application or as a Snap package. Which option you choose is dependent entirely on your personal preferences.
Enjoy coding with one of the most flexible and powerful editors available!
If you have any questions, please leave them in the comments section below. To learn more about Visual Studio Code, visit its official documentation page.

Thanks!
Thank you a lot. perfect teach 🖤
How about vscodium? It’s vscode but recompiled without including microsoft telemetry. I’d recommend installing it imstead.