Java, a robust and widely used programming language, is essential for running various applications and development tasks. Fedora Linux, known for its cutting-edge features, offers an excellent platform for Java developers.
This article shows and explains the installation process of Java on Fedora, guiding you through each step with clarity and precision. So, whether you are setting up a development environment or need to run Java apps, this guide will provide you with all the necessary information to get Java up and running smoothly on your Fedora system.
But before that, let’s introduce you to the Java varieties available in Fedora’s repositories. We’ll explain what each one is for, helping you choose the best option for your needs.
Differences Between OpenJDK’s Variants
Fedora provides OpenJDK in its repositories. Short for Open Java Development Kit, it is an open-source implementation of the Java Platform, Standard Edition (Java SE), free to use and governed under the GNU General Public License, version 2.
This means you can use it to develop and run Java applications without worrying about license fees or proprietary code.
Furthermore, two package types of OpenJDK are available for different uses, reflecting the specific needs of various users and applications. Here they are.
OpenJDK Headless
This package is designed for running Java applications that do not require a graphical user interface (GUI). It is a stripped-down version of the JDK that doesn’t include the JavaFX or Swing graphical user interface libraries.
The package (openjdk-headless) contains the Java Runtime Environment (JRE) and the core libraries necessary to run Java applications. It is ideal for server-side applications, headless applications running in the background, command-line tools, and any other application that does not require a GUI.
OpenJDK Devel
This package (openjdk-devel) is intended for Java developers. It includes the full JDK (Java Development Kit), which comprises the JRE (Java Runtime Environment), compiler (javac), debugger (jdb), and other development tools necessary for developing Java applications.
On top of that, it also includes libraries for GUI development, making it suitable for developing a wide range of Java applications, including those with graphical user interfaces. Overall, it is the go-to approach for development environments, and if you’re looking to build Java applications, this package is a must.
Install Java on Fedora Linux
Firstly, it is important to mention that Fedora includes the openjdk-headless package right out of the box. This may not be the latest LTS version, but it suffices if you’re not planning on developing Java applications. In that case, you’ve already got what you need, and there’s no need to continue reading.
However, for those who require Java development tools or wish to upgrade to the most current LTS (Long-Term Support) version, let’s proceed further.
Step 1: Install OpenJDK
Java has many versions, but only a few are LTS releases. Those versions receive extended support beyond the standard period and are the recommended approach for production environments.
Currently, the Java LTS releases are 8, 11, 17, and 21, with 21 being maintained until September 2028. This makes OpenJDK 21 our logical choice for installing on our Fedora system.
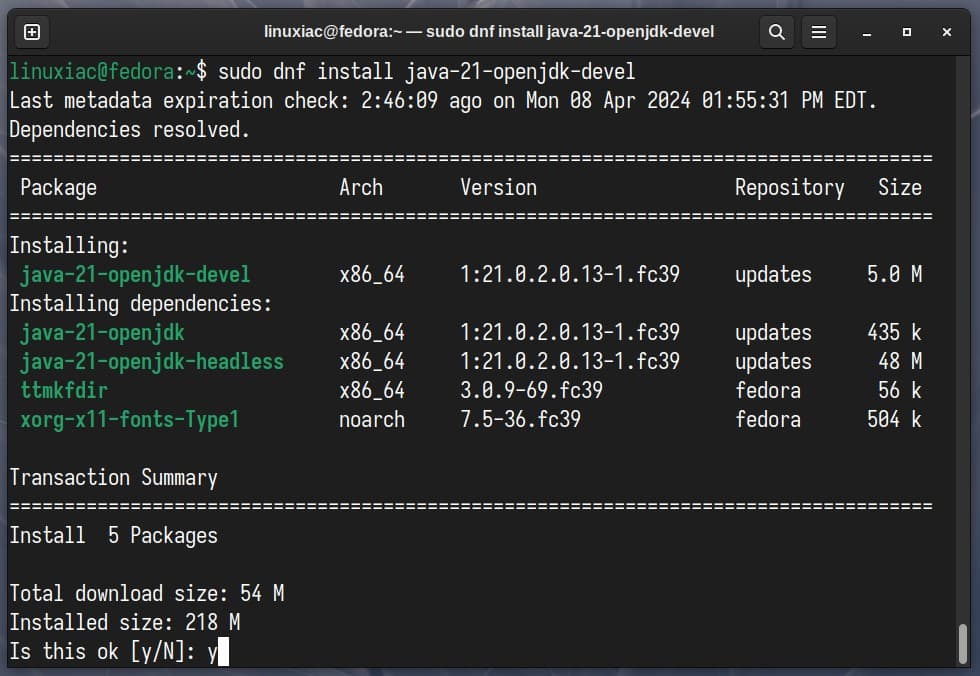
We’re opting to install the development package to access the Java platform’s complete suite of tools, including development utilities. So, let’s do it.
sudo dnf install java-21-openjdk-develCode language: Bash (bash)
The command also installs the openjdk-headless package as a dependency for the openjdk-devel package, which includes the Java Runtime Environment. In other words, you get an environment for both running and developing Java applications – all in one.
If you want to view all Java versions available in Fedora’s official repository, execute the command below. A list of results will appear.
sudo dnf search openjdkCode language: Bash (bash)Step 2: Switch Between Java’s Versions
Fedora ships with a pre-installed Java version of the headless package, which it uses by default. We must execute the command below to switch to the newly installed OpenJDK 21.
This will present a list of versions from which we need to choose the desired one; we select option 2 for our purposes.
sudo alternatives --config javaCode language: Bash (bash)
Step 3: Verify the Installation
Verify that the installation and switching to the newly installed version succeeded with the command below.
java --versionCode language: Bash (bash)
As you can see, the command’s output confirms that our Fedora system now has OpenJDK 21 set as the default Java version.
Set JAVA_HOME Environment Variable
One final step remains, serving as the finishing touch to complete our setup – setting up the JAVA_HOME variable. It is used by various applications, such as development environments and build tools, to locate Java binaries and libraries.
When JAVA_HOME is set, the system knows where to look for the JDK and can use it to execute Java applications or compile Java code. Open the “/etc/environment” file with the terminal text editor you are using:
sudo nano /etc/environmentCode language: Bash (bash)Add the following line to it, then save the file and exit.
JAVA_HOME="/etc/alternatives/java_sdk/"Code language: Bash (bash)
To clarify, the specified path “/etc/alternatives/java_sdk/” is a symlink to the actual directory containing OpenJDK 21, located at “/usr/lib/jvm/java-21-openjdk-21.0.2.0.13-1.fc39.x86_64“.
The beauty of using this symlink is that it adapts to updates. So, when there’s a new version of the Java package and the directory’s name changes, the symlink automatically updates to redirect to the new directory, ensuring “/etc/alternatives/java_sdk/” always leads to the correct location.
Additionally, you can find the JAVA_HOME path by executing the following command.
dirname $(dirname $(readlink -f $(which javac)))Code language: Bash (bash)
Finally, run the two commands below to apply the changes and verify everything is correct.
source /etc/environment
echo $JAVA_HOMECode language: Bash (bash)
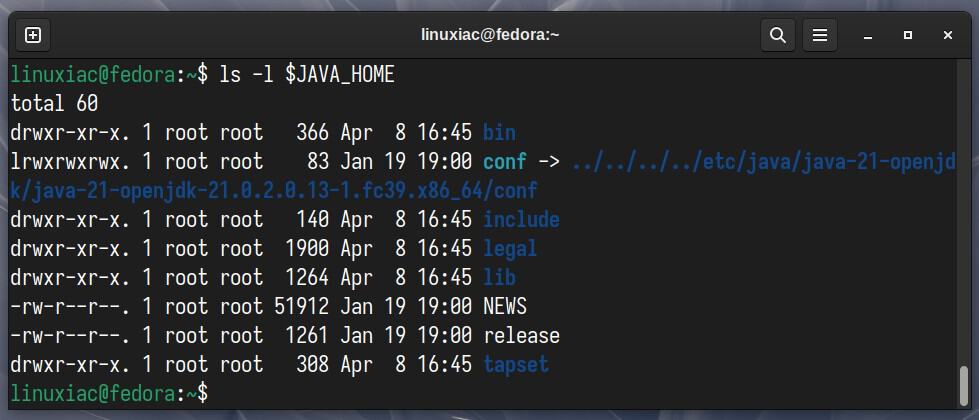
As we can see from the echo command output, the JAVA_HOME environment variable is set correctly. Therefore, executing the command below should produce an output like the one shown.
ls -l $JAVA_HOMECode language: Bash (bash)
Conclusion
Installing Java on Fedora Linux is a straightforward process that can open up a whole new world of development possibilities for you. Following the steps outlined in our guide, you’re all set to start with Java programming on your Fedora system.
Of course, remember to keep your Java installation up to date to ensure compatibility with the latest features and security patches. Regularly updating your system with the DNF package manager or setting up automatic updates on your Fedora system will guarantee that you have access to the latest versions and bug fixes.
For more information, we highly recommend to visit the official documentation.
Thanks for your time! I hope you find this guide helpful. Your feedback and comments are most welcome.
