Google Chrome is known for its speed, security, and extensive features. However, because it is not open-source software, it is not included by default in almost any Linux distribution, including Debian.
This article will walk you through the step-by-step process of installing Google Chrome on Debian 12 (Bookworm). We’ll cover the graphical and command-line methods, ensuring you have options based on your preference and expertise level.
So, whether you’re new to Debian or a seasoned user looking to switch to Google Chrome, let’s dive in and set you up with this widely-adopted browser.
Installing Google Chrome on Debian 12 from DEB File
This method is suitable for new Linux users as it doesn’t involve any command line interaction, and using only a mouse and graphical applications, you can quickly and easily install Chrome on your Debian 12 system.
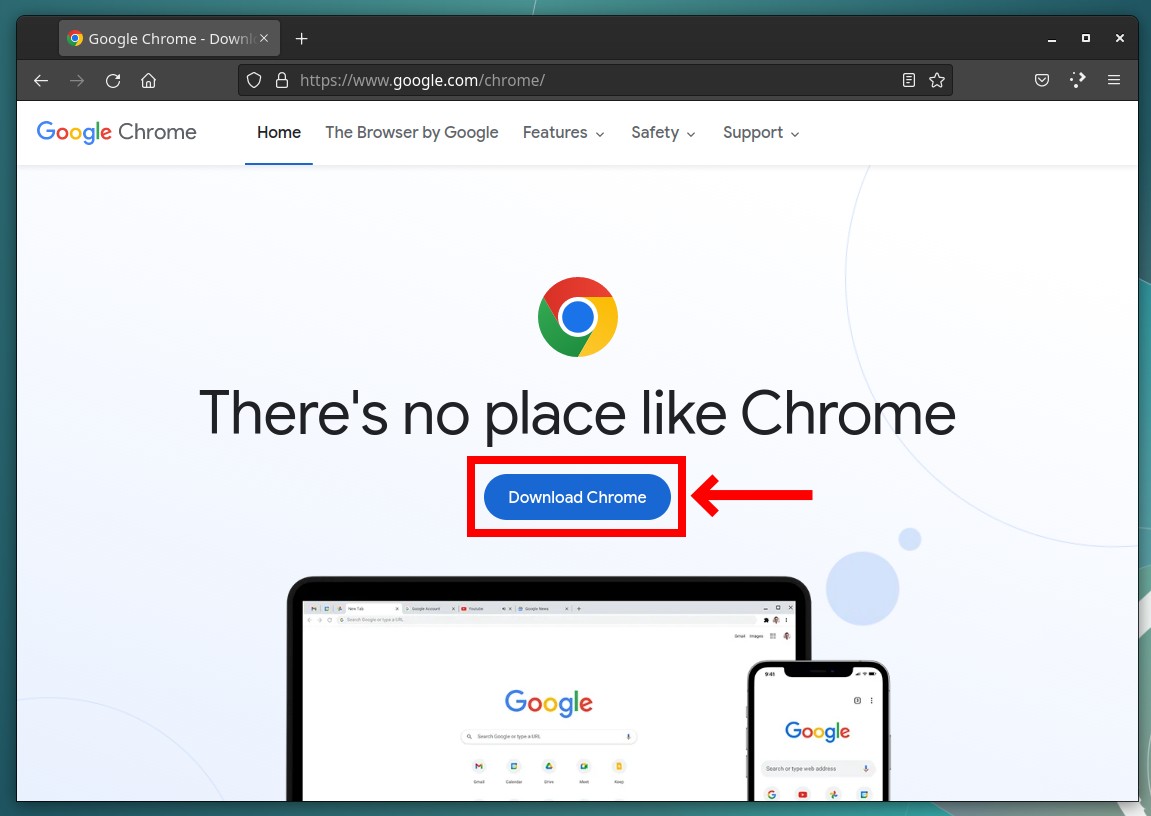
Step 1: Download the Google Chrome Linux Installer
Visit the download page for Google Chrome by clicking here or copying and pasting the following address in the browser: https://www.google.com/chrome/. Then, hit the “Download Chrome” button.
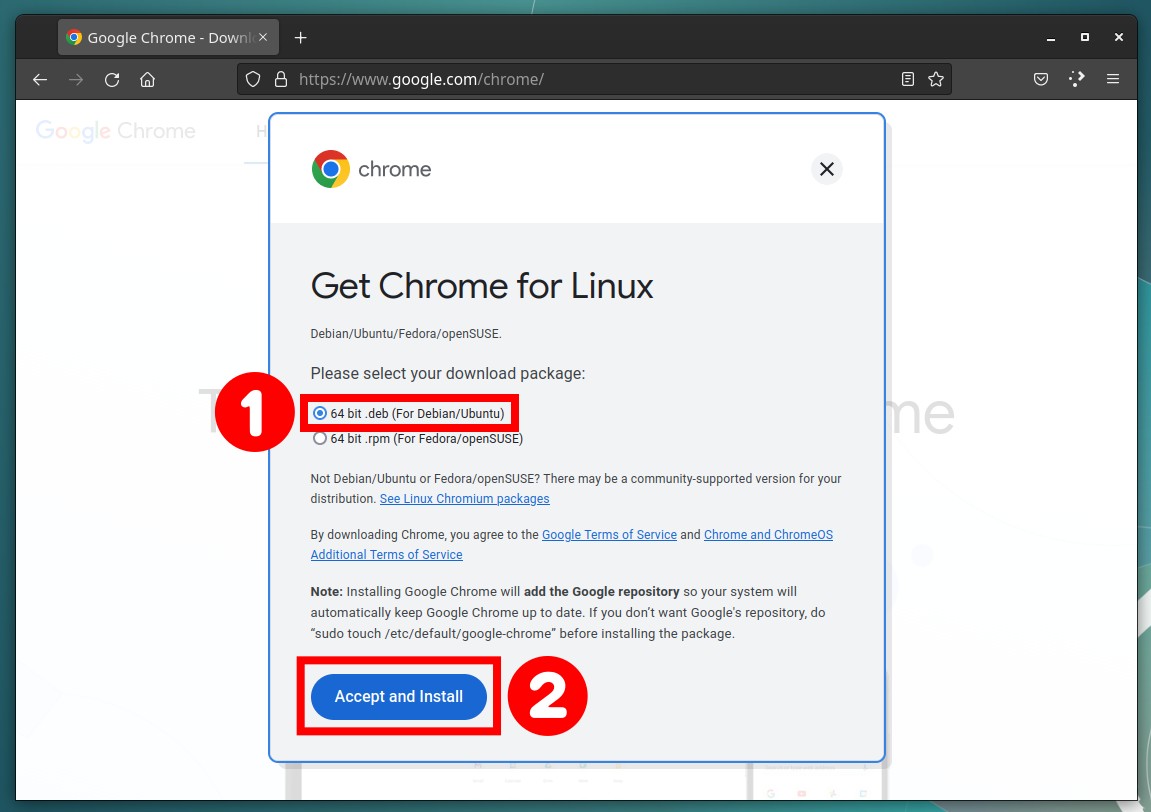
Next, select the “64-bit .deb (For Debian/Ubuntu)” download package option and confirm by clicking the “Accept and Install” button.
Step 2: Installing Google Chrome on Debian 12
Depending on your desktop environment, the approach to installing Chrome with the help of a GUI app is different. For this, we’ll cover each scenario.
Step 2.1: GNOME
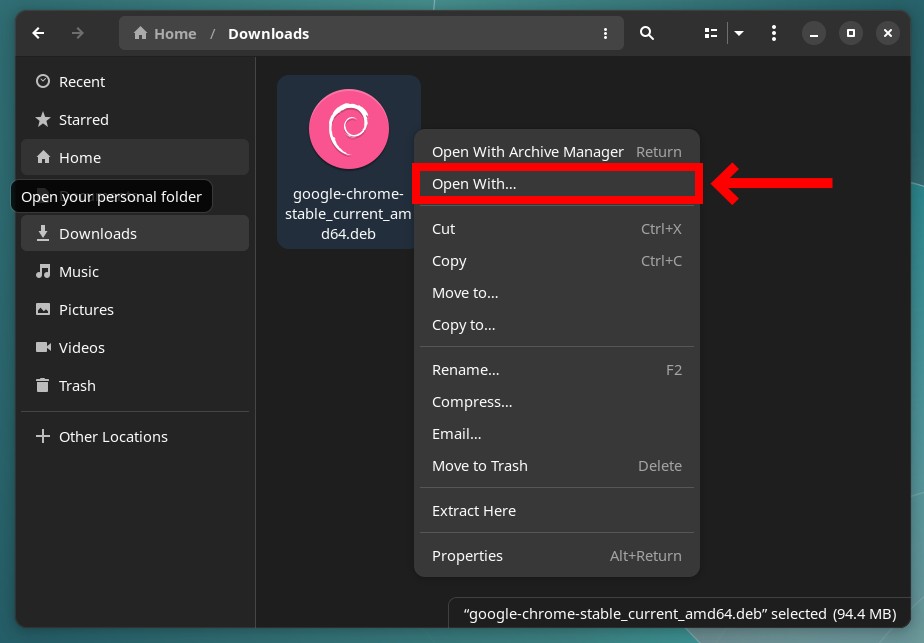
Once the download is complete, open the Files app, navigate to your downloads directory, find the Google Chrome DEB installation package (google-chrome-stable_current_amd64.deb), right-click on it, and choose the “Open With…” option.
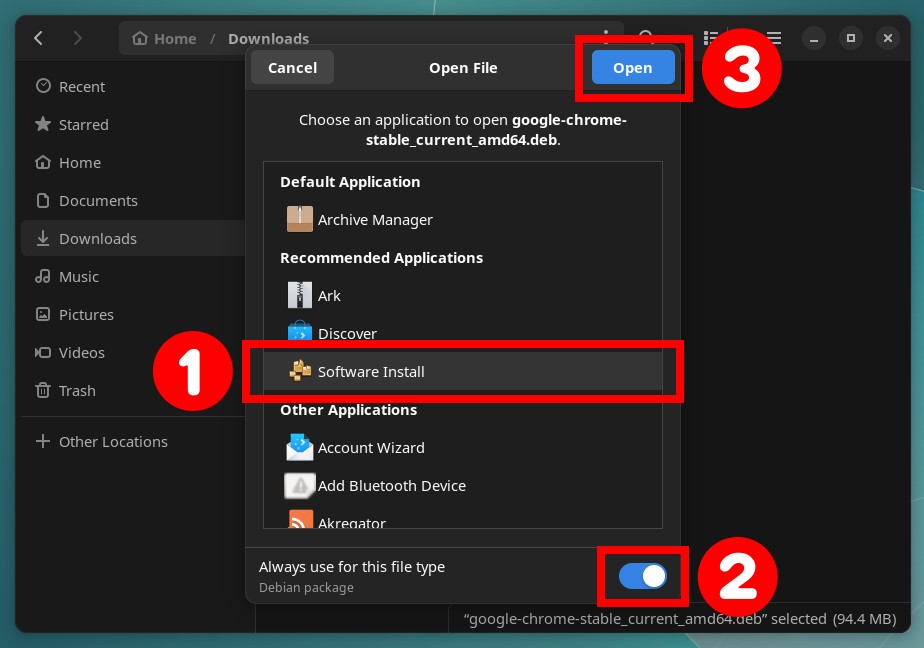
Highlight “Software Install” in the new window that appears, flip the “Always use for this file type” switch on, and confirm by hitting the “Open” button.
The file will open in the Software app so that you can install it. Click the “Install” button to begin the Chrome installation on your Debian 12 system.
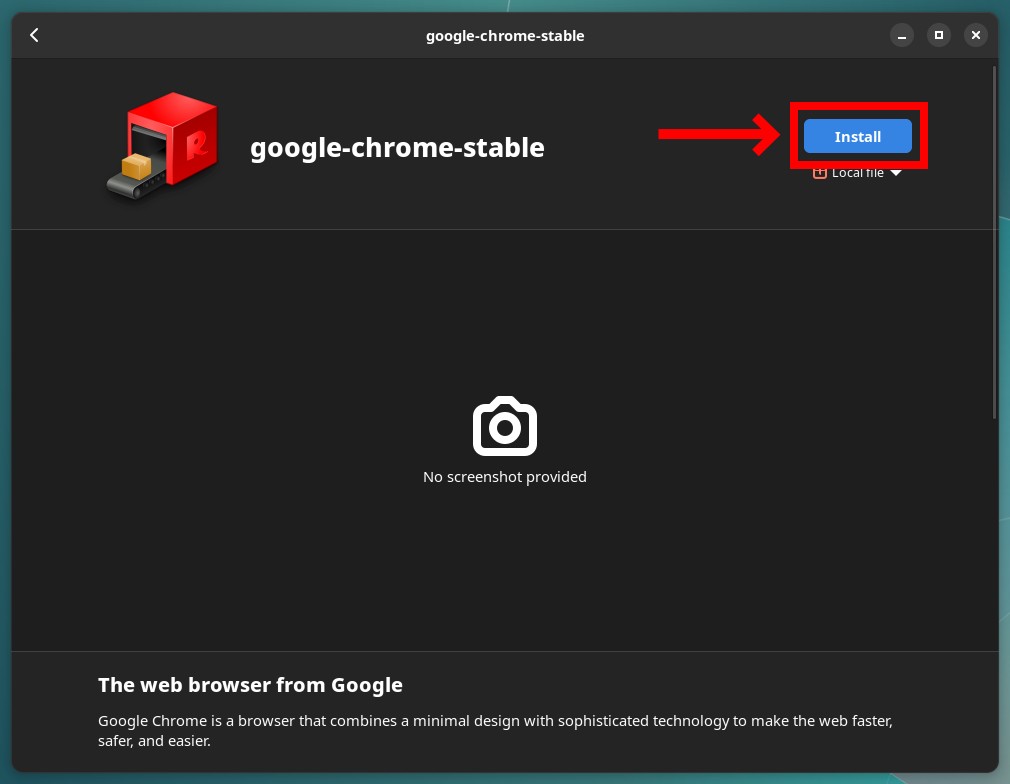
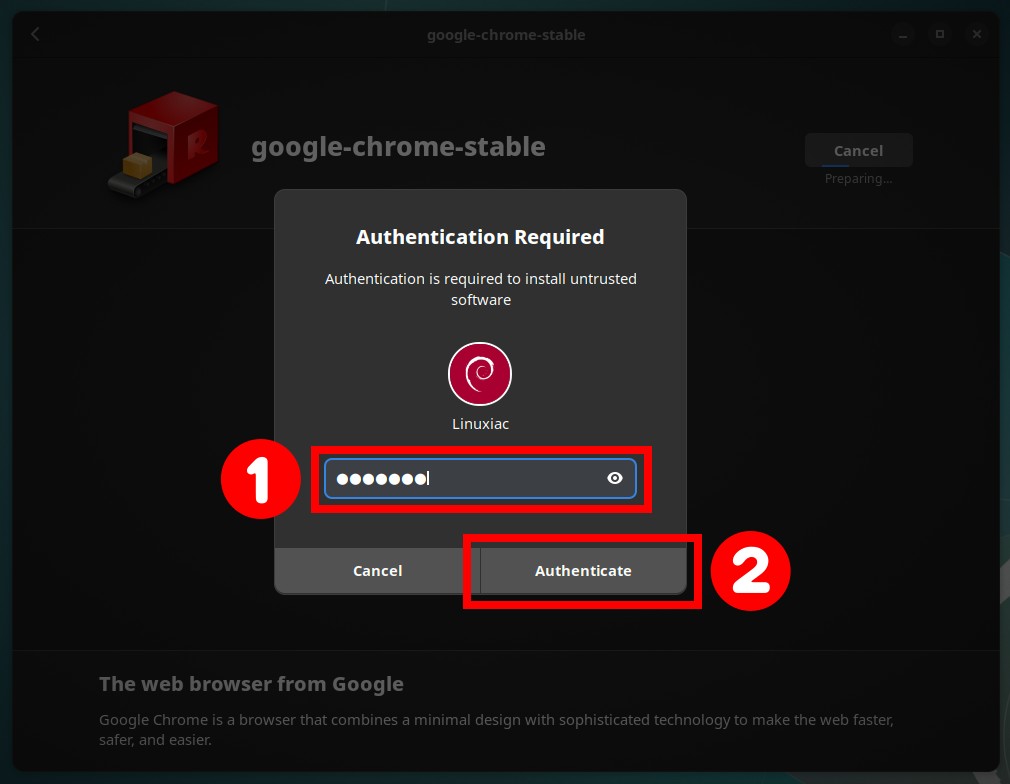
Enter your user password when prompted and hit “Authenticate.”
The progress bar under the button lets you know when the Google Chrome browser has finished installing on your Debian 12 system, so please wait for it to complete. Then you can safely close the window.
Step 2.2: KDE Plasma
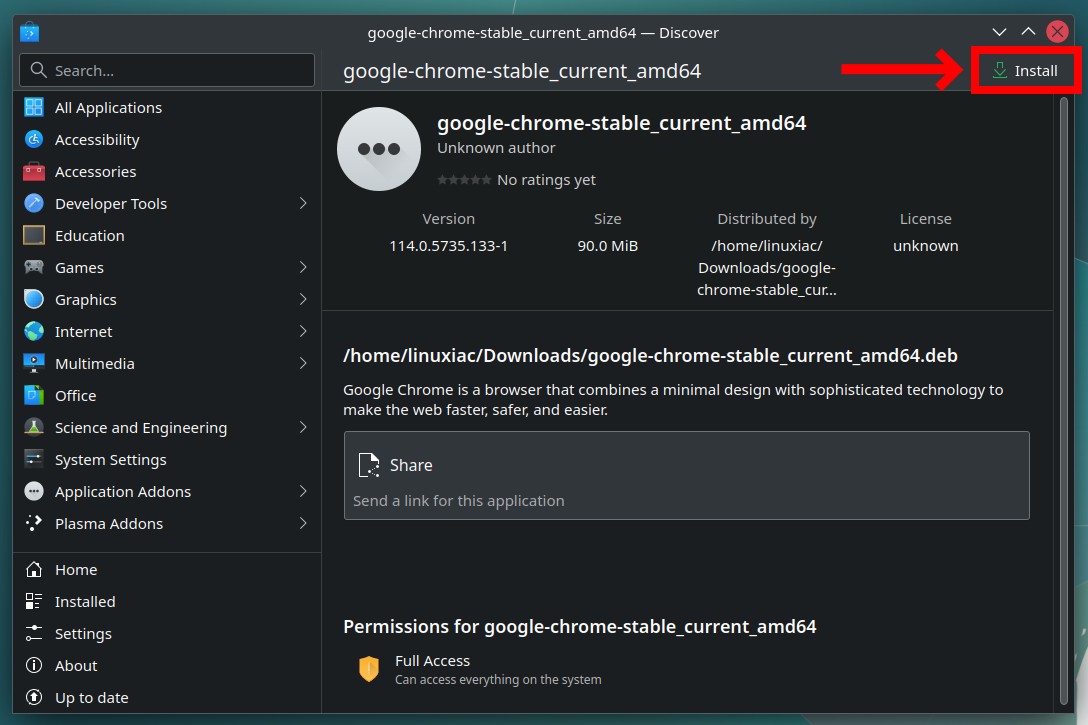
Plasma users should launch the Dolphin file manager, navigate to Chrome’s installation DEB file and right-click on it. Then, choose the “Open with Discover” option.

The file will open in the Discover app so that you can install it. Click the “Install” button to begin the installation.
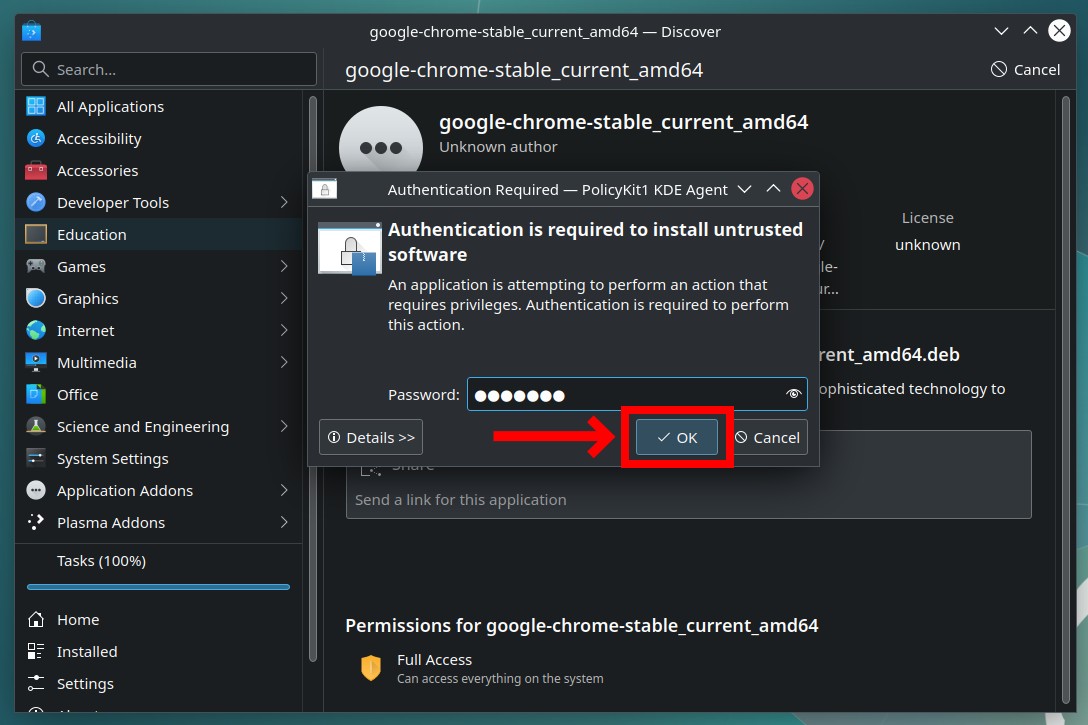
When prompted, enter your password and click the “OK” button. Wait for the Google Chrome installation on your Debian 12 system to complete and close the window.
Step 2.3: Xfce, MATE, and Other Desktop Environments
Unlike GNOME and KDE, other desktop environments do not include a built-in GUI tool for installing DEB files. Of course, this shouldn’t bother you as we’ll install the universal one immediately – GDebi. It is a tiny desktop-agnostic app that helps you install DEB files.
Run the command below to install GDebi on your Debian 12 system.
sudo apt install gdebiNext, run the GDebi app with root privileges.
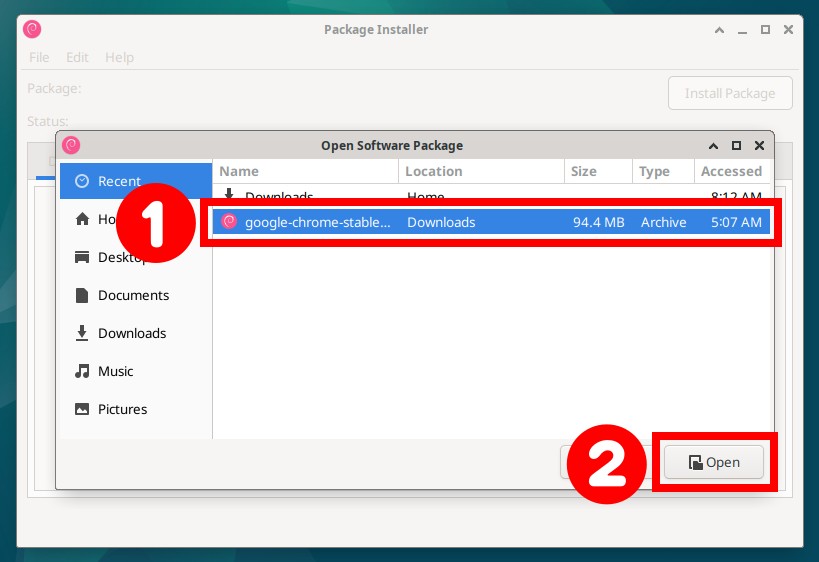
sudo gdebi-gtkSelect “File” -> “Open” from the menu, locate Chrome’s DEB installation file, mark it, then click the “Open” button to confirm.
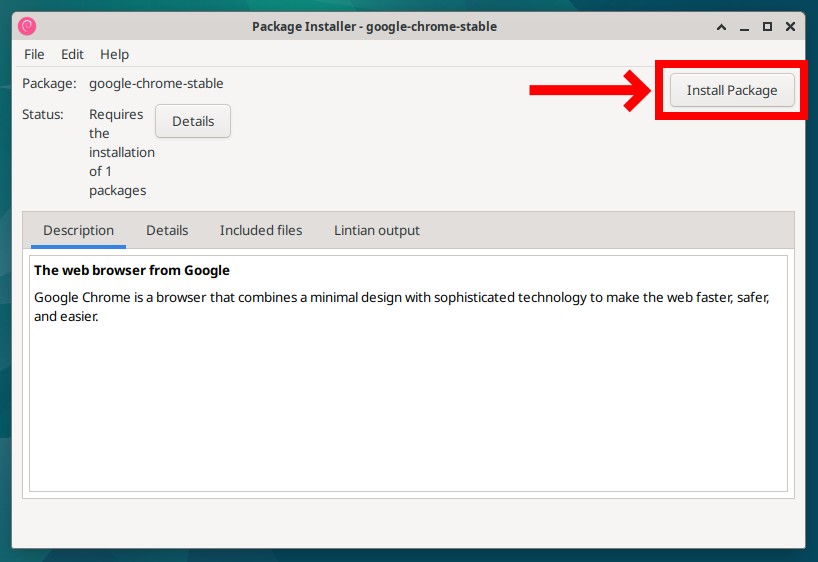
Once the file is loaded into the application, click the “Install Package” button.
Wait for the installation to complete and close the window.
Step 3: Launch Google Chrome Browser
That’s all! Once installed, you can start it using your application launcher and enjoy it.

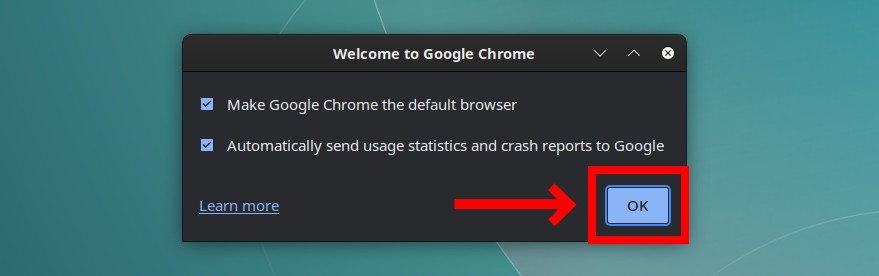
The first time you start Chrome, you’ll have the chance to make it your default browser. You can also choose to “Automatically send usage statistics and crash reports to Google.” It is up to you whether you want to enable this or not.
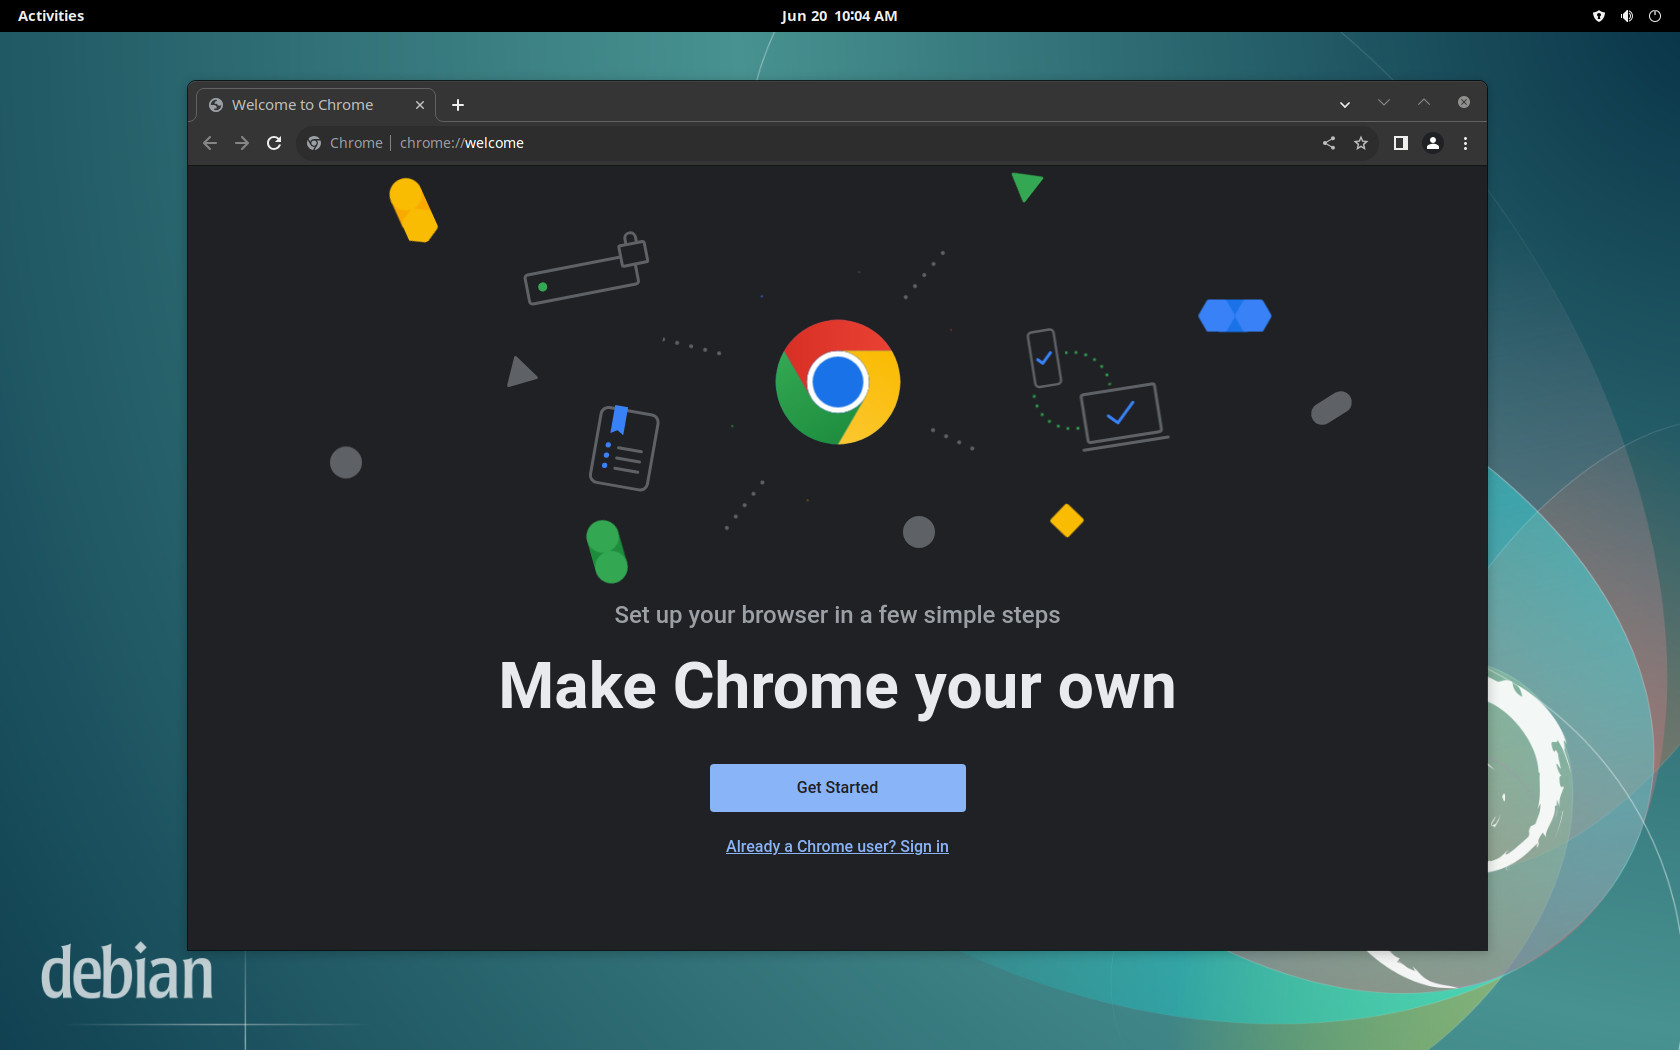
Google Chrome will start. Enjoy it!
Method 2: Installing Google Chrome on Debian via Command Line
The second way to install Chrome on Debian 12 is entirely command-line-based. This approach is way faster, so if you’re not afraid to dive into the Linux terminal, follow the steps below, and you’ll be greeted with a successful result in minutes.
Step 1: Download and Import Google’s Signed Key
To ensure that the packages we receive to install the Chrome browser are genuine, first, we should download and import the Google signed key on your Debian system.
To do so, type the following two commands:
wget -q -O - https://dl-ssl.google.com/linux/linux_signing_key.pub > linux_signing_key.pub
sudo install -D -o root -g root -m 644 linux_signing_key.pub /etc/apt/keyrings/linux_signing_key.pubCode language: JavaScript (javascript)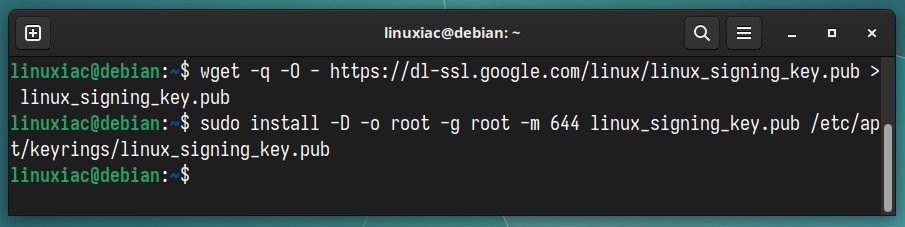
Notice that neither command produces any output.
Step 2: Add Google’s Chrome Repository
After importing the package signing key, you must add the official Google Chrome repository to your Debian 12 system. This implies that the update package will be made available with the rest of our system’s regular updates when a new version is released.
Type the command shown below, which also will not produce any output.
sudo sh -c 'echo "deb [arch=amd64 signed-by=/etc/apt/keyrings/linux_signing_key.pub] http://dl.google.com/linux/chrome/deb/ stable main" > /etc/apt/sources.list.d/google-chrome.list'Code language: JavaScript (javascript)
Step 3: Run System Update
You should update the packages list before installing Google Chrome on your Debian system. So, run the below APT command to update the repositories index.
sudo apt update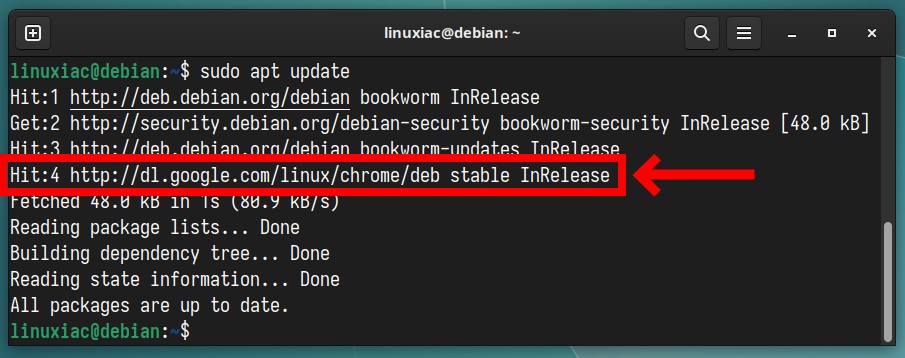
As you can see, your new Google Chrome repository is now available and ready to be used.
Step 4: Install Google Chrome on Debian 12 (Bookworm)
Everything is already prepared for the actual installation. Now, to install Chrome on your Debian 12 system, run the following command:
sudo apt install google-chrome-stable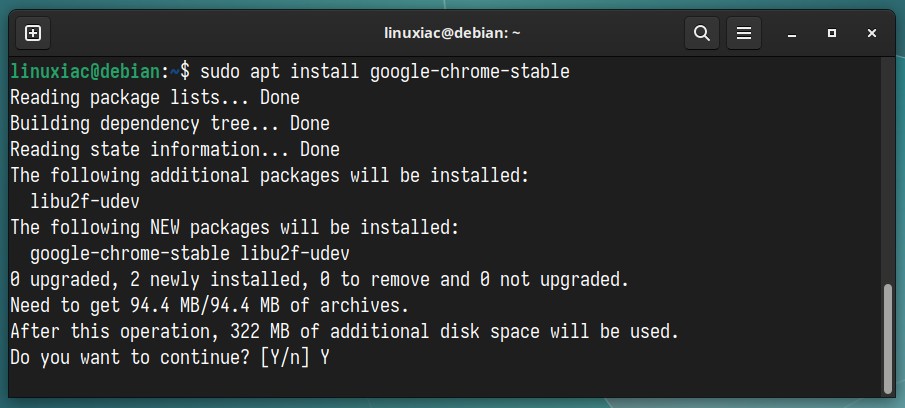
Once installed, launch the Chrome web browser and enjoy it.
Uninstall Google Chrome
If you decide to remove the Google Chrome browser from your Debian system for some reason, you can do it quickly and easily by typing the command shown below:
sudo apt purge google-chrome-stableConclusion
Installing Google Chrome on Debian 12 (Bookworm) is a straightforward process that allows users to access the full range of features and functionalities offered by this popular web browser.
In addition, once Chrome has been installed on your system, you can add Chrome extensions and your favorite themes from the Chrome Web Store.
It is important to note that the installation process adds Google’s Chrome official repository to your system, so the browser will receive the latest updates automatically whenever you update your system via the Software app or command line.
Thanks for your time! I hope you find this guide helpful. Your feedback and comments are most welcome.