
Fonts play a crucial role in enhancing text’s visual appeal and readability on your Linux system. Known for its flexibility and customization, Linux offers multiple ways to install fonts, catering to various user preferences and skill levels.
This guide will explore two main approaches: the command line and the dedicated graphical user interface (GUI) applications available in popular desktop environments like GNOME and KDE Plasma.
But first, let’s look over the various font type formats.
Types of Font Formats
In Linux, several font formats are commonly used to store and manage fonts. Each has its characteristics and advantages, catering to different needs and use cases.
Here are some of the most common font formats you’ll encounter on Linux systems:
- TrueType Font (TTF): TrueType is one of the most popular and widely supported font formats. TTF fonts are scalable and display well at various sizes. They are commonly used for both on-screen and print purposes, making them suitable for web design, graphic design, and general text rendering.
- OpenType Font (OTF): OpenType is an extension of the TrueType font format. OTF fonts support advanced typography features, such as ligatures, alternative characters, and stylistic sets. They can include TrueType and PostScript font data, making them versatile for different platforms and applications.
- PostScript Font (Type 1): PostScript fonts, often called Type 1 fonts, were one of the earliest digital font formats. While they have been largely replaced by TrueType and OpenType fonts, they still find use in specific legacy applications and printing workflows.
- Bitmap Font (BDF): Bitmap fonts are created using a grid of pixels, where each pixel corresponds to a specific glyph. These fonts are not scalable and are best suited for particular screen resolutions. They were commonly used in older systems and terminals with limited screen space.
- X11 Font Format (XLFD): The X Logical Font Description (XLFD) format was used in the X Window System to describe fonts. It included various attributes like font family, style, size, weight, etc. However, XLFD has become less relevant as newer font technologies and formats have emerged.
- Web Font Formats (WOFF, WOFF2): While not exclusive to Linux, web font formats like WOFF (Web Open Font Format) and WOFF2 are optimized for web usage, providing efficient compression and faster loading times. They allow web designers to use custom fonts on their websites while ensuring cross-browser compatibility.
- SVG Fonts: Scalable Vector Graphics (SVG) fonts use XML-based descriptions to define font outlines. While they offer scalability without losing quality, they are less common than TrueType or OpenType fonts for general text usage.
These font formats vary in their capabilities, compatibility, and use cases. When installing fonts on a Linux system, choosing a format that suits your intended purpose, whether for general text rendering, design work, or web development, is essential.
In this guide, we will focus on the OTF and TTF formats as they are the most used.
Installing Fonts on Linux: A Command-Line Approach
Adding new fonts to a Linux system through the command line offers a swift and efficient method for enhancing typographic choices. By utilizing simple commands, users can easily manage font caches and refresh font lists. Let me show you how.
Step 1: Obtain the Font File
The first step is to download the font file we want to install on our Linux system. For this guide, we will use the Fira Code font, available for free download from GitHub.
We download it with the following wget command:
wget https://github.com/tonsky/FiraCode/releases/download/6.2/Fira_Code_v6.2.zipCode language: JavaScript (javascript)After unzipping it, we will get several folders with different font types – TTF, WOFF, and WOFF2. We will use TTF.
Step 2: Install Font
Here, we must decide how we want the font to be available on our system. Linux provides two main ways to install fonts: system-wide and per-user.
System-wide font installation involves installing fonts that will be available to all users on the system. This typically requires administrative privileges and affects the entire system’s appearance.
Per-user font installation allows users to install fonts only available to them. This can be useful if you want to customize your environment without affecting other users on the system.
Below, we will show you how to install the font with both approaches.
Step 2.1: System-Wide Font Installation
Most Linux distributions store the system-wide fonts in the “/usr/share/fonts” directory.
To install the font system-wide, you need to copy or move the font files (“.ttf “) into that directory, and to make them easier to manage, it is good practice to put them in the one you create in advance. So let’s do it.
First, we will create a new sub-directory under “/usr/share/fonts” with the name “fira-code” and then copy or move the font files to it.
sudo mkdir /usr/share/fonts/fira-code
sudo mv *.ttf /usr/share/fonts/fira-code/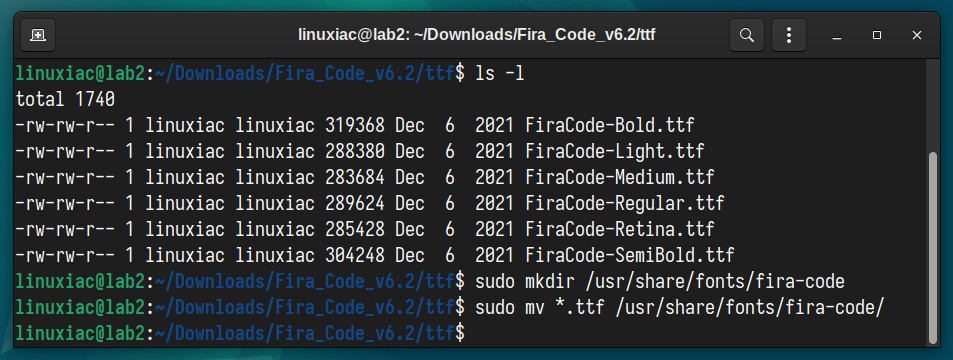
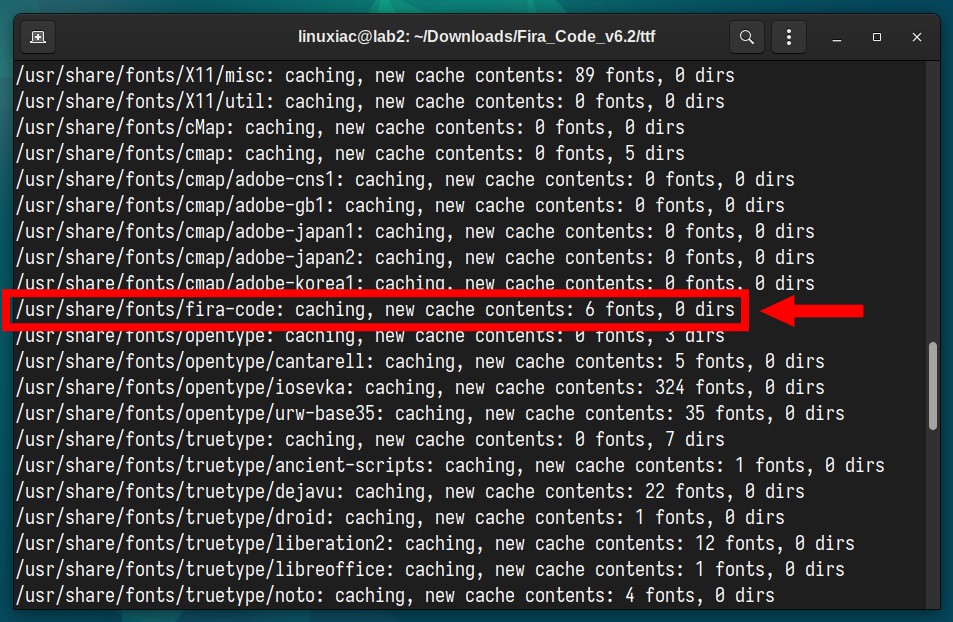
Finally, you’ll need to update the system’s font cache so that applications can recognize the new fonts. Running the below command will regenerate the font cache.
sudo fc-cache -f -vAfter regenerating the cache, the command’s output shows your Linux system’s font folders, including our newly created directory containing the Fira Code font.
Using the fc-list command, you can confirm that the fonts are installed by displaying the paths and style definitions:
fc-list | grep "Fira"Code language: PHP (php)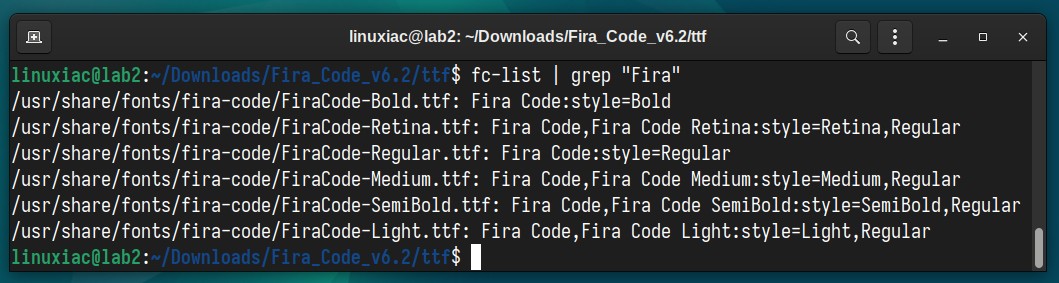
And that’s it. The font is successfully installed and ready to be used by applications on our Linux system.
Need more details? Check fc-cache and fc-list commands man pages.
Step 2.1: Per-User Font Installation
Per-user font installation on Linux allows users to install fonts only accessible within their own user accounts. This approach offers a personalized way to customize the appearance of text in applications without affecting other users or the system as a whole.
The procedure is identical to the system-wide installation; the only difference is that this time, the directory where we will install the fonts is in our home Linux directory. More appropriately, on most Linux systems, this is “~/.local/share/fonts.”
The directory may not exist, so let’s first make it with the sub-directory where we will install the font.
mkdir -p ~/.local/share/fonts/fira-codeCode language: JavaScript (javascript)Then, familiarly, copy or move the font files there and regenerate the cache.
mv *.ttf ~/.local/share/fonts/fira-code
sudo fc-cache -f -vCode language: JavaScript (javascript)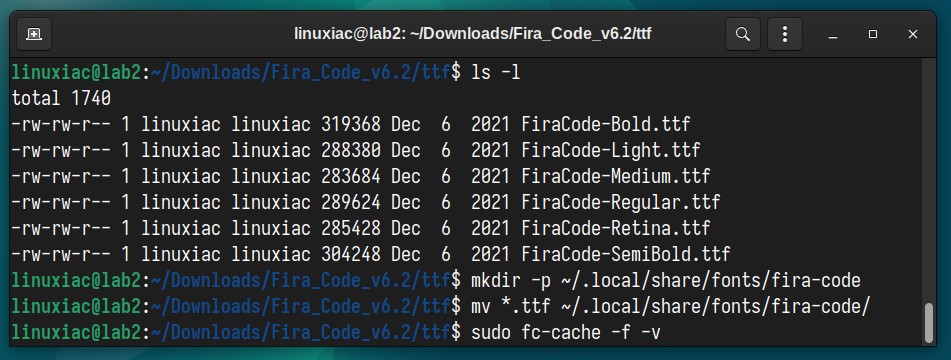
That all! Enjoy your new font.
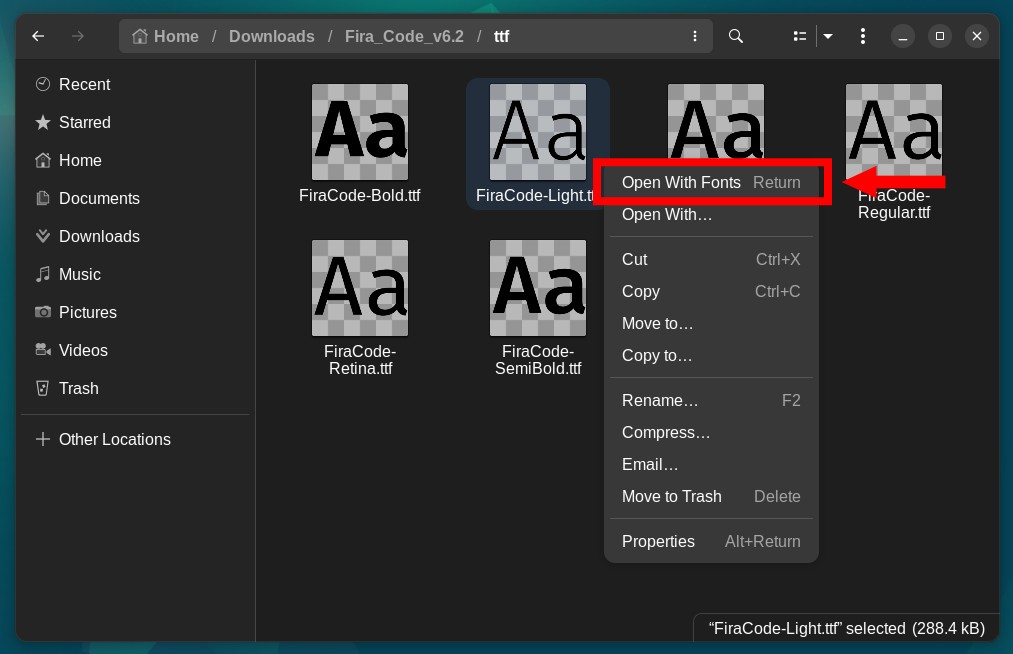
Install Fonts on Linux with GNOME’s Fonts Manager
The GNOME Fonts Manager provides a user-friendly and graphical way to manage and install fonts on Linux systems running the GNOME desktop environment. This method simplifies the font installation process and is especially helpful for users who prefer a more intuitive approach.
Go to the font file you want to install, right-click, and select “Open With Fonts” from the context menu.
The font will open in the default GNOME font management application. Click the “Install” button to install the font.
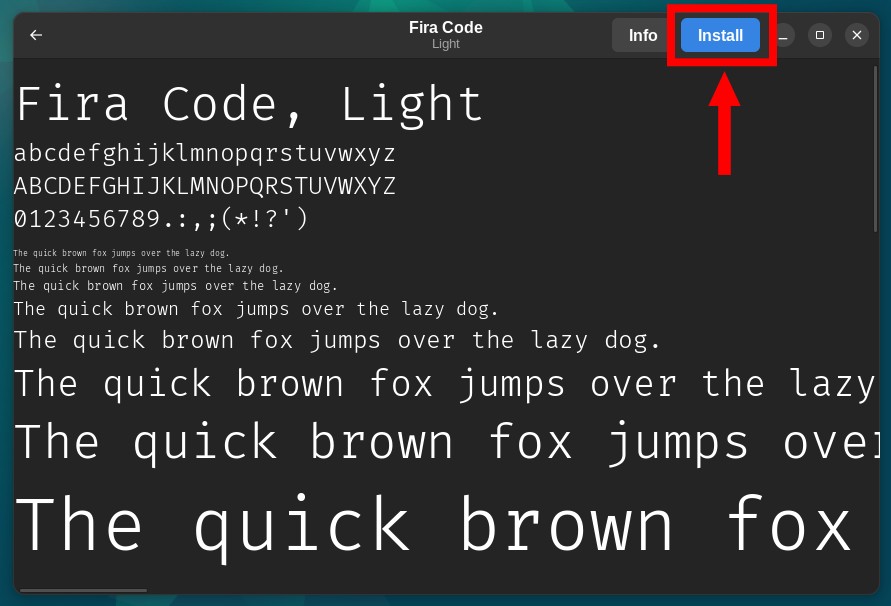
You are ready. The font is installed. How much easier could it be? Repeat the procedure for all the other files if more than one.
Finally, we’ll point out that the fonts are thus installed just for the current user and can be located in the “~/.local/share/fonts” directory.
Install Fonts on Linux with KDE’s Fonts Manager
KDE Plasma, one of the popular desktop environments for Linux, provides a user-friendly Fonts Manager that simplifies installing and managing fonts on your system.
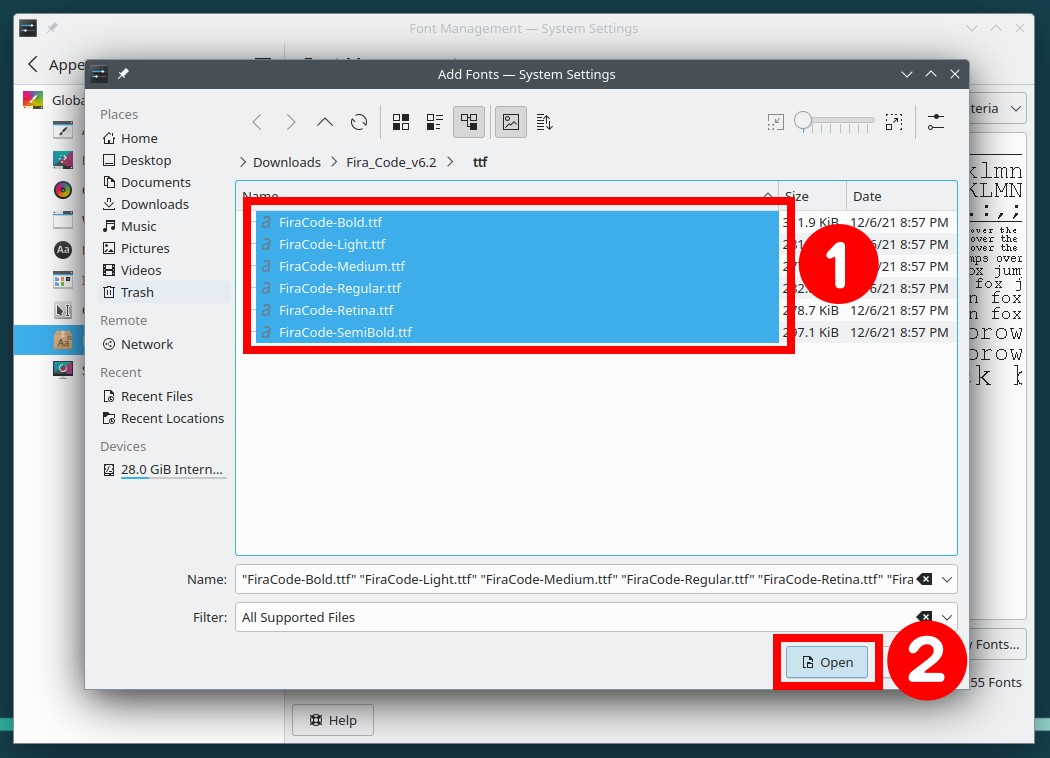
Go to “System Settings” > “Appearance” > “Font Management” and click on the “Install from File” button.
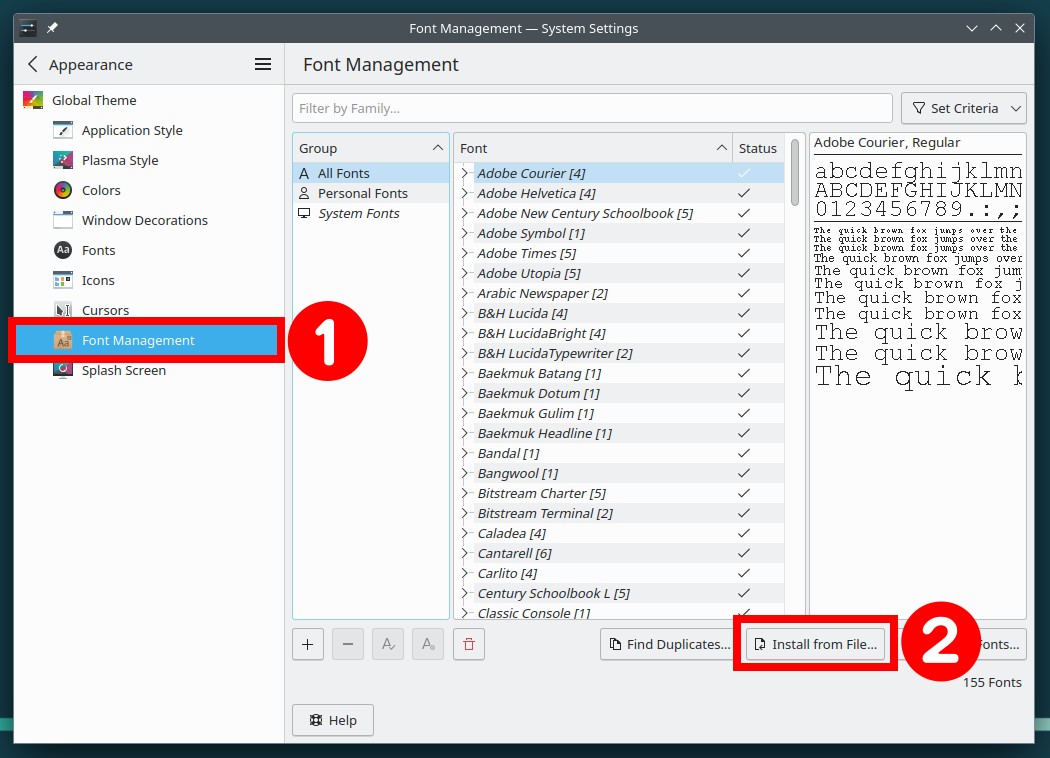
Then select the font files you want to install and click the “Open” button.
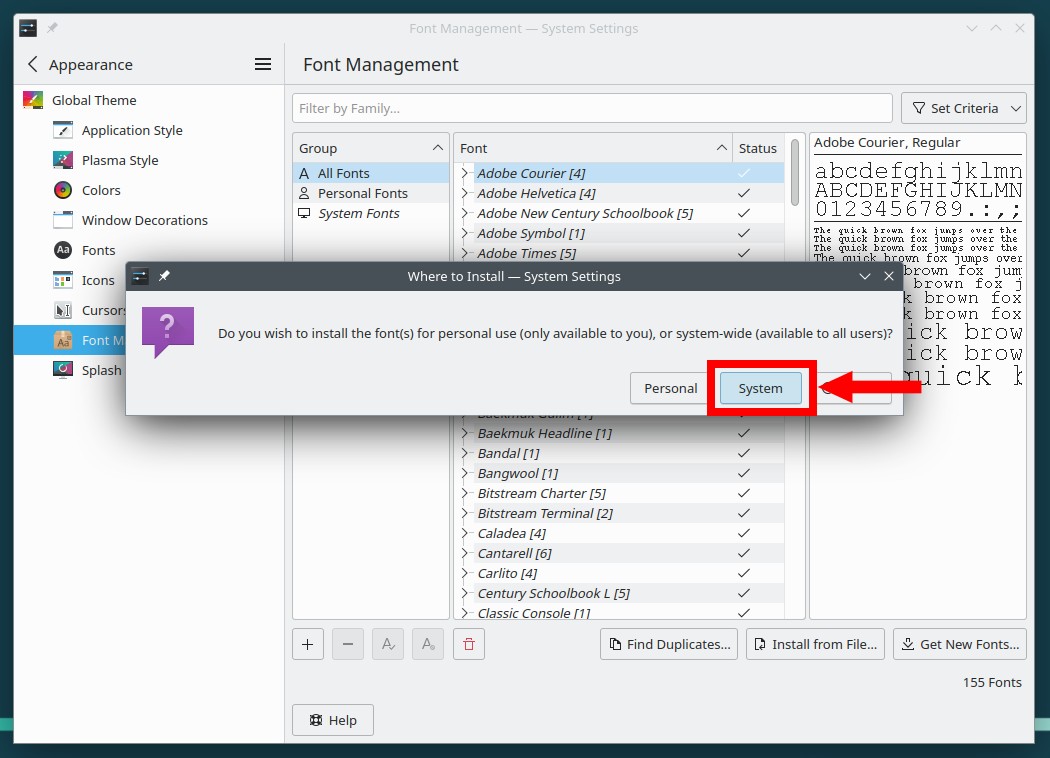
You’ll be asked whether you want the fonts installed system-wide or per-user. My advice is to choose “System.”
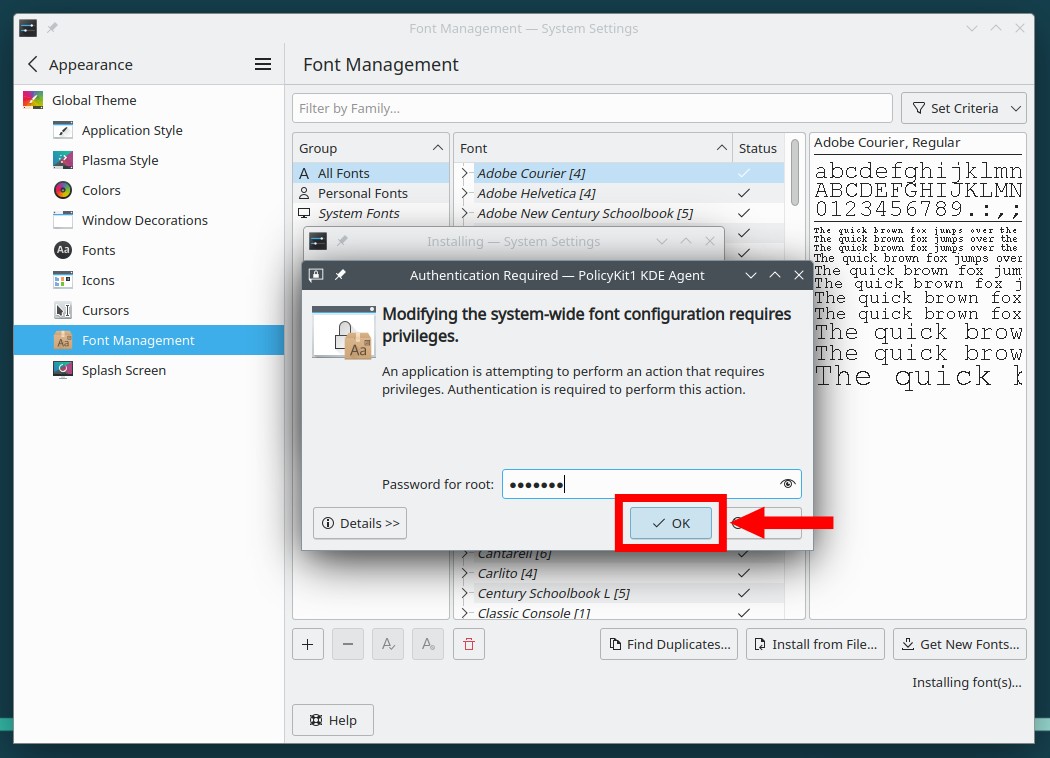
You will be prompted to enter your password for the user with administrative privileges to execute sudo commands. So, enter it and confirm with “OK.”
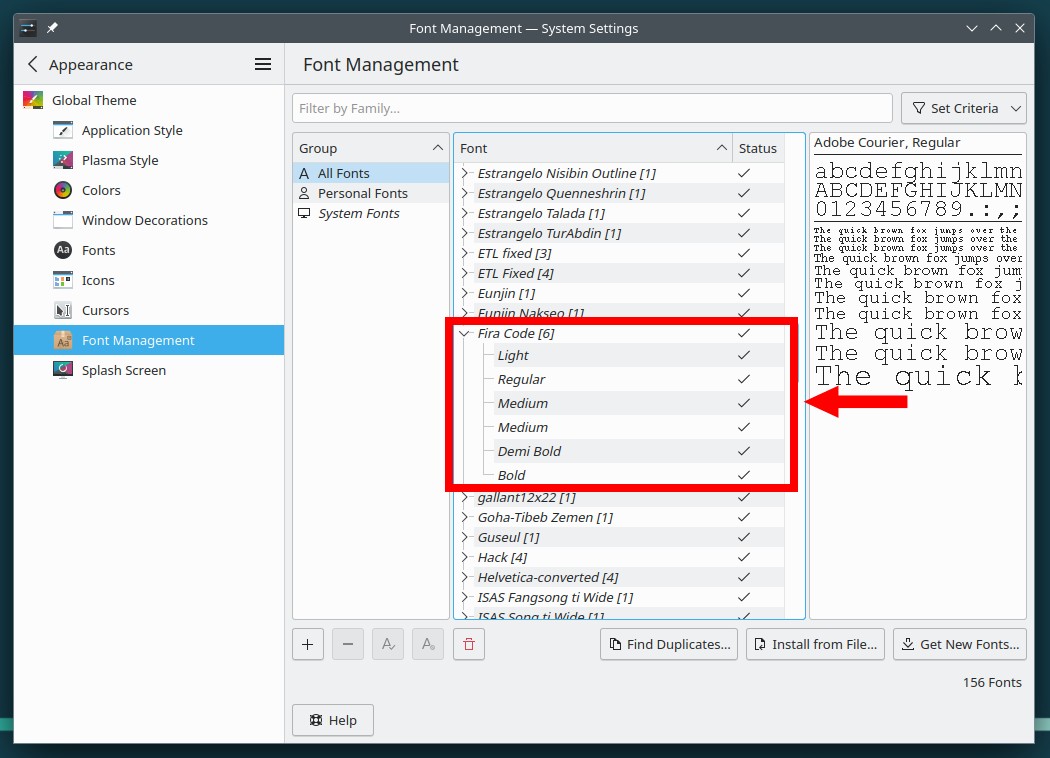
The fonts will be installed; you can see them on the list immediately.
Uninstall Fonts on Linux
Uninstalling fonts on Linux can be necessary to clean up your font collection or remove fonts you no longer need. Whether you’ve installed fonts system-wide or for a specific user, removing them is a straightforward process. Here’s how to do it.
Step 1: Locate Fonts Directory
Open a terminal window and search for specific fonts using the fc-list command by filtering its output and pipelining it to the grep command with the font name you want to remove.
fc-list | grep -i "fira"Code language: PHP (php)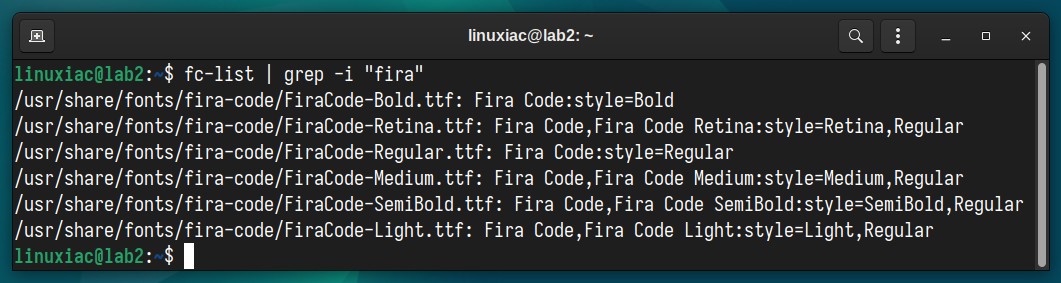
Step 2: Delete Font Files/Directory
Once we have found where the font files are located in the filesystem, we delete them, or as in our case, delete the entire sub-directory they are in.
sudo rm -rf /usr/share/fonts/fira-code/Step 3: Update Fonts Cache
After removing the fonts, update the system’s font cache to reflect the changes.
sudo fc-cache -f -vRemember: When uninstalling fonts, make sure you are removing the correct fonts. Removing system fonts improperly could affect system stability.
Additionally, in some cases, you might need to log out and then log back in for applications to recognize the changes.
Conclusion
This guide is a comprehensive resource for users looking to enhance their font selection and customization on Linux by installing additional fonts on their systems.
So, whether you’re a seasoned Linux user comfortable with the command line or a newer user seeking a more straightforward GUI approach, this guide equips you with the knowledge to enhance your system’s aesthetics through font installation.
Thanks for your time! Your feedback and comments are most welcome.


Thank you, this guide is perfect!
Not QUITE comprehensive, it does not cover how to install or set CONSOLE fonts! I would have liked to see that as well.
Excellent instructions. On linux mint, debian there is an additional /tff folder. So, command sudo mkdir /usr/share/fonts/fira-code would become sudo mkdir /usr/share/fonts/ttf/fira-code.