
The first stable release of System76’s COSMIC desktop is now available, making its debut in Pop!_OS 24.04 LTS. Beyond that, many Linux distributions have already started offering COSMIC through their repositories. Unfortunately, Ubuntu users aren’t quite so lucky because the desktop environment isn’t included in Ubuntu’s default set.
Still, there’s no reason for disappointment. Last month, an Ubuntu user shared on Reddit that they had created a dedicated PPA repository, making it possible to install COSMIC smoothly and without hassle. I tested it myself and can confirm that it works as advertised. So, in this guide, I’ll walk you through how to install the COSMIC desktop environment on Ubuntu 24.04 “Noble Numbat” in just a few minutes.
An Important Clarification
Installing the COSMIC desktop makes it available alongside Ubuntu 24.04 LTS’s default GNOME desktop, letting you switch between the two easily from the login screen (more on that below).
However, keep in mind that even if you end up liking COSMIC so much that you use it exclusively, you should never try to remove the existing GNOME setup. Doing so will almost certainly break your system, as Ubuntu’s default desktop is tightly integrated with many core system components. The safest and simplest approach is to let both desktop environments coexist.
With this clarification made, we can now move on to the essence of this guide.
How to Install COSMIC Desktop on Ubuntu 24.04 LTS
The first step is to add the COSMIC PPA repository to your Ubuntu system. To do this, run the following command:
sudo add-apt-repository ppa:hepp3n/cosmic-epochCode language: Bash (bash)
You’ll be asked to confirm the addition by pressing Enter. Once you do, your system’s package cache will be automatically updated to include the packages available in the COSMIC repository.
You can now install the COSMIC desktop environment itself.
sudo apt install cosmic-sessionCode language: Bash (bash)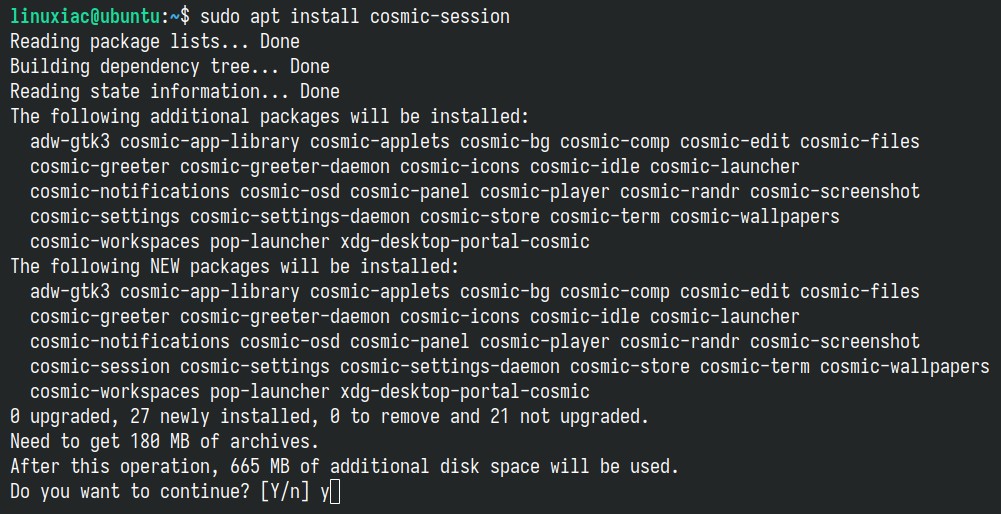
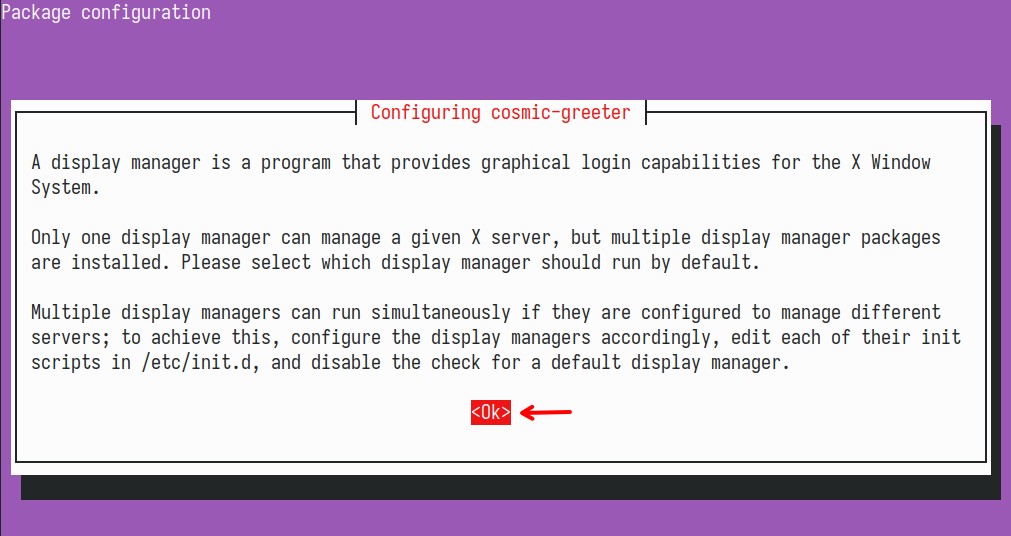
The required packages (about 200 MB) will begin downloading. At this point, there’s an important step to keep in mind. Before the installation continues, you’ll be asked to configure the login manager.
The first screen is purely informational, so you can simply press Enter to move on.
On the second screen, however, you’ll need to make a key decision: whether to keep Ubuntu’s default GDM3 login manager or switch to the one provided by the COSMIC desktop environment. Here, I strongly recommend choosing GDM3.
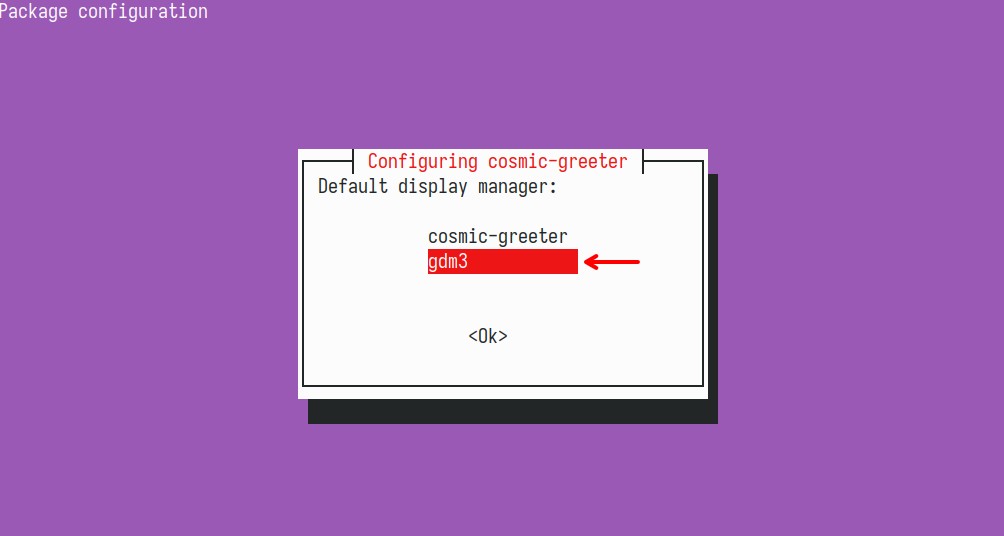
Let me explain why. In my testing, setting the COSMIC greeter as the default worked fine when logging into a COSMIC session, but it caused issues when trying to sign in to the default Ubuntu GNOME desktop. By contrast, GDM3 worked reliably with both desktop environments, which is why I recommend using it instead.
There’s also another reason for this choice. If you set the COSMIC greeter as the default and later decide to switch back to GDM, undoing that setup requires running several commands, steps you can easily avoid from the start. That said, if you really want to use the COSMIC greeter, you can still do so. Set it as your default, and I’ll show you below how to switch back to GDM3 if needed.
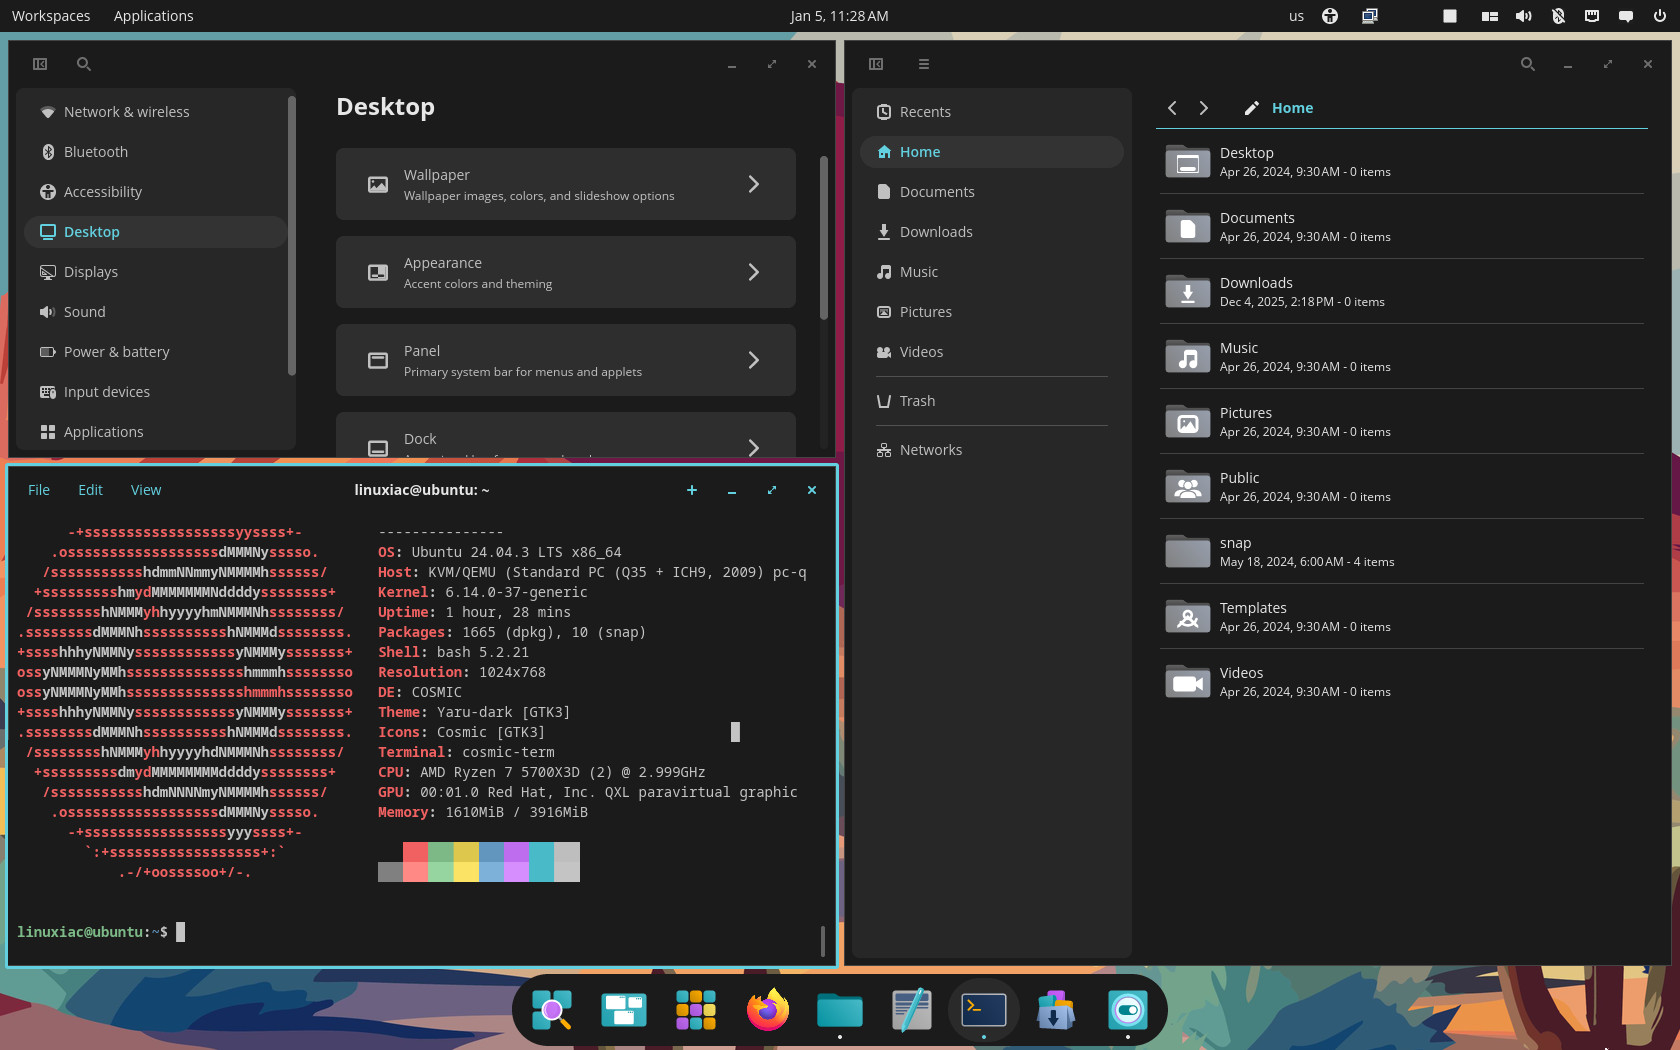
Wait for the packages to finish installing. Once they’re done, log out of the system. When you log back in, click the cog icon in the lower-right corner and select COSMIC from the list of available sessions.
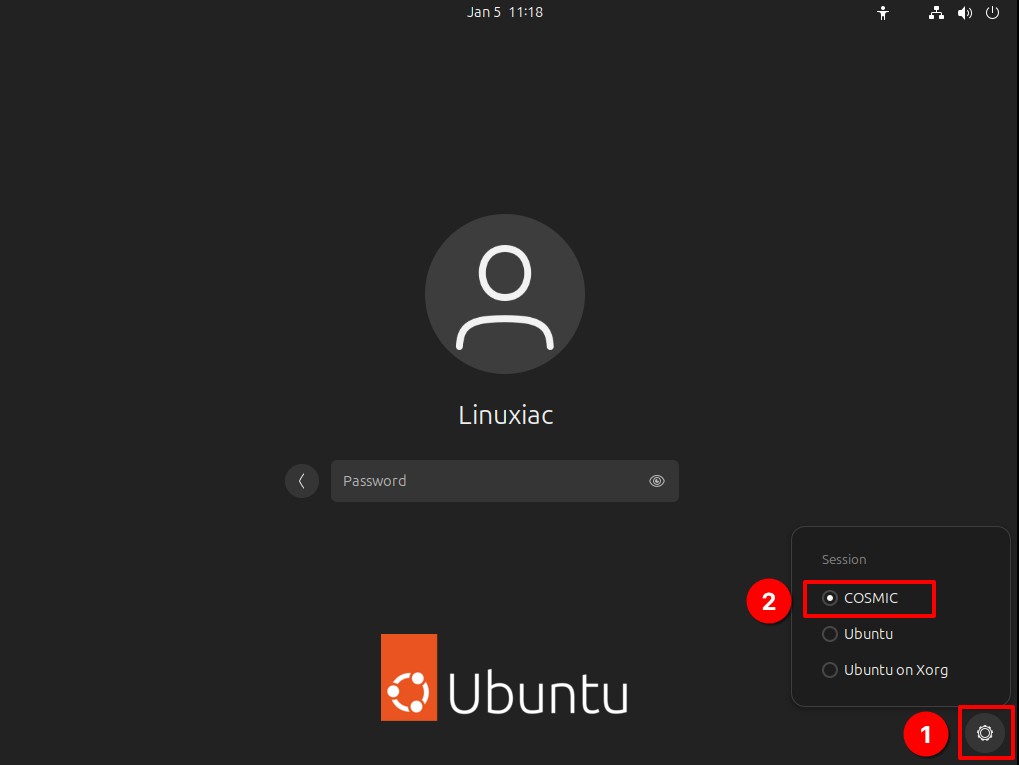
Log in and enjoy your new COSMIC desktop. It has a lot to offer, and I’m sure it will win you over.
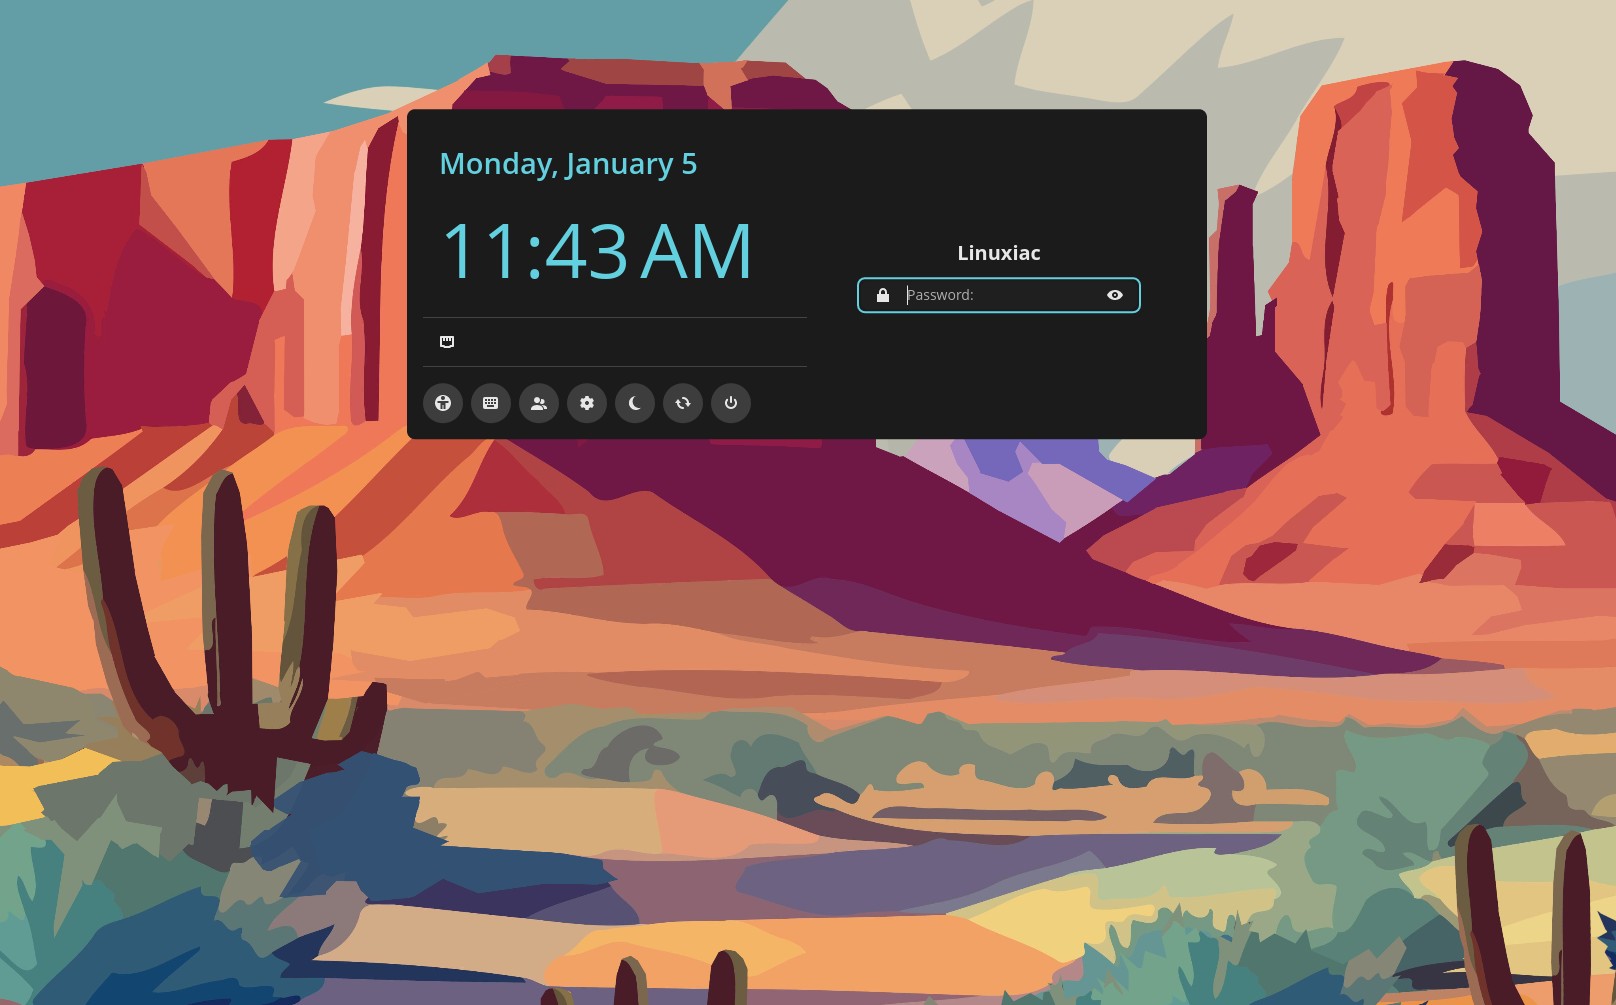
Okay, let’s go back for a moment to something I mentioned earlier. When installing COSMIC on Ubuntu 24.04 LTS, you may have chosen the default COSMIC greeter for login. This is what it looks like:
To revert to using the default Ubuntu GDM3, run:
sudo dpkg-reconfigure gdm3Code language: Bash (bash)When prompted, select gdm3 and confirm.

Finally, execute those two commands:
sudo systemctl enable gdm3
sudo systemctl restart gdm3Code language: Bash (bash)
If you are doing this from a graphical session, the screen may briefly go black or return you to the login screen. Ubuntu’s standard GNOME login screen will be restored, while COSMIC remains available as a selectable desktop session after login.
Removing the COSMIC desktop from Ubuntu
Finally, there’s one more thing worth mentioning. If you decide to remove the COSMIC desktop environment from your Ubuntu 24.04 LTS system, you can do so easily and without any hassle. Start by installing the ppa-purge tool:
sudo apt install ppa-purgeIt’s a small utility designed to uninstall software installed from a PPA safely. In fact, it does three things in one step:
- Restores the original versions from Ubuntu’s official repositories.
- Disables the specified PPA.
- Downgrades any packages installed or upgraded from that PPA.
Next, run the command below to remove the COSMIC desktop environment from your system completely:
sudo ppa-purge ppa:hepp3n/cosmic-epochCode language: Bash (bash)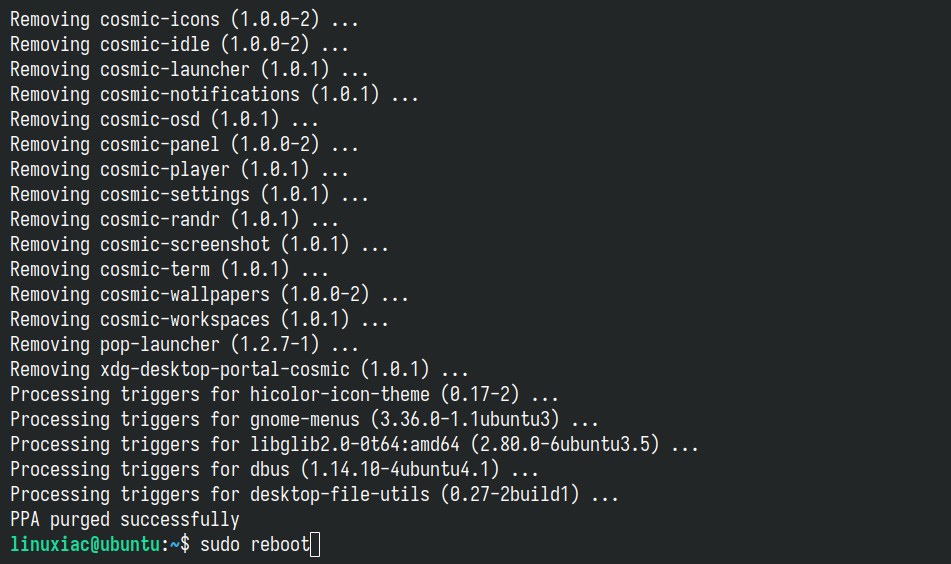
Once everything is complete, I strongly recommend restarting your Ubuntu system.
Conclusion
I hope this guide on installing the COSMIC desktop environment on Ubuntu 24.04 LTS was helpful and that you’re enjoying your new setup. COSMIC has a lot to offer, going beyond many of the limitations found in GNOME, limitations that Ubuntu often addresses through its own set of integrated extensions.
On top of that, features like COSMIC’s tiling capabilities really stand out and are hard to find, or simply unavailable, in other major desktop environments. But that’s a topic for another time.
Thanks for taking the time to read and follow this guide. As always, your comments are most welcome.


Im a new Linux user currently running Ubuntu think I’ll like the COSMIC desktop
Hmmm, did something change since this was published? I can add the repository, but cosmic-session isn’t found when I try to install. Anyone else having issues?
You need to do a sudo apt update after adding the repository
Yes exactly as you stated “unable to locate package cosmic-session”
I suspect 24.04 got updates (being an LTS version), and therefore you ran into the same issue I ran into trying to install it in 26.04 (currently in dev).
You need to install the libdisplay-info1 package (with updates it got upgraded to libdisplay-info3).
Then you will be able to install cosmic-session and cosmic-comp.
For those using a more recent version of Ubuntu, you can install Cosmic (I’m writing from Cosmic on 26.04), all you need to do is add the universe repository of 24.04, install libdisplay-info1 then disable 24.04 repositories (to avoid update conflicts) and go on with the steps described in the article.
Keep in mind that this is somewhat of a hack and it might be broken with subsequent progress of Cosmic and the dependencies it relies on.
But it works for me now.
And I’m sure it will work for you on 24.04 too.
Also, please install cosmic-greeter rather than gdm3 garbage as described in the article.
It will probably be asked at install time to chose between gdm and cosmic-greeter or lightdm and cosmic-greeter (if you already got rid of gdm trash).
Pick lightdm or cosmic-greeter over gdm, they’re 10x better solutions.
To do it manually:
sudo systemctl disable gdm3
sudo systemctl enable cosmic-greeter