OK, so you’ve decided to install Linux on your computer—congratulations on that decision. You probably already know that creating a bootable USB drive is the first step, but you’re unsure where to start. Don’t worry; you are in good hands.
In this step-by-step guide, I’ll help you create a bootable Linux USB flash drive on a Windows system using Rufus. By the end, you will have everything set up and be ready to install your favorite Linux distribution quickly.
Prerequisites
To get started, you’ll need a Windows PC with an active internet connection, a USB flash drive, and, of course, the ISO file for the Linux distribution you want to install, which you’ve probably already downloaded from the relevant website. I’ll use the Ubuntu 24.04 LTS for this guide.
But before we move on, let me quickly explain what a Linux ISO file is. In short, it is a complete copy (or “image”) of the operating system that you can use to create a bootable USB. It contains everything needed to install or run Linux. Think of it as a snapshot of the operating system packaged into a single file.
Lastly, before proceeding, you might want to double-check the file size of your chosen Linux ISO to confirm that your USB drive has enough capacity.
Step 1: Download Rufus
Rufus is a free, lightweight tool for creating bootable USB drives. It is widely used for writing Linux ISO files to USB drives on Windows, making them bootable so you can install or run an OS directly from the USB.
Yes, other tools in this space offer similar functionality—like Etcher or Ventoy, for example—but I highly recommend going with Rufus. Here’s why. Etcher recently introduced ads in its latest version, which isn’t exactly the experience I’d recommend.
As for Ventoy, things can get a bit more complicated. Compared to these, Rufus stands out as the easiest and most reliable tool for creating bootable Linux USBs on Windows. It’s been tested and trusted for years, making it my top recommendation.
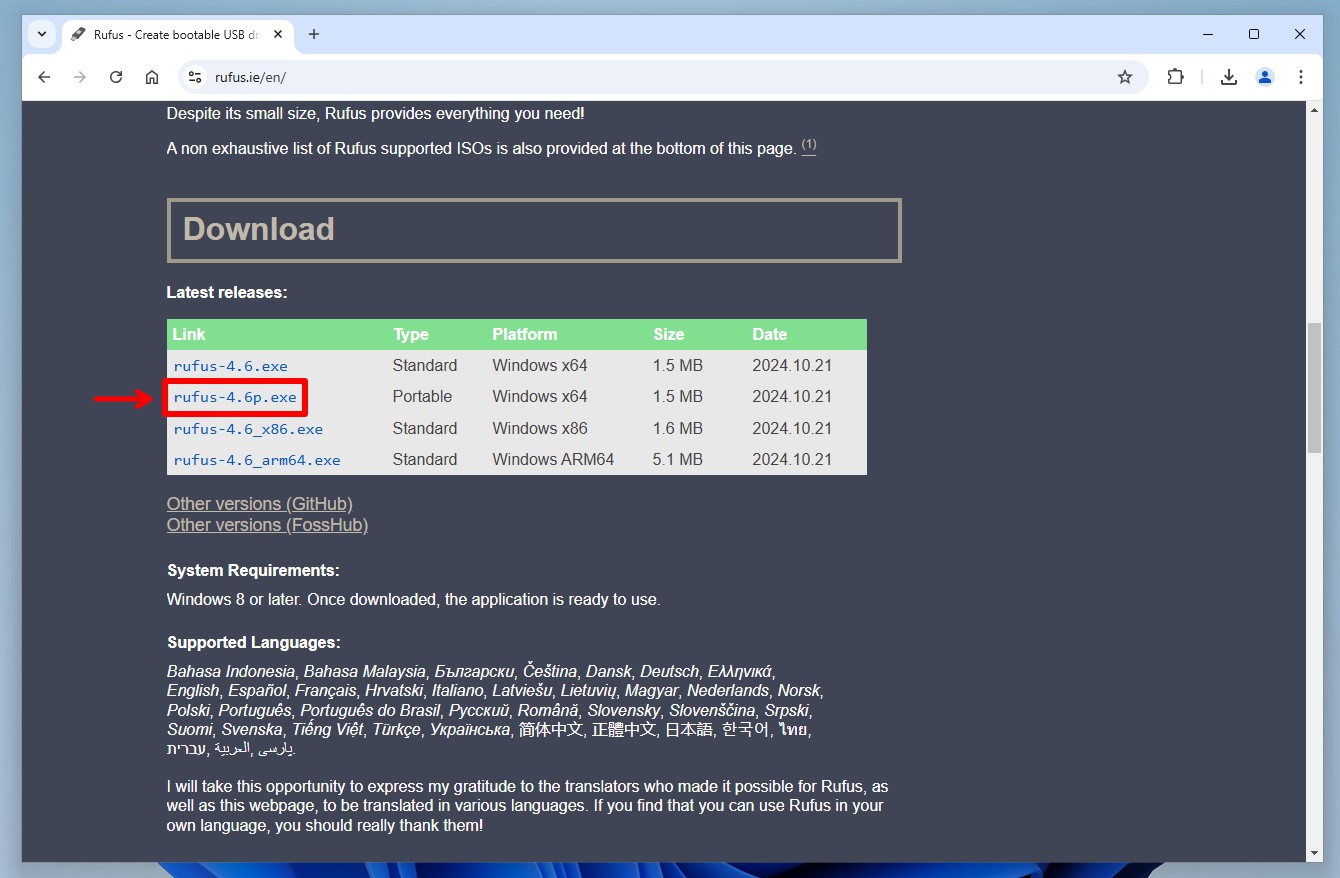
So, as the first step, go to the Rufus website (rufus.ie) and scroll down until you reach the “Download” section. Grab the portable version of the app—it doesn’t require installation, so you can use it right away.
Step 2: Insert the USB Flash Drive
Next, plug your USB drive into your Windows computer. Make sure it does not contain any crucial files you have not backed up elsewhere. You should do this because when a bootable USB is created, all existing data on that flash drive will be erased.
So, before proceeding, transfer everything you need from your USB drive to another location to avoid losing any important information.
Step 3: Launch Rufus
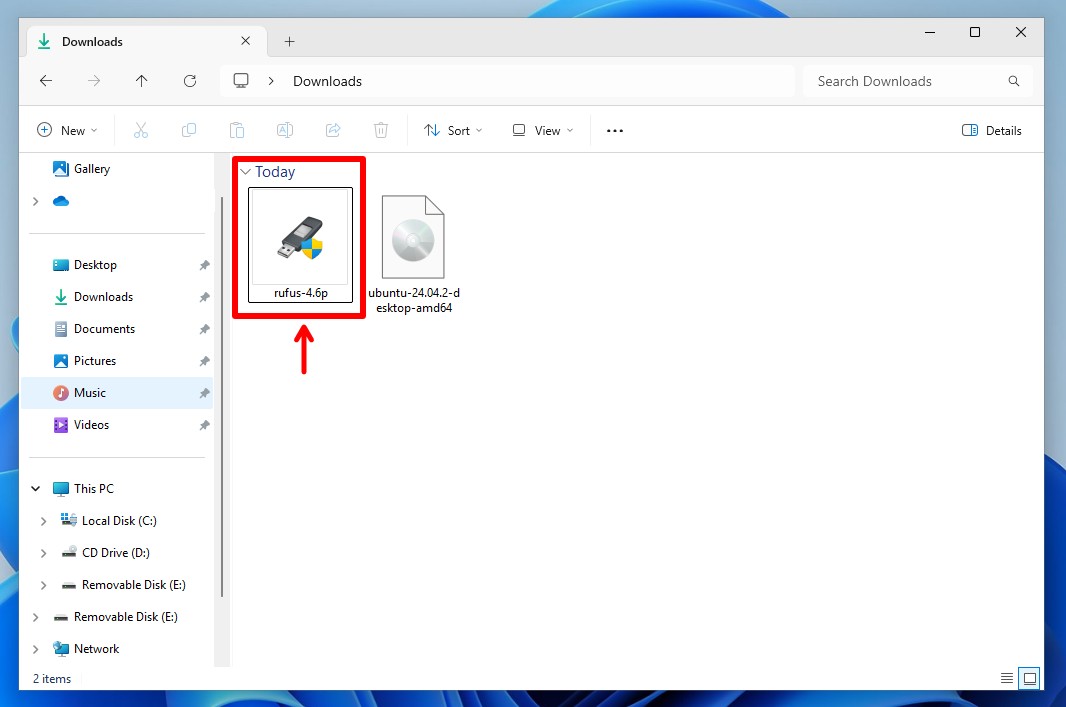
Navigate to the folder where you downloaded Rufus, then double-click on the file to run the app.
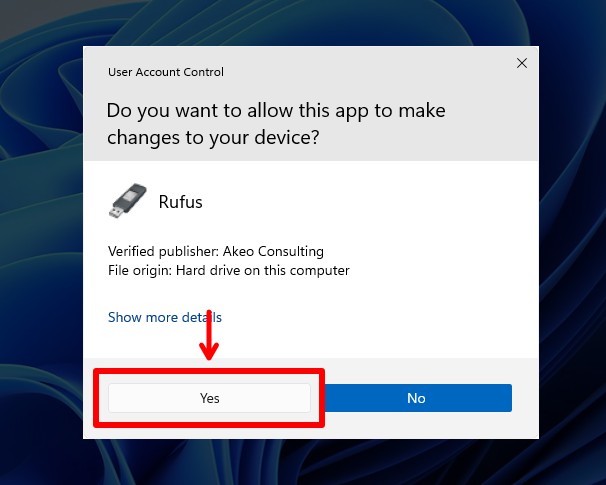
Windows User Access Control will prompt you to confirm whether you want to run this file. Click “Yes” to proceed.
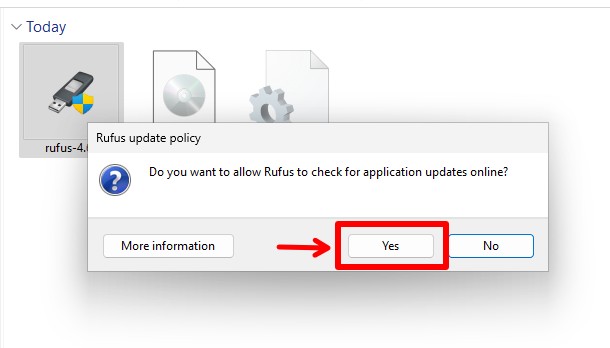
The first time you launch Rufus, it will ask if you want to allow automatic app updates. It’s completely up to you, but in general, there’s no harm in turning it on.
Step 4: Write a Linux ISO to a USB Drive
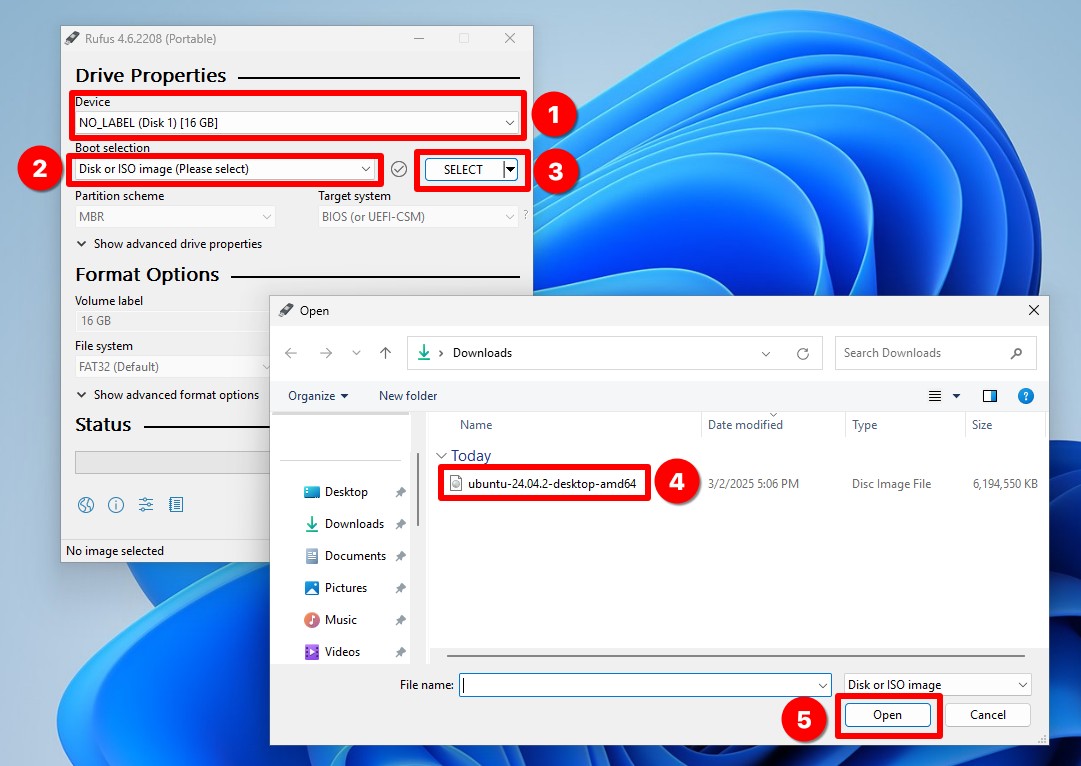
Now, we’re getting to the fun part. First, double-check that the “Device” section is set to your USB drive—the one you’ll use to write the bootable Linux ISO onto it.
Next, in the “Boot selection” section, make sure “Disk or ISO image” is selected, then click the “SELECT” button.
A file explorer window will pop up. Navigate to the folder where you downloaded the ISO file, select it, and click “Open” to confirm.
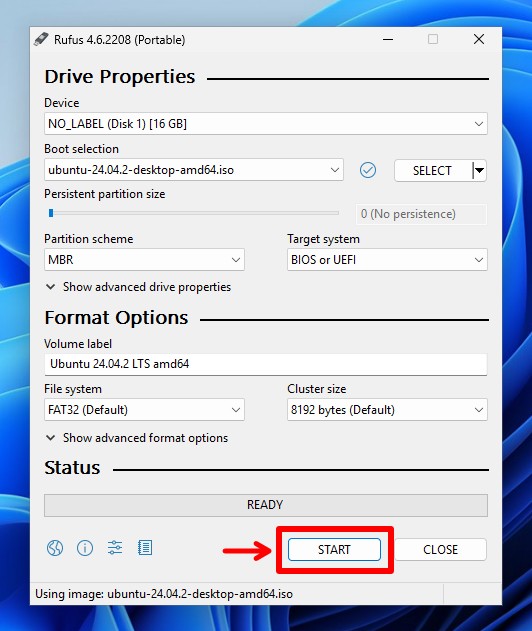
You’re all set to create your bootable USB drive. Hit the “START” button to write the downloaded Linux ISO onto it.
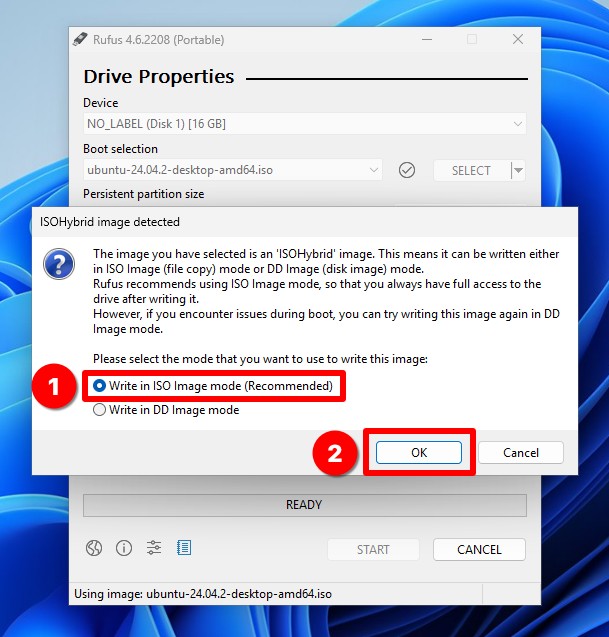
You’ll receive a message asking you to choose a writing mode. Select the recommended option, “Write in ISO Image mode,” and click “OK.”
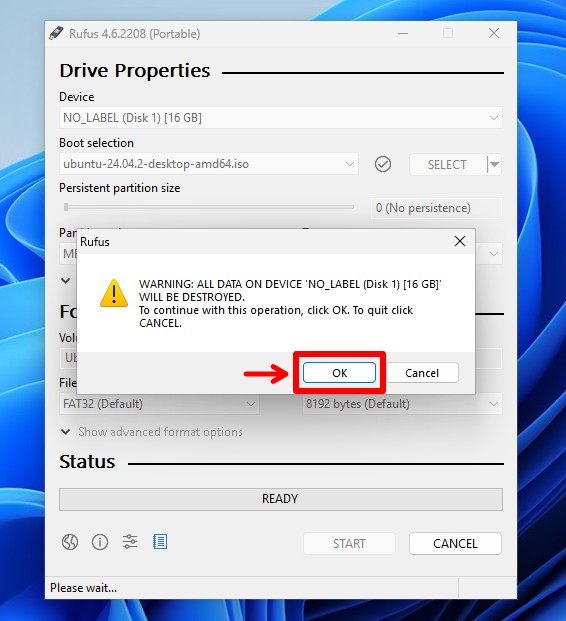
Then, you will receive a warning stating that all data on the USB drive will be destroyed. Go ahead and click “OK” to confirm.
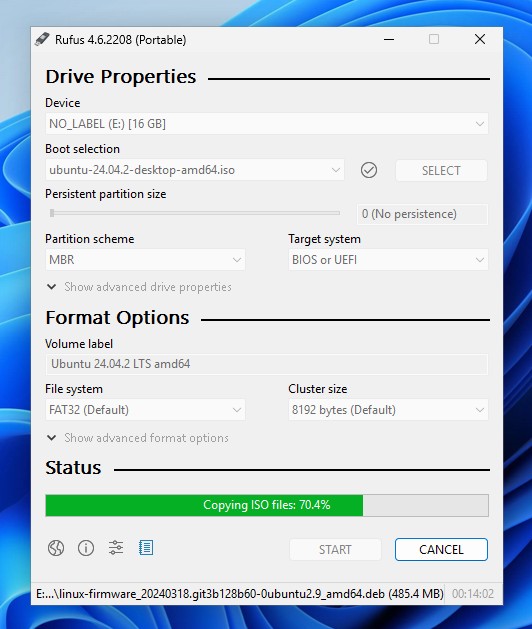
Rufus will begin copying files and making the USB drive bootable. Depending on the ISO file size, this process generally takes a few minutes, so be patient and wait for it to finish.
After completing the process (when the status message displays “READY“), you can close Rufus and safely eject the USB drive.

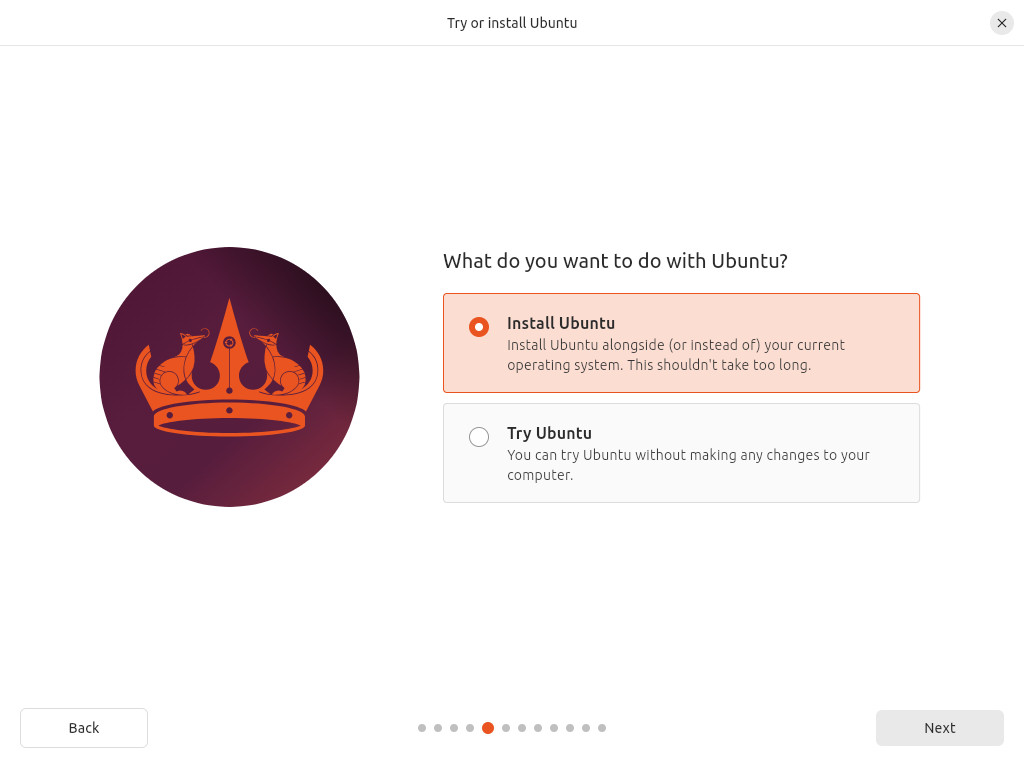
And that’s it! You are all set to begin the Linux installation. Ensure your computer’s BIOS is set to boot from a USB drive. Then, plug in your flash drive, restart the computer, and begin installing your chosen Linux distribution.
Conclusion
Creating a bootable Linux USB flash drive on Windows using Rufus is straightforward. Rufus’s simplicity and ease of use make the entire process almost effortless.
As you’ve seen for yourself, in just a few simple steps and clicks, you’re all set to begin your Linux adventure—so congratulations. And believe me, it’s totally worth it!
Thanks for your time and for using this tutorial. As always, your feedback and comments are most welcome.


Last Ubuntu LTS iso Image (Kubuntu 24.04.3 LTS) – when creating by rufus (rufus-4.9) not working. Something wrong with GRUB – its jast show “Welcome to GRUB!” and after several seconds – reboot my PC.
Very weak arguments against Ventoy, which is arguably much simpler than Rufus. Once you prepare your USB drive, which is a single click operation, there's nothing simpler than just copying an ISO to the USB drive.
Rufus. The Windows app that will never be used more than once… Wintoys on the other hand…