
In Linux, the ls command is a cornerstone, aiding users in listing directory contents for decades. It is one of the first that newcomers learn and use countless times after in their everyday work with the operating system.
But as with all tools, users are constantly searching for better solutions. Enter eza – a modern alternative to the ls command. In this article, we’ll explore how to install and get started with it. But first, let me explain what this is all about.
What’s eza Command in Linux?
eza, written in Rust programming language, is a modern alternative to one of the most frequently used commands in Linux, ls, packaged in small, fast, single binary. It is a direct descendant and fork of exa, which is now unmaintained.
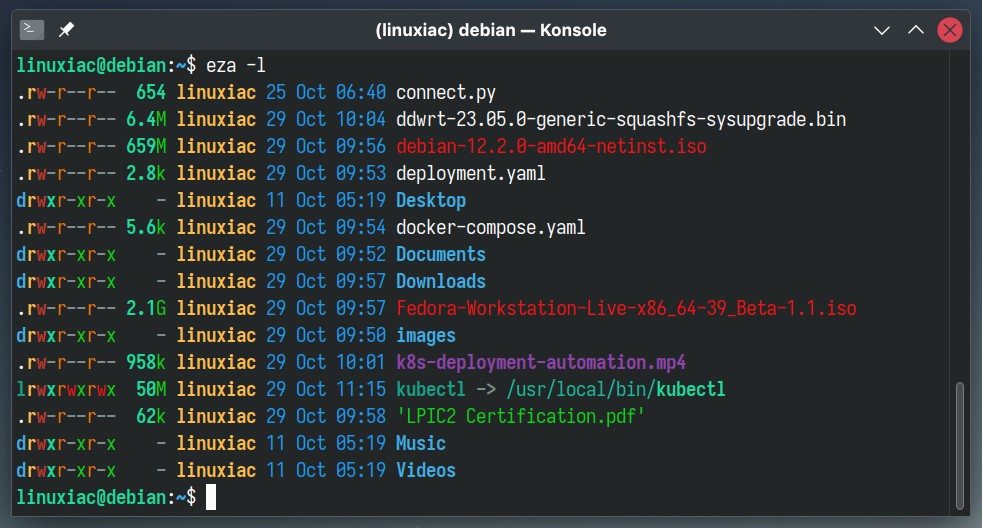
Its primary function is to list the contents of a directory. Unlike the ls command, however, eza makes it more attractive and easy to understand, relying on color differentiation between file types. In addition, the accompanying information is in an easier-to-read format.
Key Features
As a novel alternative to the classic ls command, eza isn’t just about listing directory contents; it is about doing so with efficiency and enhanced default settings. Here are its main advantages.
Written in Rust
Rust is known for its safety, speed, and concurrency. By leveraging Rust, eza ensures efficient performance while reducing potential bugs and vulnerabilities.
Color Output
Unlike the traditional ls command, which might require additional configuration for color differentiation, eza provides a colorful output right out of the box. This enhances readability, especially when dealing with dense directories.
The different file types are vividly distinguished thanks to a specific color for each of them. This visual distinction contributes to the user’s quick and easy orientation while browsing through a list of such.
Moreover, the metadata to them also inherits the coloring, further contributing to user convenience.
Better Defaults
eza comes equipped with settings that many find preferable over ls. These defaults are designed to give a more comprehensive and user-friendly overview of directory contents.
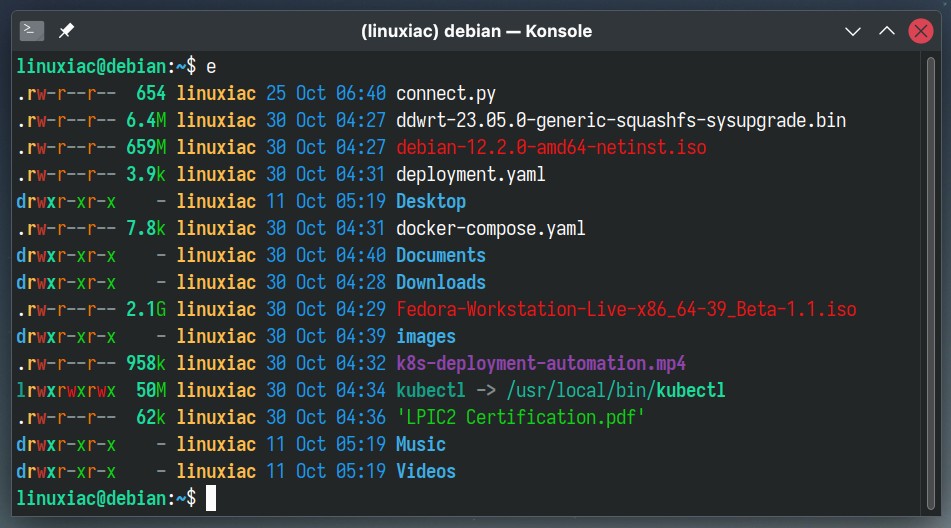
For example, when listing a directory, the size of each file is displayed in a human-readable format, “23k,” “2.1M,” “4G,” instead of the default representation in bytes used by ls by default.
Advanced Features
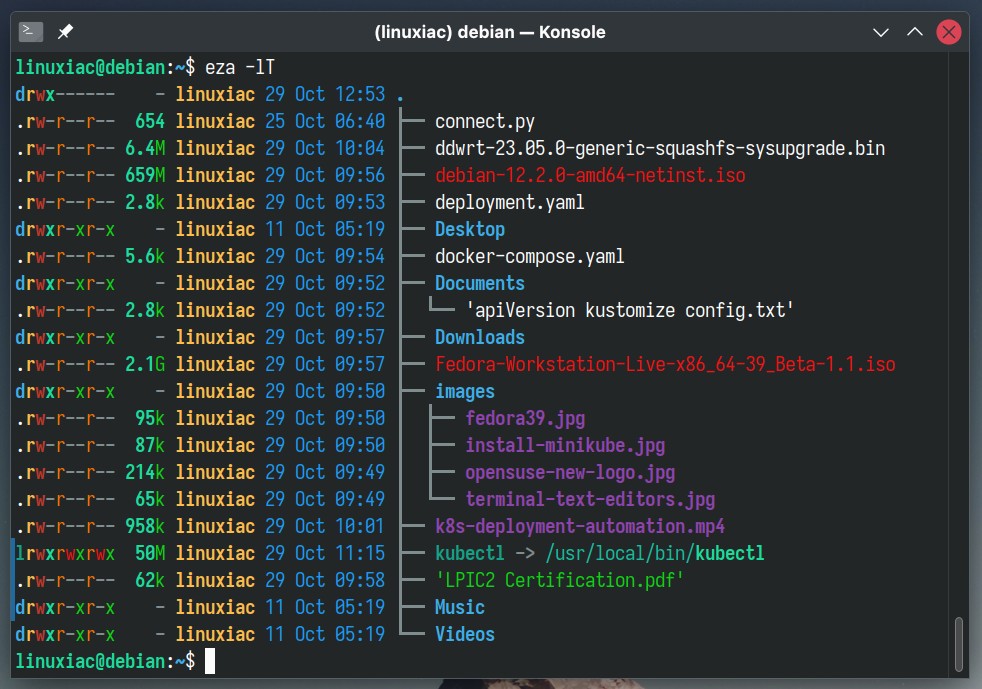
Coloration is far from eza‘s only distinguishing feature. Not at all! The command has many additional powerful capabilities. For example, developers will fall in love with the ability to list each directory and file’s Git status.
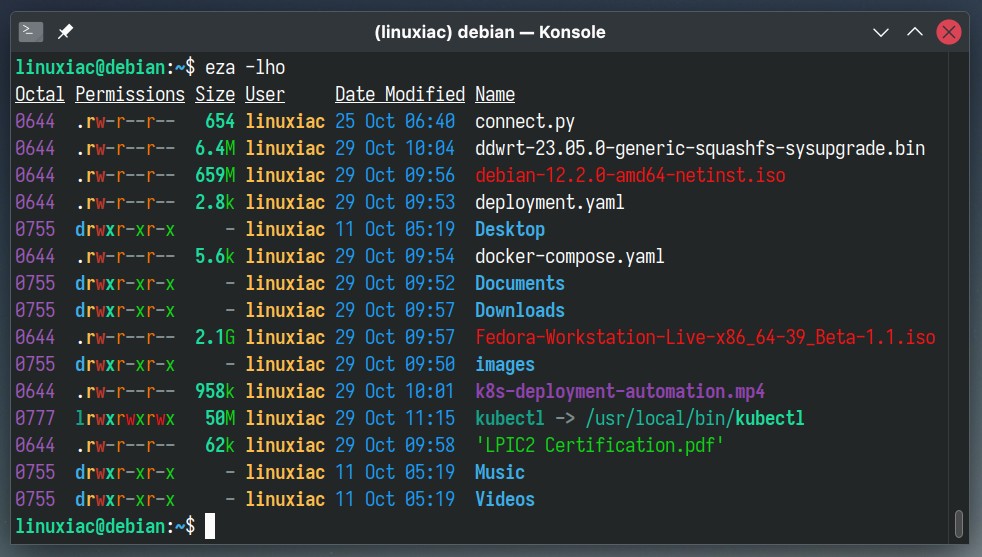
Displaying entries as hyperlinks, recursing into directories as a tree, reversing the sort order, adding a header row to each column, showing mount details, listing each file’s security context, listing each file’s permission in octal format, and many more, are just some of the advanced features the eza command offers.
Command-Line Options
Below is the full list of options offered by the eza command.
Display Options
- -1, –oneline: display one entry per line
- -G, –grid: display entries as a grid (default)
- -l, –long: display extended details and attributes
- -R, –recurse: recurse into directories
- -T, –tree: recurse into directories as a tree
- -x, –across: sort the grid across, rather than downwards
- -F, –classify: display type indicator by file names
- –colo[u]r=(when): when to use terminal colors (always, auto, never)
- –colo[u]r-scale: highlight levels of file sizes distinctly
- –icons=(when): when to display icons (always, auto, never)
- –hyperlink: display entries as hyperlinks
- -w, –width=(columns): set screen width in columns
Filtering Options
- -a, –all: show hidden and ‘dot’ files
- -d, –list-dirs: list directories like regular files
- -L, –level=(depth): limit the depth of recursion
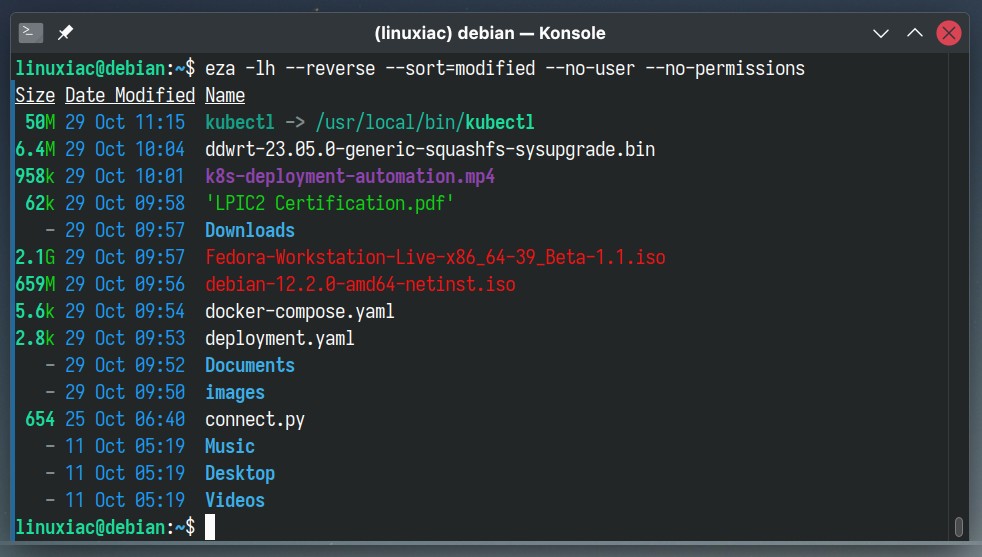
- -r, –reverse: reverse the sort order
- -s, –sort=(field): which field to sort by
- –group-directories-first: list directories before other files
- -D, –only-dirs: list only directories
- -f, –only-files: list only files
- –git-ignore: ignore files mentioned in
.gitignore - -I, –ignore-glob=(globs): glob patterns (pipe-separated) of files to ignore
Long View Options (Available When Running with ‘-l’)
- -b, –binary: list file sizes with binary prefixes
- -B, –bytes: list file sizes in bytes, without any prefixes
- -g, –group: list each file’s group
- -h, –header: add a header row to each column
- -H, –links: list each file’s number of hard links
- -i, –inode: list each file’s inode number
- -m, –modified: use the modified timestamp field
- -M, –mounts: Show mount details (Linux and MacOS only).
- -S, –blocksize: show the size of allocated file system blocks
- -t, –time=(field): which timestamp field to use
- -u, –accessed: use the accessed timestamp field
- -U, –created: use the created timestamp field
- -X, –dereference: dereference symlinks for file information
- -Z, –context: list each file’s security context
- -@, –extended: list each file’s extended attributes and sizes
- –changed: use the changed timestamp field
- –git: list each file’s Git status, if tracked or ignored
- –git-repos: list each directory’s Git status, if tracked
- –git-repos-no-status: list whether a directory is a Git repository, but not its status (faster)
- –no-git: suppress Git status (always overrides
--git,--git-repos,--git-repos-no-status) - –time-style: how to format timestamps. Valid timestamp styles are ‘
default,’ ‘iso,’ ‘long-iso,’ ‘full-iso,’ and ‘relative,’ or you can use acustomstyle with ‘+‘ as a prefix. - –total-size: show recursive directory size
- –no-permissions: suppress the permissions field
- -o, –octal-permissions: list each file’s permission in octal format
- –no-filesize: suppress the filesize field
- –no-user: suppress the user field
- –no-time: suppress the time field
How to Use the eza Command
Using eza is no different from how you’re already used to using ls or any other Linux command. In other words, you can run the command without any parameters, or you can tailor the output to your needs by adding options to it.
For example, executing the command without parameters will provide you with a listing of the files in the current directory, displaying entries as a grid, which is its default behavior.
eza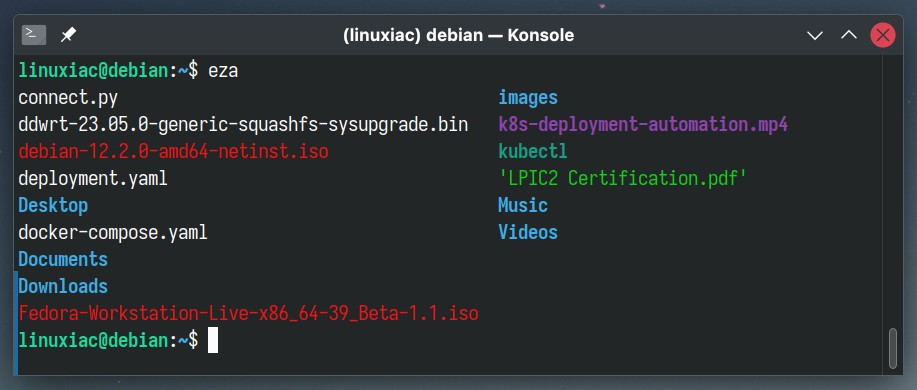
From there on, you can use the options listed above to customize the command’s output or combine them.
Furthermore, you can modify the default behavior of the eza command and save typing by adding an easy-to-use alias to your “~/.bashrc” file. This will make using the command even simpler.
As an example, if you add “alias e=’eza -l’” to the file mentioned above, executing “e” will list the contents of the current directory in an easy-to-view format, similar to the behavior of “ls -l.”
You can learn more about how to create and use aliases in Linux in our dedicated guide on the subject.
How to Install the eza Command on Linux
We’re sure the eza command caught your interest, and you’re eager to try it. Here’s how to install it, depending on the Linux distribution you’re using.
Debian / Ubuntu / Linux Mint
Installing the DEB package containing the command requires adding an extra repository because it is not present in the default software repositories of these distributions.
sudo mkdir -p /etc/apt/keyrings
wget -qO- https://raw.githubusercontent.com/eza-community/eza/main/deb.asc | sudo gpg --dearmor -o /etc/apt/keyrings/gierens.gpg
echo "deb [signed-by=/etc/apt/keyrings/gierens.gpg] http://deb.gierens.de stable main" | sudo tee /etc/apt/sources.list.d/gierens.list
sudo apt update
sudo apt install ezaCode language: PHP (php)
Fedora
sudo dnf install ezaArch Linux
sudo pacman -S ezaopenSUSE
zypper ar https://download.opensuse.org/tumbleweed/repo/oss/ factory-oss
zypper in ezaCode language: JavaScript (javascript)
Bottom Line
The ls command has been a trusted ally for users for decades, aiding them in their quests to navigate directories efficiently. At the same time, however, eza stands out as a continuation of it, redefining what it means to list files on Linux.
The command’s visual appeal, characterized by a rich color output, enhances the user experience to levels previously unimagined in a directory listing. This color differentiation, which offers immediate clarity on file types and their metadata, acts as a beacon in densely populated directories, guiding users seamlessly.
Yet, it would be remiss not to mention the plethora of advanced features that eza brings to the table. It embodies a perfect blend of user-friendly functionalities, advanced features, and reliable performance, ticking all the boxes to become your favorite replacement for the ls command.
Need more details? We highly recommend checking the command’s GitHub page or visiting its website.


Thank you for that. I realized how frustrated I was with `ls` (in large part because I have been too lazy to use it with the right options, I must confess), but the color outline, the –tree options and –git-ignore got me.