This article explains briefly how to create useful and standard-compliant desktop entries on Linux by using the DeskCut app.
Have you ever installed a program in Linux from an outside source and wished that it had a convenient entry in your desktop environment’s menu? While most GUI programs automatically create their desktop shortcut during installation, some applications may require you to set up associated shortcuts manually.
And this is where DeskCut comes on the scene. But before that, let’s explain what Linux shortcuts actually are.
What Are Desktop Shortcuts in Linux?
The freedesktop Desktop Entry specification provides a standard for applications to integrate into a desktop environment. The most common desktop entries are the “.desktop” files.
A “.desktop” file in Linux is simply a shortcut that is used to launch an application in Linux. Without the “.desktop” file, your application won’t show up in the Applications menu and you can’t launch it.
The entries that you see in your desktop environment’s program menu come from simple plain text configuration files with the “.desktop” extension. They are a combination of meta-information resources and a shortcut of an application that needs to be launched.
These files usually reside in the “~/.local/share/applications/” or “/usr/share/applications/” directories, depending on whether you want the launcher to be accessible only for a local account or for everyone.
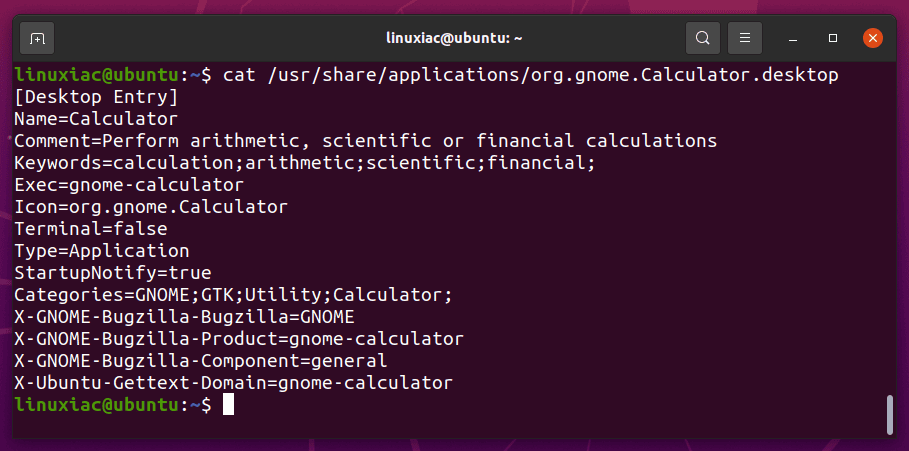
If you navigate to either directory you will see quite a few “.desktop” files that correspond to the installed apps on your computer. For demonstration purposes, the “.desktop” file of the GNOME’s Calculator application looks like this:
Create Linux Desktop Shortcuts with DeskCut
Sometimes you have to manually create a “.desktop” file for the application to add it to the app launcher. However, this is not something that can be done easily by a novice Linux user.
Fortunately, besides manually creating “.desktop” files, DeskCut is here to help you easily create an application shortcut with just a few clicks.
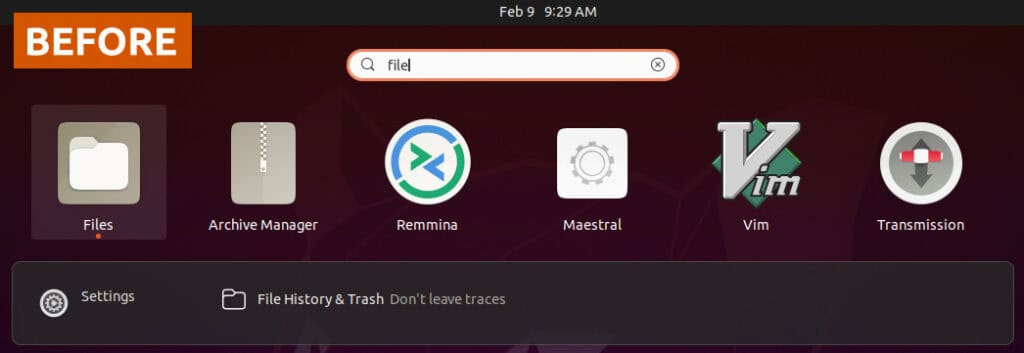
For the purpose of the guide, let’s assume that for some reason FileZilla’s launcher has disappeared and we need to recreate it. Here’s what our App Launcher looks like when we try to launch FeleZilla:
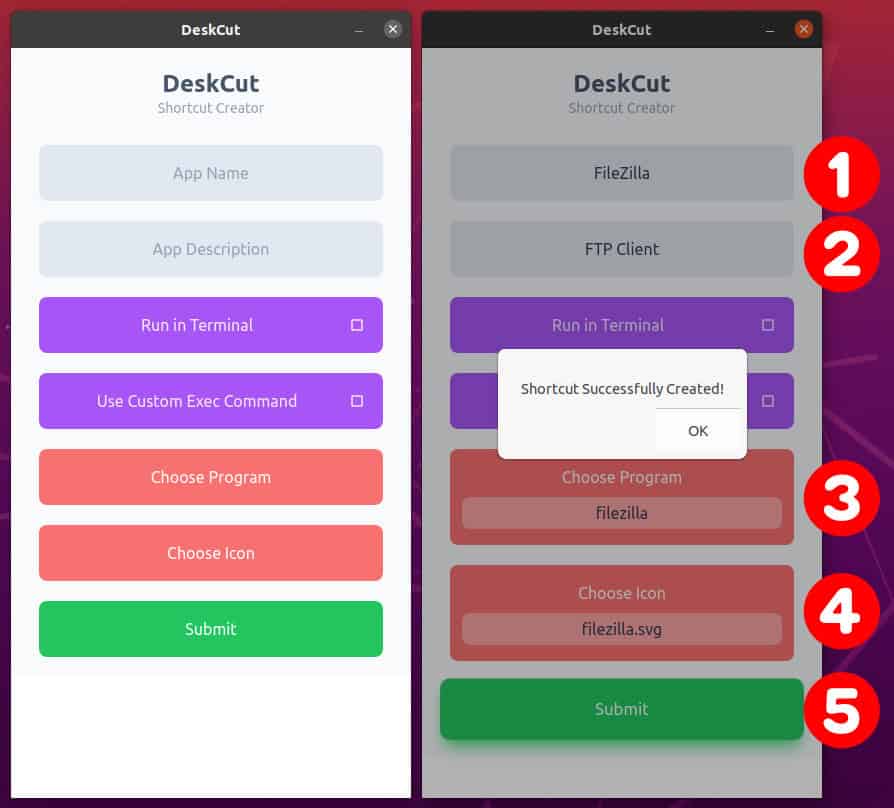
Now it’s time to launch the DeskCut app and make the following settings:
- The name you want to be shown in the App Launcher.
- A short description of the application.
- The exact path to the executable file. For example, “/usr/bin/filezilla.”
- The exact path to the icon of your choice. For example, “/usr/share/icons/hicolor/scalable/apps/filezilla.svg.”
- When you’re ready, hit the “Submit” button to create a “.desktop” file.
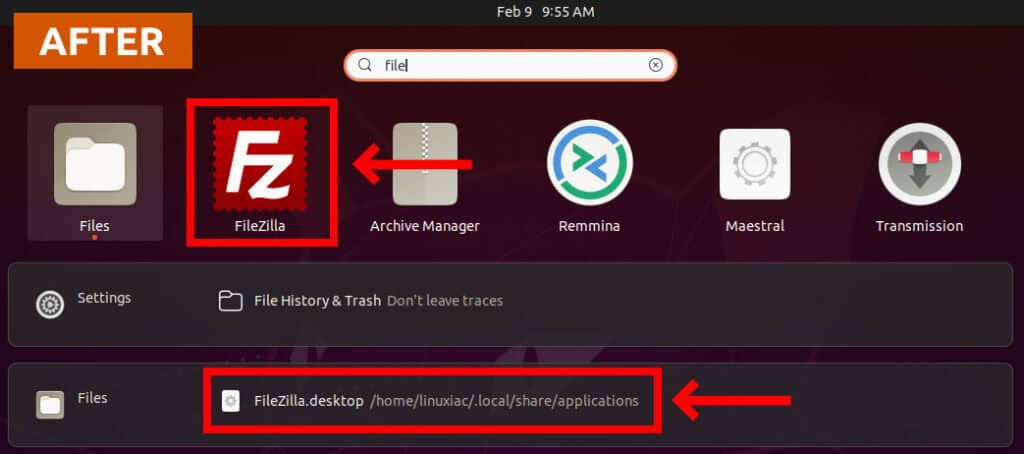
That’s it! When you’re done, you should be able to see your applications in the App Launcher, regardless of which launcher you use.
So, if we open it and search for FileZilla, the result now looks like this:
Now you are fully prepared to create your own desktop entries for any application you can think of.
Installing DeskCut on Linux
DeskCut is available for download as a portable “.AppImage,” and native “.deb” package file.
Debian and Ubuntu users need to download the “.deb” file from the project’s GitHub page and save it locally.
Next, open your terminal app and run the command below to install it.
sudo apt install ./Downloads/deskcut_1.3.0_amd64.debOf course, you need to replace the file name with the one you downloaded.
Another and easier way of installing DeskCut is by using the AppImage. Just download the “DeskCut-1.3.0.AppImage” file, right-click on it to bring up the context menu and choose Properties. Make the file executable as shown on the image below.
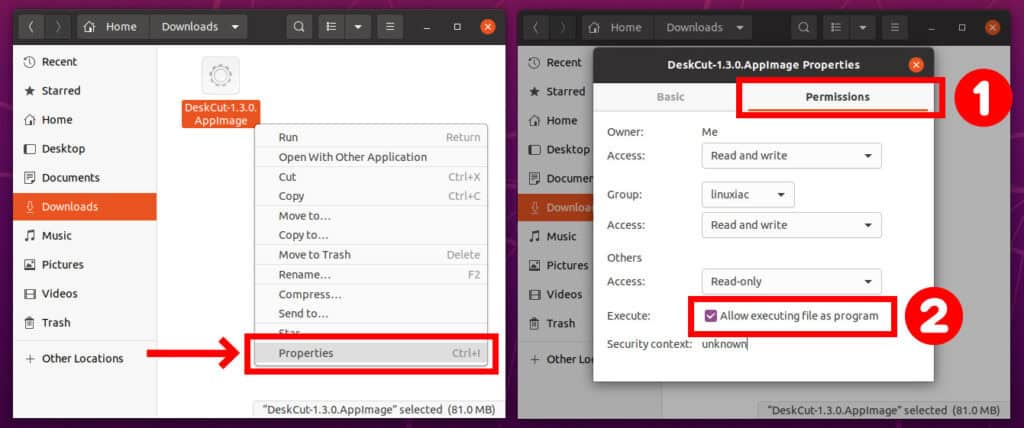
Next just double-click on the file, and the DeskCut program will start.
