
Apache Tomcat is an open-source web server and servlet container used to deploy and serve Java web applications. Most modern Java web frameworks are based on servlets, e.g., JavaServer Faces, Struts, Spring, etc.
Apache Tomcat also provides by default an HTTP connector on port 8080, i.e., Tomcat can also be used as an HTTP server. But the performance of Tomcat is not as good as the performance of a designated web server, like the Apache HTTP server.
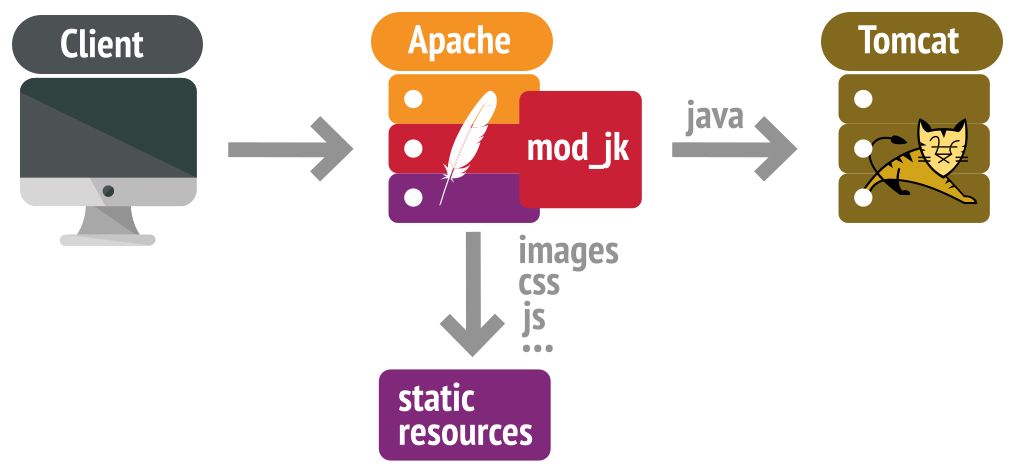
In most production, Tomcat is used in conjunction with Apache HTTP Server. Apache HTTP Server attends static content like HTML, images, etc., and forwards the requests for dynamic content to Tomcat.
This installation and configuration guide applies to Apache with Tomcat 10 on Ubuntu.
1. Install Java
First, as always, update your packages:
sudo apt updateYou must have Java installed on your system to run the Tomcat server. Tomcat 10 requires Java SE 8 or higher version installed on your system. Run the following command and install the OpenJDK 11 JDK package:
sudo apt install openjdk-11-jdkCheck the current active Java version:
java -versionopenjdk version "11.0.11" 2021-04-20
OpenJDK Runtime Environment (build 11.0.11+9-Ubuntu-0ubuntu2.20.04)
OpenJDK 64-Bit Server VM (build 11.0.11+9-Ubuntu-0ubuntu2.20.04, mixed mode, sharing)Code language: CSS (css)2. Create Tomcat System User
Running a Tomcat server under the root user is a security risk. Therefore, we recommend creating a separate user account to run the Tomcat server.
The following command will create a user and group with the name tomcat on your system:
sudo useradd -m -d /opt/tomcat -U -s /bin/false tomcatCode language: JavaScript (javascript)3. Install and Configure Apache Tomcat 10
Tomcat is a platform-independent tool, and, as long there is Java installed, the installation is a straightforward process. First, you need to download the desired version from the official website and then unpack it on your file system.
Now download the latest binary release of Tomcat from the official Tomcat downloads page.
wget https://apache.mirrors.nublue.co.uk/tomcat/tomcat-10/v10.0.8/bin/apache-tomcat-10.0.8.tar.gzCode language: JavaScript (javascript)Once the download is complete, extract the tar file to the /opt/tomcat directory:
sudo tar xzvf apache-tomcat-10*tar.gz -C /opt/tomcat --strip-components=1Next, set the proper file permissions:
sudo chown -R tomcat:tomcat /opt/tomcat/
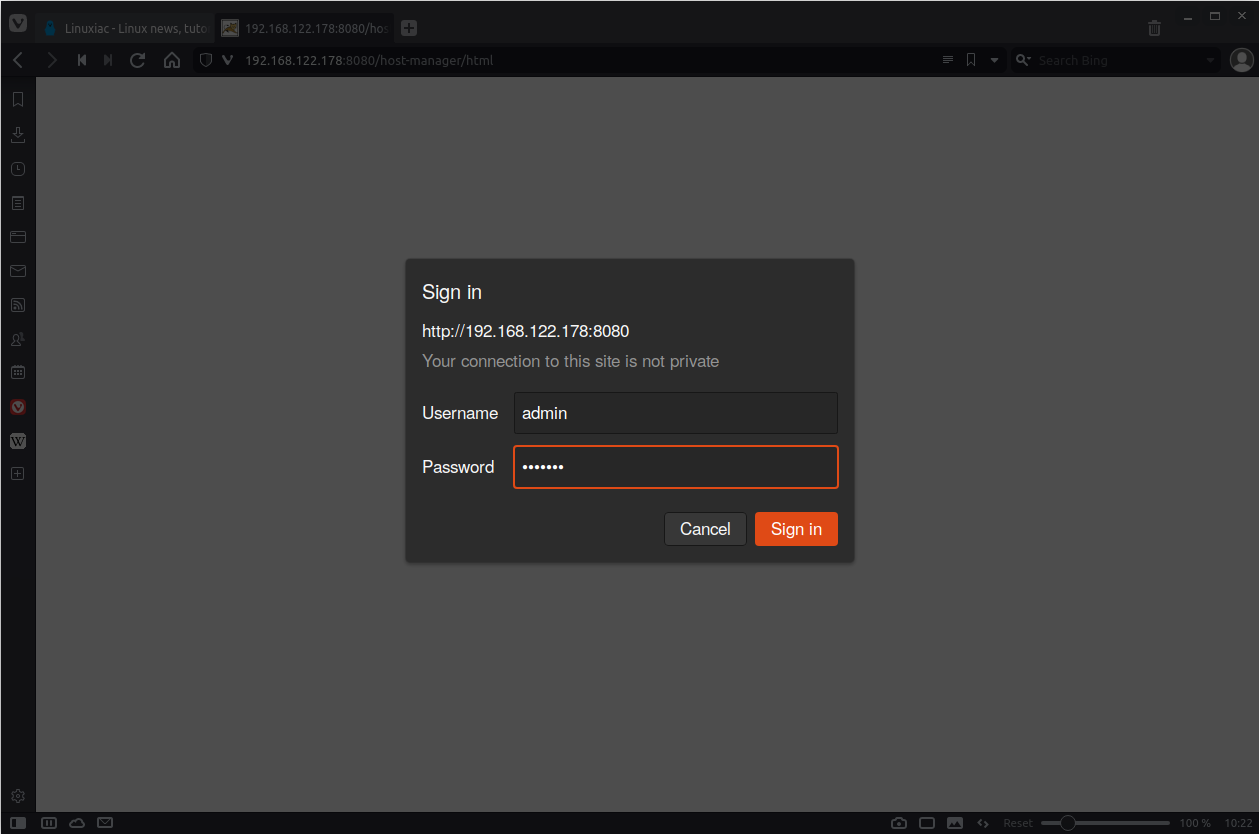
sudo chmod -R u+x /opt/tomcat/binYou should create a user for the Web Application Manager in the Tomcat Server. A new user account must be set up to use the Apache Tomcat Web Application Manager.
To do this, edit the tomcat-users.xml file in your editor:
sudo vim /opt/tomcat/conf/tomcat-users.xmlPaste the following code inside <tomcat-users> </tomcat-users> tags. Make sure to change PASSWORD for admin and manager access.
<!-- user manager can access only manager section -->
<role rolename="manager-gui" />
<user username="manager" password="PASSWORD" roles="manager-gui" />

<!-- user admin can access manager and admin section both -->
<role rolename="admin-gui" />
<user username="admin" password="PASSWORD" roles="manager-gui,admin-gui" />Code language: HTML, XML (xml)
Tomcat provides a web-based administration console. The default Tomcat server does not allow remote access for the Manager and Host Manager applications. However, you can access them from localhost only.
To enable remote connections, follow the instructions below.
Create a file conf/Catalina/localhost/manager.xml:
sudo vim /opt/tomcat/conf/Catalina/localhost/manager.xmlAdd the following content:
<Context privileged="true" antiResourceLocking="false" docBase="{catalina.home}/webapps/manager">
    <Valve className="org.apache.catalina.valves.RemoteAddrValve" allow="^.*$" />
</Context>Code language: HTML, XML (xml)
You also need to create xml file for the host-manager webapp to allow access for remote hosts.
sudo vim /opt/tomcat/conf/Catalina/localhost/host-manager.xmlAdd the following content:
<Context privileged="true" antiResourceLocking="false" docBase="${catalina.home}/webapps/host-manager">
    <Valve className="org.apache.catalina.valves.RemoteAddrValve" allow="^.*$" />
</Context>Code language: HTML, XML (xml)
4. Create a Tomcat Systemd Service
We need to create a startup script to manage Tomcat as a systemd service. Let’s create a tomcat.service file.
sudo vim /etc/systemd/system/tomcat.servicePaste the following into the file:
[Unit]
Description=Tomcat
After=network.target

[Service]
Type=forking
User=tomcat
Group=tomcat
Environment="JAVA_HOME=/usr/lib/jvm/java-11-openjdk-amd64"
Environment="JAVA_OPTS=-Djava.security.egd=file:///dev/urandom"
Environment="CATALINA_BASE=/opt/tomcat"
Environment="CATALINA_HOME=/opt/tomcat"
Environment="CATALINA_PID=/opt/tomcat/temp/tomcat.pid"
Environment="CATALINA_OPTS=-Xms512M -Xmx1024M -server -XX:+UseParallelGC"

ExecStart=/opt/tomcat/bin/startup.sh
ExecStop=/opt/tomcat/bin/shutdown.sh

[Install]
WantedBy=multi-user.targetCode language: JavaScript (javascript)
Reload the systemd daemon to apply changes:
sudo systemctl daemon-reloadSet Tomcat to automatically start at boot:
sudo systemctl enable tomcat5. Install Apache HTTP Server
Apache is available within Ubuntu’s default software repositories. To install it, type the following command:
sudo apt install apache26. Configure Tomcat to Work with Apache
To integrate the Apache Tomcat server processes with the Apache HTTP server, we need the mod_jk module, which implements the interface between Tomcat and Apache, combined with some small steps to configure Apache and Tomcat to our needs.
6.1 Install the mod_jk Module
Installing and configuring mod_jk is the key to getting the web server and the application server working together. So, let’s install it:
sudo apt install libapache2-mod-jk6.2 Configuring mod_jk with Apache and Tomcat.
You’ll need to enable the AJP Connector in Tomcat so that the Apache server can redirect requests to Tomcat. You did this by editing Tomcat’s server.xml file.
sudo vim /opt/tomcat/conf/server.xmlMake sure that the AJP Connector below is active and not commented out.
<Connector protocol="AJP/1.3" port="8009" secretRequired="false" redirectPort="8443" />Code language: HTML, XML (xml)We need to configure the Apache HTTP Server to load and initialize the JK module.
We need to create the /etc/apache2/workers.properties file. This file defines a list of Tomcat ‘workers’ to which Apache can pass requests.
sudo vim /etc/apache2/workers.propertiesand paste the following into the file:
# Define 1 real worker using ajp13
worker.list=worker1

# Set properties for worker1 (ajp13)
worker.worker1.type=ajp13
worker.worker1.host=localhost
worker.worker1.port=8009Code language: PHP (php)
Next, reference this file in the primary Apache configuration file apache2.conf:
sudo vim /etc/apache2/apache2.confWe add these lines at the end:
JkWorkersFile /etc/apache2/workers.properties

# Where to put jk shared memory
JkShmFile /var/log/apache2/mod_jk.shm

# Where to put jk logs
JkLogFile /var/log/apache2/mod_jk.log

# Set the jk log level [debug/error/info]
JkLogLevel info

# Select the timestamp log format
JkLogStampFormat "[ %a %b %d %H:%M:%S %Y ] "Code language: PHP (php)
6.3 Configure which URLs to manage with Apache
At this point, you’ll need to configure Apache to tell it which URLs to process and handoff to Tomcat and which URLs you want Apache itself to process.
sudo vim /etc/apache2/sites-enabled/000-default.confCode language: JavaScript (javascript)Add the following line under the DocumentRoot entry. This makes it possible to request JRS via the Apache webserver.
JkMount /examples worker1
JkMount /examples/* worker1
7. How to verify that it’s working
Restart Apache and Tomcat services:
sudo systemctl restart apache2
sudo systemctl restart tomcat
Once you start the server, open your internet browser and navigate the URL http://server_ip_address:8080. If you see a page similar to the one shown below, Tomcat was correctly installed.
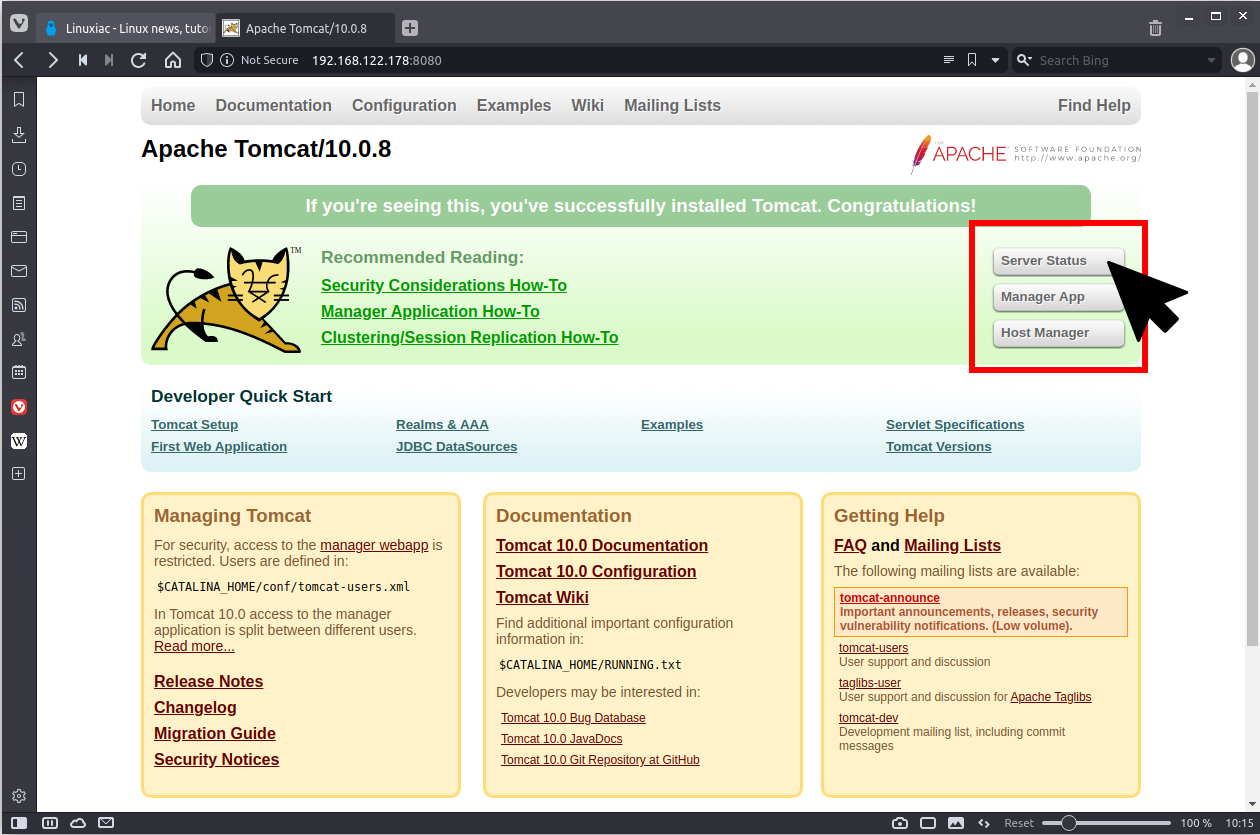

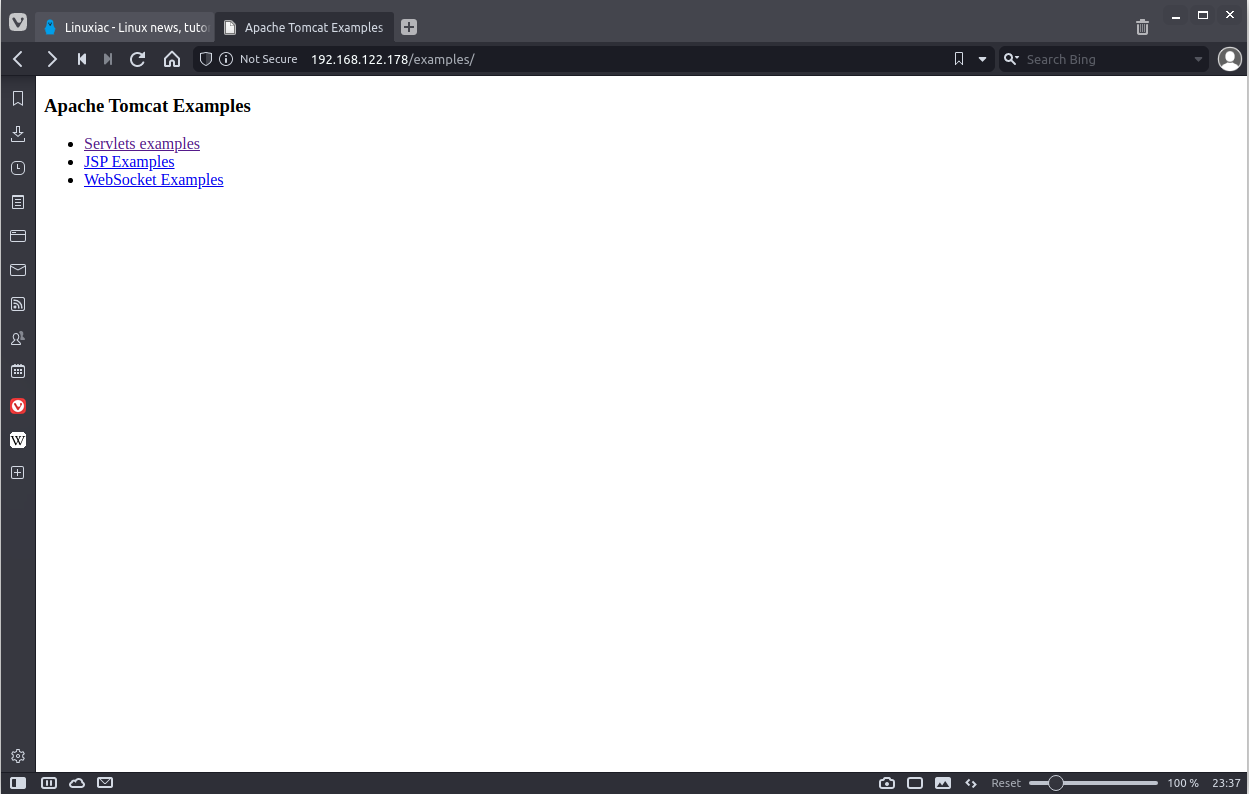
A simple way of verifying that the integration between Apache HTTP Server and Tomcat is working is to request one of the example files that Tomcat should serve up.
Point your browser to the http://server_ip_address/examples/ and run some of the sample applications.
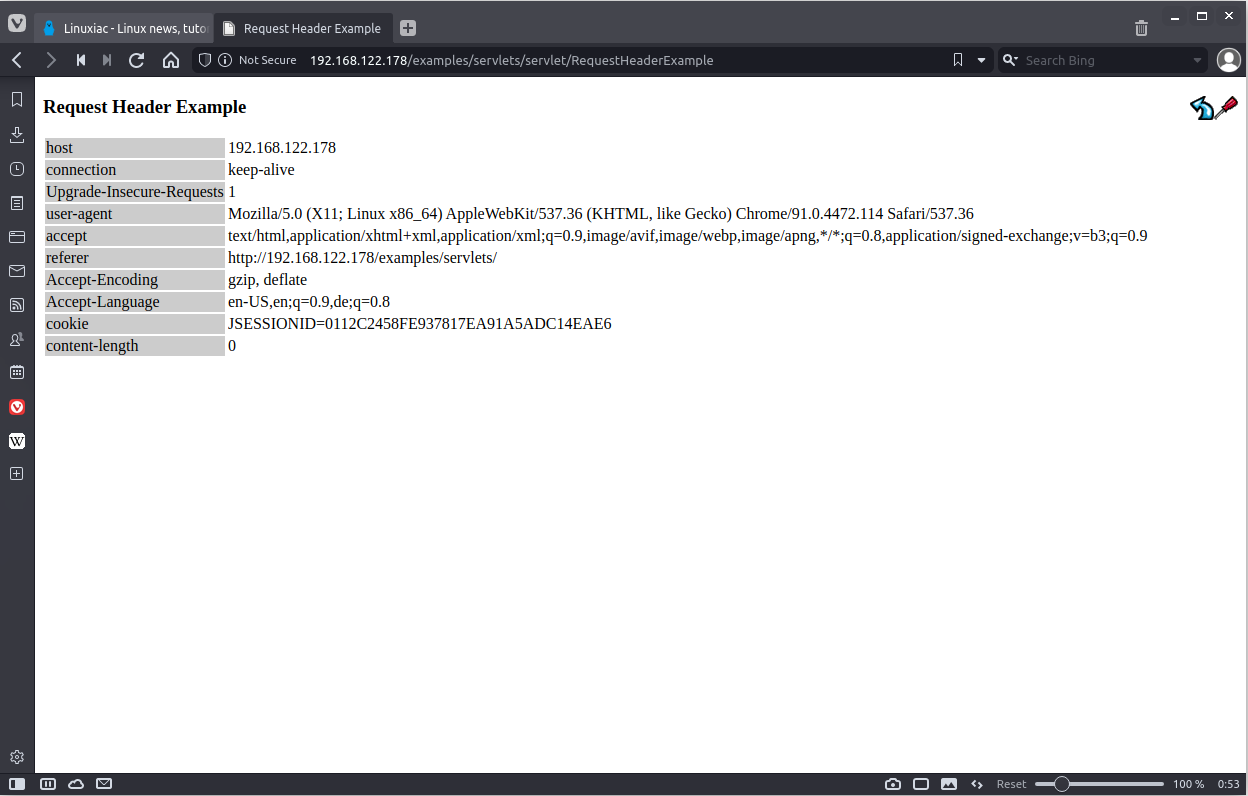
Congratulations! You have successfully integrated Tomcat with Apache HTTP Server.
Conclusion
If you want to run Java-based applications that operate seamlessly and fast, then Apache Tomcat is the best choice.
This tutorial taught you how to install and configure the Tomcat application server with the Apache webserver. I hope you now have enough information to deploy your Java-based application on the Tomcat server.
I hope you also found the guide helpful. For more information, visit the Tomcat official documentation at Tomcat Doc.
Thanks for reading! Your feedback and comments are most welcome.


Yes I have it set up for SSL, everything is working but when I try to load any .jsp files it returns text. I’m using your example to load tomcat/webapps/examples. The first page load with the links but when I click on the link it shows the code not the .jsp page. This also happens with my Servlets as well. How do I load the .jsp pages.
Do you have this set up for SSL?