After more than two years in the making, Debian 13 (Trixie) has finally arrived—packed with a bunch of new features and improvements. It’s no surprise that many Debian 12 users are already itching to make the jump to this latest stable release.
If that’s you, I have some good news for you – you’re in the right place. While the upgrade process is pretty straightforward, it’s always best to do it the safe way—following the right steps, in the right order, with the right guidance. And that’s exactly the purpose of this article.
I’ll walk you through the process of upgrading to Debian 13 (Trixie) from Debian 12 (Bookworm), covering all key points to navigate this major version transition successfully.
Naturally, the time it takes to finish the task will depend on how many packages you’ve got installed and how powerful your hardware is. But for most cases, the whole process usually wraps up in about 30 to 60 minutes.
Needless to say, everything you’ll see below has been tested and proven to work in our lab. And as always, the goal is simple—making your upgrade to Trixie as smooth and hassle-free as possible. So, let’s do it together.
Step 1: Take System Backup
First, let’s ensure all your important data is safe. Before doing anything else, I strongly recommend fully backing up your Bookworm installation using one of the system snapshot tools you’re familiar with. If you’re not sure which one to go with, check out my recommendations on the topic.
Thus, if something goes wrong, you can restore it to its previous state with all the vital data.
However, if you do not feel like taking the above approach, you can instead use a command like the one shown below, which will archive all of the more critical directories and their contents in a tar.gz archive.
sudo tar czf /bookworm.tar.gz \
     --exclude=/bookworm.tar.gz \
     --exclude=/dev \
     --exclude=/run \
     --exclude=/mnt \
     --exclude=/proc \
     --exclude=/sys \
     --exclude=/tmp \
     --exclude=/media \
     --exclude=/lost+found \
     /Code language: Bash (bash)
Feel free to add more “–exclude=” parameters if needed. Finally, the command creates a backup of all files in the “bookworm.tar.gz” file located on the root partition (/), which you should ideally transfer to another computer or drive, for example, using the SCP command.
Step 2: Update All Software
Ensure you have a fully updated Debian 12 system. Run the three commands below to ensure no packages are waiting to be updated. If there are, apply them before moving on.
sudo apt update
sudo apt upgrade
sudo apt full-upgradeCode language: Bash (bash)
Next, I recommend cleaning off any leftover packages and rebooting the system.
sudo apt --purge autoremove
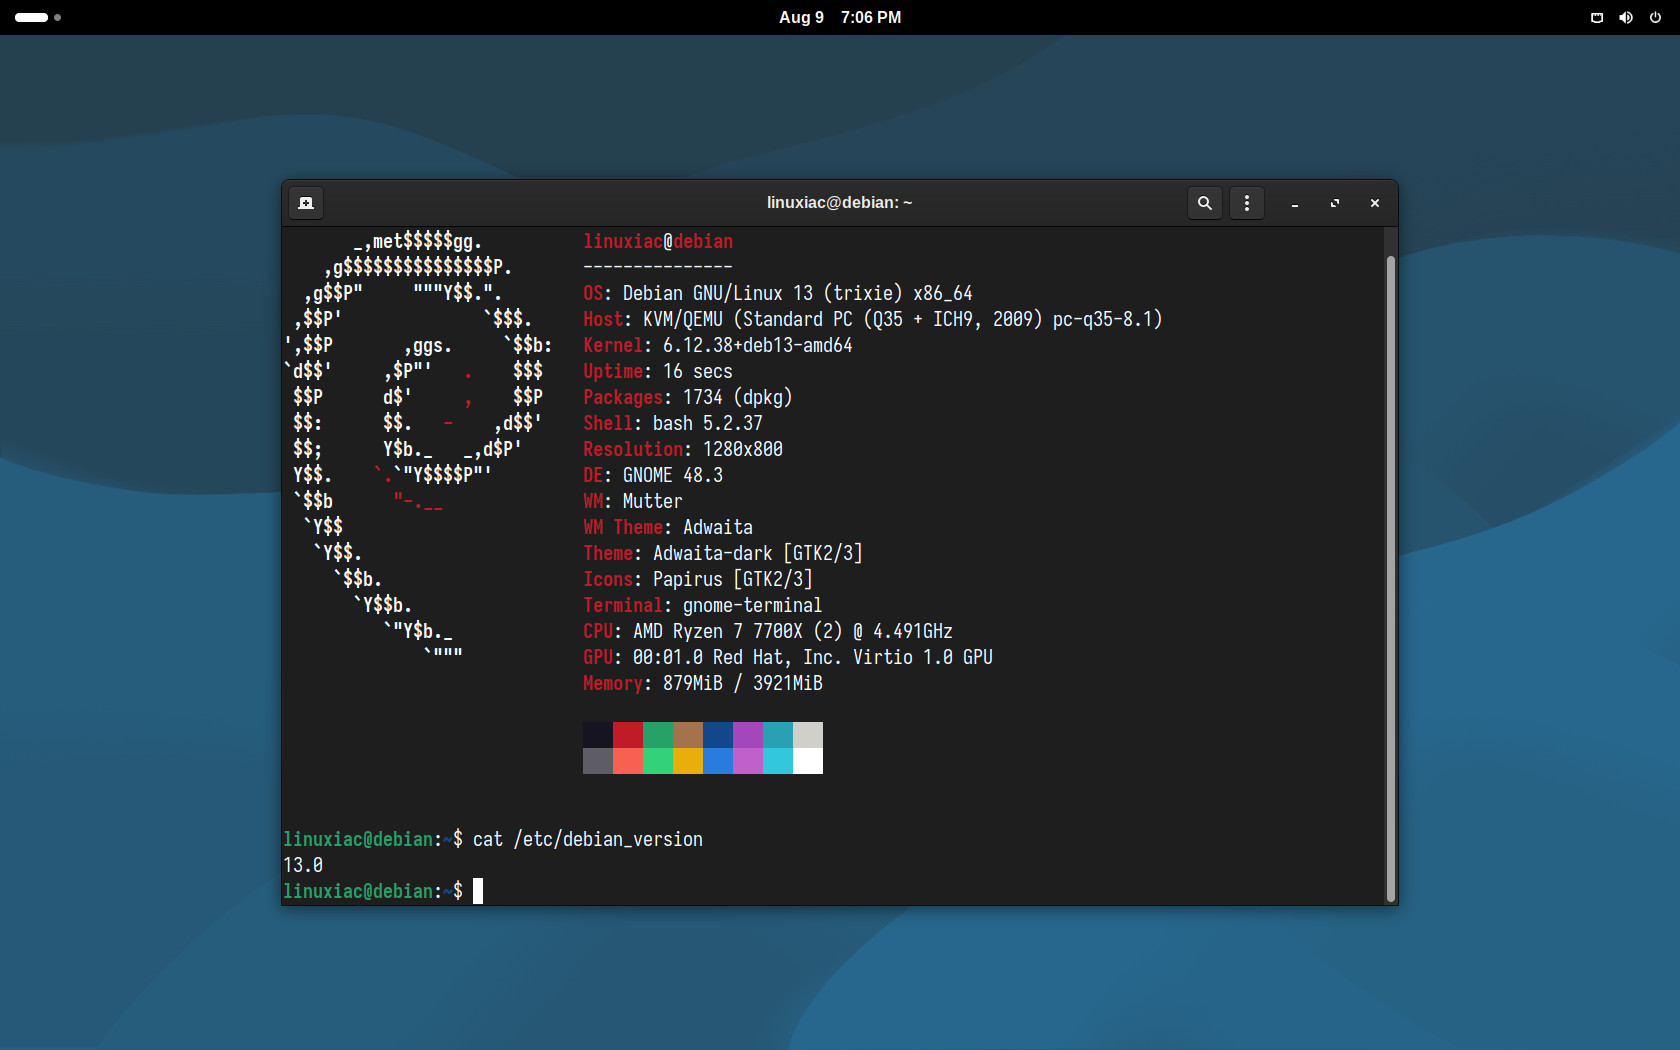
sudo rebootCode language: Bash (bash)By the end, you’ll need to end up with the fully updated latest minor release of Debian 12 series — which, at the time of writing, is version 12.11. You can quickly check this by running the command below.
cat /etc/debian_versionCode language: Bash (bash)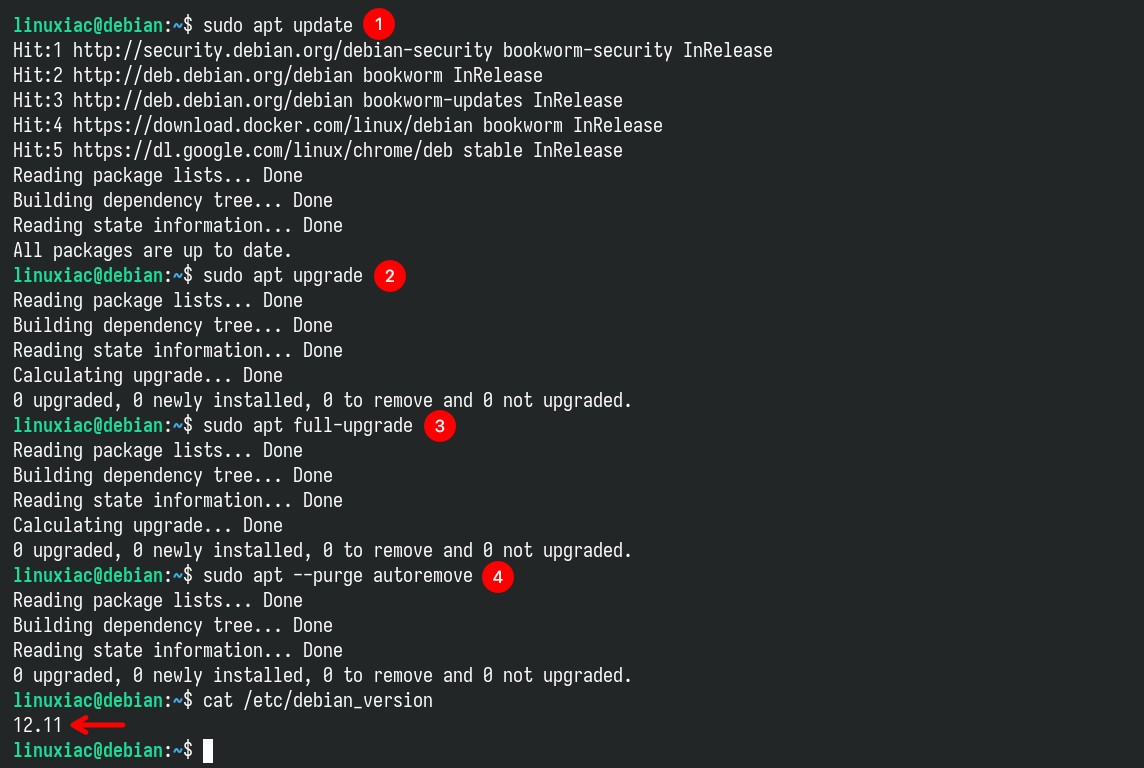
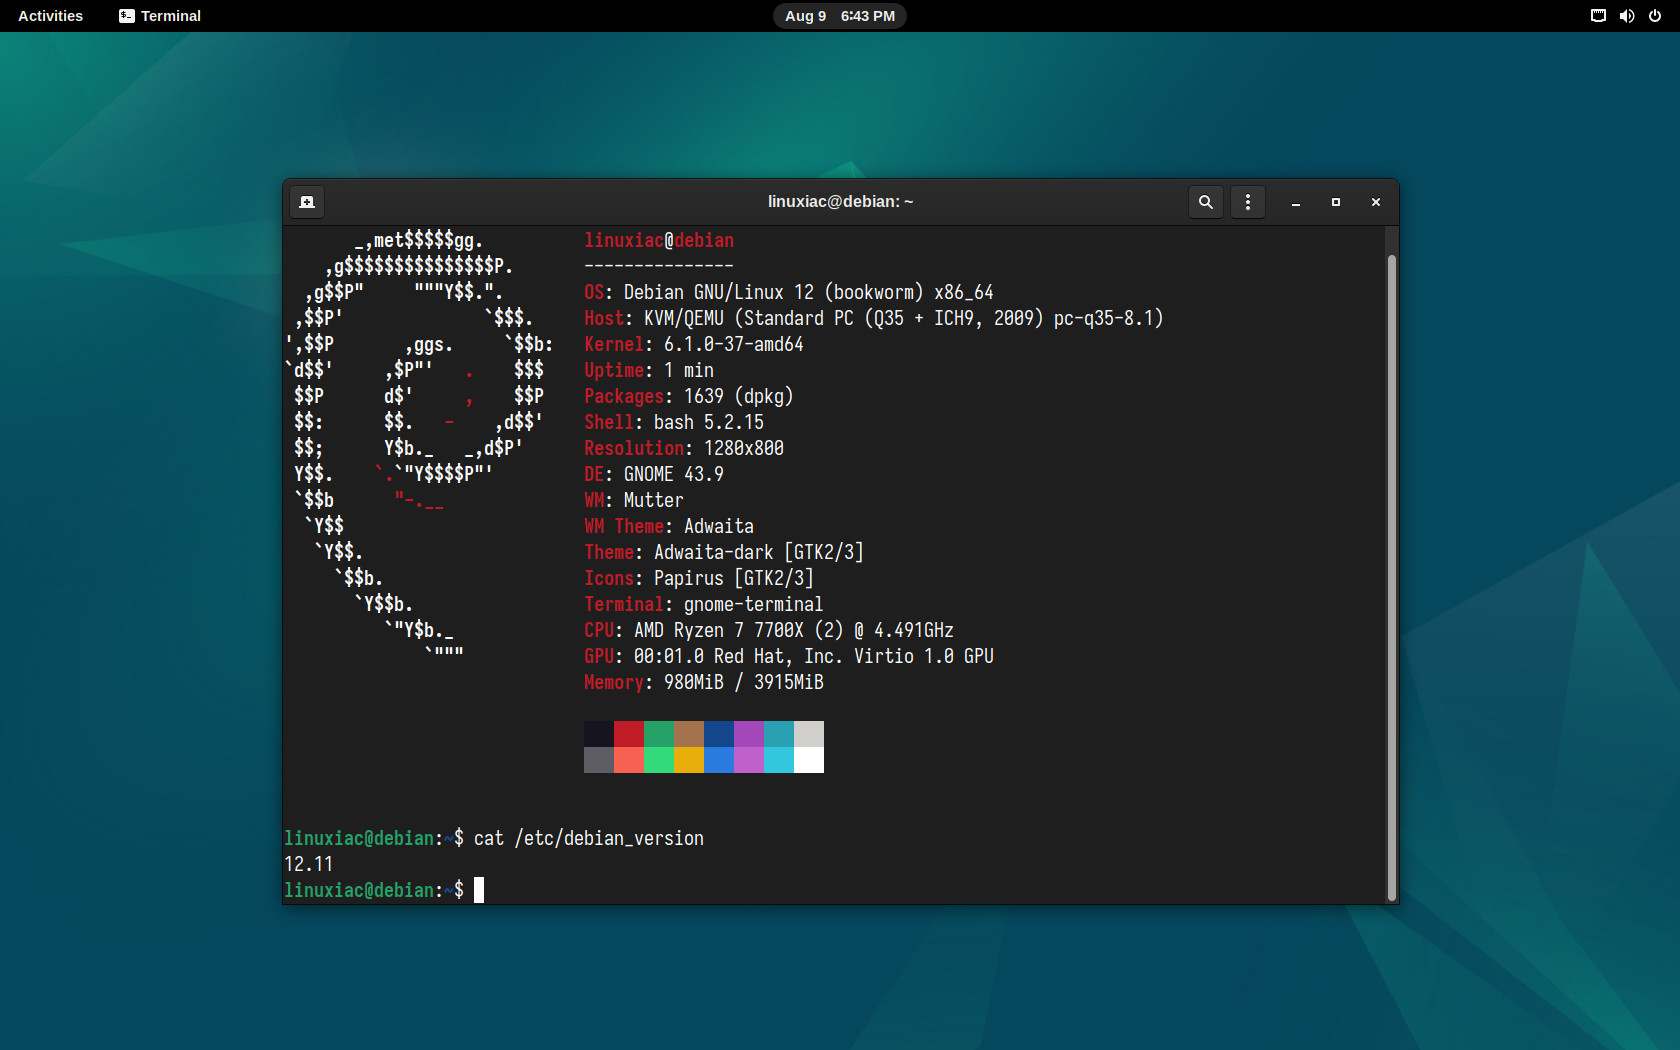
Below is our current fully-updated Debian 12 (Bookworm) system before we upgrade to Debian 13 (Trixie).
Step 3: Check for Installed Non-Debian Packages
Before proceeding with the upgrade to Trixie, following best practices, we will check if any additional packages currently installed on our system are from outside the official Debian 12 repositories.
We do this because, over time, we might have installed extra server or client software on our Debian 12 system that didn’t come from the official Debian repositories—things like Google Chrome, VirtualBox, and so on.
In that case, this may cause complications when upgrading to Debian 13, as these external repositories may not yet be set up to work with the Trixie release.
sudo apt list '?narrow(?installed, ?not(?origin(Debian)))'Code language: PHP (php)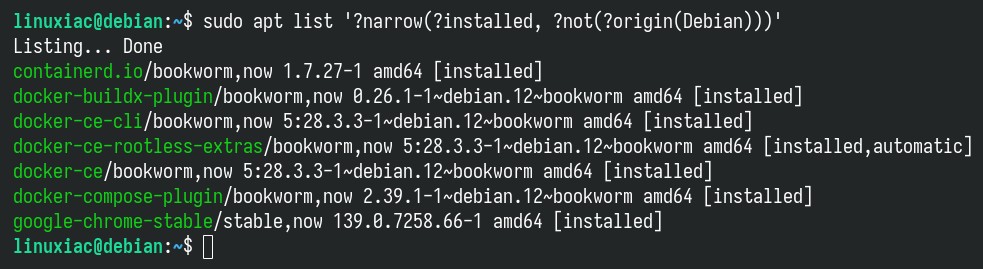
As you can see, the check showed that we have a Docker and Google Chrome installation that is from non-Debian repositories. So what do we do in such a situation?
My best and recommended advice is, if the installed software is not critical to your needs, to uninstall it and reinstall it after successfully upgrading to Debian 13 to avoid issues.
However, in this case, with Docker and Google Chrome, since the software is from proven companies that immediately made their software compatible with Debian 13, we will continue upgrading to Trixie without removing it.
In addition, check for packages that, for some reason, you have specified not to be updated. You can do this by running:
sudo apt-mark showholdCode language: Bash (bash)If the command returns an empty output, it is okay to move on. However, if you get a list of package names, you must allow them to be updated, as for each manually executed:
sudo apt-mark unhold package_nameCode language: Bash (bash)Finally, if you use the Debian backports repositories, the packages from bookworm-backports have lower version numbers than those in Trixie, so they should upgrade just like regular Bookworm packages during the distribution upgrade.
Step 4: Modify Software Sources Files
The Debian software repositories are defined in the “/etc/apt/sources.list” file and the “/etc/apt/sources.list.d/” directory. Before upgrading, you must update them to point to the Debian 13 (Trixie) repositories.
Before you do so, however, it is a good practice to back up the current software repositories’ configuration files. We’re doing this just in case something goes wrong with the commands below, so we can easily restore the original files if needed.
mkdir ~/apt
cp /etc/apt/sources.list ~/apt
cp -r /etc/apt/sources.list.d/ ~/aptCode language: Bash (bash)
Now, let’s update the current Debian 12 (Bookworm) repositories to those of Debian 13 (Trixie).
sudo sed -i 's/bookworm/trixie/g' /etc/apt/sources.list
sudo sed -i 's/bookworm/trixie/g' /etc/apt/sources.list.d/*Code language: Bash (bash)
The above commands will replace the “bookworm” keyword with “trixie” in software repository files. After the changes, the final version of your “/etc/apt/sources.list” file should look something like this:
deb http://deb.debian.org/debian/ trixie main contrib non-free non-free-firmware
deb http://security.debian.org/debian-security trixie-security main contrib non-free non-free-firmware
deb http://deb.debian.org/debian/ trixie-updates main contrib non-free non-free-firmwareCode language: Bash (bash)
Step 5: Perform an Initial Minimal Upgrade
At this point, your Debian 12 system is ready to be upgraded to Debian 13. The first step is to update the repository to let the system recognize the newly added repo URLs.
sudo apt updateCode language: Bash (bash)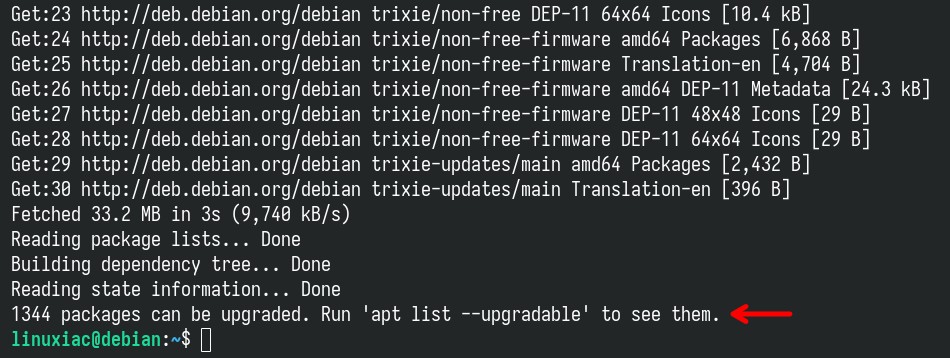
Once the command finishes running, you’ll notice that quite a lot of packages—over 1,300 in this case—are ready for an update. That’s perfectly fine—we can move on.
According to the official Debian documentation, the recommended way to handle the upgrade is to break it into two separate steps.
- Minimal system upgrade
- Full system upgrade
So, let’s proceed with the first step, which tells APT to upgrade all currently installed packages to their latest available versions — but without installing any brand-new packages that aren’t already on your system. This option is handy for a safer, more minimal update.
sudo apt upgrade --without-new-pkgsCode language: Bash (bash)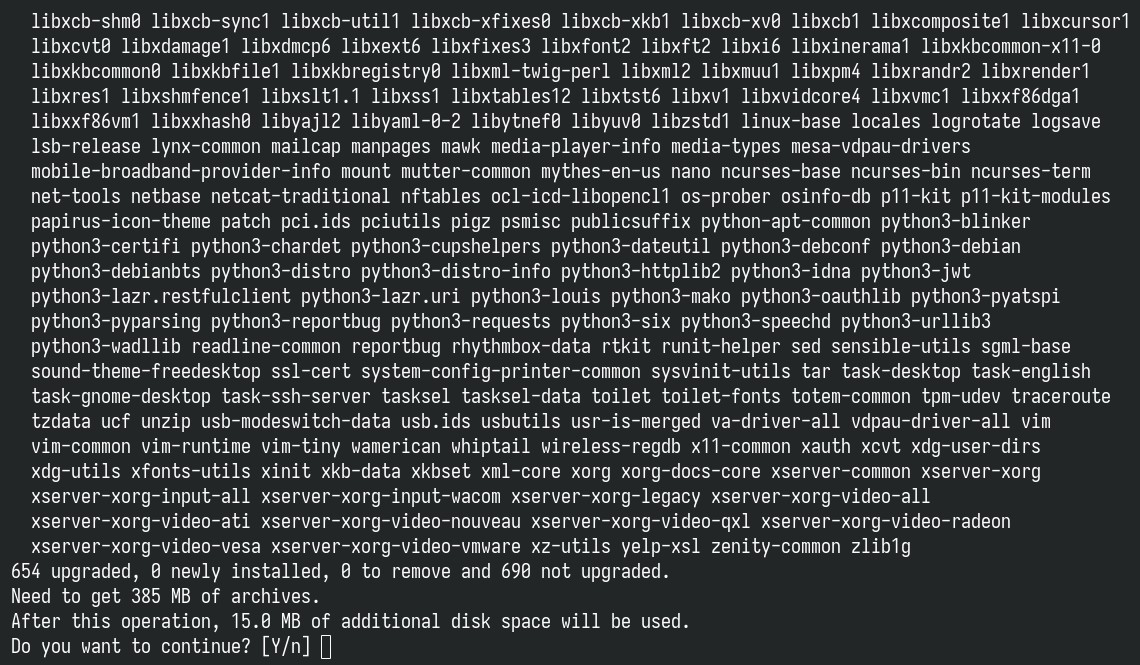
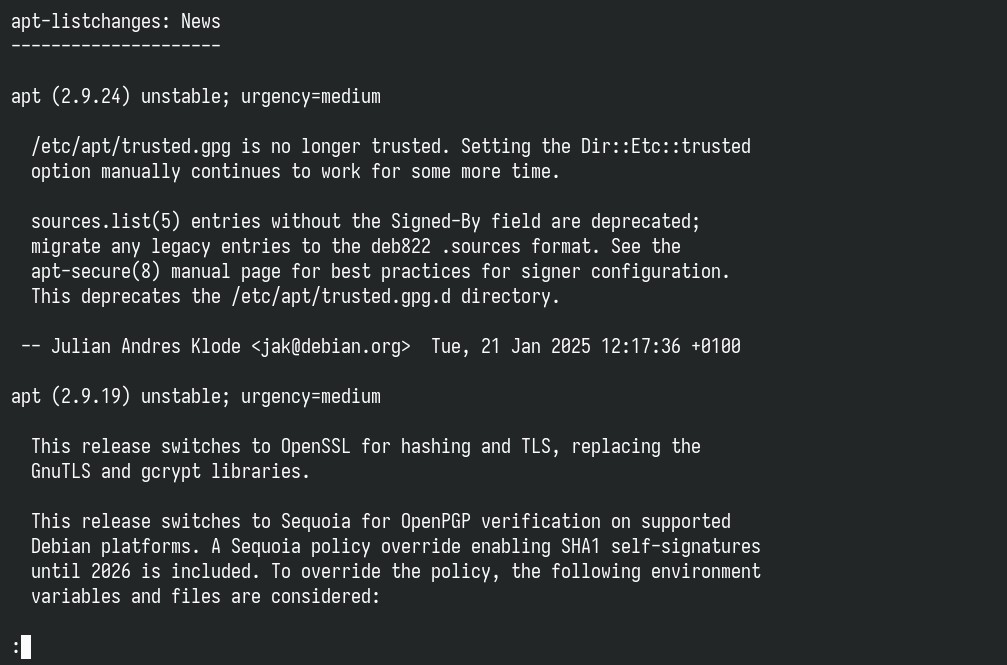
Just hit “Enter” and keep an eye on the screen – it will show you important information about some upgraded packages. Press “q” after reading to exit the pager and continue the upgrade.
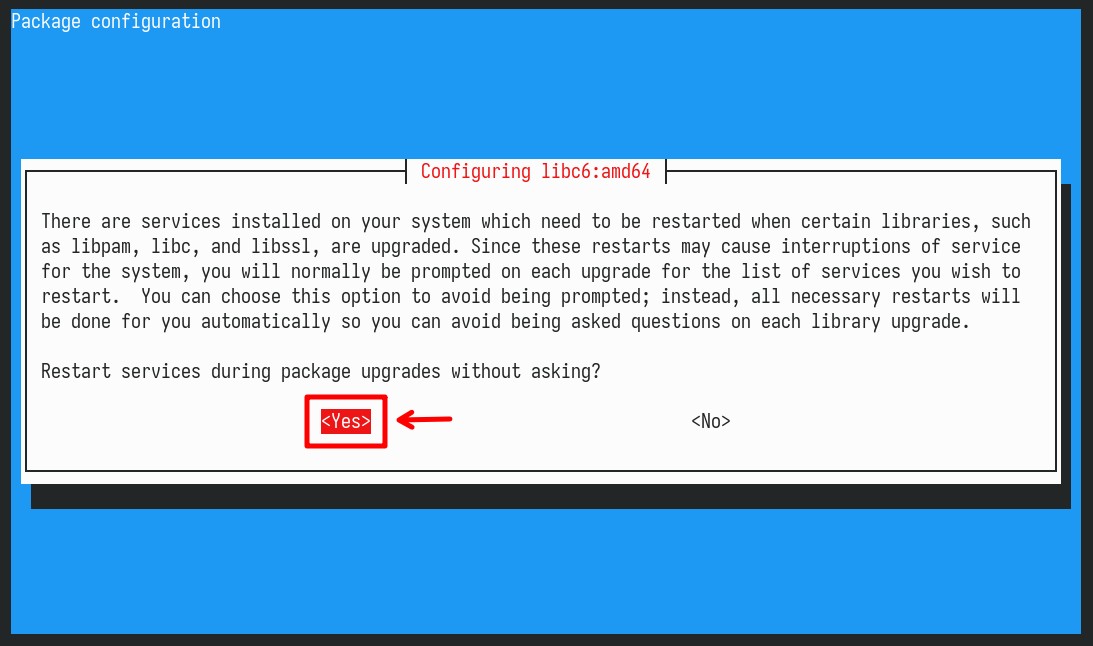
In addition, the upgrade process will prompt for permission to restart services without asking. Choose “Yes” and hit “Enter.”
Be patient. During the process, you may also be asked what you want to do with a specific configuration file whose content you’ve changed so it no longer matches what’s expected in the updated package. If you’re unsure what to do, go with defaults by pressing the “Enter” key to continue with the upgrade.
Step 6: Upgrade to Debian 13 (Trixie) from Debian 12 (Bookworm)
Once the minimal system upgrade completes, run the following command to begin the full upgrade.
sudo apt full-upgradeCode language: Bash (bash)You’ll see a long list of packages that are about to be updated. Hit “Enter” and again, keep an eye on the screen, read the notifications, and perform the necessary actions required for the upgrading process to proceed.

The command will upgrade all packages, install new dependencies, and remove packages if necessary to complete the upgrade. So, hang tight — it’s going to take just a little longer. Once everything is complete, reboot the system.
sudo rebootCode language: Bash (bash)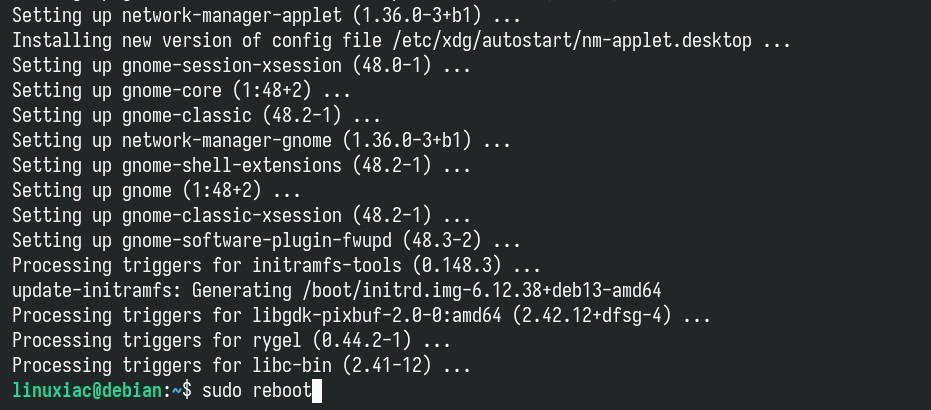
And that’s all. Your system has been successfully upgraded to version 13 (Trixie) from 12 (Bookworm). Log in, and enjoy your newly upgraded Debian system.
Post-Installation Steps
Now it’s time to update your Debian repository configuration files, switching from the old format used in Bookworm to the newer one introduced in Trixie. If you don’t do it, APT will still work just fine either way—but you might see a “modernize sources” warning when running APT commands.
So, to keep things clean and avoid the extra message, it’s worth taking a moment to make the change.
It’s a single command, a helper tool introduced in newer versions of APT, which automates the conversion of your system’s software repository configuration from the older .list‑based format (“/etc/apt/sources.list” and files under “/etc/apt/sources.list.d/“) to the newer, structured deb822 format that uses “.sources” files.
sudo apt modernize-sourcesCode language: Bash (bash)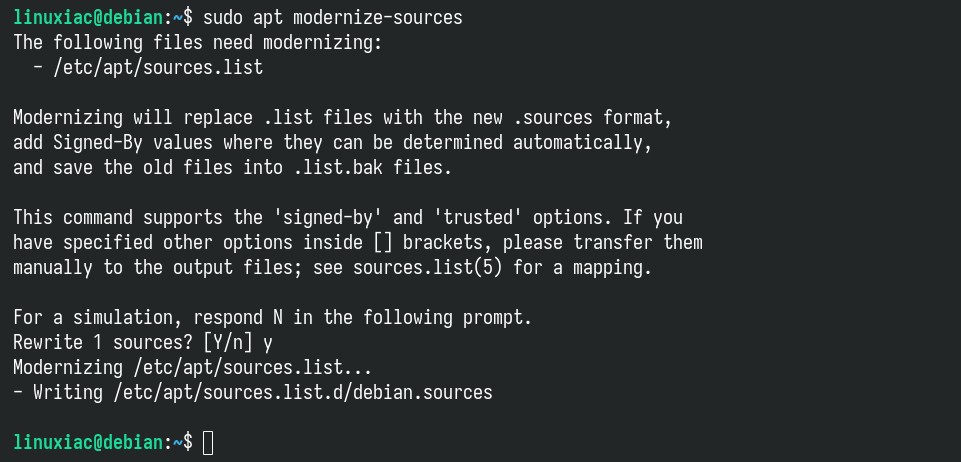
If you’re curious to see what the new files look like, just run:
cat /etc/apt/sources.list.d/debian.sourcesCode language: Bash (bash)
Your old files are still there—they’ve just been automatically renamed with an added “.bak” extension. For example: “/etc/apt/sources.list.bak.” Of course, with this new name, APT won’t use them anymore.
And one last step – let’s clean up the leftover Debian 12 packages. Execute the command below—you’ll be asked to confirm the removal—just type “y” to proceed.
sudo apt --purge autoremoveCode language: Bash (bash)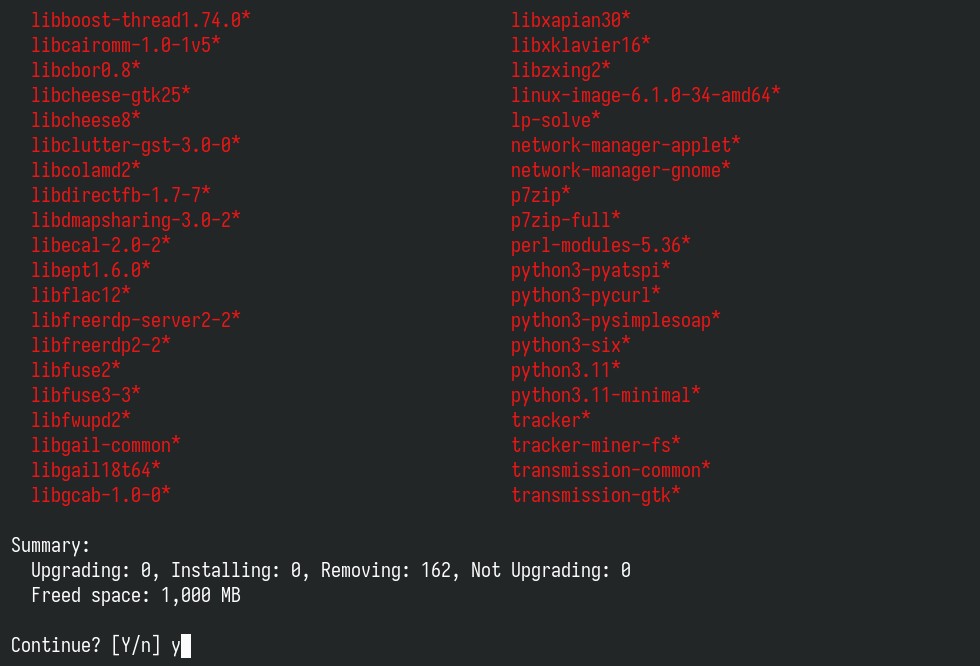
Finally, delete the outdated package files from the local APT cache.
sudo apt autocleanCode language: Bash (bash)Conclusion
As you can see, upgrading from Debian 12 (Bookworm) to Debian 13 (Trixie) is straightforward when you follow the right steps. Once the upgrade is complete, verify that all services are running correctly and that your applications are functioning as expected.
I made this guide as simple as possible. Thanks for taking the time to read it and for using it. As always, your comments are most welcome.
For additional help, check the official Debian upgrade documentation.


Last year I used this site to upgrade from Debian 11 to 12. Today I used this page to upgrade from Debian 12 to 13. Both times went very smoothly.
sudo apt list ‘?narrow(?installed, ?not(?origin(Debian)))’
/usr/bin/apt: eval: line 308: syntax error near unexpected token `(‘
Why this error?
After upgrade I have some issues with users in sudo group and sshd. Accessing Debian 13 server by ssh and then restarting the server [sudo reboot] is rebooting but with the following error message – “client_loop: send disconnect: Broken pipe”.
Thanks for this great guide. Helped me upgrade my early 2015 MacBook Pro running Debian 12 to 13.
Only issue I had was during running `sudo apt upgrade –without-new-pkgs`. The command threw an error and wouldn’t allow me to re-run. The message was `The following packages have unmet dependencies: ncurses-base : Breaks: ncurses-term`
I had to run `sudo dpkg -r ncurses-term`, and run `sudo apt upgrade –without-new-pkgs`, and everything was OK. I definitely suggest uninstalling the packages highlighted by `sudo apt list ‘?narrow(?installed, ?not(?origin(Debian)))’`. In my case the problem was Ghostty terminal, but all the others were updated without an issue.
I made a boo boo while following these steps. I accidentally missed step 6. I rebooted, and now I’m unable to access my desktop. Any idea as to what I should do?
Thanks so much for the post, very well!
The WeB gossips is this. This way of upgrade will keep your legacy drivers intact (NVIDIA). The apt upgrade –without-new-pkgs term is the key thing– True or False. How about future upgrades? If true?
tried a fresh install had issues with some things not working correctly and instead of wasting time trying to solve the issues on my picky pc I instead moved to ubuntu which seems to have no issues on my picky pc.
Thanks so much. Was wondering what to do with docker and veeam. Couldn’t see uninstalling docker and what that might bring down on me. So on we go!
Perfect guide, my friend. So much easier than the old way of manually changing all the bookworm references into trixie with text editors. My old beat up Lenovo likes staying as current as I can get her. Been through what – bullseye, bookworm, and whatever the first one was that I got with the system, she keeps kicking. Chromebooks do have their place. Thanks care, and thanks again!
Hell yeah, thanks! So excited that scrolling works great with my trackpad now, likely due to Wayland, and the internal speakers on my Legion finally work. Excellent upgrade and it went flawlessly for me. Great!
Nice Guide, Thanks!
Maybe add replacing the old /etc/apt/sources.list to /etc/apt/sources.list.d/debian.sources (Deb822)
This can be done with “sudo apt modernize-sources”
Greetings from Germany!
Hey Johannes,
That’s a great find—thanks for mentioning it! I’ve already added it to the guide.
Thanks for the excellent guidance.
Thanks for the excellent guidance
Me gusta Debian, pero no tengo mucho tiempo para dedicarle, así que recurri a Perplexiti para que me guiara en la actualización, y me envió a esta página. ha funcionado perfecto. Muchas gracias desde Barcelona, España.
Thanks. Makes a lot more sense than trying to wade through the debian pages.
Tried these steps in one VM so far and worked perfectly. One thing to note is that in the issues to be aware of document it does say /tmp becomes an in-memory tmpfs filesystem in Deb13 for those that do not have a dedicated /tmp filesystem entry in fstab but use a default of just having a directory tmp under /. I run my VMs with the minimum memory allocated to do the job so that is a painful change but that page also documents reverting back to using origional behaviour with “systemctl mask tmp.mount” and rebooting.
May be worth a comment for anyone that may store large files in /tmp as the default is it can grow to use 50% of memory.
The official Debian upgrade documentation also states
”
If you have listed the proposed-updates section in your APT sources files, you should remove it before attempting to upgrade your system. This is a precaution to reduce the likelihood of conflicts.
”
coming from
https://www.debian.org/releases/trixie/release-notes/upgrading.en.html#the-proposed-updates-section
Debian 13 is awful. Clunky, slow and it operates within such tight parameters it’s like trying to eat wearing a suit of armour. How anyone can base an operating system on this is beyond belief. I installed it and removed it after a few hours when I couldn’t even do simple tasks without having to jump through interminable hoops.
i wonder if you were stuck in the gnome desktop environment like i was…could not change the mouse cursor …so change DE back to plasma11…but not easy to do if you dont know how…*at login top right, change gnome to your preferred desktop…much better
I guess everyone’s experience is different because it works perfectly fine for me. Not slow at all. Seems just as responsive as before, shuts down a lot faster, and I’m getting way better battery life on my laptop.
“Molte grazie dall’Italia, questo tutorial ha funzionato perfettamente, ottimo lavoro”
Many thanks from Italy, this tutorial worked perfectly, great job guy
Worked like a charm: thank you !
Thank you
Thanks worked perfectly.
Thankyou very much, your guide was very usefull for me.
Best document I have seen! Nice a simple guide without a lot of extra information to confuse a newbie like me. VERY well done and greatly appreciated.
Jeff
Thanks a lot
doesn’t work, debian 12 is bullseye, not bookworm
sorry, duh, I misread the version of my existing server. sorry
Dear sir,
In this posted message
https://www.debian.org/News/2025/20250809.en.html
, in the “Upgrading Debian” section, it is written
”
It is advisable to remove bookworm-backports entries from APT source-list files before the upgrade; after the upgrade consider adding trixie-backports.
”
but there is no explanation for this.
Works perfectly !
Many thanks from Germany
Flawless 🙂 Thanks a lot!
worked perfectly – thanks!!
Works perfectly !
Many thanks from France