If you’re looking to set up a development environment on your Raspberry Pi, one of the best options is Visual Studio Code (VS Code). VS Code is a popular, open-source, and cross-platform code editor developed by Microsoft that is packed with features and is easy to use.
Its key characteristics include syntax highlighting, built-in debugging support, embedded Git control, code completion, an integrated terminal, snippets, and code refactoring.
In this article, we’ll walk you through installing VS Code on your Raspberry Pi OS, so you can start writing code and building projects immediately. Whether a beginner or an experienced developer, this guide will help you get up and running with VS Code on your Raspberry Pi.
System Requirements
VS Code is supported on the following Raspberry Pi devices, which run a 32-bit or 64-bit version of the Raspberry Pi OS:
- Raspberry Pi 3 Model B/B+
- Raspberry Pi 4 Model B
- Raspberry Pi 400
In addition, while 1 GB of RAM is sufficient for the system to run Visual Studio Code, users will benefit from installing it on a Raspberry Pi 4 with more memory.
Install Visual Studio Code on Raspberry Pi
This guide will use the sudo command and assuming you have sudo privileges.
Step 1: Refresh the Packages List
Before we install VS Code on our Raspberry Pi, we need to refresh the package list to ensure that the system is up-to-date with the most recent package versions available in the repositories.
sudo apt update
Step 2: Install VS Code on Raspberry Pi
The good news is that Visual Studio Code is available in the official Raspberry Pi OS repositories under the name “code,” so installing it is as simple as running a single APT command. Let’s do it.
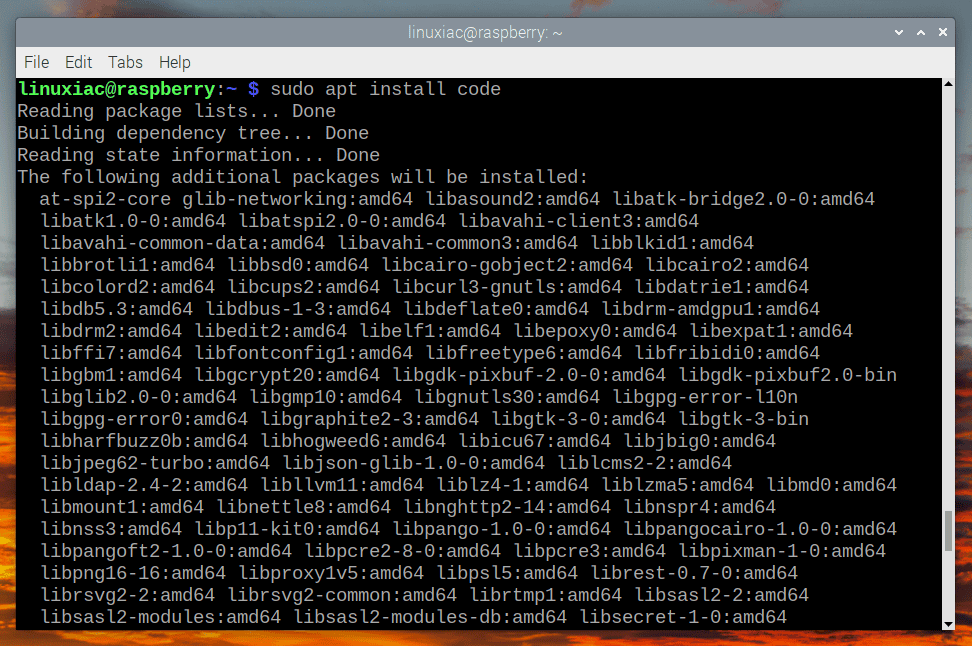
sudo apt install code
This will result in the installation of additional dependencies, as Visual Studio Code includes many. But don’t worry – confirm with “Y” and hit “Enter” to proceed with the installation.
Step 3: Run Visual Studio Code on Raspberry Pi
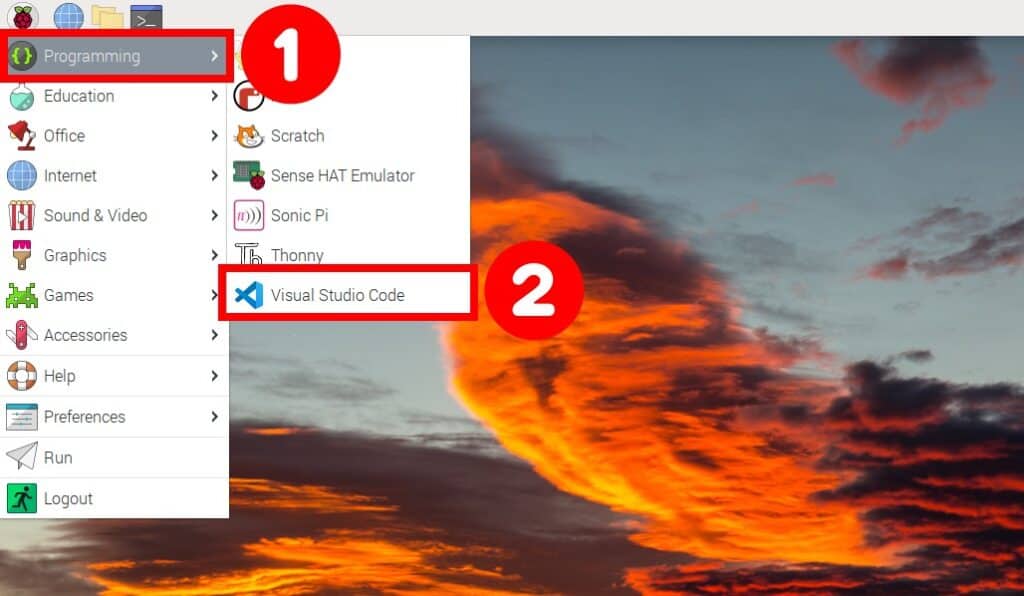
And that’s all! You can start using VS Code by launching it from the “Start Menu” -> “Programming” -> “Visual Studio Code.”

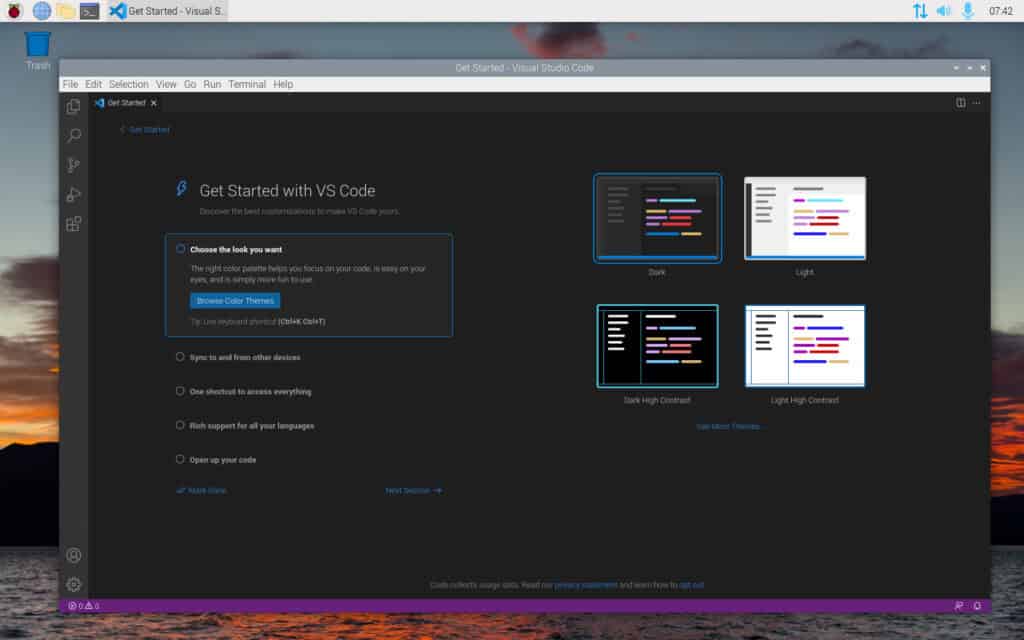
When you start VS Code for the first time, a window like the following should appear:

From now on, your Raspberry Pi will handle updating VS Code in the same way as other packages on the system.
Performance Tuning Tips
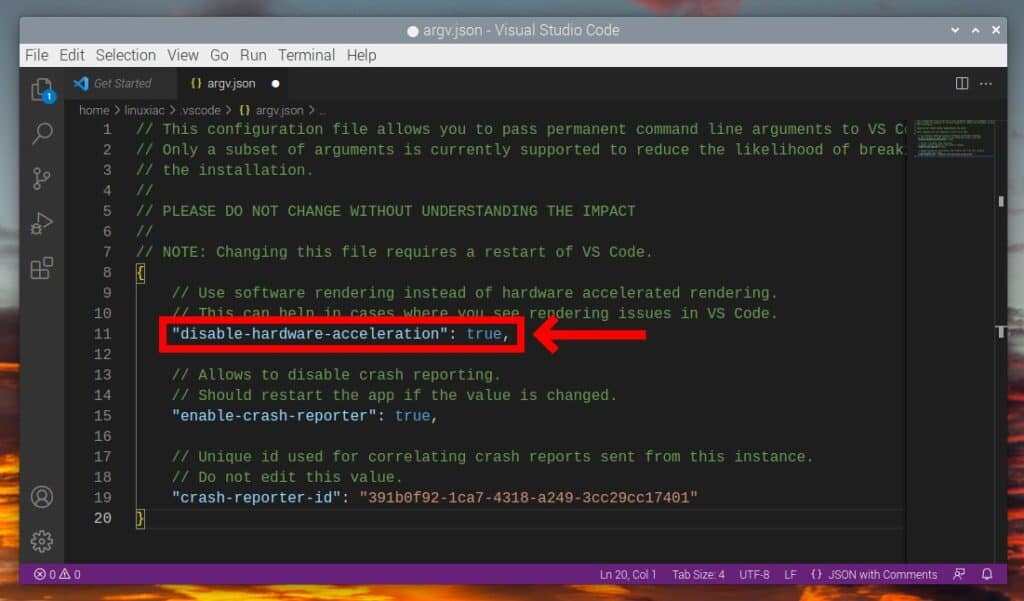
However, if the performance of VS Code is poor, you can improve it by disabling VS Code to use hardware acceleration. Use the keyboard shortcut “Ctrl+Shift+P” to open the interface for executing quick commands. Then, type “Preferences: Configure Runtime Arguments” and select it.

The file “argv.json” will be opened for editing. Uncomment the line containing the directive “disable-hardware-acceleration: true” so that the final result is like the one shown below.

Finally, save the file (“Ctrl+S“) and restart the app.
Conclusion
As we have shown you in this guide, installing VS Code on Raspberry Pi is a straightforward process that involves issuing a single APT command. Now, you can take advantage of the powerful features and functionality offered by VS Code to enhance your coding experience.
If you have any questions, please leave them in the comments section below. To learn more about Visual Studio Code, visit its official documentation page.
