Spotify, a digital music and podcast streaming service that gives users access to millions of songs, albums, and podcasts from artists worldwide, needs no introduction. Since you’re here, you must be looking to add this awesome software to your Ubuntu system. Well, you’re in the right place.
In this guide, I’ll explain two different ways to install Spotify on Ubuntu 24.04 LTS. The first—and my recommended method—is using a standard APT package. The second option is installing it as a Snap application, which is easier since it’s entirely GUI-based, but it has some drawbacks.
I won’t discuss Snap’s downsides here since that’s not our focus, but I will say that the main ones are slower startup times, increased disk usage, auto-updates without user control, (sometimes) permissions and file access issues, and so on. That’s why, to ensure the best user experience, I recommend installing Spoify on Ubuntu as an APT package. The choice is, of course, entirely up to you.
Install Spotify on Ubuntu 24.04 LTS (APT Approach)
Step 1: Install Prerequisites
Before we begin, install the Curl command-line tool if you haven’t already—it’s needed for the next step.
sudo apt install curlCode language: Bash (bash)Step 2: Import Spotify’s GPG Key
We should download and import Spotify’s signed GPG keys on our Ubuntu 24.04 system to ensure that the packages we receive to install Spotify are genuine.
curl -sS https://download.spotify.com/debian/pubkey_C85668DF69375001.gpg | sudo gpg --dearmor --yes -o /etc/apt/trusted.gpg.d/spotify.gpgCode language: Bash (bash)
Notice that none of the commands generate output.
Step 3: Add Spotify’s Visual Studio Code Repository
After importing Spotify’s GPG keys, we’ll add its official repository to our Ubuntu 24.04 LTS system. The best part? From now on, if a new version is released, the update package will be made available with the rest of your system’s regular updates.
echo "deb https://repository.spotify.com stable non-free" | sudo tee /etc/apt/sources.list.d/spotify.listCode language: Bash (bash)
Step 4: Run System Update
Before we proceed with Spotify installation on our Ubuntu 24.04 LTS system, we should update the list of available packages. So, run the below command to refresh Ubuntu’s software repositories index.
sudo apt updateCode language: Bash (bash)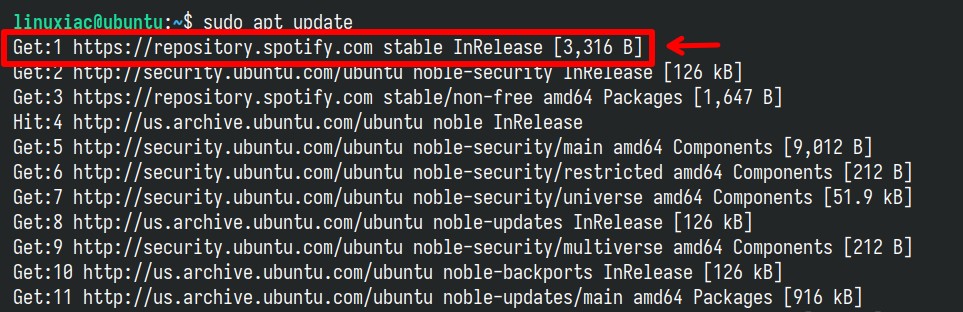
As you can see from the output above, the Spotify repository is now available on your system and ready to be used.
Step 5: Install Spotify on Ubuntu 24.04 LTS
Everything is already prepared for the actual installation. To install Spotify on Ubuntu 24.04 LTS, run the following command and wait for the installation to complete.
sudo apt install spotify-clientCode language: Bash (bash)
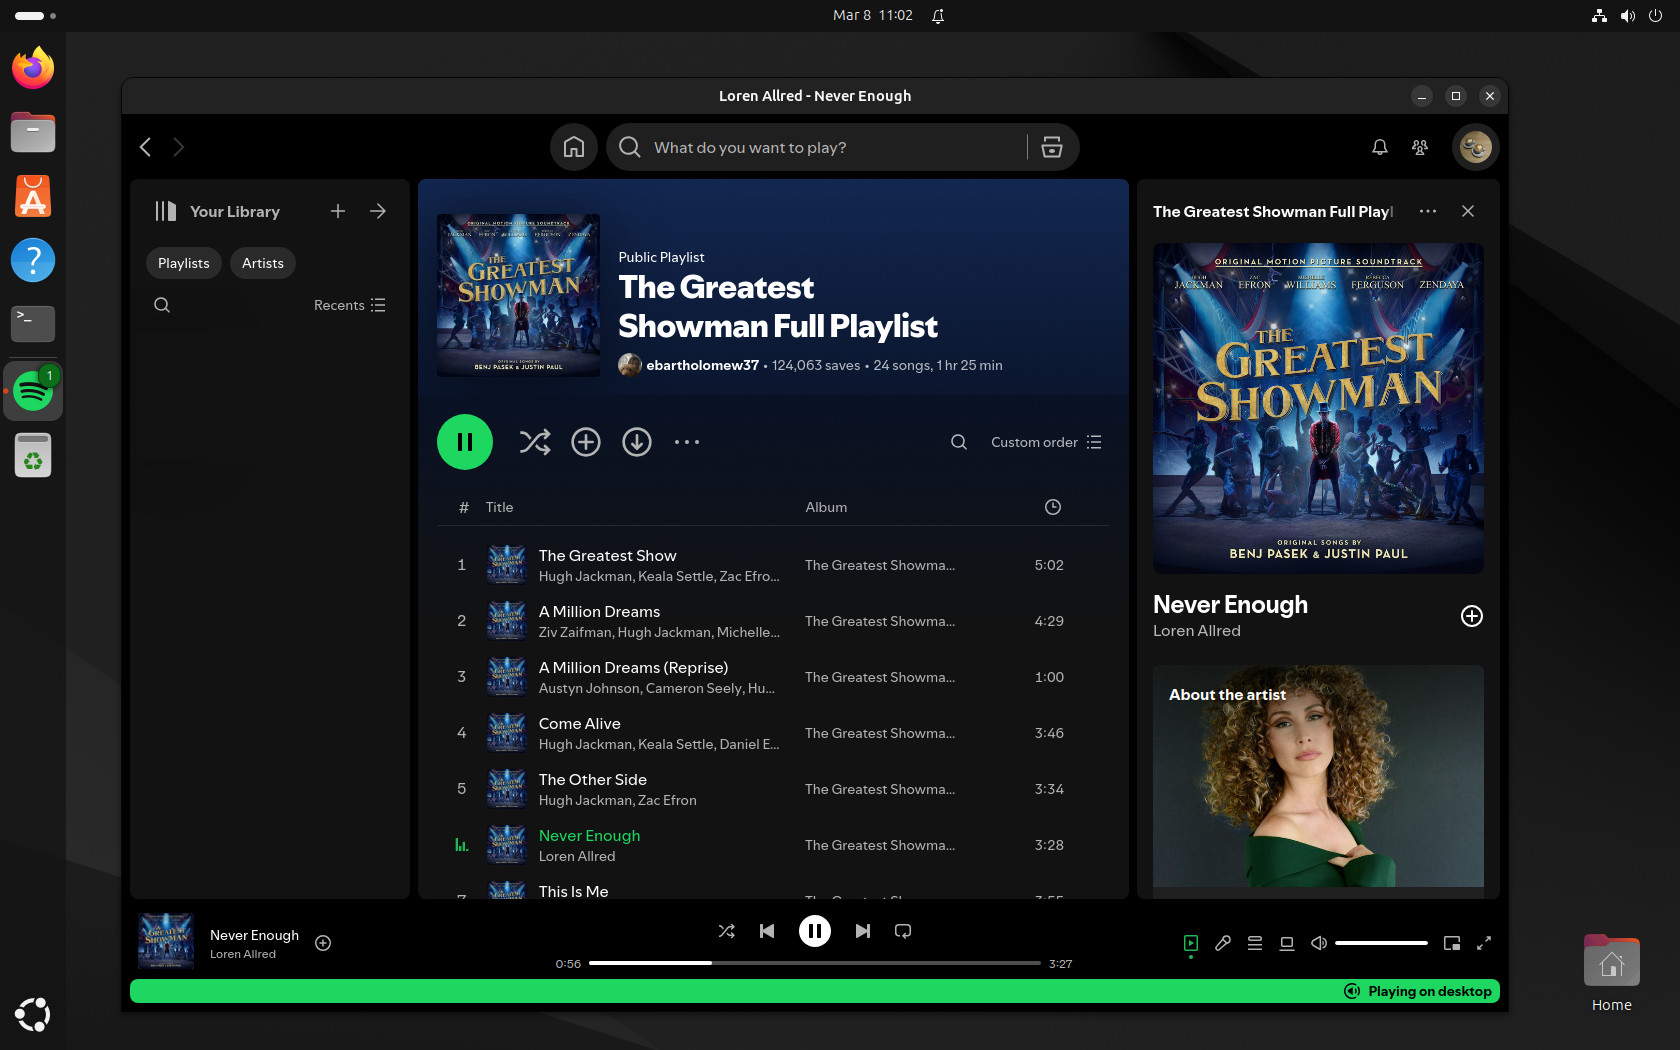
Step 6: Run Spotify on Ubuntu 24.04 LTS
You can start using Spotify by launching it from Ubuntu’s dash. Search for “spotify” and click to run it when its icon appears.

And that’s all! Just log in to your account—or create a free one if you haven’t yet—and start enjoying your favorite artists.
If you later decide to uninstall the application (for some reason), you can do so easily by running the APT command below:
sudo apt remove spotify-clientCode language: Bash (bash)Install Spotify on Ubuntu 24.04 LTS (Snap Approach)
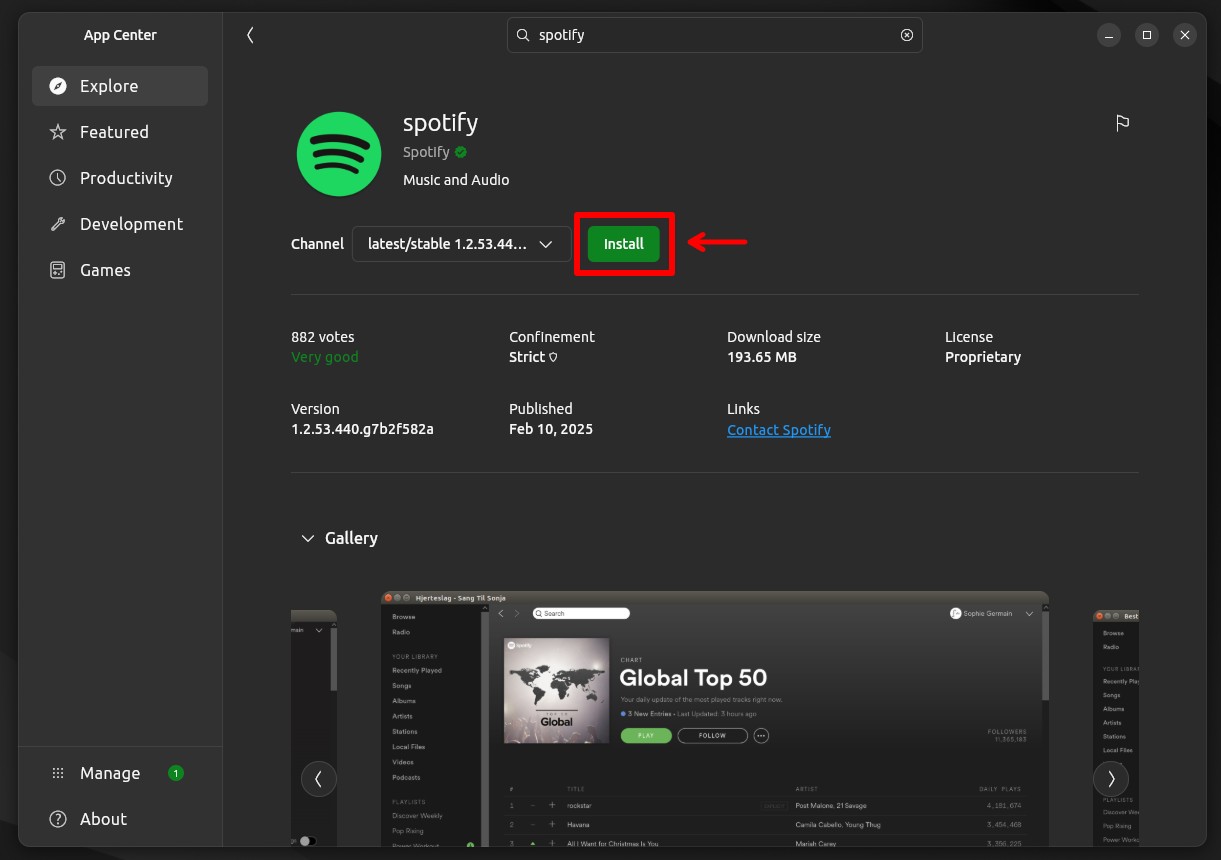
The second way to install Spotify on Ubuntu 22.04 LTS is through the App Center as a Snap package. Just open the App Center, type “spotify” in the search bar, and click on it when it appears in the results.
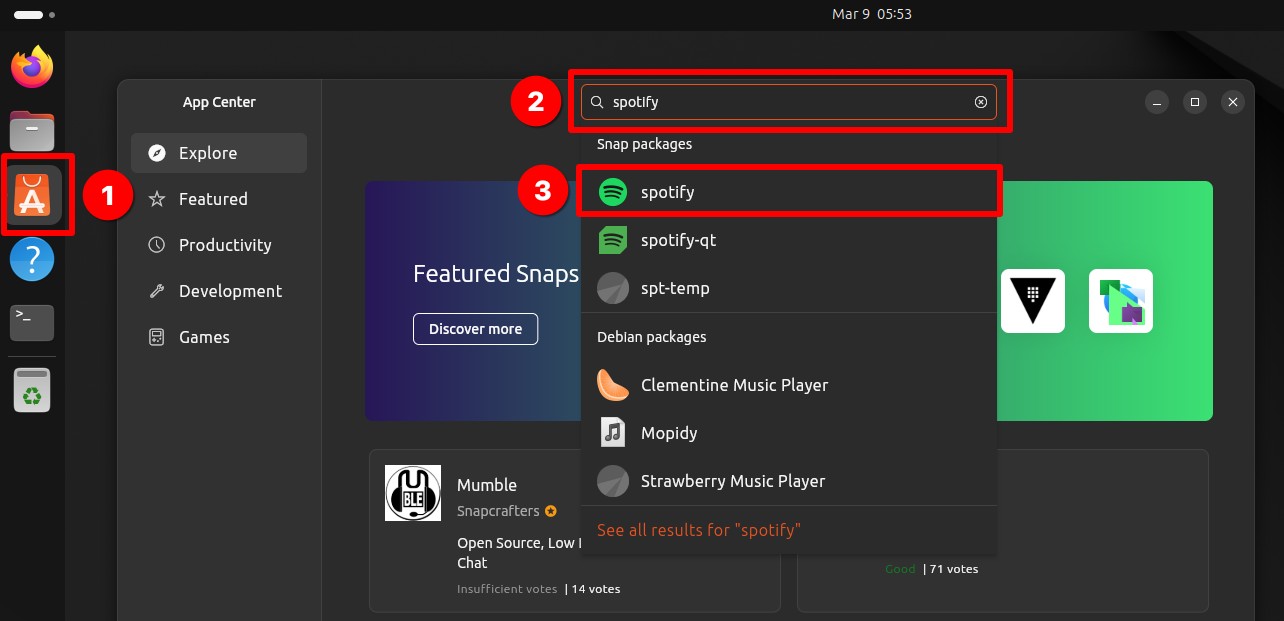
From here on, things are simple. Just click on the “Install” button.
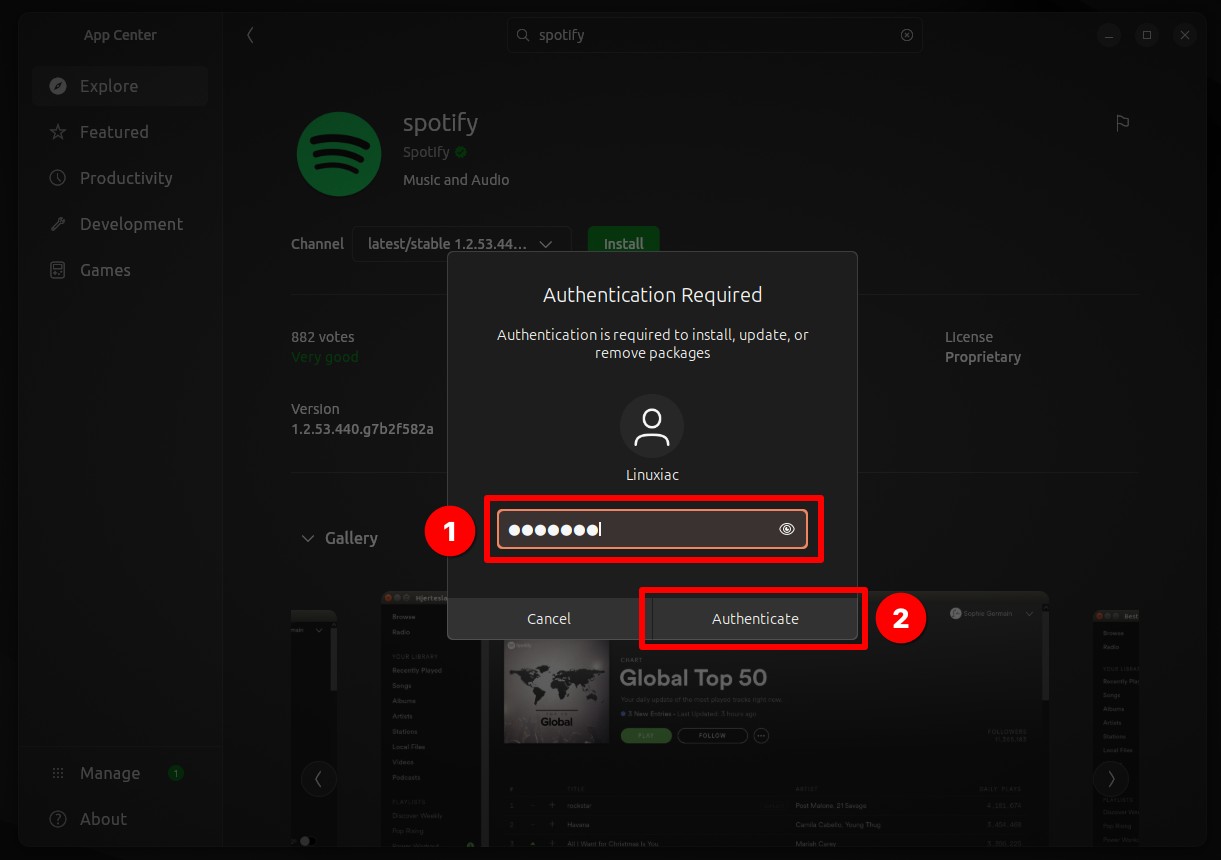
You’ll be prompted to enter your user password. Just type it in, click “Authenticate,” and wait for the installation to finish.
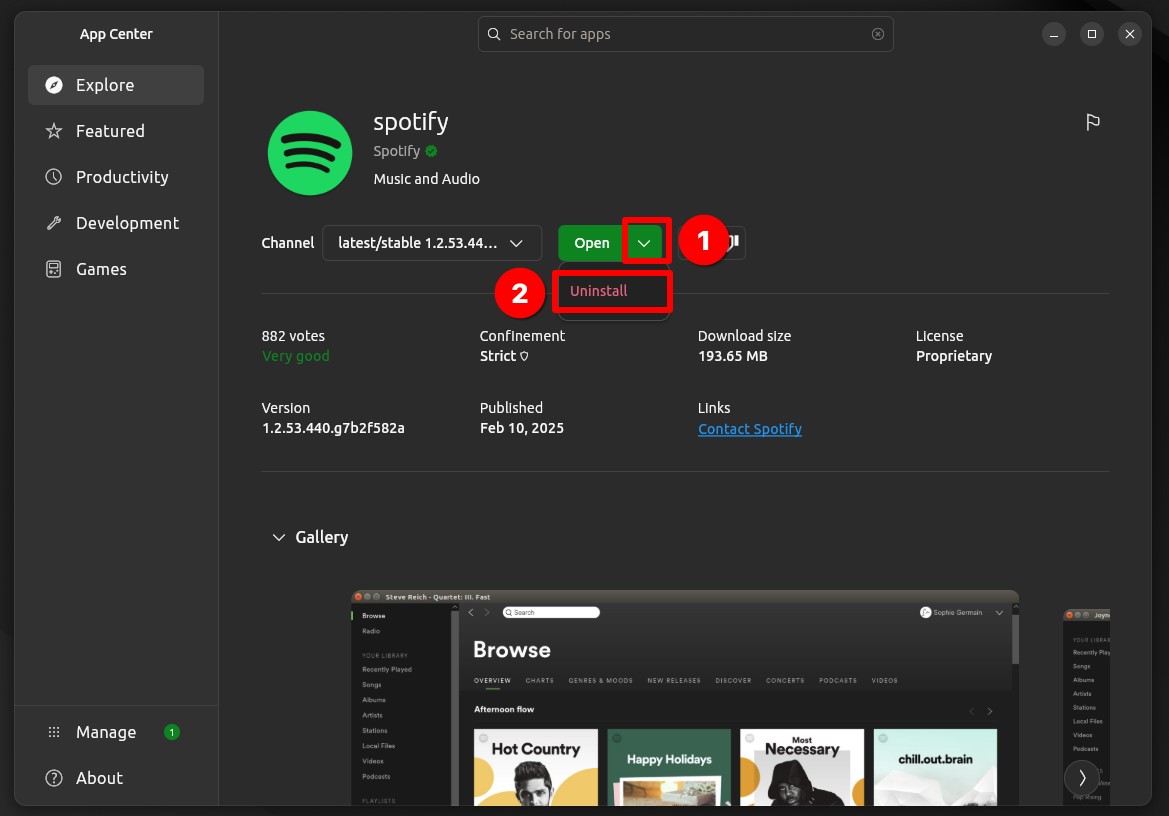
Once Spotify is installed, you can close the App Center, find the app in Ubuntu’s dash, and launch it. To uninstall it, follow a similar approach using the App Center. This time, however, click the down arrow symbol on the “Open” button and select “Uninstall” from the submenu.
Finally, if you’re more comfortable with the command line, you can install Spotify as a Snap package (saving you all the mouse clicking above) by running in the Terminal app:
sudo snap install spotifyCode language: Bash (bash)To uninstall it:
sudo snap remove spotifyConclusion
As this guide shows, installing Spotify on Ubuntu 24.04 LTS is straightforward, whether you choose the APT method for a traditional package installation or the Snap approach.
If you encounter any issues, let me know in the comments below, and I’ll be happy to help. Thanks for your time and for using this tutorial. Happy streaming!


I will use the snap method since I hate adding repositories that cause me headaches when upgrading to next version of ubuntu. I have not used a repository in years. The only other thing I add for more software choices is flathub flatpaks since they will work with the next os release automatically without any extra effort from me.
I agree ppa’s are not really needed anymore and I have had issues with them over the years basically to many times to count. I agree snaps and flatpaks help make the upgrade process better since there will most likely be no compatibility issues but there is still some work that is needed in other areas to make os upgrades more reliable for everybody.
Non-sense comments by Michael and Pablo. Thanks Bobby for showing two ways of installing Spotify, especially the APT way for those who don’t like installing snaps on their systems.
Thank you Bobby, I took the APT approach. It seems and feels all good as sound. My previous Snap experience was freezing my computer (Mouse and Keyboard) unexpectedly. In my case there was conflict instances in the Kernel Log. I’m not an expert, more like a newbie and passionate with Linux. Still need some time to prove it holds without freezing, but it’s not showing any instance in the Kernel Log. My OS: Linux Mint 22.1 Cinnamon – Ubuntu 24.04.
you say snaps auto-update without user control but on my system if i am using a snap such as spotify it will not update and only let me know there is a update and will not not update till i close it and i can postpone for a couple weeks i think. you talk like computers are going to be slow if you use a snap or they take up lots of space and i disagree with both. my cheap intel n100 is lightning fast with both snaps and flatpaks and with modern hard drives i see almost no space taken when installing a snap since my cheap nvme has plenty of space. most people install more software on there cell phone then there computer and the apps on your phone are about the same size as flatpak or snap plus the phone usually has a smaller hard drive and you do not see most people complaining constantly about app sizes on cell phones like people do in articles on linux trying to brainwash everyone into thinking they will have no space which is absurd. Snaps and Flatpaks are the future since you can build a package once instead of maintaining multiple versions of it which most people no longer want to do since they have lifes outside of linux.
Why on Earth would you show the hard way first? You should start by saying “if you don't like snap for whatever reason, don't use Ubuntu. Otherwise use the app center as usual”. Then eventually, you could explain “the hard way” for the stubborn out there.