Are you ready to embark on a thrilling journey into container orchestration with Kubernetes? If you’ve been looking for a beginner-friendly way to dip your toes into this vast ocean, you’re in the right place.
Let’s start this endeavor with Minikube, a simplified, single-node version of Kubernetes tailored especially for learners and developers like you!
Why Start with Minikube?
Kubernetes, while powerful, can be a tad overwhelming for newcomers. At the same time, Minikube streamlines the experience by offering a lightweight, local Kubernetes environment that installs on your server or desktop system.
This way, you can practice, play, and learn without worrying about expensive cloud bills or complex multi-node setups. So, let’s dive effortlessly into the exciting journey of installing Minikube on Linux.
By the end of our guide, you’ll have a fully operational one-node Kubernetes cluster ready for all your learning and experimentation needs.
Install Prerequisites
Before diving in, we’ll ensure your Linux system meets all the necessary prerequisites. Here’s what you’ll need on the hardware side for Minikube to run smoothly:
- 2 CPUs or more
- 2GB of free memory
- 20GB of free disk space
Additionally, on the software side, you’ll need a few more tools available on your system to install and use Minikube on Linux, specifically Curl, Docker, and kubectl. But don’t worry if you don’t have them – all the information you need to get them in a matter of minutes is provided below.
Curl
You probably already have Curl on your system, but if you don’t, installing it requires a simple command, depending on the distro/package manager you use.
For Ubuntu/Debian/Mint users, it is “sudo apt install curl.” For RHEL/Fedora/Alma/Rocky, run “sudo dnf install curl.” Arch and Arch-based distributions – “sudo pacman -S curl.” Finally, openSUSE users need to run “sudo zypper install curl.”
Docker
Minikube can be installed and run using various drivers, Docker being one of the preferred ones (more on that here). In other words, it allows you to install Minikube into an existing Docker install.
So, if you don’t already have Docker installed, any of the following guides will be helpful:
- How to Install Docker on Ubuntu 22.04
- How to Install Docker on Debian 12 (Bookworm)
- How to Install Docker on AlmaLinux / Rocky Linux
- How to Install Docker on Fedora
- How to Install Docker on Linux Mint 21
- How to Install Docker on Raspberry Pi
Follow the steps, and you’ll have Docker installed on your Linux system quickly.
Kubectl
The last essential component we need is kubectl – a command-line tool for interacting with a Kubernetes cluster (the Minikube instance in our case).
It allows you to run commands against Kubernetes, such as deploying applications, inspecting and managing cluster resources, and viewing logs.
Installing it is very easy by executing the commands shown:
curl -LO "https://dl.k8s.io/release/$(curl -L -s https://dl.k8s.io/release/stable.txt)/bin/linux/amd64/kubectl"
sudo install -o root -g root -m 0755 kubectl /usr/local/bin/kubectlCode language: JavaScript (javascript)
Then, delete the now unnecessary copy left in the current directory and test that the kubectl command works as expected.
rm ./kubectl
kubectl version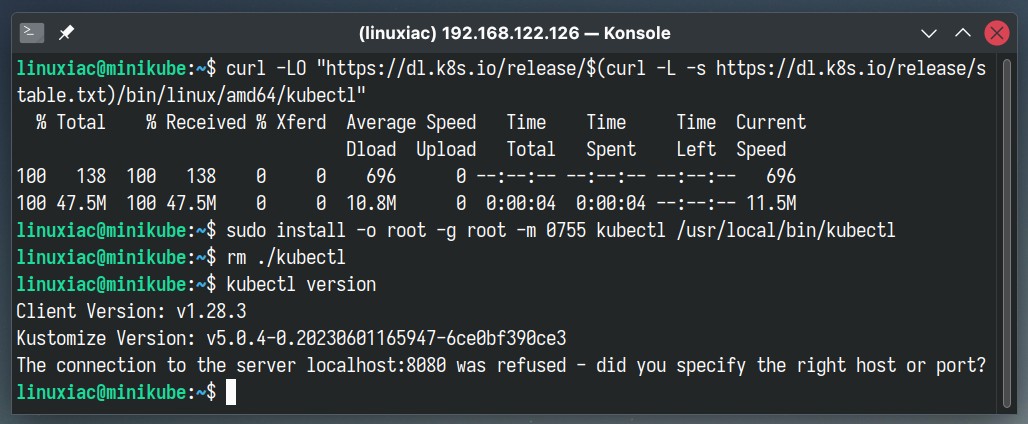
The result should be similar to that shown above.
Install Minikube on Linux
With everything in place, it is time to install Minikube on our Linux system. The process is straightforward: downloading and moving a single binary to a directory (“/usr/local/bin/“) already in our executable search path.
curl -LO https://storage.googleapis.com/minikube/releases/latest/minikube-linux-amd64
sudo install minikube-linux-amd64 /usr/local/bin/minikubeCode language: JavaScript (javascript)
Then, remove the no longer needed copy of the “minikube-linux-amd64” file from the current directory.
rm ./minikube-linux-amd64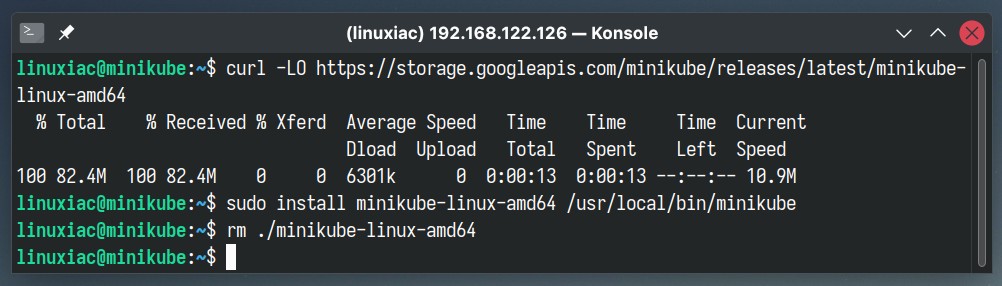
Start Your Minikube Instance
The most exciting and fun part is launching our brand-new Minikube cluster. To do so, run the below command and load yourself with patience because, initially, some images will have to be downloaded, which will take up to a few minutes.
minikube start --driver=docker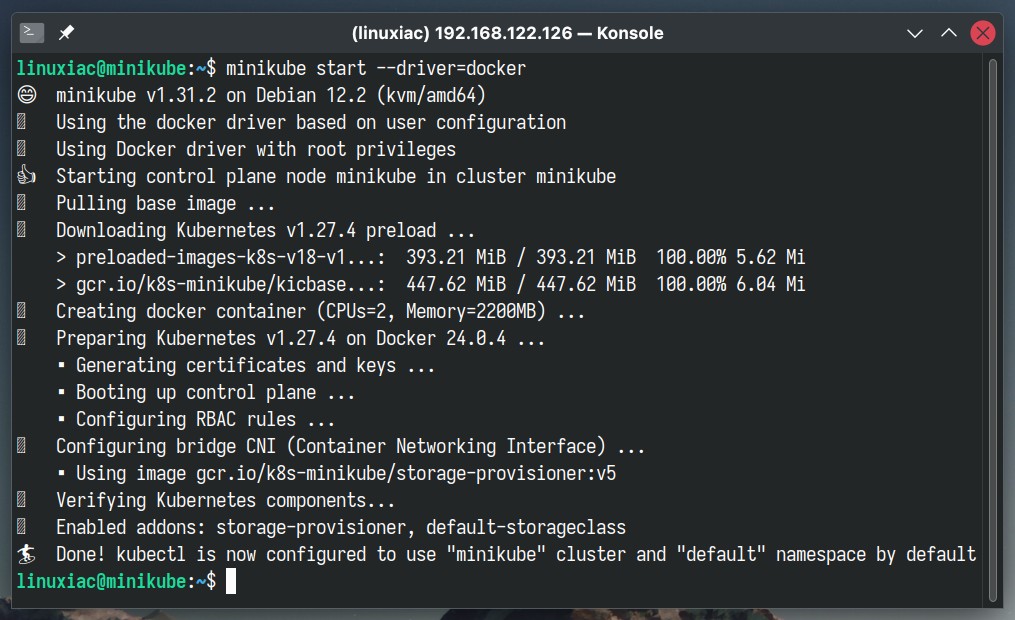
Let’s now check the Minikube status and try a simple kubectl command to make sure everything is in place and working as expected:
minikube status
kubectl get namespacesCode language: JavaScript (javascript)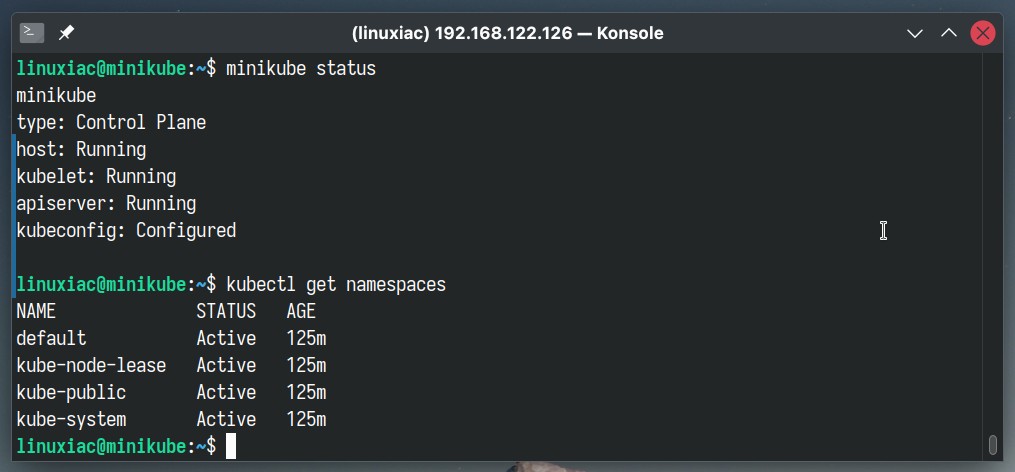
As we can see, our new single-node Minikube cluster is up and running, ready to serve, and awaiting our instructions via the Kubernetes kubectl command. So, we can only congratulate ourselves on a job well done so far.
Finally, set Docker to be the default driver used.
minikube config set driver dockerCode language: JavaScript (javascript)
Don’t worry about the message. Later in the guide, we will introduce you to all the main commands so you can quickly and easily manage the Minikube instance.
Enable Autocompletion
Autocompletion, often recognized by the press of the “Tab” key while typing commands in the Linux terminal, is more than a convenience. It is a feature that boosts productivity, reduces errors, and enhances the overall user experience.
Minikube gives us an excellent opportunity to assist us in auto-completing commands, so let’s take advantage of this feature. First, execute the folowing:
minikube completion bash > .minikube_completion_bashCode language: CSS (css)Then open for editing the “.bashrc” file in your home directory (nano ~/.bashrc) and add the following line at the end:
source ~/.minikube_completion_bash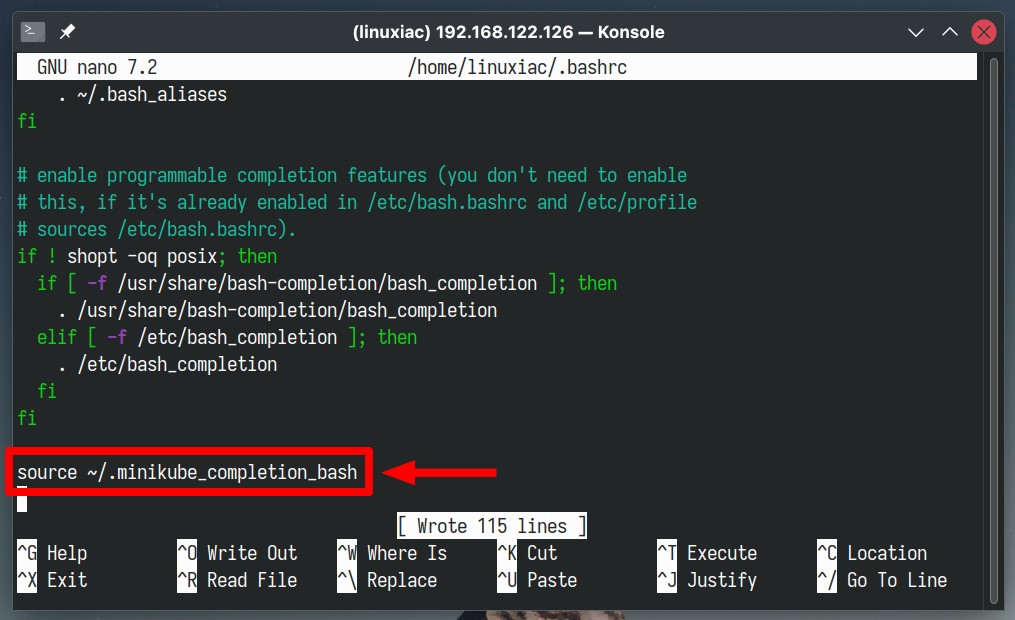
Finally, save the file, exit, log out, and log back in. All available minikube commands will be autocompleted when you repeatedly press “Tab” in the familiar Bash shell way.

Enable Dashboard
Minikube has integrated support for the Kubernetes Dashboard, a web-based user interface allowing you to acclimate to your new environment quickly. It enables you to scale a deployment, initiate a rolling update, restart a pod, or deploy new applications using a wizard.
But first, let’s talk briefly about one of Minikube’s best features: integrated addon support. These prebuilt features expand its functionality; all it takes is a single command to install them: “minikube addons enable <addon-name>.” To see all available ones, run:
minikube addons listCode language: PHP (php)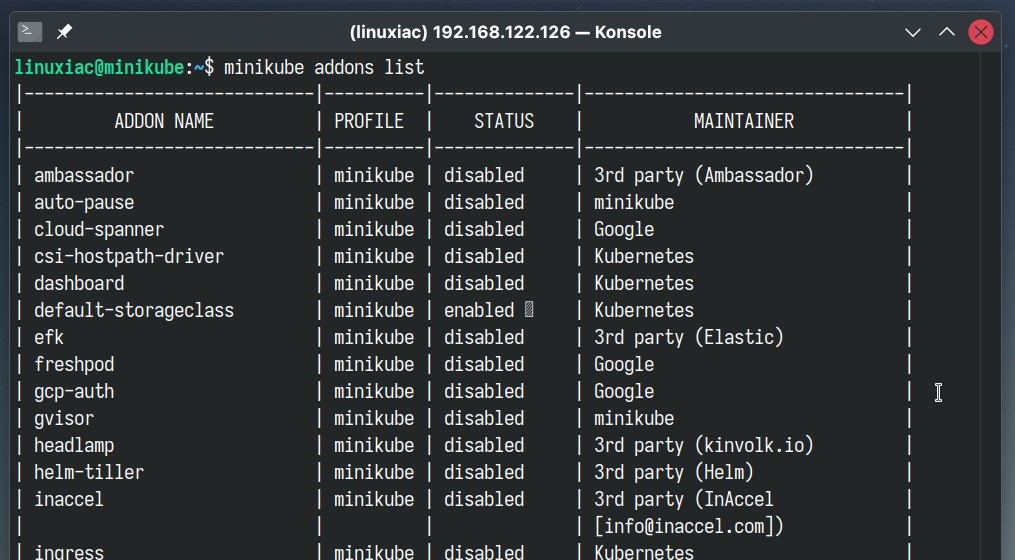
Now, there are two different scenarios to access the Kubernetes dashboard. The first is if Minikube runs on your local Linux machine, which has a full-featured desktop environment and browser. In this case, enabling the Dashboard addon is as easy as child’s play.
Open a new tab on your terminal emulator app and run the following:
minikube dashboardThis automatically activates the addon, opens the proxy in your default web browser, and loads the Kubernetes dashboard into it. So much for that.
The second scenario is much more interesting – when you run the Minikube cluster in a headless virtual machine or on a remote host. Here’s what you need to do to enable and access the Kubernetes dashboard.
First, enable the plugin:
minikube addons enable dashboard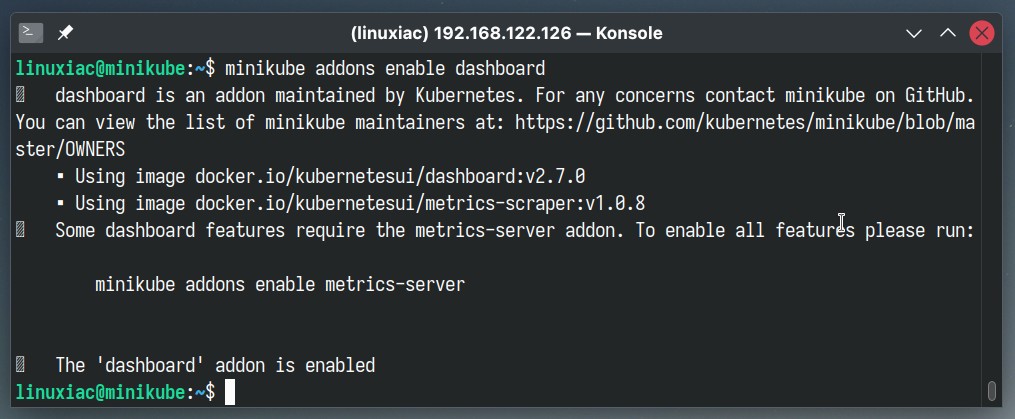
Next, run the command below to create a proxy server or application-level gateway, listening on port 8001 by default between localhost (the machine running Minikube) and the Kubernetes API server.
kubectl proxy &Now it is time for the fun part, where, with the help of the local forwarding SSH tunnel, we will do a little magic, mapping the localhost 12345 port on our desktop machine to the remote 8001 of the Minikube server.
It is important to note that the command below runs on your client machine, which is the one that has the desktop environment and that we’ll use to open the Kubernetes dashboard in a browser.
ssh -N -L 12345:localhost:8001 linuxiac@192.168.122.126Code language: CSS (css)Of course, replace the last part of the command above (“linuxiac@192.168.122.126“) with the user and IP address of the remote machine – the Minikube host – valid for your case.
After a successful login, the terminal will “hang” on a flashing prompt, which is normal. Please do not close it, as the tunneling traffic will be interrupted.
Why is all this necessary? In short, by default, the dashboard is only accessible from localhost. Through the SSH tunnel, we ensure that requests to the Kubernetes API originate from localhost (127.0.0.1).
Finally, to get the dashboard address, go back to the machine running Minikube and execute the following:
minikube dashboard --url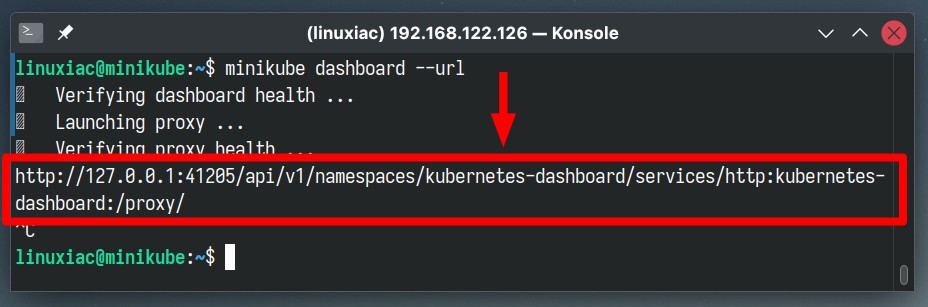
Copy the address, replace only the port part (“41205“) with “12345,” and open it in your browser. The Kubernetes dashboard will load.
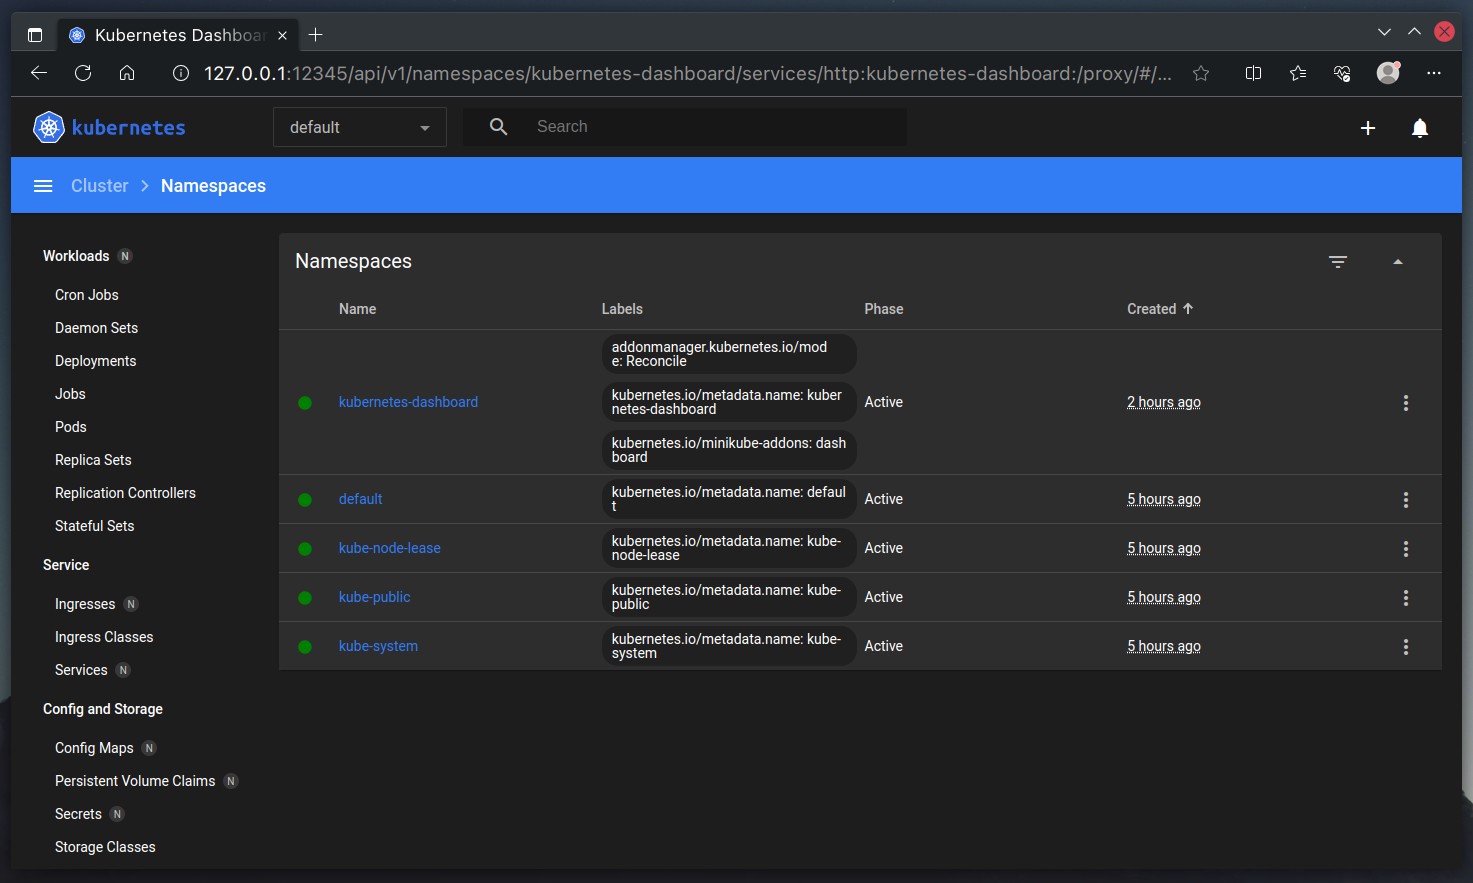
And there you have it! Embarking on the Kubernetes journey might seem daunting at first, but with the help of Minikube and our comprehensive guide, setting up a one-node cluster on Linux becomes a breeze.
Delete Minikube
If, for some reason, you decide to remove the Minikube cluster, the command below will delete it together with all profiles and also delete the “.minikube” folder from your home directory.
minikube delete --all --purgeCode language: JavaScript (javascript)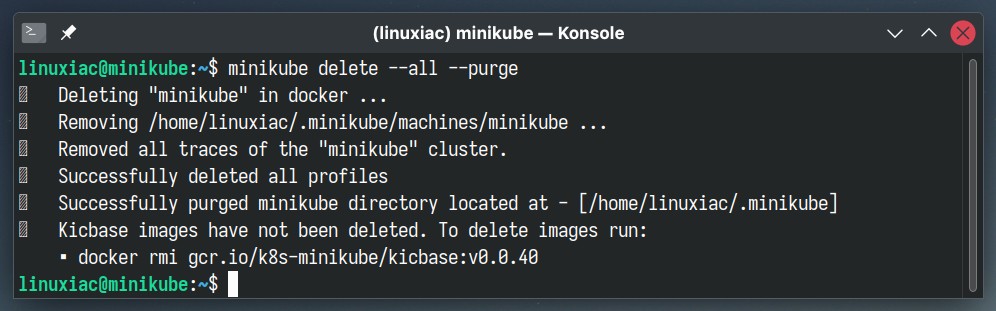
Finally, it would be best if you did some more manual work to remove the remaining directories holding information about Minikube and its executable itself.
rm -rf .kube/
sudo rm -rf /etc/kubernetes/
sudo rm /usr/local/bin/minikube
However, remember that the Minikube’s Docker image will remain on your system. To remove it, first list all the images executing “docker images -a,” find the one with the repository name “gcr.io/k8s-minikube/kicbase” and then remove it using “docker rmi <Image ID>.”
Main Minikube Commands
Minikube has some nifty commands to help you set up, manage, and experiment with your local single-node Kubernetes clusters. Here are the most important ones.
minikube start– Start a local Kubernetes clusterminikube stop– Stops a running local Kubernetes clusterminikube pause– Pause Kubernetesminikube unpause– Unpause Kubernetesminikube delete– Delete a local Kubernetes clusterminikube status– Get the status of a local Kubernetes clusterminikube ssh– Log into the minikube environment (for debugging)minikube version– Print the version of minikubeminikube update-check– Print current and latest version number
For a complete list of commands and their accompanying options, check this.
Finally, remember, every expert was once a beginner, and by taking this first step, you’re already paving your way toward mastering Kubernetes. Happy orchestrating, and here’s to many successful deployments ahead!
Conclusion
In recent years, Kubernetes has emerged as the forefront technology for container orchestration, topping the microservices world and enabling scalable and reliable application deployment.
However, for those new to the ecosystem, starting with Minikube on Linux presents a gateway into the Kubernetes ecosystem, breaking down the complex learning curve and inviting more enthusiasts and professionals to integrate container orchestration into their skill set.
In other words, it is a full-fledged one-node Kubernetes cluster, facilitating a hands-on approach without the complexities of multi-node environments.
By following the outlined procedures in this guide, users avoid common pitfalls associated with setting up Kubernetes for the first time, saving time and resources.
For further insight, we highly recommend you consult the project’s documentation.