
Have you ever found yourself in a situation where you’ve mistakenly deleted important files from your Linux system using the command line? We’ve all been there. The rm command can be pretty unforgiving; once something is deleted, it’s gone for good.
But don’t worry; there’s a solution: say hello to gtrash! It’s the safer, more user-friendly way to delete files in Linux, giving you peace of mind.
The Essence of gtrash
gtrash stands out as a command-line trash manager that adheres to the FreeDesktop.org specification. It’s designed to substitute for the traditional rm command used in Linux.
However, unlike rm, which permanently deletes files, gtrash safely moves them to the system trash can. This approach allows for the easy retrieval of files should you change your mind or accidentally delete something.
The tool is designed for Linux systems but also works on Mac (though it doesn’t use Mac’s system trash can). Windows users, however, cannot use it, although it functions perfectly in Windows Subsystem for Linux 2 (WSL2).
One of its highlights is the intuitive Text-based User Interface. Built with the innovative Bubbletea TUI framework, it provides a comfortable and modern user experience, especially when restoring files.
Users can enjoy features like incremental search, simultaneous restoration of multiple files, and a convenient layout separating trashed files from those queued for restoration.
But gtrash is more than just a basic trash tool; it fully complies with the FreeDesktop.org specification, ensuring compatibility and standardization. Advanced features include directory size caching support, restoration of co-deleted files, and easy integration with other CLI tools. Safety is also a priority, with prompts for confirmation before permanent deletion.
How gtrash Works
gtrash operates under the hood much like the mv command, but with added sophistication. It records metadata and uses specific directories to store trashed files, whether in the main or external file systems. This approach allows for efficient file management and restoration.
Installation
Setting up gtrash is easy. It’s just one file, a single binary, that you need to download with a tool like Curl and then add to your executable path. Let me show you how.
curl -L "https://github.com/umlx5h/gtrash/releases/latest/download/gtrash_$(uname -s)_$(uname -m).tar.gz" | tar xz
chmod a+x ./gtrash
sudo mv ./gtrash /usr/local/bin/gtrashCode language: JavaScript (javascript)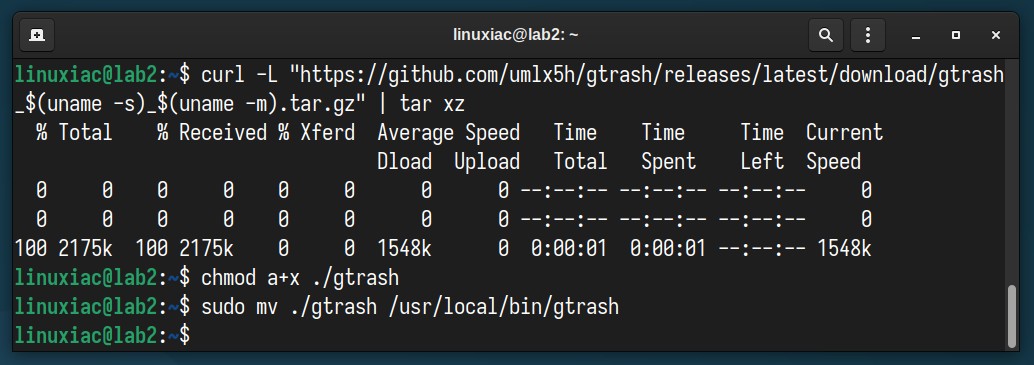
Usage
Moving a Files to the Trash Can
Moving a file to the trash can is the most commonly used action of the gtrash command. To do so, use the “put” parameter followed by the file name.
gtrash put debian-handbook.pdfCode language: CSS (css)
You’ll notice that this command doesn’t produce any visible output. To move several files to the trash can at once, simply list their names one after another.
gtrash put debian-handbook.pdf connect.py mount.shCode language: CSS (css)Moving a Directory to the Trash Can
You can easily put a directory into the trash can, similar to the example above with files. The good news is that with the gtrash command, you don’t need to use extra parameters like “-r,” which you usually have to with the rm command. Simply provide the directory’s name.
gtrash put images/Trash Can Summary Report
The “summary” subcommand gives you a quick overview of your trash can, showing you the number of items in it and their total size. It also tells you the path where the files were moved.
gtrash summary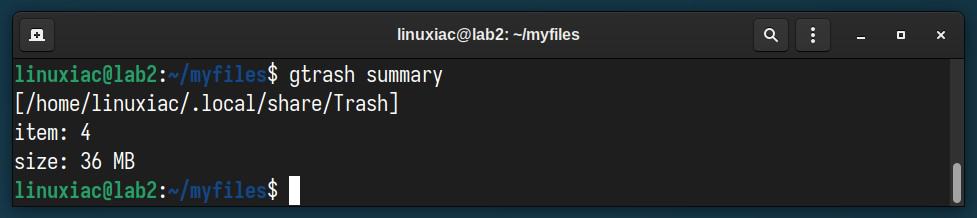
List the Files in the Trash
Use the “find” option to see what files are currently in your trash can. The “Path” column in the command’s output displays the file’s original location before it was moved to the trash can.
gtrash find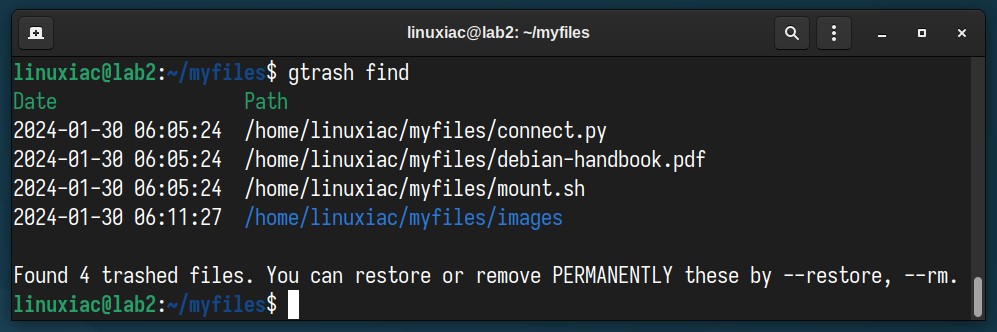
Find Files
With gtrash, finding files in the trash can is a breeze. Just type a portion of the file name you’re looking for – no need for complicated wildcards or regular expressions.
For example, let’s search for files containing “handbook” in their name.
gtrash find hadnbook
Restore Files Using TUI
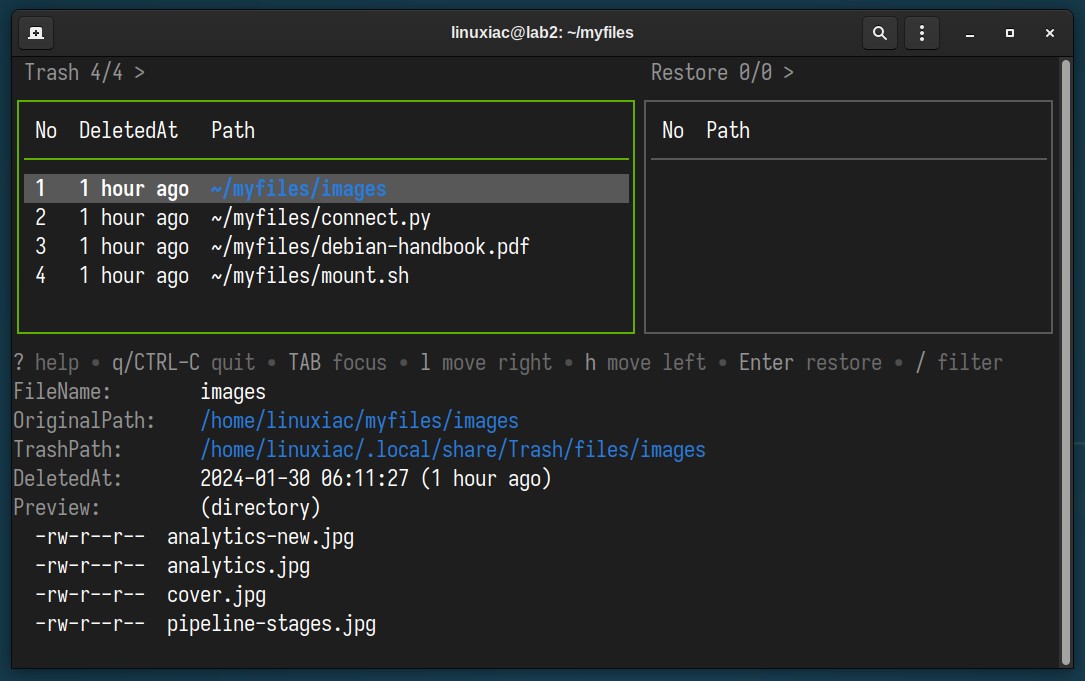
There are two main ways to restore files with gtrash: using the Text-based User Interface (TUI) or command-line mode. Let’s take a look at the TUI method first. To begin, enter the following command:
gtrash restoreOnce you start, you’ll see the TUI interface as shown. On the left, a table displays all the files in the trash. On the right, you’ll find a table listing the files you can choose to restore.
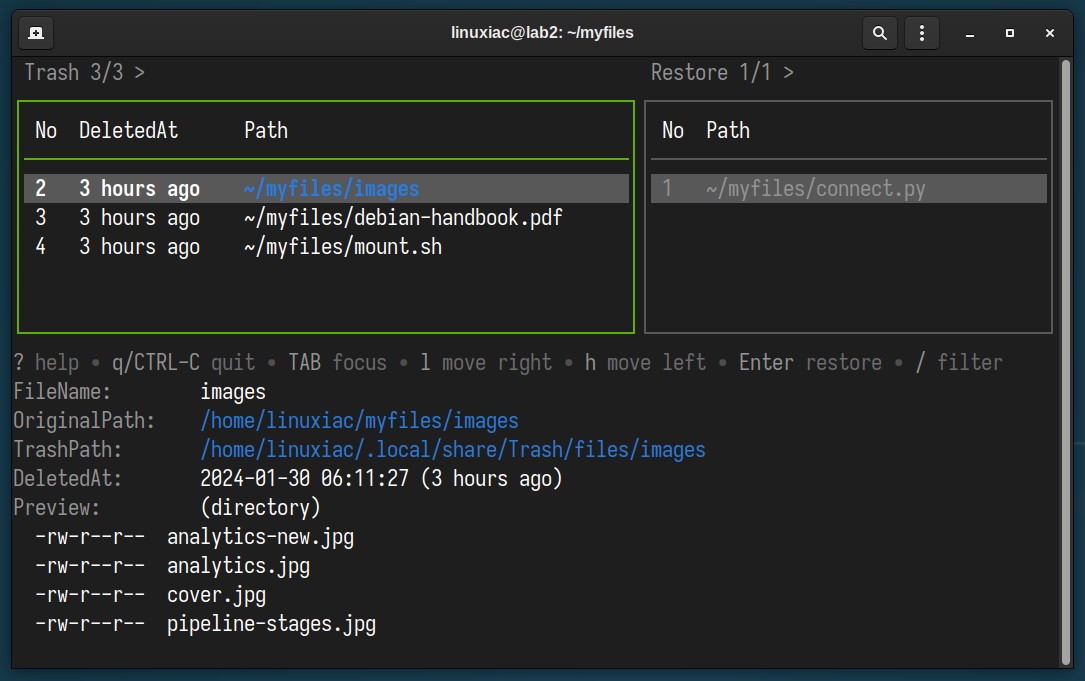
Need help? Just press “?” to get a full guide on how to operate. Moving around is easy: Use the “j,” “k,” or the arrow keys to navigate. To shift files to the right table, press “l” or the “Space” bar.
For those familiar with Vim, gtrash uses Vim-style key bindings for your convenience. To quickly find something, just use “/” for an incremental search.
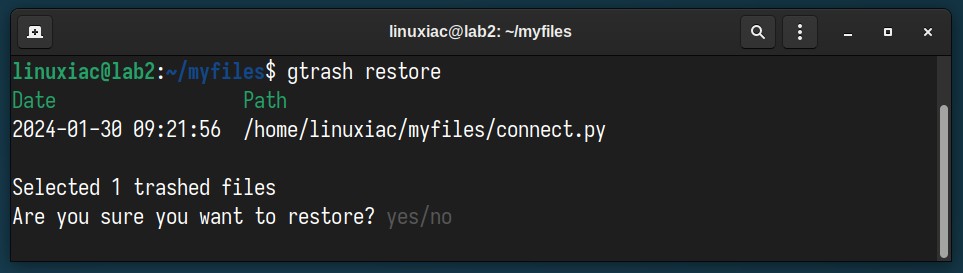
To restore files, select them and hit “Enter.” You’ll see a list of your selected files and a confirmation prompt. Confirm your action by pressing “y” to proceed with the restoration.
To restore all the deleted files moved to the trash with a single gtrash put command, use the “restore-group” subcommand, which will call the TUI interface again, showing you the files deleted in the individual runs of gtrash put.
gtrash restore-group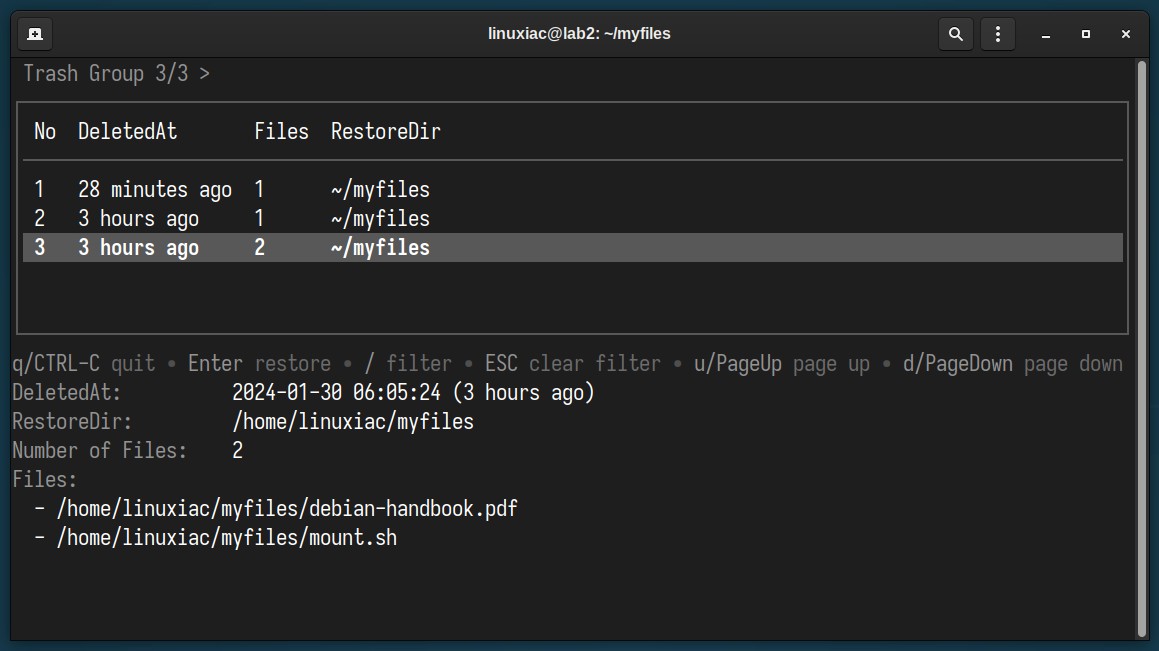
Restore Files Using Command-Line
To restore files without using the TUI, use the “–restore” option along with the find, specifying the exact file names you want to bring back. For example, if you want to restore a directory named “images” and a file called “debian-handbook.pdf,” you would run the following command:
gtrash find images debian-handbook.pdf --restoreCode language: CSS (css)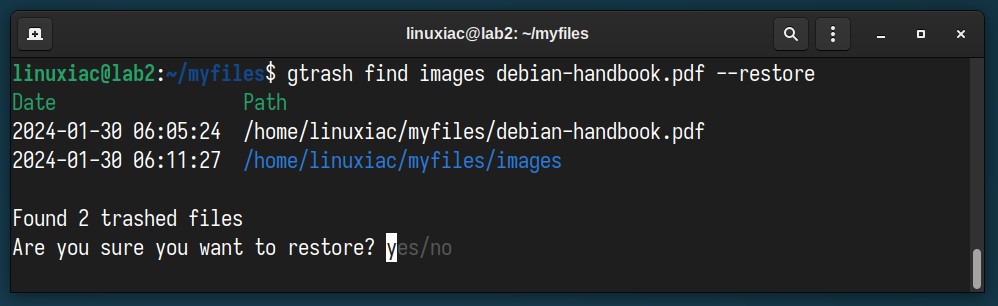
Permanently Delete Files
To permanently remove a file from the trash can, use the command gtrash find followed by the file’s name, and add “–rm” at the end. Remember, this action can’t be undone, just like when using the rm command, so the files will be irretrievable once deleted.
For example, to permanently remove the “debian-handbook.pdf” file from the trash, execute:
gtrash find debian-handbook.pdf --rmCode language: CSS (css)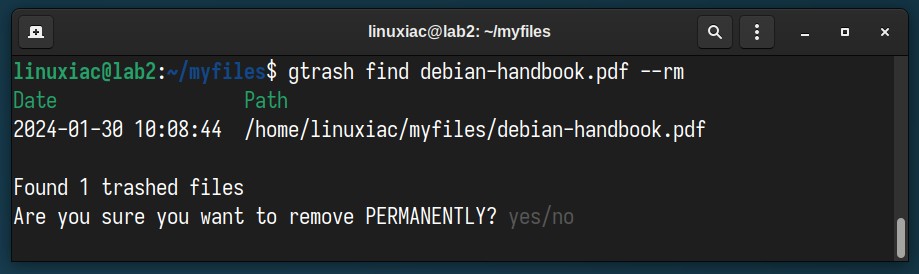
To empty the entire bin and get rid of everything in it all at once, do the following:
gtrash find --rmBottom Line
By seamlessly integrating the functionality of rm with the safety net of a trash can system, gtrash minimizes the risk of accidental file deletion. Moreover, the tool’s user-friendly TUI enhances the user experience, particularly in file restoration.
Tired of repeatedly typing gtrash? Make your life easier by setting up some handy shortcuts. Try adding these aliases to streamline your workflow:
alias g="gtrash"
alias gp="gtrash put"Code language: JavaScript (javascript)
Not sure how to set up aliases in Linux? Don’t worry; we have a detailed guide to walk you through the process.
Remember, whenever you need a quick guide to all the available command options, use gtrash -h, gtrash put -h, and so on. For additional details, visit the project’s GitHub page.


For the same reason I use “trash-cli” under Linux Mint.
What a clever solution. Going to have to try this out!